
Windows 11 will be public available on Oct 5, 2021. A lot of folks cannot wait any more and want to test Windows 11 out for preview builds in advance. This is totally possible but you need to create a Windows 11 installation media first. This could be a pain if you are using the wrong tools.
However, there are lot of tools available that can make this job easier for you. Here we have listed different software for this purpose that work on Windows, macOS and Linux, along with the detailed process of how you can use them to create Windows 11 installation media. Based on their pros and cons, you can follow the instructions and make Windows 11 install media for yourself in no time at all.
Notice: Before getting started, please download Windows 11 ISO image and prepare for a USB flash drive first.
Table of Content:
Part 1: How to Create Windows 11 Installation Media on Windows PC
There is no change in Windows 11 booting scheme according to Windows 11 Insider Build ISO file. This means there are dozens of tools you can use to create Windows 11 bootable USB on a Windows PC.
We have done the researching part and tested a bunch of tools. Some of them works great and some of them have errors. To make it clear and avoid wasting time on useless software, below is a list of theremarkable ones that works great with Windows 11 ISO according to our test result.
Windows 11 Media Creation Tool
If you are a long time Windows users like me, you might notice that Microsoft released a free tool for creating Windows bootable media when a new OS is debuted, such as Windows 7 USB/DVD Download Tool for Windows 7 or Media Creation Tool for Windows 10.
Windows 11 Media Creation Tool is another free official tool developed by Microsoft that makes it easy to create a bootable Windows 11 install USB so that you can use it to install Windows 11 on a given PC or laptop. Apart from that, you can also download Windows 11 ISO from Microsoft remote server.
Here's how you can use the Media Creation Tool to create a Windows 11 installation media:
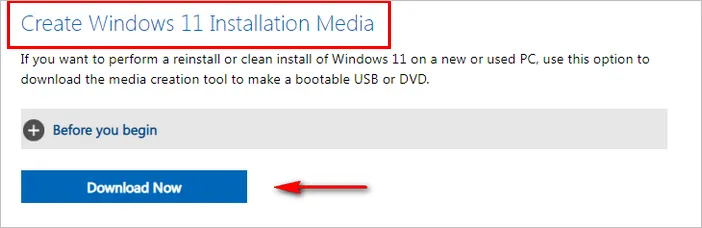
First, head over to Windows 11 official download page and navigate to Create Windows 11 Installation Media section. Now, click Download Now button to save MediaCreationToolW11.exe file on your computer.
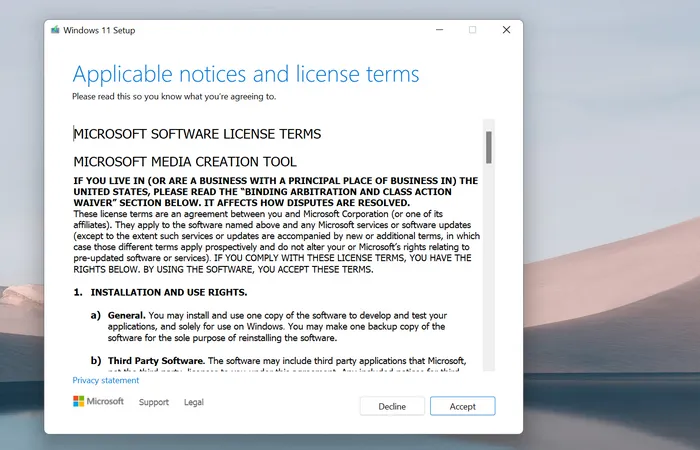
Now, go to the download folder and fire up the utility (no installation required). It takes some time to load as it needs to gather the basic information of this device. Wait about one minutes , it brings up Microsoft Software License Terms window, press Accept to go to the next step.
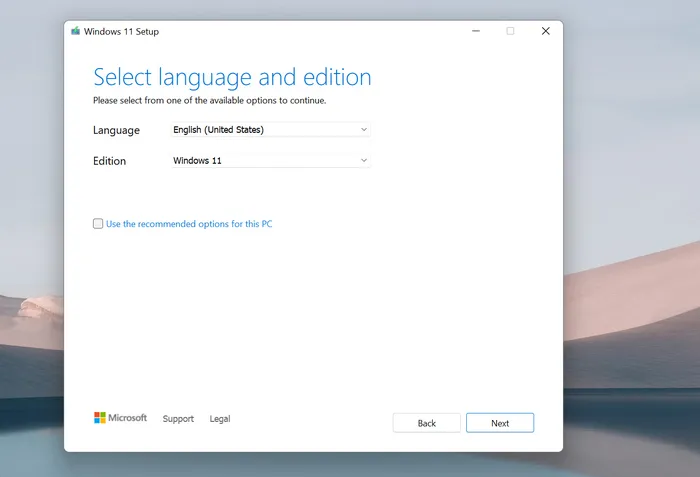
Now it will show you two settings related to Windows 11 installation. Based on these selections the tool will create a custom Windows 11 installation media accordingly. If you are happy with the recommended settings, press Next. Otherwise, uncheck 'Use the recommended options for this pc' box, make the selection as per your choice, and then press Next.
On the next window, there are two options presented and asks what do you want to do with Media Creation Tool. You need to choose the first menu labelled with USB flash drive and press Next. If you want to create a Windows 11 bootable DVD, go for the ISO file option. But remember, using this option, you are still required to burn the ISO image into a DVD using some of the other methods discussed below.

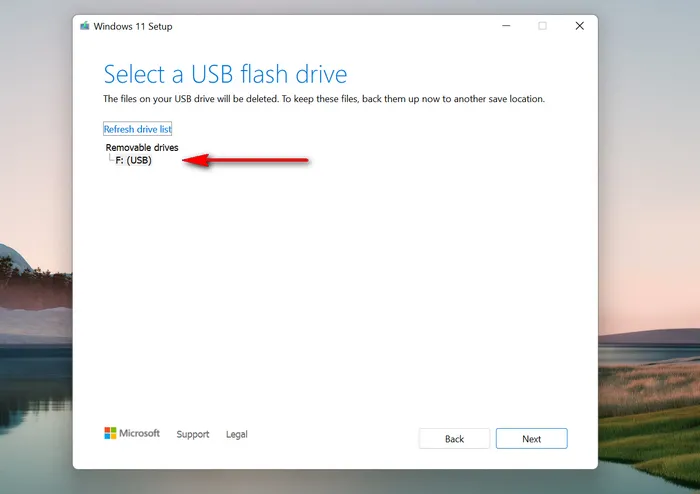
Next, it will let you select the USB if you have multiple ones. Otherwise, it will simply show you the USB you inserted into the computer. Confirm by pressing Next.
Finally, click Finish to start Windows 11 installation media creation process. Remember, this will take at least 15 minutes to complete. Once done, take out the USB from the drive and try to install Windows 11 on a PC from this bootable USB.

Pros:
- Developed and maintained by Microsoft official.
- 100% Free and small in size.
- No installation required.
- No virus or malware.
Cons:
- Program loads very slow at startup.
- Wait more time for downloading Windows 11 ISO.
- Come with errors at the end on old computers.
- Slow file copying speed to USB drive.
Takeaway: Go with Windows 11 Media Creation Tool if you had a lot of spare time.
UNetbootin
UNetbootin is another free tool that lets you create a installation media from various ISO files. According to our test, UNetbootin has good support for Windows 11 ISO. You can create a Live CD for Windows (almost all version of Windows including Windows 11), Linux, and other bootable ISO images.
For Linux distributions, you won't even need the ISO file as this utility has a built-in feature for downloading ISO for most of the popular Linux distributions.
However, the major drawback for using this tool is that it does not have a dedicated support team. It does have a FAQ section and a Wiki, but that's not enough in some cases. So, in case you come across any issue, you need to search for help all by yourself. Also, you need to have the Windows 11 ISO image handy because unlike the Media Creation Tool, this won't let you download the same. Here's how you can use UNetbooting to create a Windows 11 installation media:
Go to UNetboot Github project page and download Windows version of UNetbootin tool. Once downloaded, start up the utility. Below is the screenshot when the program is opened for the first time.
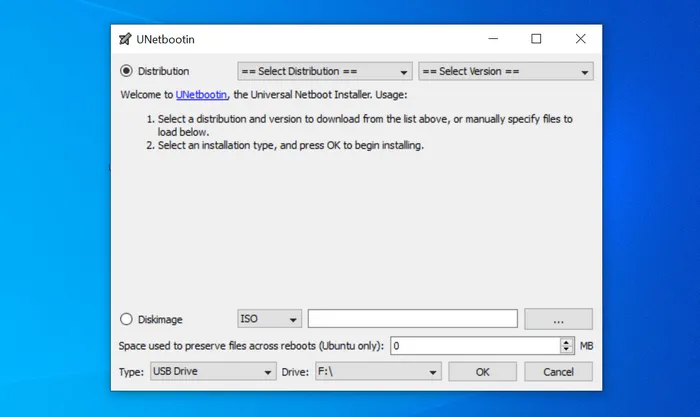
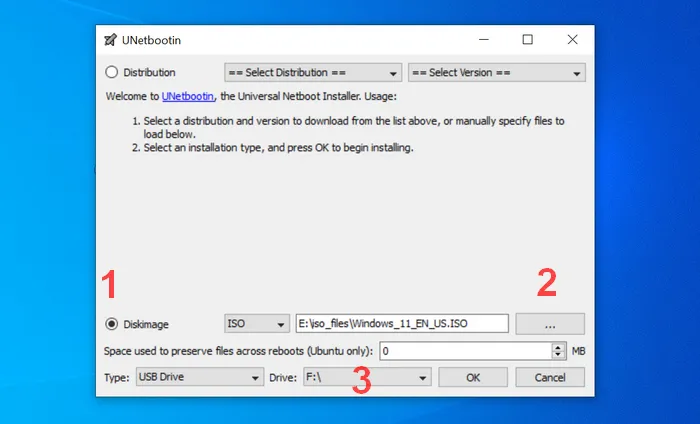
The top menu Distribution is used to download Linux ISO. We won't use the download feature at this time. Instead, enable Diskimage menu at the bottom. From there, you should add Windows 11 ISO into the program and select the drive name of USB. Then you need to press OK to begin the process of creating Windows 11 installation media.
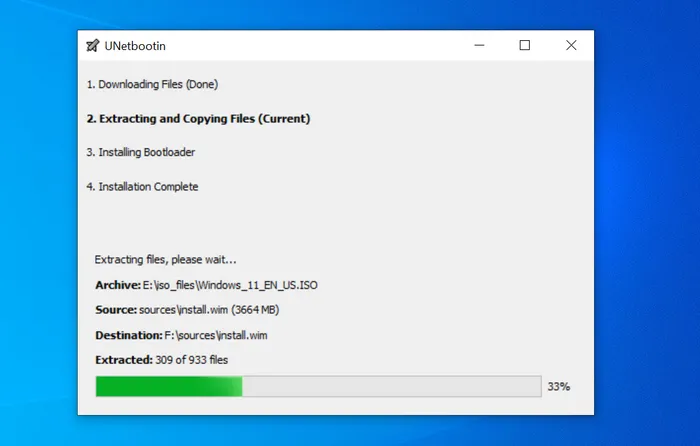
During the ISO burning process, UNetbootin will first decompess the ISO file and extract content from it. After that, it starts coying all files to USB drive. Once file copying phrase is completed, UNetbootin writes bootloader information to connected USB.
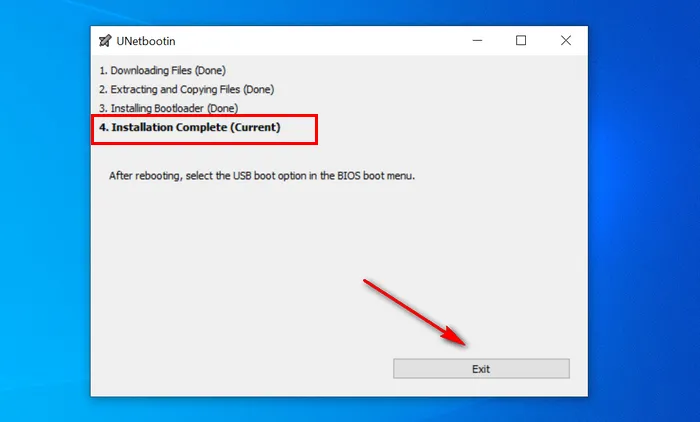
Wait about 30 minutes, UNetbootin says installation complete and you should quite the program and select the USB drive at boot up to install Windows 11.
It is as simple as that! No further steps required. However, finding the ISO image file for Windows 11 can be a bit challenging since Microsoft has not released the official version of the same on their website yet.
Pros:
- Free and lightweight.
- Standalone and no installation.
- Cross platform support for Windows, Linux and macOS.
- Open source project maintained by global developers.
Cons:
- Very slow in ISO decompressing process.
- The core code base never updated for nearly 7 years.
- USB not seen as a bootable media by UEFI-only computer.
- Only FAQ available and no official support.
Takeaway: Pick up UNetbootin if you were an advanced user or software developer, who knows how to deal with source code and debug errors.
Ventory
Ventory is a new type of bootable USB creation software released in early 2020. Ventory is completely different from traditional bootable USB creator like Media Creation Tool or UNetbootin. You can create a multiboot USB drive from 730+ images files without formatting the disk over and over again.
In simple words, you can use Ventory to make a bootable USB that holds multi-types of OS, including Windows, Linux and bootable PE. With a Ventory formatted USB, it is easy to install different types of OS on different computers. It sounds obscure. Let make a demonstration via the following example.
I am going to create a bootable USB that can be used to install Windows 11/Windows 7/Ubuntu on other machines.
First, download Ventory Windows ZIP from here. Unzip the file and open Ventory2Disk.exe in Ventory folder. Now, insert a USB drive into the PC and click Install button to make a Ventory bootable USB.
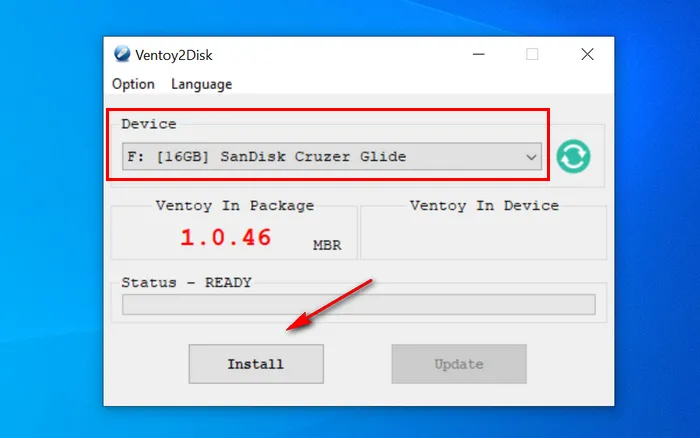
Wait a few seconds and you will see a pop-up window, saying Ventory has been successfully installed to the device.

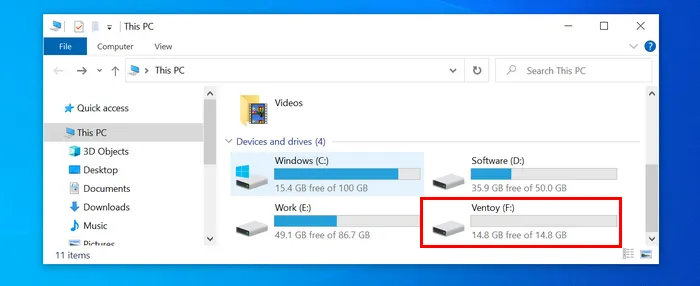
Go back to Windows explorer and the USB drive is renamed to Ventory.
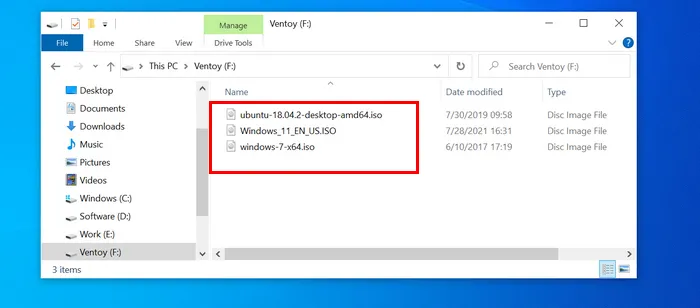
Now, it is time to copy ISO images file to Ventory USB drive. You can put many as you like. In this example, we will put a Windows 11 ISO, Windows 7 and Ubuntu ISO.
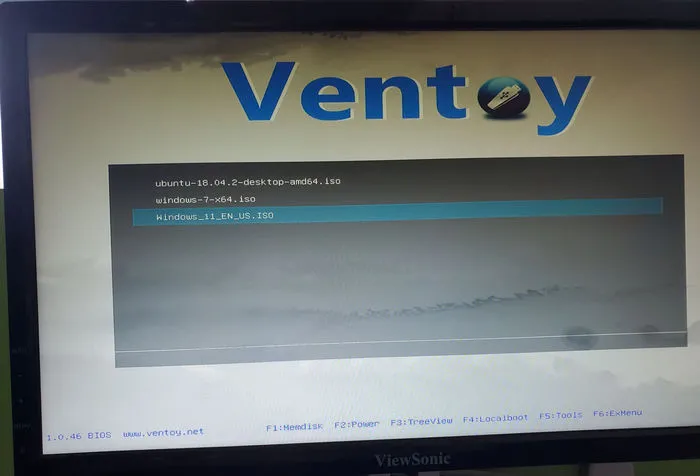
Boot your computer from Ventory USB and you will see multiple boot options on the screen. This means you can install any of the operating systems on this device. Move to Windows 11 ISO and click on it. A minute later, Windows 11 installation will get started. Now, it is time to install Windows 11 on a PC. Simply enough, right?
Pros:
- Put multiple OS installations on a single USB drive.
- Format USB only for one time.
- Free and open source.
- Support various types of ISO images, such as Windows, Linux, Unix and Windows PE.
Cons:
- USB not bootable on UEFI only laptops.
Takeaway: Ventory should be your choice if you want to create a multiboot USB drive.
Other Honorable Mentions:
UUByte ISO Editor for Windows: A premium Windows bootable USB creation software available on both PC and Mac. If you have problem with the above tools, then this is a great alternative solution you can try out. It is built upon a very intuitive user interface and a Windows 11 installation media is ready only after several clicks. This is the easiest program to create Windows 11 bootable USB! The only drawback is that you have to pay for a few bucks to unlock the premium features.
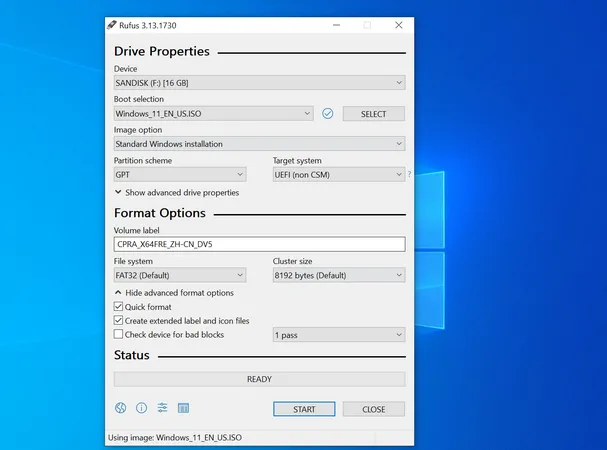
Rufus: You will see a lot of Rufus recommendations from Internet when searching for terms about bootable USB. It is totally free and it does work well for making bootable USB from Windows 11 ISO. However, the settings are too complex and confusing for beginners because it involves many advanced technical terms. Also, you have to download additional configuration files.
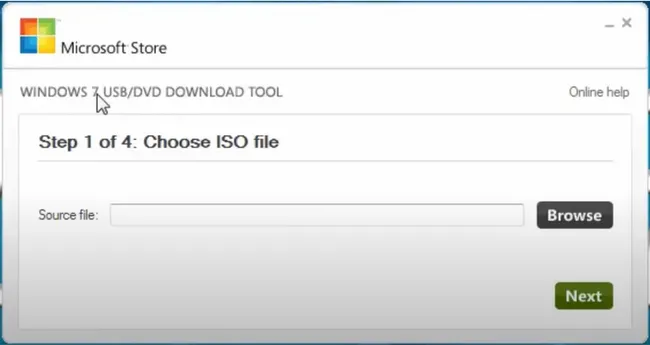
Windows 7 USB/DVD Download Tool: This is a free tool developed by Microsoft ten years ago. Initially, it was used to create Windows 7 installation media on PC. But it is still capable of creating Windows 11 bootable USB or DVD according to our recent test. The only issue is that Windows 7 USB/DVD Download Tool is now discontinued by Microsoft. You can only download it from third-party websites, which may be risky because of potention adware or malware injected into installation file.
Part 2: How to Create Windows 11 Installation Media on Mac
The situation becomes more challenging when it comes to create a Windows 11 installation media on a Mac. There are much less available on Mac because Apple has enforced more strict security policy towards disk access. You are unable to find such apps in Mac App Store. However, you can still get it done with the following suggestions.
Windows Virtual Machine
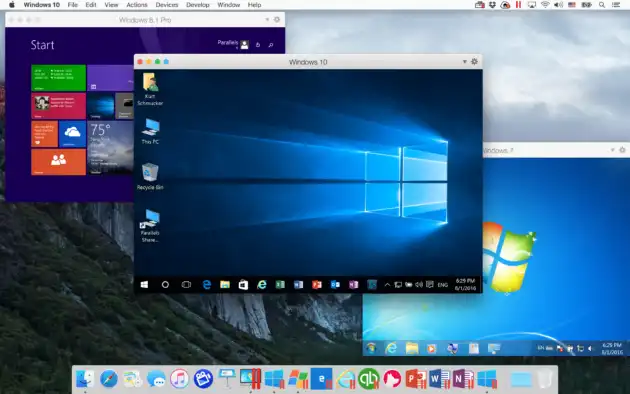
It is common to run Windows 11 on Mac through a virtual machine or create a Windows BootCamp instance on a Mac. If this was the case, then switch to Windows environment on the Mac and follow the above suggestions in Part 1 to create Windows 11 installation media on Mac. This is more reliable way to make Windows 11 installation media on Mac. Below is a Windows 10 virtual machine created with Parallels Desktop app.
Pros:
- Have access to free ISO burning software only available on Windows.
Cons:
- More expensive with yearly subscription fee.
- Consume additional disk space on Mac (At least 60 GB).
- Require extra steps.
- Sluggish user experience.
Takeaway: This is the best solution if you already set up a Windows virtual machine or Boot Camp on a Mac.
ISO Editor for Mac
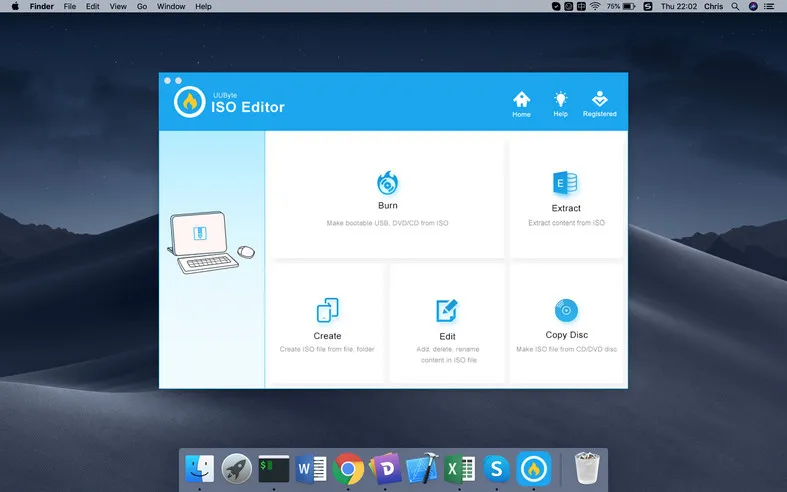
UUbyte ISO Editor is one of the simplest, yet most versatile tool that you can use to create a Windows 11 installation media on Mac. This tool will also let you extract content from the ISO files, create a new ISO file from local files or folders, edit contents of an ISO file, and create ISO image from CD/DVD.
Unlike UNetbootin, they do have a dedicated support team, so no need to worry if you run in trouble. They also have a free version available on their website. Here's how you can use the ISO Editor to make a Windows 11 installation media.
At first, click the below download button to download and install the app on your Mac.


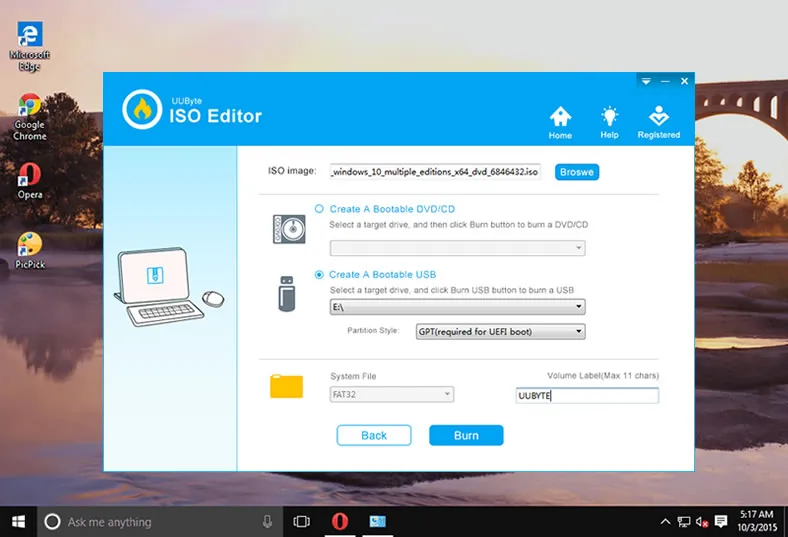
Next, fire it up after installation. You will get a window that will give you a number of options, choose the one that says Burn.
From now on, select Windows 11 ISO image with the Browser button, then choose the USB drive, enter a volume label (this will be the name of the USB), and finally press Burn.
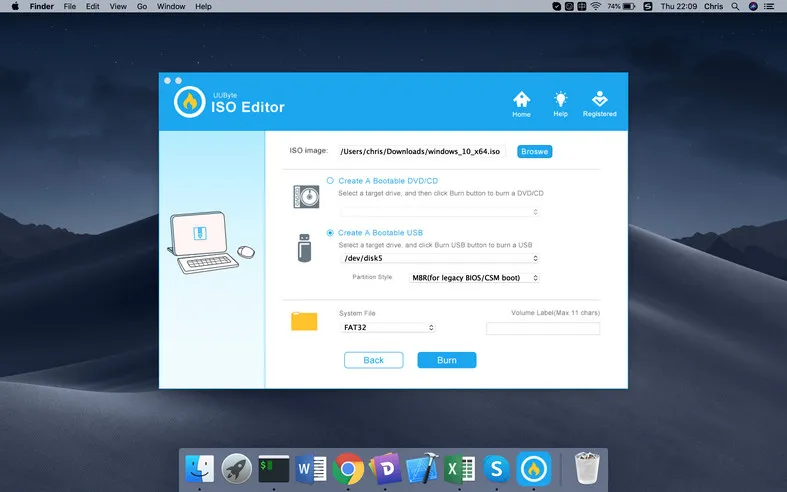
This will start the process of creating Windows 11 installation media on Mac. This might take a couple of minutes. Once the process completes, simply eject the USB and keep it safe so that you can use it in case of an emergency.

Pros:
- Powerful ISO file features
- Easy to use and less error.
- Much faster file copying capability.
- Support the latest Windows 11 ISO.
- Split large install.wim file by default.
- Work on Mac OS X and modern macOS, including Big Sur.
- Compatible with both Intel Mac and Apple Silicon Mac (M1 Chip).
Cons:
- Not free.
- Registration fails sometimes.
Takeaway: If you did not have a Windows virtual machine on your Mac. UUByte ISO Editor is the perfect tool for making Windows 11 installation media on Mac.
Terminal Utility
The last suggestion for Mac is the Terminal app, which is a free system utility that comes with Mac. It is equivalent to Command Prompt on Windows. However, most of Mac users are not aware or even using this app in their daily life because it only supports plan text commands/input. It is a super boring and complicated process if you are trying to use Terminal to create Windows 11 installation media on macOS. And this is the reason why we only list this app as the third suggestion.
To get started, please plug in a USB drive into Mac and make sure you can see the drive name in Finder sidebar.
Now, open Terminal utility and input the following command to find the external storage devices connected to this Mac. In our example, the USB drive is /dev/disk3.
diskutil list external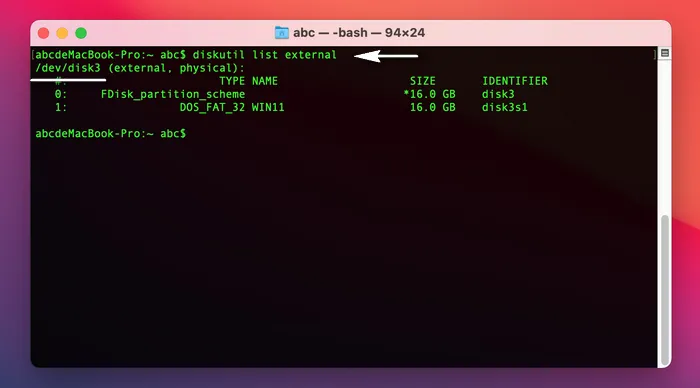
When you know the disk name, you need to format the disk to proper file system that Windows support, including FAT32 and NTFS. On Mac, only FAT32 is available. In here, we will format the USB drive to FAT32. WIN11 is the new volume name of USB drive.
diskutil eraseDisk FAT32 WIN11 /dev/disk3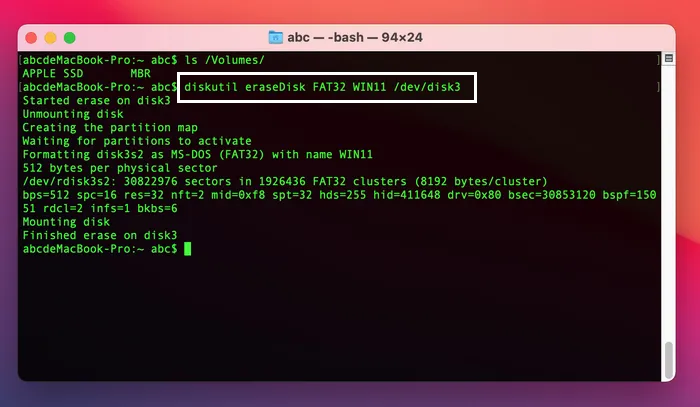
It is time to mount Windows 11 ISO. You can double click the ISO file or enter the following command to achieve the task. The string after mount parameter is the file path of Windows 11 ISO image.
hdiutil mount ~/Documents/ISO\ Images/Windows_11.iso
Before the file copying starts, you have to know the volume name for USB drive and mounted ISO image. You can do this with the following command. CCCOMA_X64FRE_EN-US_DV9 is the volume name of mounted Windows 11 ISO image and WIN11 is the volume name of USB drive. We will use them in next step.
ls /Volumes 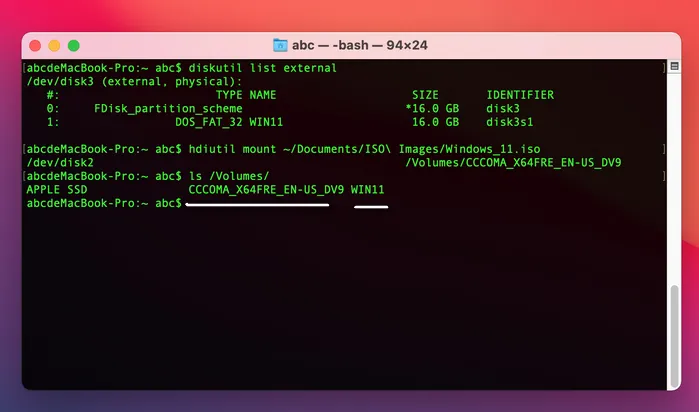
The final step is to copy all files and folders from mounted Windows 11 ISO volume to USB drive with rsync command. You will see a live progress bar about the file copying task.
rsync -avh --progress /Volumes/CCCOMA_X64FRE_EN-US_DV9/ /Volumes/WIN11/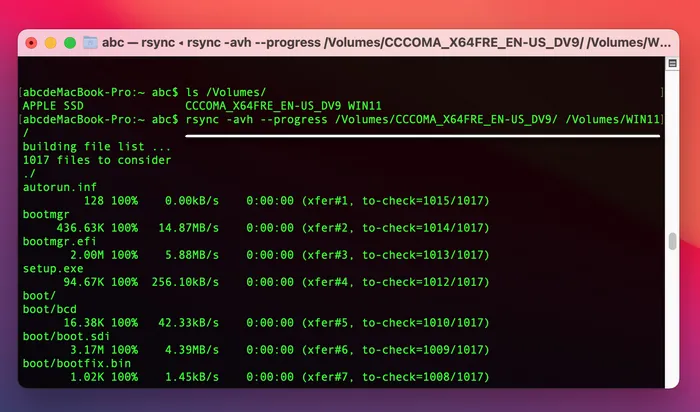
Notice: If the install.wim file was larger than 4GB, then you have to split it first before copying.
Pros:
- Come with macOS.
- Free of charge.
- Much faster file copying capability.
- Support all macOS versions.
Cons:
- More Dangerous even for a single character typo.
- Be familiar with commands and associated parameters.
- Spend more time.
Takeaway: Terminal is your best friend for making bootable Windows 11 installation media on Mac if you were a system administrator or software developer.
Part 3: How to Create Windows 11 Installation Media on Linux Machine
You don't have much good luck for beginers who play with Linux machine. Most of this type of staff are done with text commands and there is only one GUI app available. That is WoeUSB-ng, a graphics user interface wrapper of original WoeUSB, which is a linux command-line package for creating installation media from Windows image or DVD.
WoeUSB-ng
WoeUSB-ng is a free software package you can use to create a Windows 11 installation media on a Linux. So, in case you are unable to login to Windows 11 PC, and do not have another Windows PC but a Linux one, you can use this to create Windows 11 installation media.
Also, this tool being a freeware, does not have a dedicated support team behind it. So, using it might be a bit challenging. This program also has a number of dependencies, so make sure to check them before you start using it. Otherwise, it might not work at all. Here's how you can use the WoeUSB to create the Windows 11 installation media:
Launch Terminal app on Linux and install all dependencies required by WoeUSB-ng, taking Ubuntu as example:
sudo apt install git p7zip-full python3-pip python3-wxgtk4.0 Next, install WoeUSB-ng, a graphics user interface app being used to replace the original WoeUSB with command mode only.
sudo pip3 install WoeUSB-ng Connect a USB drive to Linux comuter and launch WoeUSB-ng app. Next, import Windows 11 ISO and choose the USB drive name.
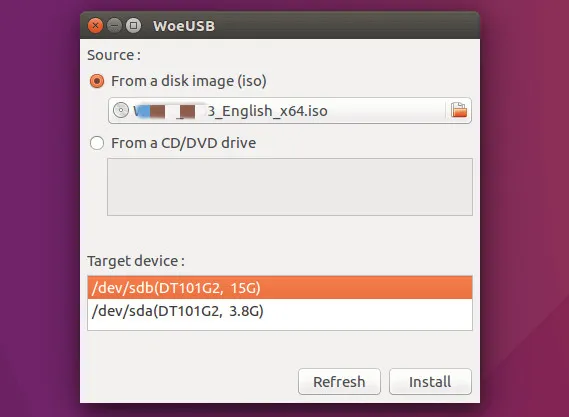
Finally, click Install button to write Windows 11 ISO to USB flash drive. Once the process completes, you can take out the USB drive and test it to check if it has been created properly.
Pros:
- Clean GUI.
- Simple to use.
- Less error.
- Compatible with Legacy BIOS and UEFI boot.
Cons:
- Only available on Ubuntu, Arch and Fedora.
- No GPT support.
Takeaway: The most recommended program for creating Windows 11 installation media on a Linux comupter.
Linux Terminal
Terminal is also system-level utility that you can find on all Linux distributions. It works the same as Terminal on Mac and the steps are almost identical, including USB detecting, formatting, ISO mounting and file copying. The only difference is that Linux uses a set of different commands for detecting and formatting USB drive.
List connected USB devices: lsblk
Format USB to FAT32: sudo mkfs.fat -F 32 /dev/sdb1
Mount Windows 11 ISO: sudo mount -o loop /path/to/Windows-11-image.iso /mnt/iso
Copy file to USB: rsync -avh --progress /mnt/iso/ /dev/sdb1/
Pros:
- Work on all Linux distributions.
- No software or package install.
- Completely free of charge.
Cons:
- Super complex steps.
- A bit lower success rate.
Takeaway: The only solution on Linux if WoeUSB did not work!
The Bottom Line:
We have offer different solutions for all popular desktop operating systems, including Windows, macOS and Linux. This should work in most of the cases. Please going by the simplicity of using these programs, and their respective usefulness.
For Windows PC, I would prefer the official Media Creation Tool, which is the simplest to use. However, it cannot perform any other task, compared to which the UUByte ISO Editor can do a lot more than simply create Windows 11 installation media. On a Mac, UUByte ISO Editor is clearly the winnder. For Linux machines, we recommend WoeUSB-ng as it has an ultra simple user interface and no command involved at all!

Petty is editor in chief at UUByte and writes various topics about Windows and Mac to help people make the most of current technology.