
Burning an ISO file to blank DVD is not as simple as copying a file from one location to another. If you want to create bootable media from an ISO file, you will need a utility that is specifically designed for that purpose. Otherwise, what will happen is that you will be wasting DVDs because what you are creating are not bootable media: they are merely copies of the ISO file, which is completely different.
There are several tools available for this purpose, including the one that is built into Windows. In this article, we will cover this one as well as three other specialty applications that will help you burn ISO files onto DVDs.
Part 1: Burn ISO to DVD with Built-in Tool (Windows 10 & 7)
Beginning with the first beta version of Windows 7 several years ago, Microsoft introduced an image burning application in their operating system called Windows Disc Image Burner. The utility is very simple to use, and all you need is the PC running Windows 7 or higher, and a blank writable DVD.
Step 1: To burn an ISO file to a DVD using this application, simply insert a blank DVD into the DVD drive.
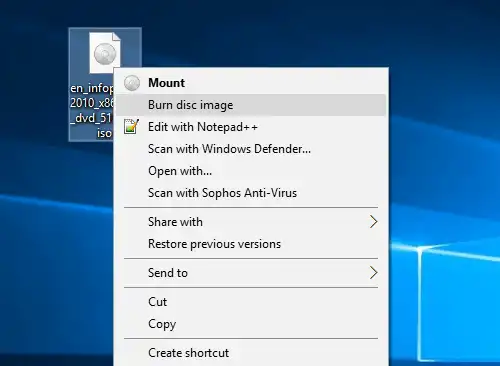
Step 2 : In File Explorer, go to the ISO image that you wish to burn and right-click on it. When you right-click, you will see an option called "Burn disc image". Click on this.
Step 3 : Choose the media type, which will be USB drive in this particular instance.
Step 4 : You will now see a small window with several options. You must first select the correct drive with the blank DVD in it. You will also see an option called "Verify disc after burning". This function will check if your image file works fine once it has been burned to the DVD. This process takes additional time, so do not check that if you are in a hurry.
Step 5 : Finally, click on "Burn" and your DVD with bootable media will be created in a few minutes.
Part 2: How to Burn ISO to DVD Bootable via UUByte ISO Burner
The default DVD burning utility on Windows is free and works great for Windows ISO files. However, it sucks at burning other types of ISO images. So if it failed at your case, then the second choice you can try out is UUByte ISO Burner, the primary function of ISO Editor.
UUByte ISO Editor is an all-in-one ISO toolkit. It is able to burn, edit, create and copy ISO files within this tool. Besides the powerful functions, another great feature is the east of use. Unlike other popular ISO burning software such as UltraISO, PowerISO, UUByte ISO Editor has a very clear user inferface. You don't need to take anytime underding how it works.
Key Features of ISO Editor
- Directly burn ISO to DVD.
- Make bootable DVD from ISO image.
- Edit ISO files as easily as local folders.
- Copy ISO from blank DVD disc.
- Create ISO file from other files.


Step 1: Install UUByte ISO Editor on a Windows PC or Mac
Once you download and install UUByte ISO Editor, simply launch the application and insert a blank DVD into the drive.
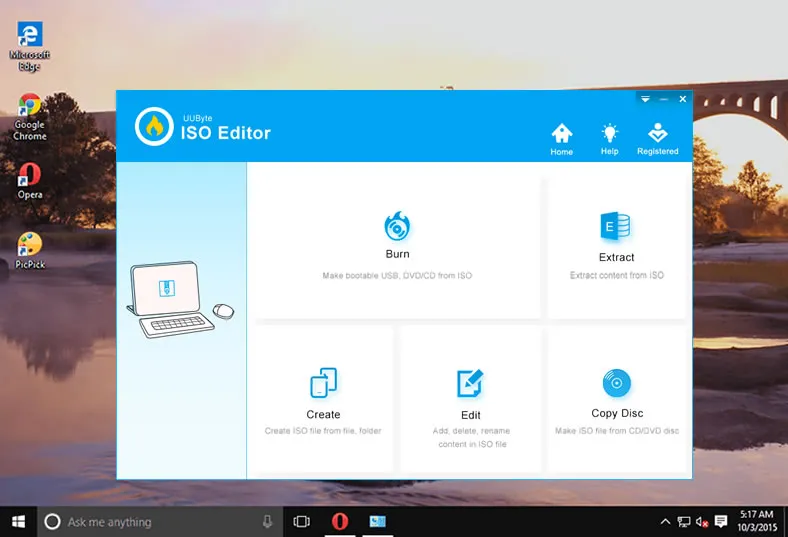
Step 2: Import ISO File to UUByte ISO Editor
On the software interface, click "Burn" tab on the main screen. Then select the ISO file that needs to be burned, then select your target drive, which is the one that contains the DVD. Just lefe the settings with default, or the burning process would fail if it was wrong.
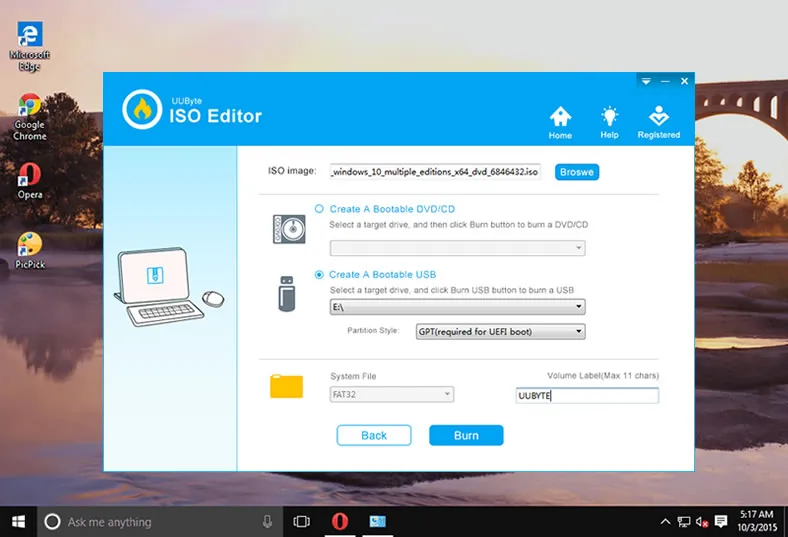
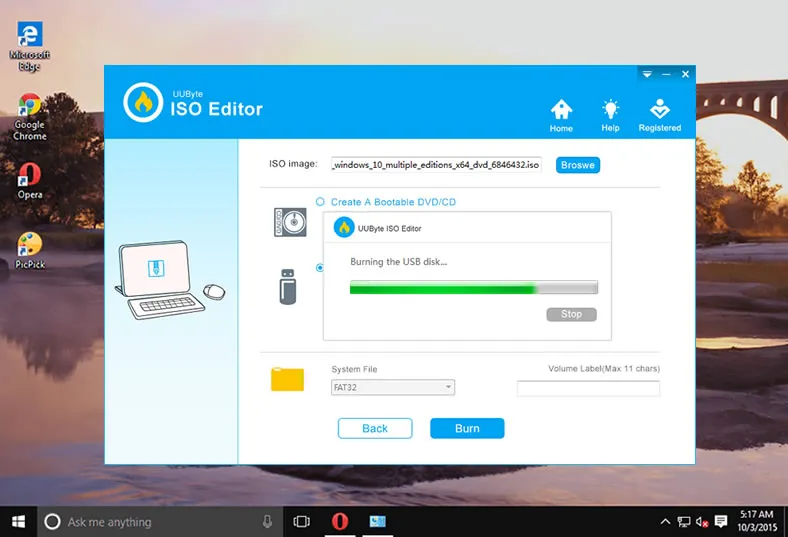
Step 3: Start Burning ISO to DVD Disc
Now click on the "Burn" button to burn ISO image to blank CD or DVD. Usually, it needs more time for burning Windows ISO becasue it is too large. Aslo make sure the volume of blank DVD is over 4G. When the burning process is completed, you will see a message saying the burning is successful!
The reason why using UUByte ISO Editor is for higher success rate. You won't waste DVD disc and time on this boring process. One-time success is guranteed for UUByte!
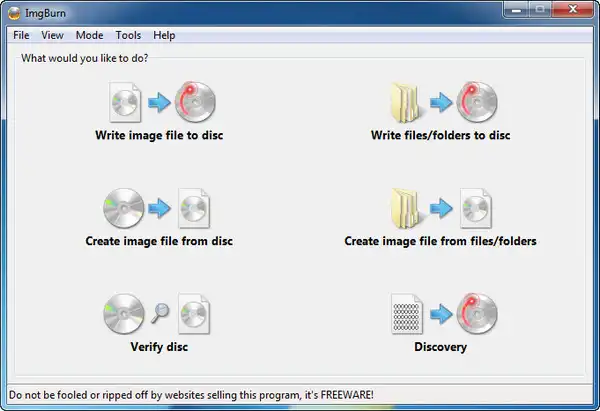
Part 3: How to Burn ISO Files to a CD/DVD with ImgBurn
Using ImgBurn is little bit different from the previous utility. Once you install the software on your PC, you can simply go to the ISO file in question in your file explorer, right-click it, and select the option called "Burn using ImgBurn". Alternatively, you can launch the software and choose the option yourself.
If you use the first method, the source and destination files will already be filled in to the corresponding fields. All you need to do is double-check the settings, and click on the "Write" option. Your bootable DVD will be created in few minutes.
Part 4: ISO Recorder: Best ISO Burner for Windows 7/8/10
ISO Recorder is another convenient utility for creating bootable DVDs. The interface is quite intuitive and you should have much trouble figuring out what goes where. Here's how to use ISO Recorder:
Step 1: Download and install the software on your computer.
Step 2: Next, you can right-click on the ISO file and you will see an option called "‘Copy image to CD". Click on this option.
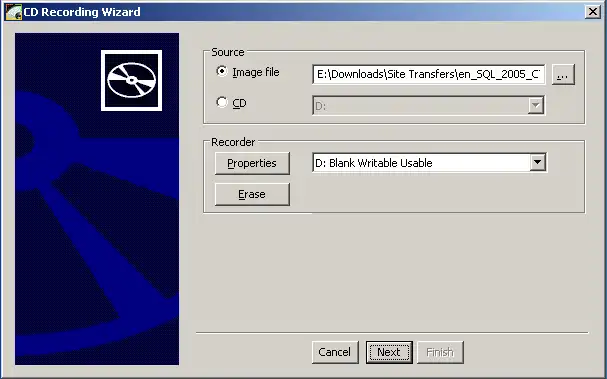
Step 3: You will now see the Recording Wizard popup on your screen. Here, you can select the source and target locations, and you also have the option of choosing whether or not you are using a blank or non-blank writable disk. If you select non-blank writable disk (rewritable), the next step will show you an option to first erase the disk.
Step 4: If you are using a blank DVD, then the "Next" button will be enabled in the previous step. Click on that. The process will begin and your DVD with bootable media will be ready in a few moments.
Conclusion
Choosing the right software is generally a matter of convenience and preference. Depending on what interface you are comfortable with, you may choose one over the other. For example, if you don't want to fuss about with downloads and installations, you can simply use the Windows default utility. On the other hand, if you prefer a dedicated application you can choose one of the other three based on what type of bootable media you would like to create. The choice is ultimately yours, but there are enough options to satisfy almost any user's requirements.

Petty is editor in chief at UUByte and writes various topics about Windows and Mac to help people make the most of current technology.