
[Updated On Dec 2023] Method 1 and Method 3 are still working perfectly in the latest macOS Sonoma and Apple M1/M2/M3 Mac.
How to create a Windows 10 bootable USB on macOS Catalina? If that question has been bothering you for a while, we've got a couple of great solutions. Just because ISO is not a native format for macOS computers, that doesn't mean there are no tools to get the job done on a Mac. In fact, we've showcased the best two methods to create Windows 10 bootable USB media on macOS Catalina, the latest version of the Mac operating system for iMacs, MacBook Pro and other desktop-based devices.
macOS is also great for making Windows 10 bootable USB, as long as you have the right tools and know the right methods to get the task done. Here are the three best methods to create Windows 10 bootable USB on mac Catalina with detailed instructions.
Create Windows 10 Bootable USB on Mac Catalina via UUByte ISO Editor
Creating Windows 10 bootable USB on Mac Catalina is much more challenging than doing it with a Windows PC, which has many tools to complete the task. Actually, you can use Terminal app on Mac for this task but it involves complex commands and this is very hard for beginners. So our first recommendation is a beautiful GUI-based app called UUByte ISO Editor.
UUByte ISO Editor is a great tool to manage your ISO files on Mac, including the one to create Windows bootable USB for installation. In addition, you can edit ISOs, extract content, add or remove files, and even copy CDs to ISO. The interface is user-friendly, and you won't have to do all the complicated work of verifying your ISO after burning, messing around with complicated settings, and so on.
Highlights of ISO Editor
- Simplified and elegant user interface.
- Support large Windows 10 ISO file (> 5GB).
- Easily create Windows bootable USB and DVD.
- Edit ISO files and repack into a new one.
- Extract content from ISO image to local hard drive.
- Support latest macOS Catalina and Windows 10.


Step 1: Download and Install UUByte ISO Editor App on Mac Catalina
Download and Install UUByte ISO Editor for Mac. Make sure you download an authentic copy of the DMG file from the official website.
Step 2: Download Windows 10 ISO and Insert USB
Download the ISO file for Windows 10 from the official Microsoft website. Since you're on a Mac, you'll get to bypass the Media Creation Tool and download the ISO file directly to your computer. Insert your USB pen drive with at least 6 to 8GB of free space. If you have anything on it, take a backup because it will be formatted when creating the Windows 10 installer.
Step 3: Start Creating Windows 10 Bootable USB on Mac Catalina
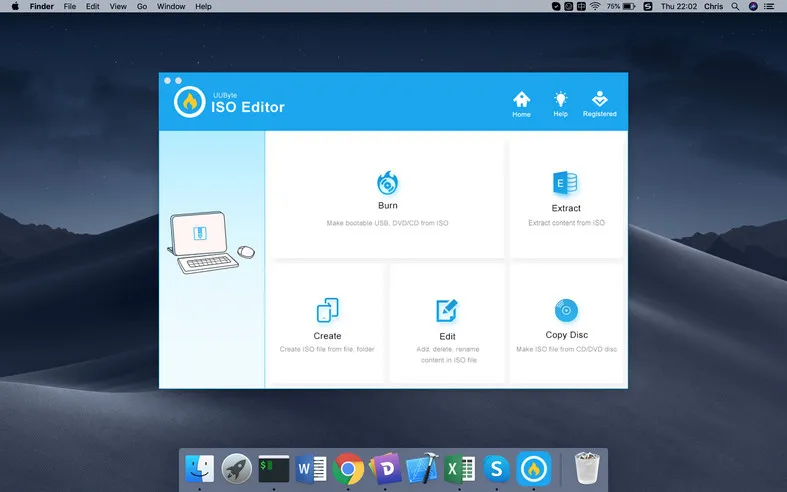
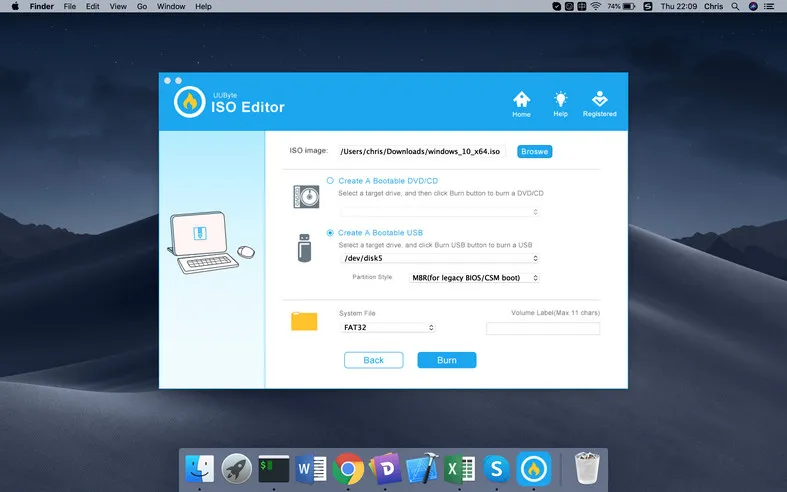
In the UUByte interface, you'll see several modules, including Burn; click on it. On the next page, you'll see your USB drive automatically detected. Import the downloaded Windows 10 ISO to the app and hit the Burn button and wait for your Windows 10 bootable USB to be ready in less than 10 minutes.

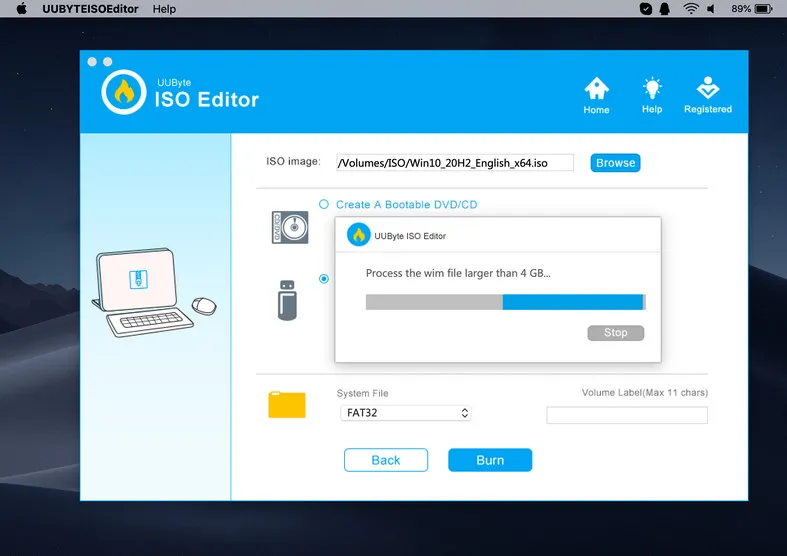
[Edit]: Old version of UUByte ISO Editor is unable to handle latest Windows 10 ISO image and we fixed the issue. Please download the latest version of UUByte ISO Editor from our website and burn large Windows 10 ISO to USB. A new pop-up message will show up, telling you it is currently in process to split install.wim file contained in ISO image. Please wait 3- 10 minutes for that.
This is the easy way to create a Windows 10 bootable USB on Mac Catalina, but there's also another way if you're familiar with setting up a virtual machine on your Mac.
Create Windows 10 Bootable USB on Mac Catalina via Boot Camp Assistant
Boot Camp Assistant is pre-built app of macOS that essentially run Windows OS on a Mac. Fortunately, you can piggyback on it to get the Windows 10 ISO file and write it to a USB drive. Here are the steps you need to replicate to use Boot Camp Assistant app for creating Windows 10 bootable USB on Mac Catalina.
Step 1: Launch Boot Camp Assistant and then insert your USB drive into an available and working port. The will need to be of 6GB capacity for the 32-bit version and 8GB for the 64-bit version of ISO, depending on which one you downloaded.
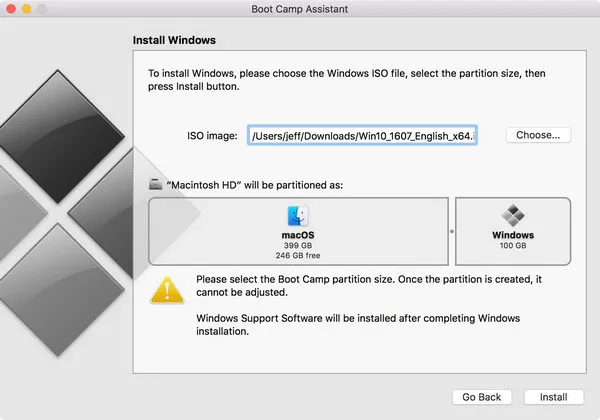
Step 2: In Boot Camp, choose the option for creating an install disk. Be sure not to choose the Install option because you're not doing an installation right now, just creating the bootable media so you can install Windows 10 on a different machine.
Step 3: When you hit Continue, the software will automatically pick up the ISO file and display the location in the ISO Image section. Make sure it's the right one and also make sure that your USB is correctly displayed in the section below it.
Step 4: When you see the name of your USB drive change to WININSTALL in Finder, that means it's ready to be used as an installer. Eject it in Finder and remove it from your Mac.
This method is easy and doesn't require additional tools, but Boot Camp Assistant has known issues when working with Windows 10 ISO for that reason, we recommend UUByte ISO Editor for Mac since you won't have any of those problems. If you're technically adept, you can also try creating a virtual machine, as explained in the following section.
Cons:
- No enough disk error.
- Not recognizing USB drive .
- No USB option available .
Create Windows 10 Bootable USB on Mac Catalina via Virtual Machine
Virtual machine is now widely known to most of us, especially in tech field. The virtual machine software are able to run a guest operating system along side with the host operating system. It means you can run a Windows 10 instance on a Mac. This can be done with the help of VirtualBox software, a free and open source tool.
The process is a little complicated if you don't know what you're up against, so we're not covering it in this article. You can head over to the WikiBooks web page for that. Once you've done that, you will need to set up Windows 10 in VirtualBox to create the installer. Once you've done that using this resource, you can now use the media creation tool to get the ISO and create the Windows 10 USB installer. The process is explained below:
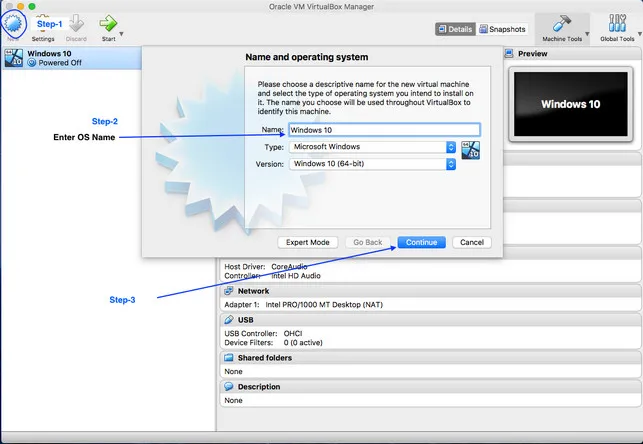
Step 1: Download VirtualBox Mac DMG file and create a new virtual machine in VirtualBox.
Step 2: In the Windows environment that you've set up on your Mac, open a browser window and head over to the Windows 10 ISO download page.
Step 3: Follow the process to download the ISO file. Make sure you choose the option to download the media creation tool and then to download the ISO file so you can use the tool to create the installer without any additional software.
Step 4: Insert a blank USB into Mac and use Media Creation Tool to download and burn the ISO file to the USB drive.
Cons:
- Complex setup for non-technicians.
- Operations in Virtual machine is limited.
- USB may not be recognized in Virtual machine.
Conclusion:
Obviously, this is a roundabout method to create Windows 10 bootable USB on Mac Catalina that you should only consider if you're comfortable with setting up the virtual machine in the first place. The better option is to use UUByte ISO Editor for Mac because you won't have to mess about with complex tasks. All you need is a USB drive, an authentic Windows 10 ISO, and the software itself. In just a few minutes after that, you'll have a reliable USB installer for Windows 10 that you can use any number of times to set up a PC running the latest version of Microsoft's operating system.

Petty is editor in chief at UUByte and writes various topics about Windows and Mac to help people make the most of current technology.