
How do you create a Windows 10 bootable USB on Mac? That's the tricky question because you have to choose the most convenient way for the job. There are tons of ISO burning utilities available on the Internet, but not all of them have high burn success rates for bootable ISO files.
The four methods described below are all popular ways to create Windows 10 bootable USB stick on a Mac, but they require various levels of technical expertise. Please choose the right one for yourself.
Method 1: Easily Create Windows 10 Bootable USB on Mac via UUByte ISOKit
People are more willing to use tools that fix the certain issue at minimal effort. That's why we recommend UUByte ISOKi at this section. It is a market-leading application for burning ISO files and creating bootable media. Its flexibility allows you to choose your storage medium and change burn settings in an easy manner. The utility is fully tested on the world's top PC brands running all the recent versions of Windows. It is compatible with multiple file systems as well as both legacy BIOS and UEFI boot schemes.
The most important features are the high burn success rate and the simple UI that allows even novice users to quickly burn bootable ISO files to USB flash drive. These features have made UUByte ISOKit extremely popular among both Windows and Mac users around the world. In a matter of a few steps, anyone can create a bootable USB drive for Windows 10/8/7. The process has been described in detail below:
Key Features of ISOKit
- Support all Windows ISO images, including the latest Windows 10/11.
- Make bootable disk from USB.
- Run well on Intel and Apple Silicon Mac.
- Support legacy and UEFI booting.
- Create multiboot USB for all OS.
- Fully compatible with on macOS Tahoe, Sequoia, Sonoma, Monterey and more.


Step 1: Download and Install ISOKit
Click the Download button in above to get a copy of UUByte ISOKit app on your Mac. Double click the dmg file and drag the app icon to Application folder. By doing this, you can now open ISOKit app from Launchpad.
To create a bootable USB, please click the Burn ISO button at the left side to proceed. 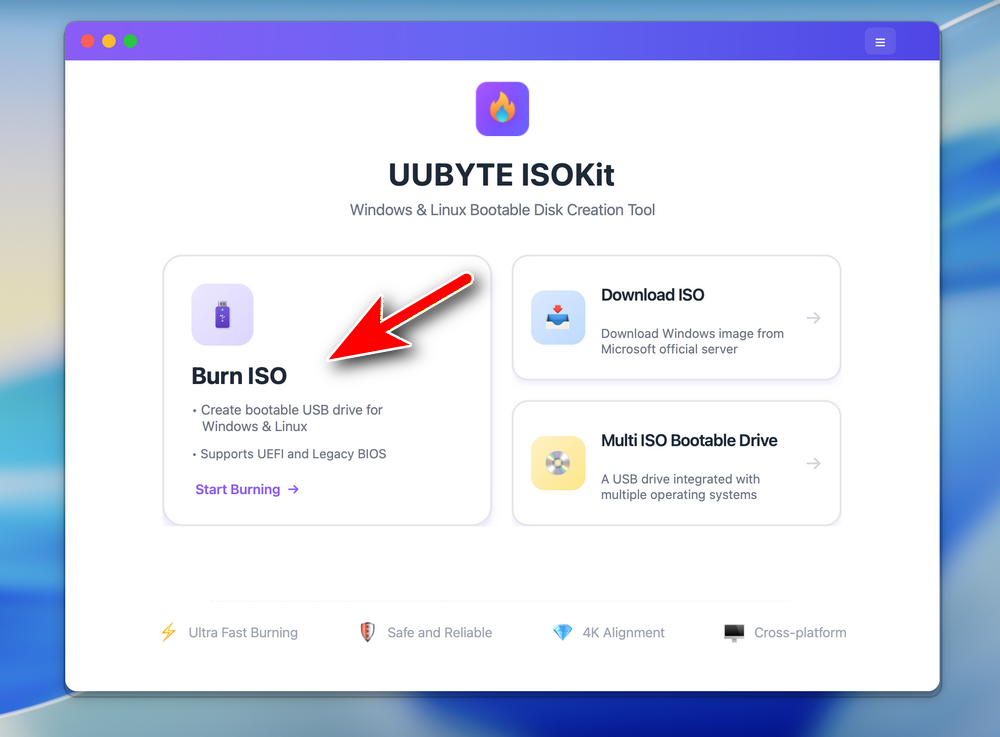
Step 2: Plug in a USB Drive on Mac
Now, connect a USB drive to Mac and make sure you can see the drive name in Finder app. This means the drive is recognized by your Mac.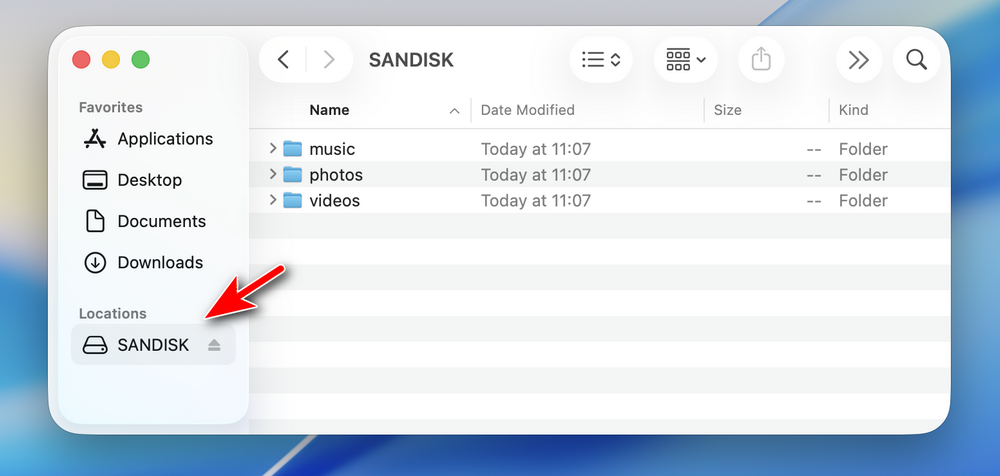
Notice: Please disconnect other USB storage devices on your Mac so you won't choose the wrong USB for burning!
Step 3: Import Windows ISO and Choose USB Drive
On the inside page, add the ISO file to the app by clicking the Browse button. Next, pick up the correct USB drive from the drop-down list.You can see the USB drive brand and volume name at this time. After that, you need also choose a partition scheme. For modern computers, please choose GPT. For old computers, select MBR instead. 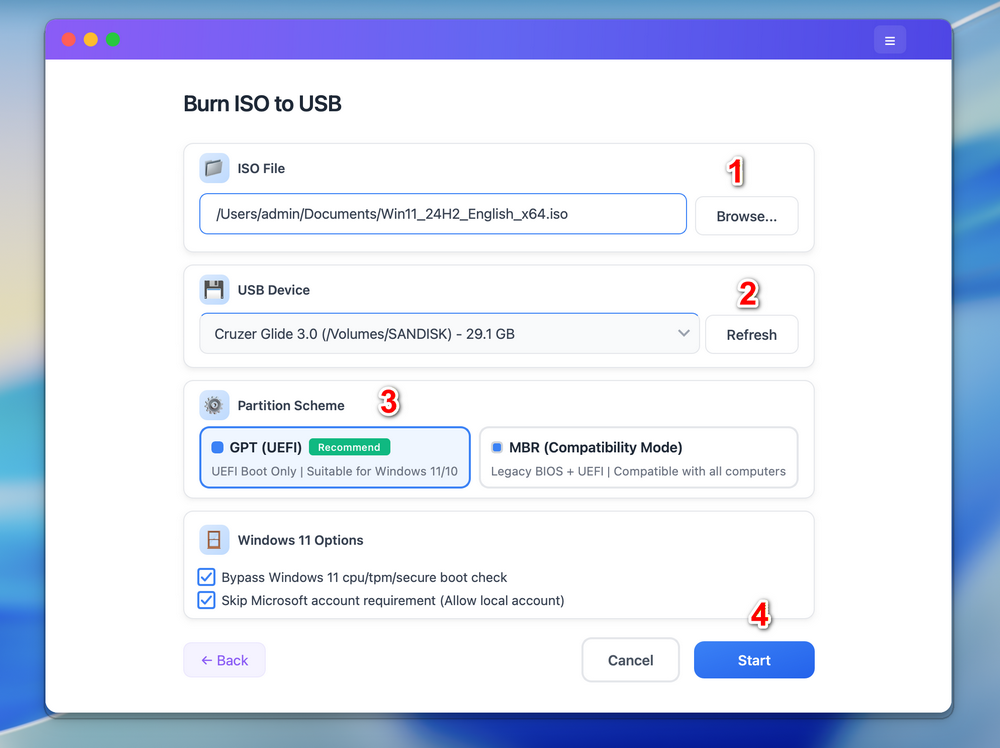
Note: For Windows 11 ISO, the app will automatically patch the ISO so it allows you install Windows 11 on unsupported hardware.
Step 4: Start Burning Windows ISO to USB
Click the Start button located at the bottom to start burning Windows ISO to target USB drive. This will format the USB drive so you should backup the drive first. In addition, please enter the login password to grant the permission to ISOKit so it can access external drive on your Mac. After that, ISOKit app will start coping files contained in ISO image to USB Drive. This will be done in 10-20 minutes for a fast drive.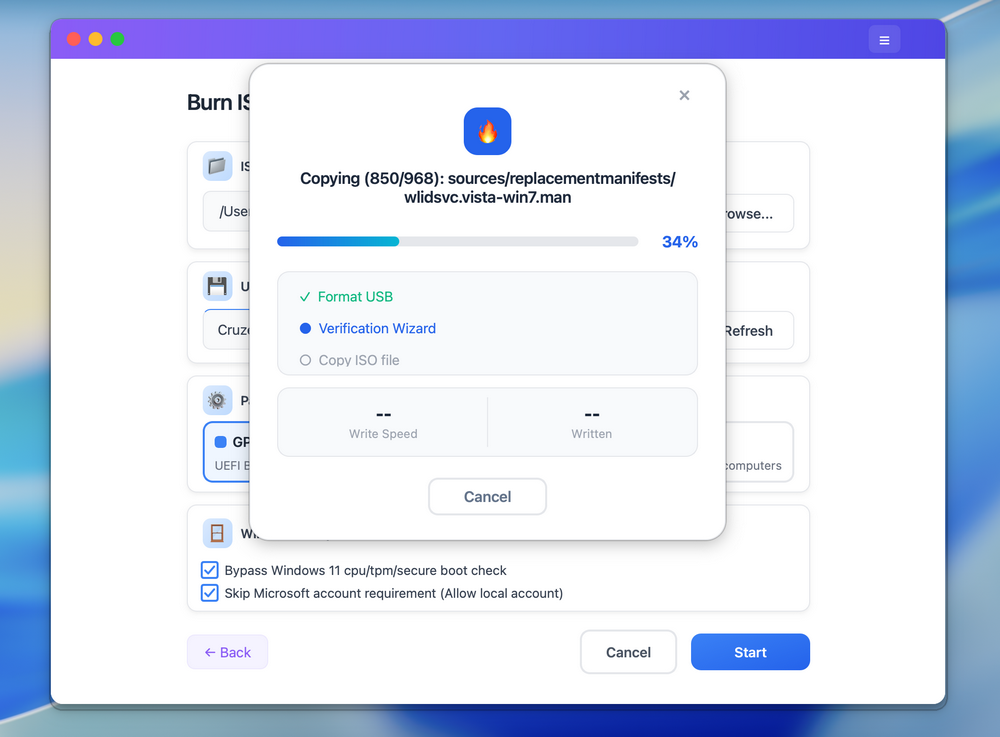
Step 5: Split Install.wim and Make USB Bootable
For latest Windows 10 or Windows 11 ISO, which contains a large install.wim file (> 4GB), UUByte ISOKit will split it automatically at the end of burning process. This make sure the install.wim file sits well on a FAT32 partition after shrinking. This extremely important on Mac as it can not read NTFS partition by deafult. Only FAT32 is available for creating Windows bootable USB.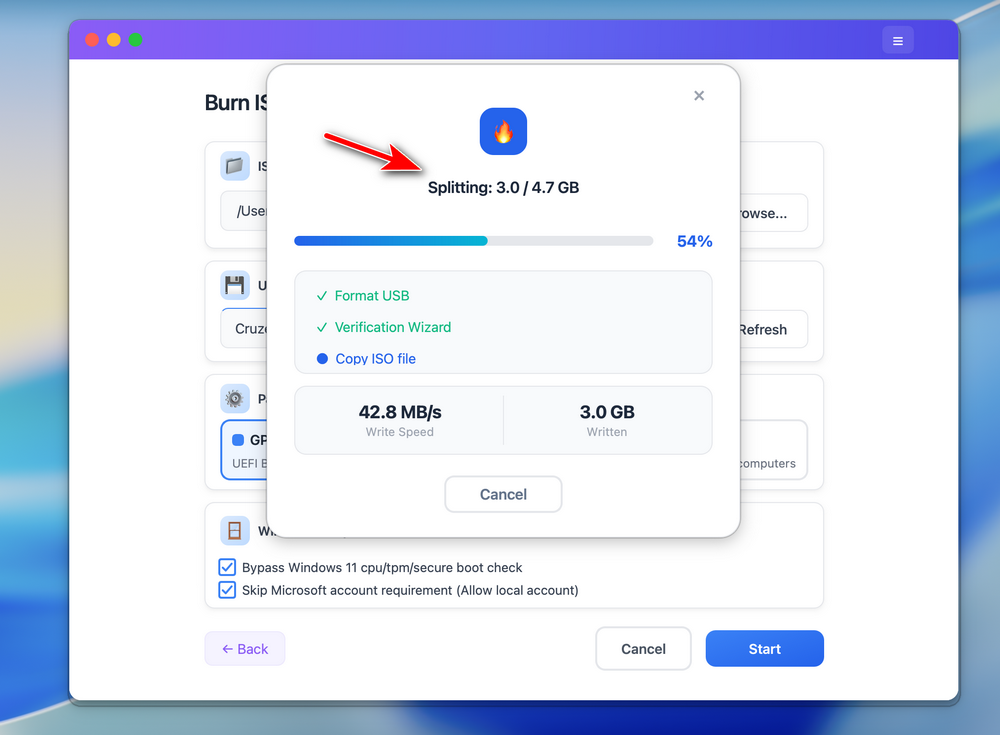
When this task is completed successfully, you will see a notification on the screen something like this: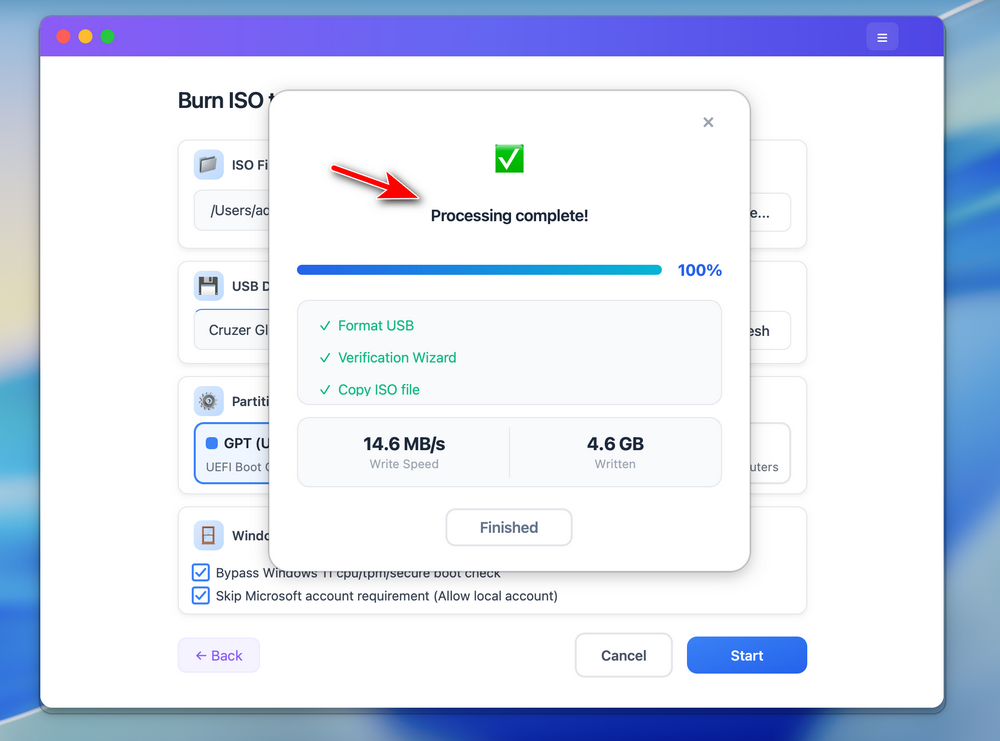
You can now eject the USB from Mac and reinstall OS on a target computer from this bootable drive.
Note: For the following two methods, you should first built a Windows virtual machine on your Mac as these two utilies are only available in Windows platform. Fortunately, it is quite easy to do this with free virtual machine software on Mac.
Method 2: Create Windows 10 Bootable USB on Mac via Terminal (Without Bootcamp)
Before macOS High Serria rolled into public eyes, there are two simple apps available on Mac for creating bootable Windows USB. They are Bootcamp and Disk Utility. For un-known reason, Apple removed the feature from the two apps and no longer valid to make bootable Windows installation USB. However, you can use the Teminal app to perform command line task so you can create Windows bootable USB without Bootcamp or Disk Uitility.
Step 1: Insert an USB flash drive and open Disk Utility app from Launchpad. You will see the drive name of USB on left sidebar.
Step 2: Right-click the drive name and choose "Erase" from the drop-down menu. At there, you have to choose a partition format. For Windows installation disk, MS-DOS (FAT32) is preferred. Now, the disk will be erased and formatted with FAT32.
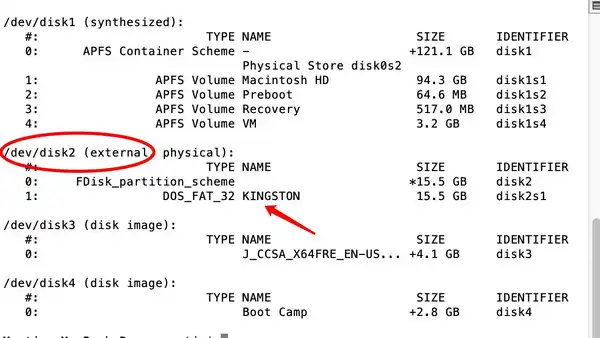
Step 3: Now open Terminal app and type "diskutil list". This will list all the storage devices on Mac, such as /dev/disk2 (with names and patition scheme).
Step 4: Now open Terminal app and type "diskutil list". This will list all the storage devices on Mac, at my computer is the USB drive is shown as /dev/disk2 (with name and patition scheme).
Step 4 : Run "diskutil unmount Disk /dev/disk2" and hit Enter. Then input "sudo dd if=/path/to/windows.iso of=/dev/disk2 bs=1m" . Replace the real path to Windows iso file. This command will write the ISO image to USB with bootable option.
Teminal is a great to make a Windows 10 bootable USB on Mac but it is also riksy enough! If you typed the wrong command, all the data on the selected drive would be erased and all data being vanished in seconds. So it is not ideal solution for beginners who don't know much technical staff.
Method 3: Use CMD to Create a Windows 10 Bootable USB Stick on Mac in Virtual Machine
Command Prompt is an extremely useful utility in Windows, but you have to know what you're doing. Command improperly executed can lead you to several issues down the road. Therefore, you need to be confident in doing command line work in order to use this method. You can certainly try it if you are a novice, but that may not be the recommended course of action. In Windows 10, it's very easy to create a bootable USB from an ISO file or disk image, but you need to format the USB drive first. The process is described as Step 0 below, but remember to remove the single quotes when entering commands:
Step 1 : Open the Command Prompt by pressing Windows + R and then typing ‘cmd' and Enter in the run box.
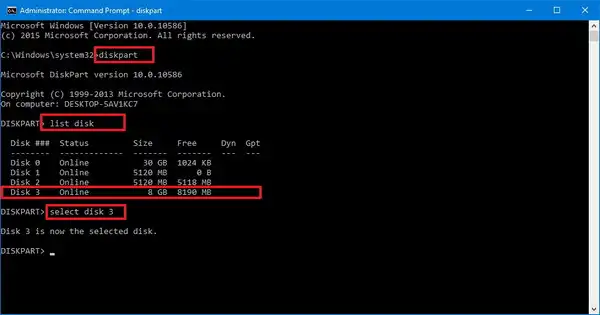
Step 2 : Now insert the USB drive and type in "diskpart" , then hit Enter.
Step 3 : Once the disk partition utility is running, you'll see a new window. In this, type "list disk" and Enter. Select the USB drive from this list; it will usually be Disk 1, so now input "select disk 1" and hit Enter.
Step 4 : In the next step, input "clean" and again press Enter. After you see the success message "Diskpart succeeded in cleaning the disk". Then you can type "create partition primary" and again press Enter.
Step 5 : Next, type "select partition 1"' and press Enter, then type "active" and Enter, and finally, "format fs=ntfs quick" and Enter. The chosen partition is now formatted as the NTFS file system. Now type "exit" and hit Enter again.
Step 6 : Assuming your ISO file is on your hard drive labeled D: Now input the following command, followed by Enter after each line:
d:
cd boot
bootsect /nt60 g: (this assumes that your USB drive has been assigned this letter; otherwise, change it as appropriate)
Step 8 : The above command creates a boot sector on your pre-formatted USB flash drive to create bootable media. You can now exit the Command Prompt with "exit".
Cons:
- Hard to understand.
- Need to deal with text commands .
- More risk to ruin the computer if you did it wrong.
Method 4: Create Bootable USB Drive from Multiple Windows ISO Files
RMPrepUSB helps you format drives and burn multiple bootable ISO files on a single drive. It's useful for when you need the same drive to contain different versions of Windows. The biggest drawback, however, is that it is built for pre-Windows 10 bootloaders. It works well with Windows XP, Windows 7 and Windows 8.
Interestingly, RMPrepUSB was originally written for the purpose of wiping, partitioning and formatting USB drives, but it has evolved into a much larger software with multiple features.
Step 1: The first step is to download the RMPrepUSB zip file, extract the .exe file and run it to install the software on your Windows PC. Then launch the application and follow the instructions provided below.
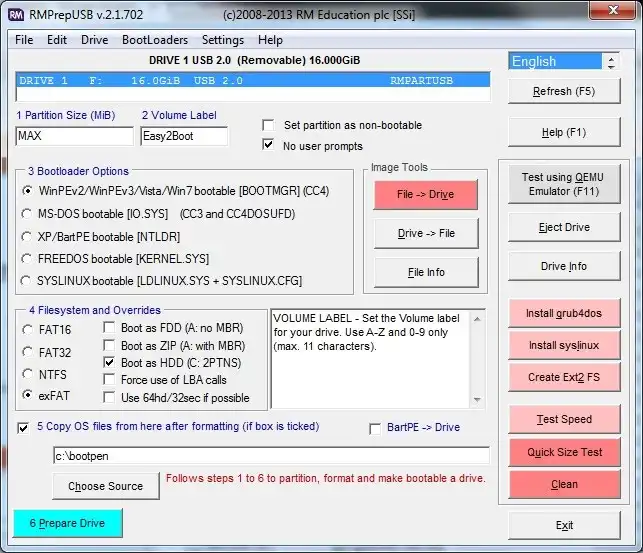
Step 2: To format the drive, there are five parameters that you must enter:
Partition size - set as MAX for maximum allowable partition size
Drive name - specify a name for your drive
Bootloader options (select the first option for Windows installations)
File system - for smaller USB drives use FAT16; for larger ones over 16GB, use NTFS.
Step 3: Finally, click on "Prepare Drive" to format it and add the bootable ISO file.
Cons:
- Complex settings and user interface.
- Not supporting Windows 10 ISO .
- Take a lot of time to find the correct user manual.
Conclusion:
RMPrepUSB utility is clearly not for everyone. If you have no experience handling disk images, then we recommend using Method 2 described above. UUByte ISOKit does not require any sort of technical expertise, and the software comes with superb technical support if you get stuck at any point. With most other bootable media creation software, you'll come across issues like drive not found, file system incompatibility or other problems. Not with UUByte ISOKit. It's the one software utility that you can trust to create bootable USB drives accurately every time.

Petty is editor in chief at UUByte and writes various topics about Windows and Mac to help people make the most of current technology.