
In this article, we will share all the steps to create a Windows 11 bootable USB on Mac, which is much more challenging than doing the same task this task on a Windows machine. Before proceeding to the details, please make sure you already have a Windows 11 ISO image. If not, please download Windows 11 ISO file from Microsoft website.
https://www.microsoft.com/en-us/software-download/windows11
Quick summary (2026): Please go with ISOKit app if you prefer a comfortable user experience. In addition, it supports the latest macOS Sonoma and Apple M3 Mac. For advanced user who is familar with commands, please go with the Terminal app. For Intel Mac running Catalina or preceding versions, you can use the free Bootcamp app to do the job.
Method 1: Create Windows 11 Bootable on Mac with ISOKit (User-Friendly)
ISOKit is a cross-platform utility for creating bootable USB from Windows ISO. Unlike Terminal or Boot Camp app, this professional app does not have limitations and super user friendly that comes with a modern UI. Currently, it can be working on macOS Tahoe, Sequoia, Sonoma, Ventura, Monterey, Big Sur, Catalina, Mojave, High Sierra and Sierra. What's more, it also adds support for Apple Silicon Mac (M3 Chip).
Step 1: Download and Install ISOKit
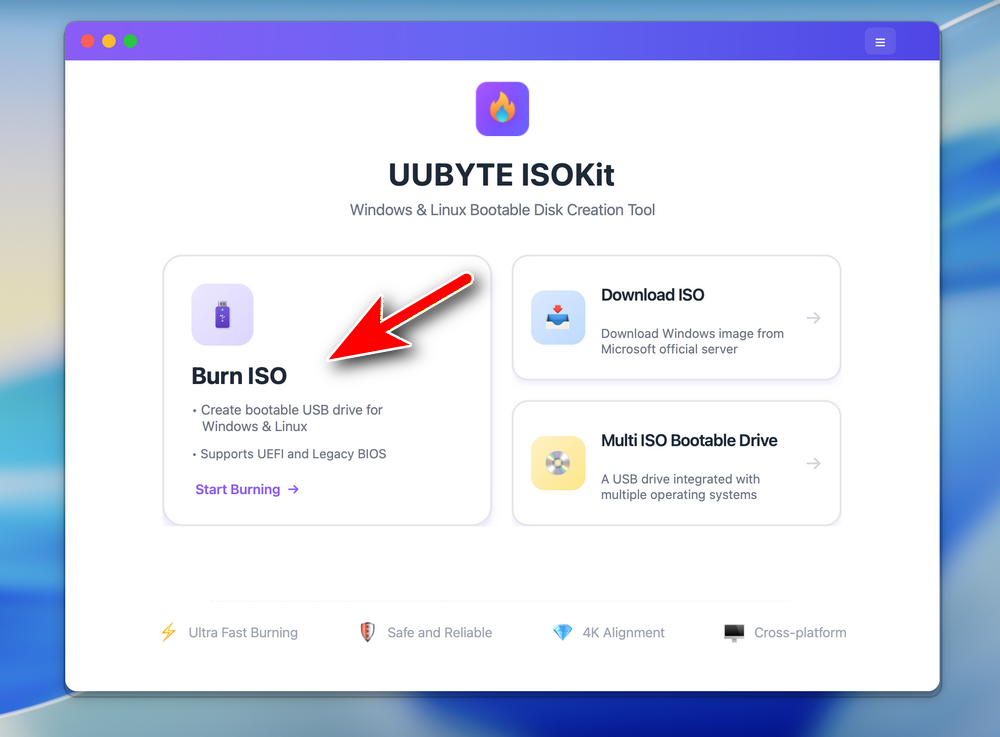
Click the Download button in above to get a copy of UUByte ISOKit app on your Mac. Double click the dmg file and drag the app icon to Application folder. By doing this, you can now open ISO Editor app from Launchpad.


To create a bootable USB, please click the Burn ISO button at the left side to proceed.
Step 2: Plug in a USB Drive on Mac
Now, connect a USB drive to Mac and make sure you can see the drive name in Finder app. This means the drive is recognized by your Mac.
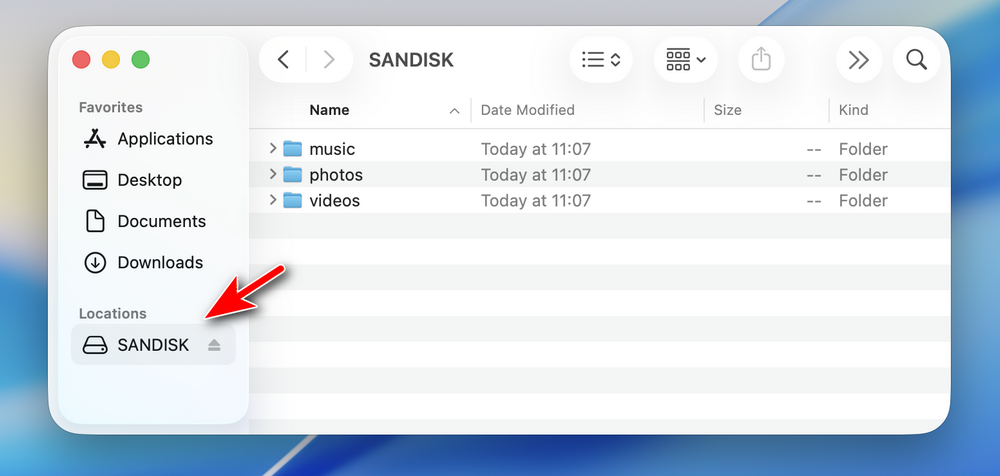
Notice: Please disconnect other USB storage devices on your Mac so you won't choose the wrong USB for burning!
Step 3: Import Windows ISO and Choose USB Drive
On the inside page, add the ISO file to the app by clicking the Browse button. Next, pick up the correct USB drive from the drop-down list.You can see the USB drive brand and volume name at this time. After that, you need also choose a partition scheme. For modern computers, please choose GPT. For old computers, select MBR instead.
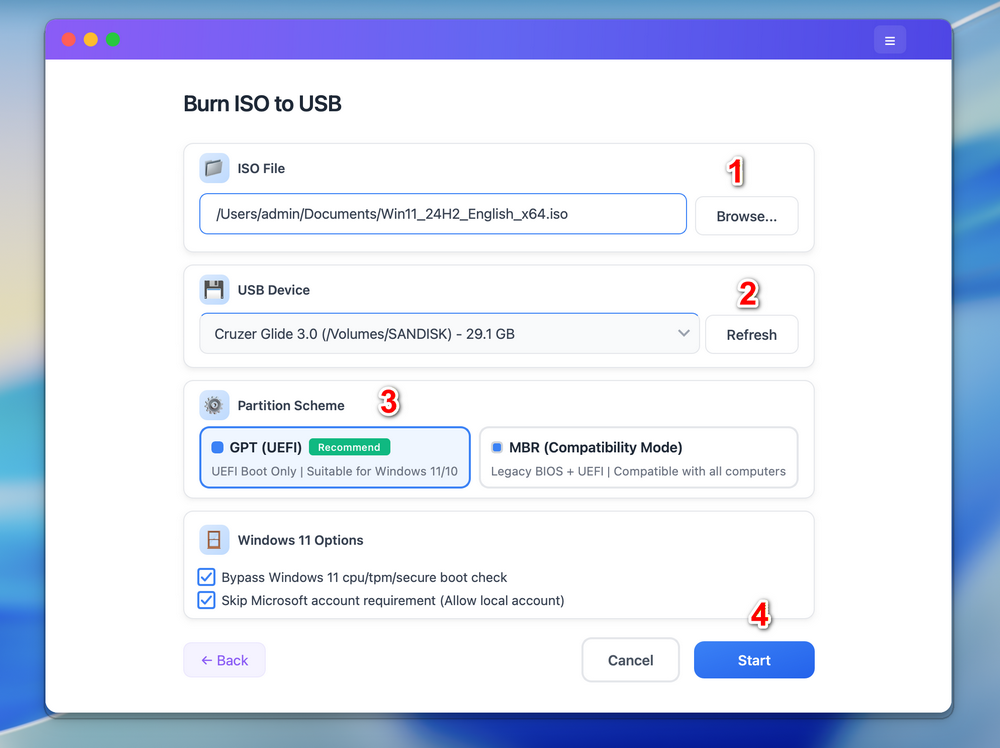
Note: For Windows 11 ISO, the app will automatically patch the ISO so it allows you install Windows 11 on unsupported hardware.
Step 4: Start Burning Windows ISO to USB
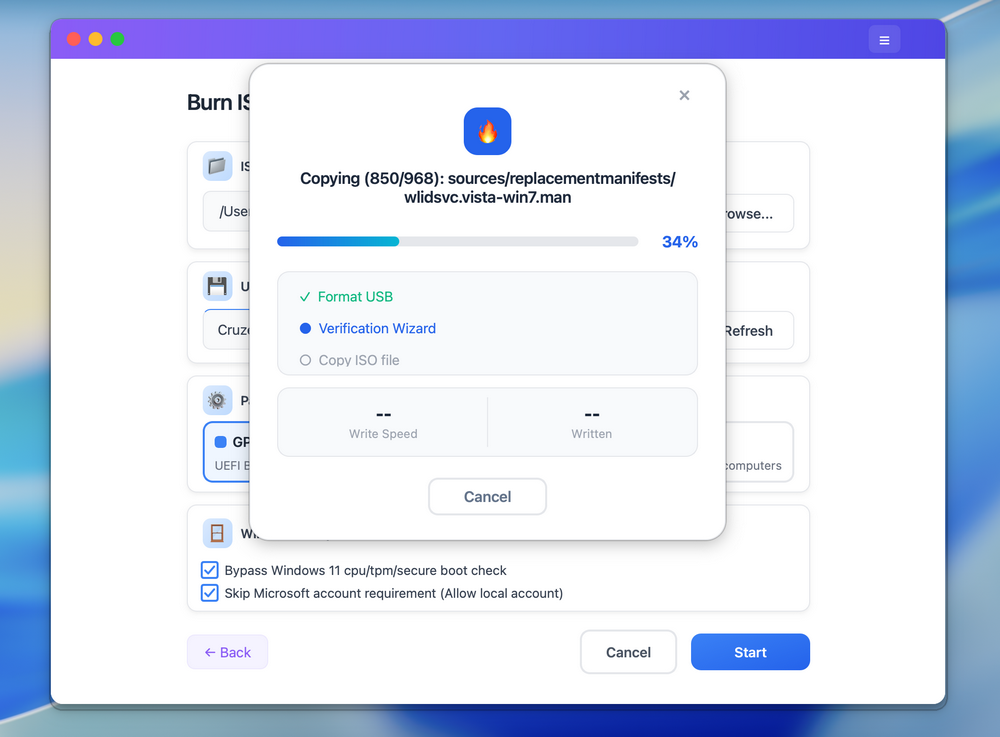
Click the Start button located at the bottom to start burning Windows ISO to target USB drive. This will format the USB drive so you should backup the drive first. In addition, please enter the login password to grant the permission to ISO Editor so it can access external drive on your Mac. After that, ISO Editor app will start coping files contained in ISO image to USB Drive. This will be done in 10-20 minutes for a fast drive.
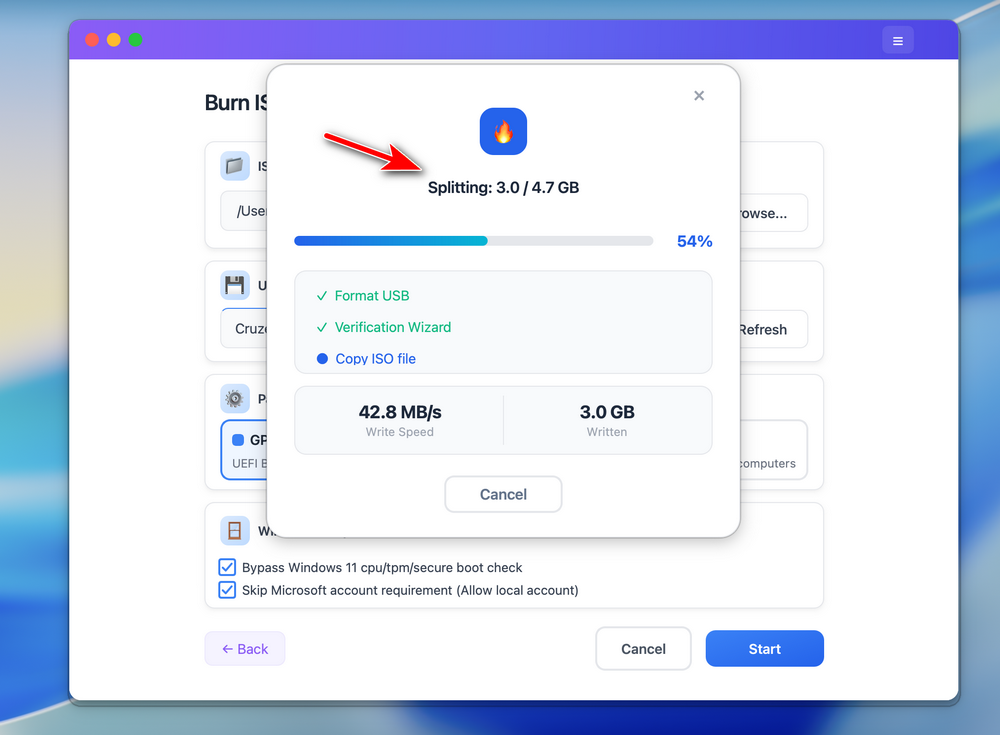
Step 5: Split Install.wim and Make USB Bootable
For latest Windows 10 or Windows 11 ISO, which contains a large install.wim file (> 4GB), UUByte ISOKit will split it automatically at the end of burning process. This make sure the install.wim file sits well on a FAT32 partition after shrinking. This extremely important on Mac as it can not read NTFS partition by deafult. Only FAT32 is available for creating Windows bootable USB.
When this task is completed successfully, you will see a notification on the screen something like this:
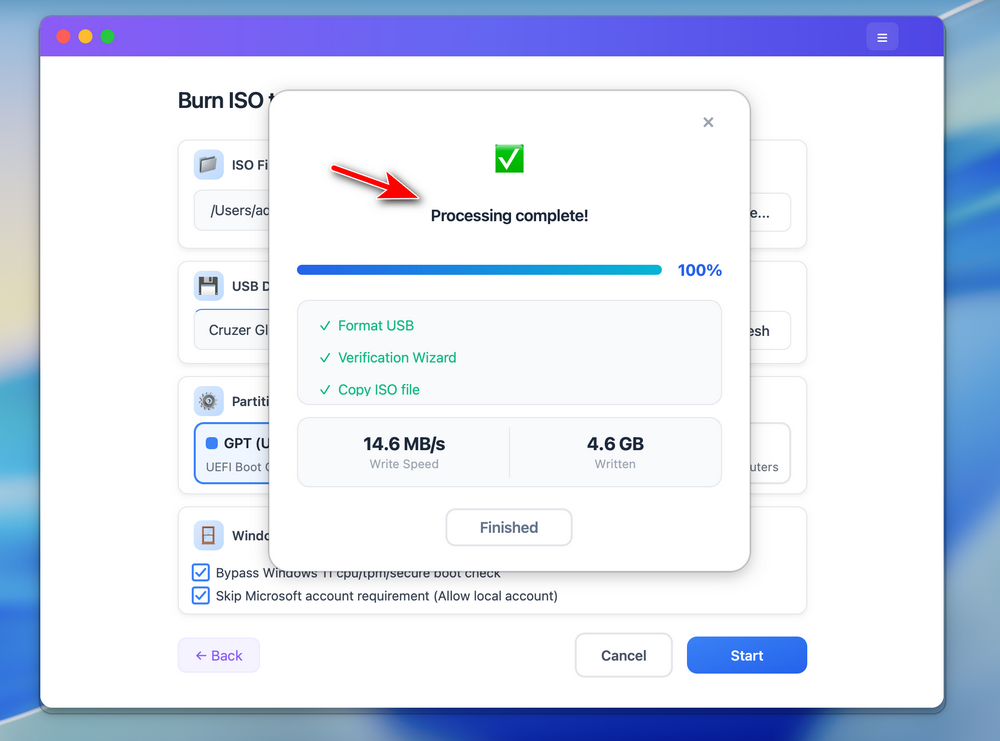
You can now eject the USB from Mac and reinstall OS on a target computer from this bootable drive.
Pros:
- GUI-based app and easy to get started.
- Super fast file copying speed and save time.
- Compatible with all modern macOS, including Monterey and Big Sur.
- Work nicely on both Intel Mac and Apple Silicon Mac.
- Support large Windows 10 ISO file (install.wim > 4GB).
- Extract content from ISO image.
- Edit and repack bootable ISO files.
Cons:
- Not totally free.
- Not support Linux ISO.
Method 2: Create Windows 11 Bootable on Mac in Terminal (NO GUI)
The first method we will be talking about is Terminal app, a command line based utility for performing tasks with text commands. Almost all the activities being done under graphics user interface can be achieve in Terminal app. We will be going to use Terminal to create a Windows 11 bootable USB on Mac.
Step 1: Insert a USB drive on Mac and eject other USB devices at this time to avoid confusion.
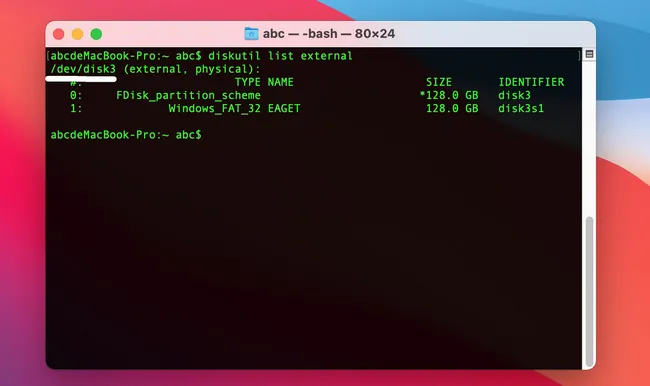
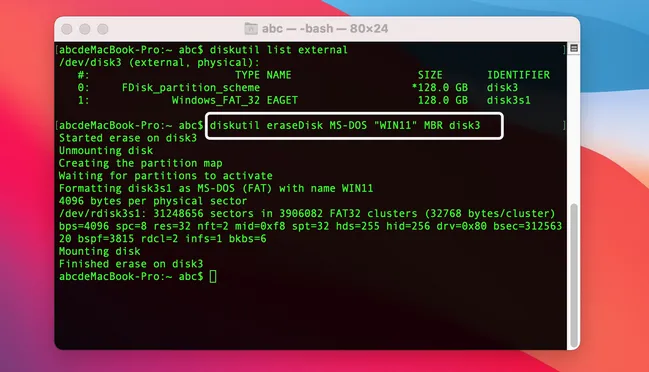
Step 2: Input the following command to get the physical drive name of target USB drive.
diskutil list external
In our example, the physical volume name of USB is disk3.
Step 3: Format the USB drive to MS-DOS with MBR boot scheme, which is mandatory to hold Windows OS files. WIN11 is the volume name of USB drive and disk3 is the physical USB drive we got from previous step.
diskutil eraseDisk MS-DOS "WIN11" MBR disk3
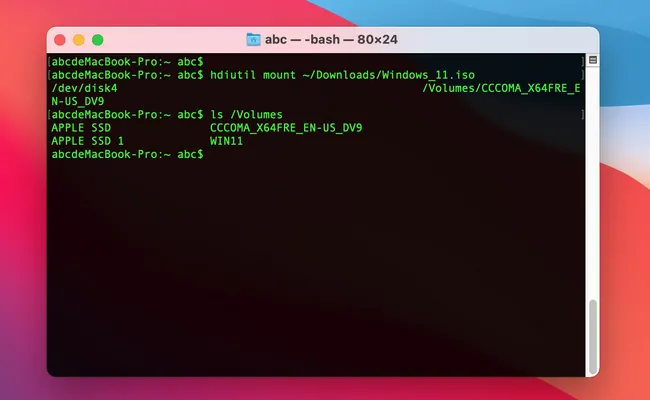
Step 4: After that, mount the Windows 11 ISO on Mac, assuming it is saved in Downloads folder. You will also see the mounted volume name at left sidebar of Finder.
hdiutil mount ~/Downloads/Windows_11.iso
Step 5: At this stage, we need to get the mounted volume name for USB drive and Windows 11 ISO with ls command. CCCOMA_X64FRE_EN_US_DV9 is the volume name of Windows 11 ISO and WIN11 is the volume name of USB drive.
ls /Volumes
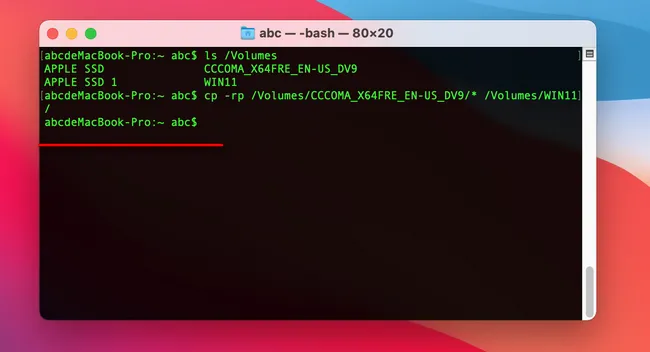
Step 6: Finally, copy all files and folders from mounted Windows 11 volume to USB drive.
cp -rp /Volumes/CCCOMA_X64FRE_EN_US_DV9/* /Volumes/WIN11/
When you see a new line of command input in Terminal, it means the file copying is finished.
That's all! After this, you can now install Windows 11 on a Mac or PC. Honestly, this is not difficult task if you are playing commands on Mac from time to time. If not, please consider the following methods instead, which could be much simpler!
Pros:
- 100% free.
- macOS built-in app.
Cons:
- Pure text command interface.
- Not easy to get started.
- More steps and take more time.
- Unable to handle large ISO files.
- More risky than Boot Camp and ISO Editor.
Make Windows 11 Bootable on Mac via Boot Camp Assistant (Only for Intel Mac)
Boot Camp Assistant, Boot Camp for short, is another system app that comes with macOS. The main usage is to create a Windows dual boot on Mac. Besides that, it is also capable of creating Windows bootable USB.
[Updates]: Creating Windows bootable USB feature is no longer available from Boot Camp app since macOS Big Sur. You have to remove all attached external USB devices before using Boot Camp app as the screenshot shows. However, you can still install Windows on Mac with Boot Camp.

The following tutorial is completed on a Intel Mac that is running macOS Catalina.
Step 1: Open Boot Camp Assistant app from Launchpad and click Continue button to process. It will remove old time machine backups and cached iCloud files to make more room for further task.
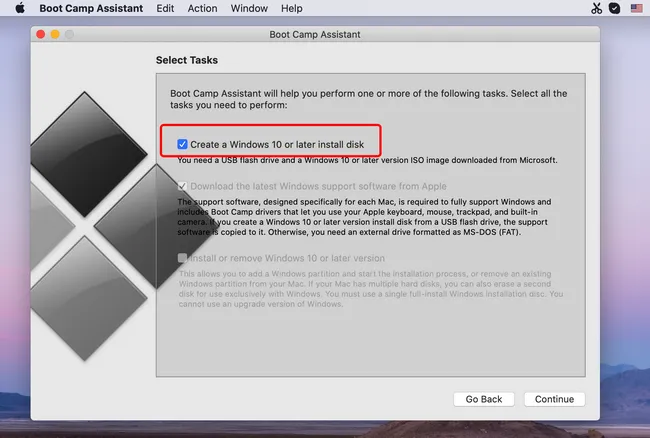
Step 2: Wait about one minute. From Select Tasks Window, please check Create a Windows 10 or later install disk and click Continue to proceed.
Step 3: Click Choose... button to load Windows 11 ISO into Boot Camp and select the USB drive name.
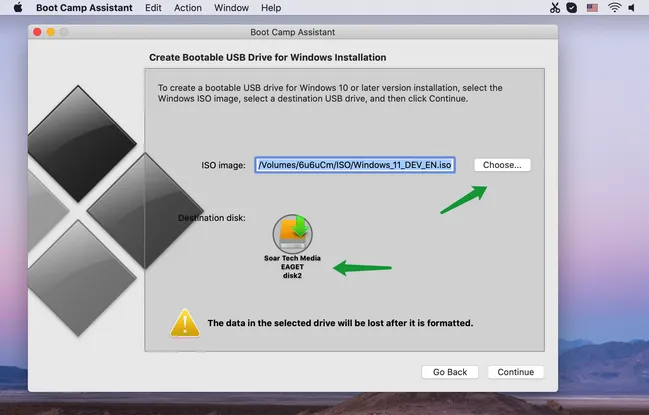
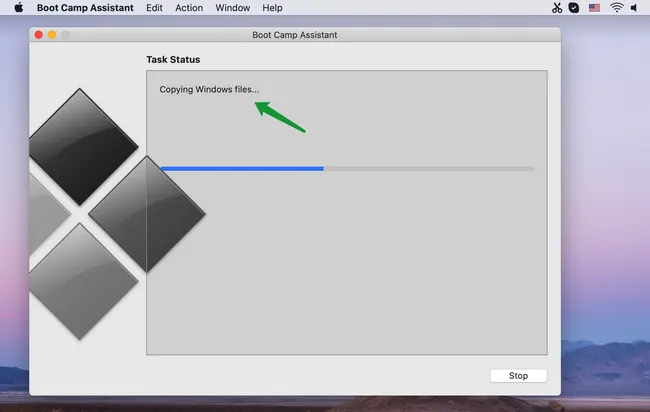
Step 4: Finally, click Continue button to erase the USB disk and start copying Windows files to USB. At the end of burning process, Boot Camp will download Windows Support Software. This will be a greta help if you are trying to run Windows 11 on Mac.
Pros:
- Free app.
- No additional software or library install.
- Able to create Windows dual boot on Mac.
- Simple to use.
Cons:
- Bootable USB feature not available on Big Sur and later release.
- Slow file copying.
- Spend more time before finishing.
- Not working on M1 Mac.
Our Takeaways
The above are the three popular ways to create Windows 11 bootable USB on a Mac. For advanced users, Terminal seems to be a nice suggestion as it is totally free. Boot Camp is a nice consideration when you are using a Mac running an old version of macOS. If the task could be completed with Terminal or Boot Camp app, then UUByte ISOKit is your best option now!
Common Issues and Bug Fix
Q: USB Drive Not Seen by Mac
Mac can only recognize external drives formatted by FAT, HFS, APFS and exFAT. Other drives, for example, NTFS drive, which is mostly used on Windows PC, is not supported by Mac. You have to format this USB to FAT with Disk Utility app to make it working on Mac.
Q: USB Not Bootable After Burning
This error mostly comes with Terminal app. In this case, you should change the disk formatting command from MBR to GPT. On modern computers with UEFI booting, GPT should be the default partition scheme.
Q: Boot Camp Not Enough Space Error
You will see a warning message (The starup disk does not have enough space to be partitioned) when opening Boot Camp Assistant app. This happens when the free space on your Mac is less than 42 GB. Please click OK button to ignore this error. This has nothing to do with the future steps for creating bootable USB.

Petty is editor in chief at UUByte and writes various topics about Windows and Mac to help people make the most of current technology.