
A clean install usually means the installation starts from a bootable USB drive and it deletes user data and third-party apps on C: drive. You should be aware of that. Honestly, installing Windows 11 from USB can be a bit difficult if you did not know the steps. And it does involve multiple steps, from disk partition to bootable USB creation to real OS installation.
We have broken down individual steps into different sections in this article so that you are comfortable doing each of them, and don't get overwhelmed.
Part 1: Make a Backup of Personal Files
If the PC was a branded new one and no data on it, then there is no need to back up the data and you can directly skip this section. If not, then it is highly recommended to take a backup of your personal data on this computer, especially the system C drive, where new Windows 11 OS will be sitting and it deletes all files and folders during installation processor.
Part 2: Create Windows 11 Bootable USB from Clean Install
After data backup, the next step is to make a Windows 11 bootable USB for clean install. We need to use a special tool for this purpose as it is not a copy-paste task.
UUByte ISOKit is a very popular and reliable utility for creating bootable USB drive from Windows ISO images, including Windows 11, Windows 10, Windows 8, Windows 7 and Windows XP. There are two major advantages when working with ISO Editor. First, it has a wonderful UI. This means it is super easy to use and no barrier at all! The second advantage is that you can use this tool on both PC and Mac as it is built for different systems.
Now, let's get started with UUByte ISO Editor and create a Windows 11 bootable USB for fresh install.


Step 1: Download Windows 11 ISO
We have written a detailed post about Windows 11 ISO download. Please refer to the guide. If you already had a Windows 11 ISO at hand, please skip this step.
Step 2: Install UUByte ISO Editor and Plug in USB Drive
Download the installation file of UUByte ISO Editor based on the computer you are currently working and connect a USB drive to the same computer. After that, launch UUByte ISO Editor after installation and click Burn ISO tab.
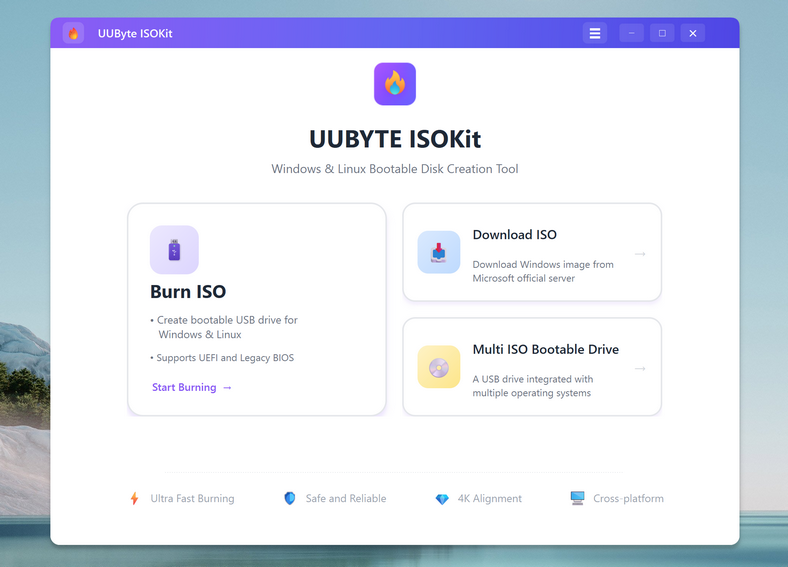
Step 3: ISO Burning Settings
You will see a few configuration fields in new window. However, there are only two items to be filled. The first one is to import Windows 11 ISO into the program. The second is selecting the correct USB drive.
Note: If the target PC does not meet Windows 11 system requirements, you can choose the bypass option at the bottom.

Step 4: Create Windows 11 Bootable USB for Fresh Install
After two settings, please click Start button located the bottom of the window to start formatting USB and burning Windows 11 ISO file to USB. From our past experience, you have to wait about five minutes to successfully create a Windows 11 bootable USB.

Part 3: How to Clean Install Windows 11 from USB
Now that you have made a Windows 11 bootable USB, which can be used for OS installation. The following steps will guide you how to install Windows 11 on a PC.
[Notice]: If your PC was not incompatible with Windows 11, then move to this post instead, which tells you how to install Windows 11 on unsupported hardware (without TMP or Secure Boot).
Step 1: Insert Windows 11 Bootable USB in the PC .
Step 2: Restart the PC if it's already on; else, simply turn on your PC and boot from the USB. You may need to change the boot order from Boot Menu or BIOS.

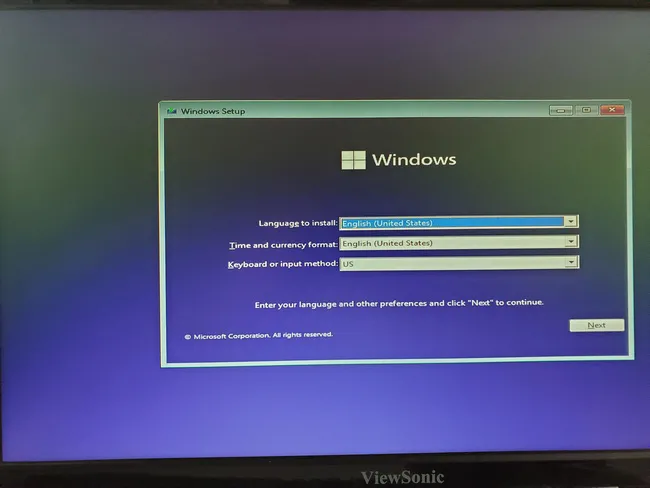
Step 3: This should boot into Windows 11 setup program. Click on Next to continue.
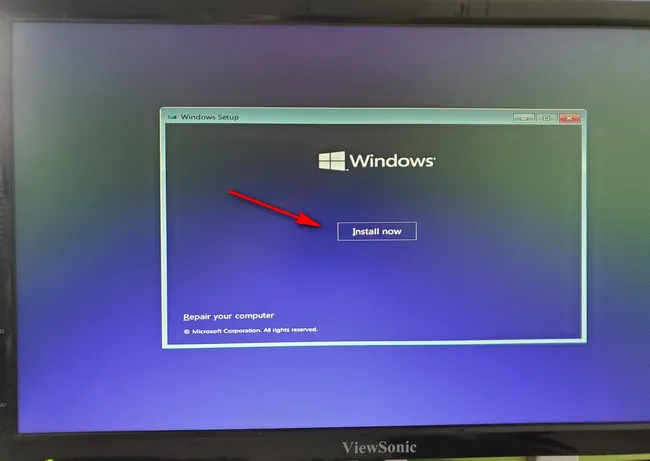
Step 4: Now you should get a screen like the one below where you need to click on the Install Now button.
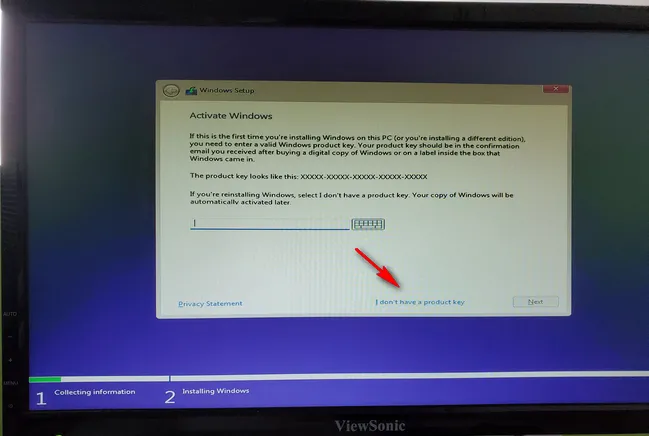
Step 5: Now it would ask you to enter a Windows 11 license key. If you already have one, enter the same and click Next. Otherwise, click on the link that says "I don't have a product key". This leave Windows 11 activation to be done in later and that should take you to the next window.
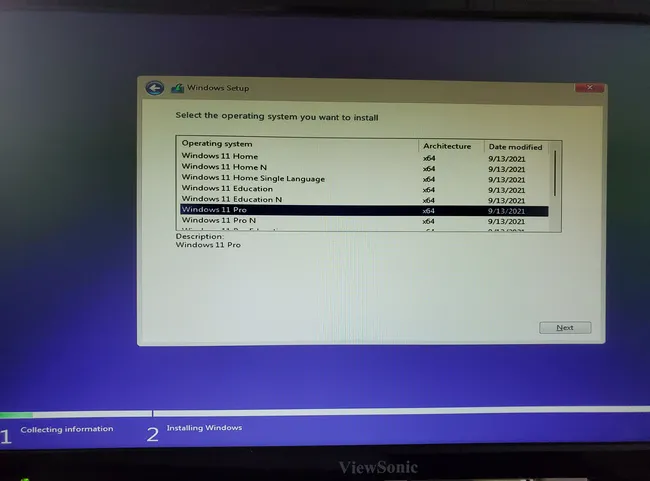
Step 6: From this time, select an edition of Windows 11 from the list and press Next.
Step 7: Now you will be asked to choose from the type of installation that you would like to do. Select Custom Install from the list. On the next window, select a partition where you want to install Windows 11, and then press Next button. Remember, this will wipe all the data from that partition.

Step 8: Now, Windows 11 setup program will start installing Windows 11 on this PC. This will be time consuming process. Please be patient!
Step 9: Once the process is completed, your PC will restart automatically, at which point you need to remove the USB flash drive because this time Windows 11 is already installed on your PC and you would like to boot from it instead of USB flash drive.
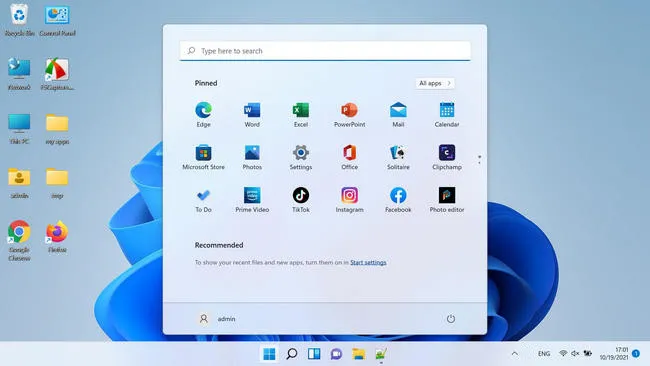
Step 10: Finally, you are required to fill in the details like your Microsoft account credentials, username, password for the user account you would like to create on this Windows 11 PC and so on to complete the setup process. Once done, Windows 11 will be fully installed on this PC.
Part 4: Frequently Asked Questions
It becomes more challenging when it comes to Windows 11 clean install as Windows 11 has much higher hardware standard than Windows 10. You might run into issue during Windows 11 installation because of incompatible or unsupported hardware. Below is a set of common issues we found out.
Q: How to Check if my PC meets Windows 11 system requirements?
Please download PC Heath Check app from Microsoft website to validate if your PC is compatible with Windows 11 or not.
Q: This PC can't run Windows 11
It is most popular issue we came across for Windows 11 fresh install. This is because the current hardware failed to meet Windows 11 system requirements, such as missing TPM or Secure Boot.
To install Windows 11 on unsupported PC or laptop, please follow the steps in this post to bypass Windows 11 system restrictions by utilizing registry hack.
Q: Can I install Windows 11 without TPM or TPM 2.0
Yes. Please refer to above link in the first question.
Q: Can I install Windows 11 without Secure Boot?
Yes. Please check the tutorial link shared in the first question.
Q: Can I install Windows 11 with unsupported CPU?
Yes. The trick (link) is shared in Question one.
Q: Windows 11 USB Not Bootable?
First, you should disable Secure Boot in BIOS if it is available. Second, format the USB to FAT32 instead of NTFS.
Q: Stuck on black screen When booting from Rufus Windows 11 USB
Rufus is the most popular software for making bootable USB on a PC. The latest version of Rufus (3.16) formats the USB drive to Rufus:NTFS when creating Windows 11 bootable USB with it. This new format is not supported by many old computers. When the computer tries to boot from it, it will be stuck on black screen forever. No text and no visual user interface. Please replace Rufus with UUByte ISO Editor.

Petty is editor in chief at UUByte and writes various topics about Windows and Mac to help people make the most of current technology.