
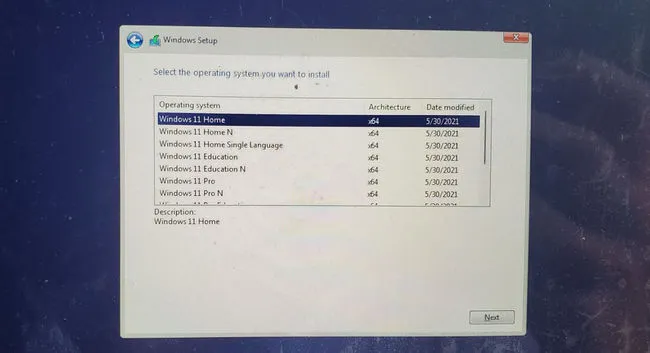
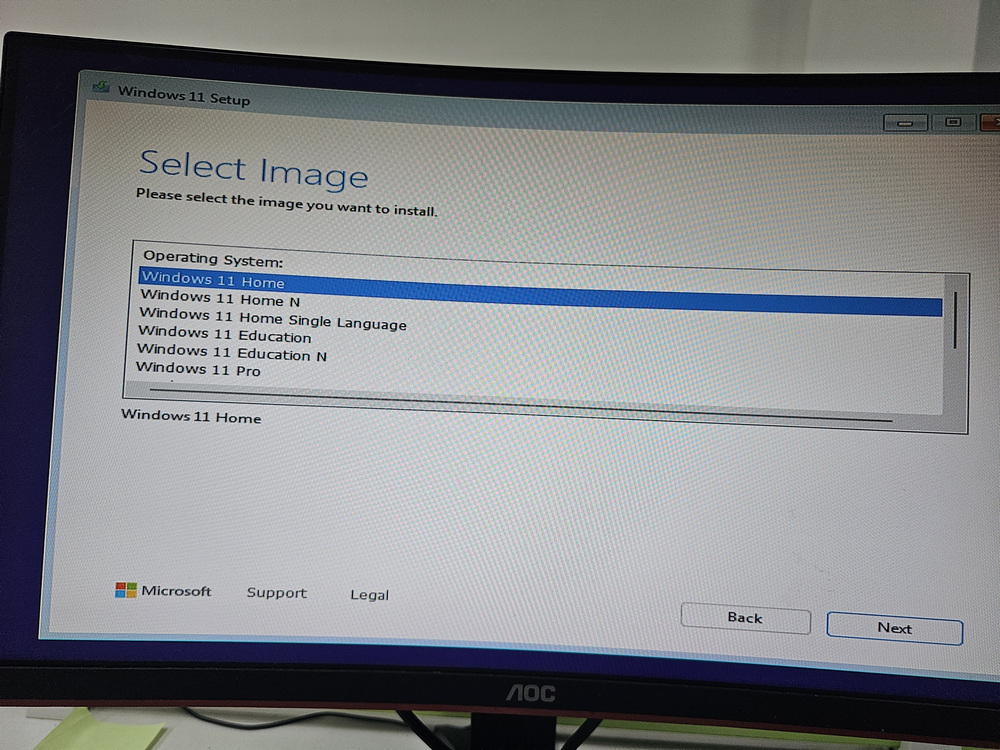
Windows 11 has been publicly available for several years. I am going to test it out on my backup MacBook Pro (Late 2019) with an Intel i7 chip. At first, I was going to use Boot Camp Assistant to complete the job like I always do. After waiting about one hour to let Boot Camp download Windows Support Software, I managed to get to Windows 11 installation screen, asking me to pick up a Windows 11 version as the following error shows:
This is really a big surprise because a lot of folks said they failed for the same process. I was so optimistic at that time. After clicking the Next button to move forward, there is an fatal error coming out:
This PC can't run Windows 11
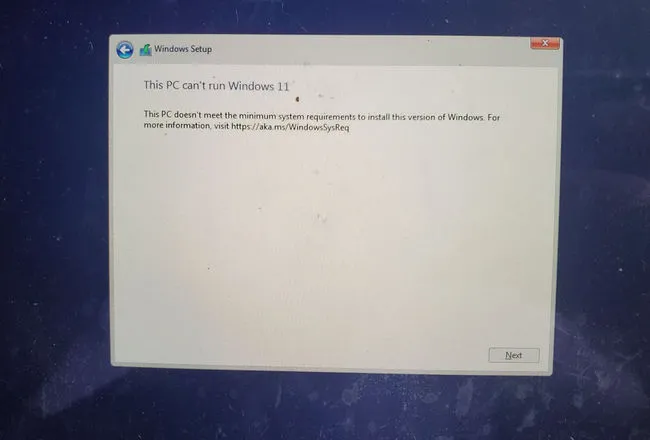
The reason is that this PC doesn't meet the minimal system requirements to install this version of Windows 11. Mostly because this Mac doesn't have TPM 2.0 enabled and this is a mandatory requirement to run Windows 11.
Fortunately, there are a few tricks we can apply to bypass Windows 11 system requirements so we can install Windows 11 on Mac without Boot Camp.
Table of Content:
Part 1: Download Windows 11 ISO (Disk Image)
To clean install Windows 11 on Mac, you need to get Windows 11 ISO image first. You can download the latest version of Windows 11 ISO from here:
https://www.microsoft.com/en-us/software-download/windows11
Part 2: Create Windows 11 Bootable USB on Mac
Once you get the Windows 11 ISO, the next step is to create a Windows 11 bootable USB from it. We could do this with free Boot Camp Assistant utility, but it no longer works on Big Sur. So in here, we are using UUByte ISO Editor instead.
In short, UUByte ISO Editor is a dedicated application for making bootable Windows USB on Mac. Currently, it supports Windows 11, Windows 10, Windows 8 and Windows 7. In addition, the steps are straightforward. I can say everyone can use this program for creating a working Windows 11 bootable USB! Why? The user interface is ultra-simple! You will know that in the following tutorial.
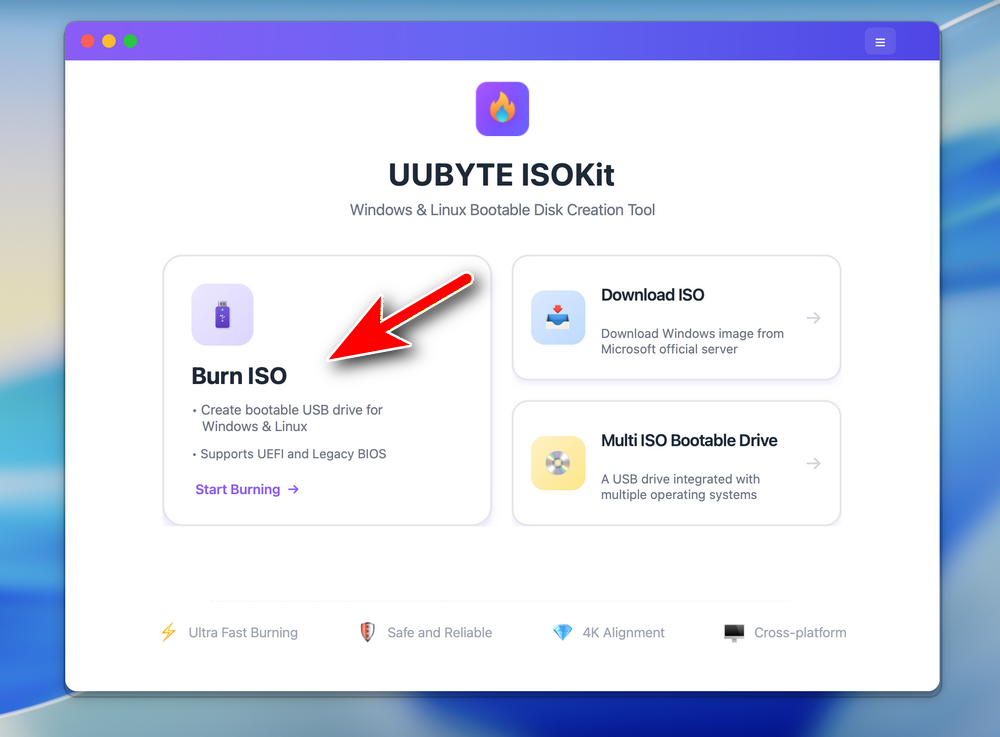
Step 1: Download and Install ISOKit
Click the Download button in above to get a copy of UUByte ISOKit app on your Mac. Double click the dmg file and drag the app icon to Application folder. By doing this, you can now open ISO Editor app from Launchpad.


To create a bootable USB, please click the Burn ISO button at the left side to proceed.
Step 2: Plug in a USB Drive on Mac
Now, connect a USB drive to Mac and make sure you can see the drive name in Finder app. This means the drive is recognized by your Mac.
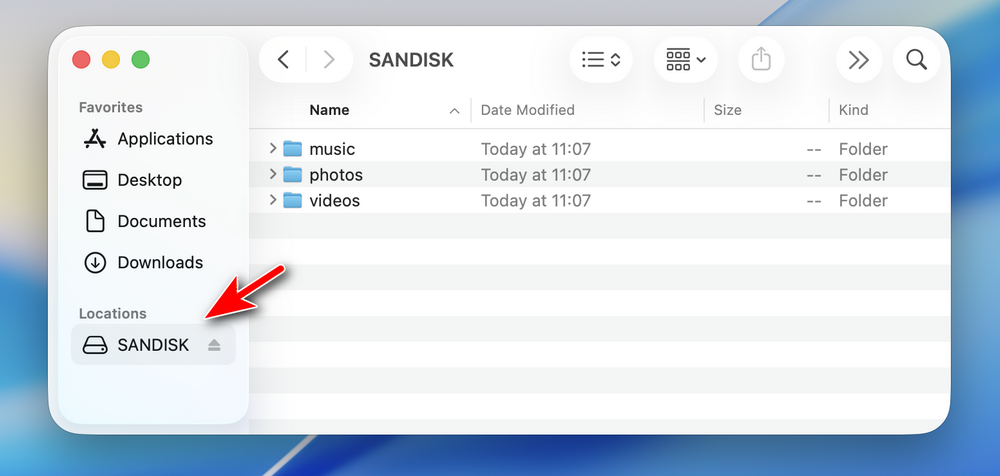
Notice: Please disconnect other USB storage devices on your Mac so you won't choose the wrong USB for burning!
Step 3: Import Windows ISO and Choose USB Drive
On the inside page, add the ISO file to the app by clicking the Browse button. Next, pick up the correct USB drive from the drop-down list.You can see the USB drive brand and volume name at this time. After that, you need also choose a partition scheme. For modern computers, please choose GPT. For old computers, select MBR instead.
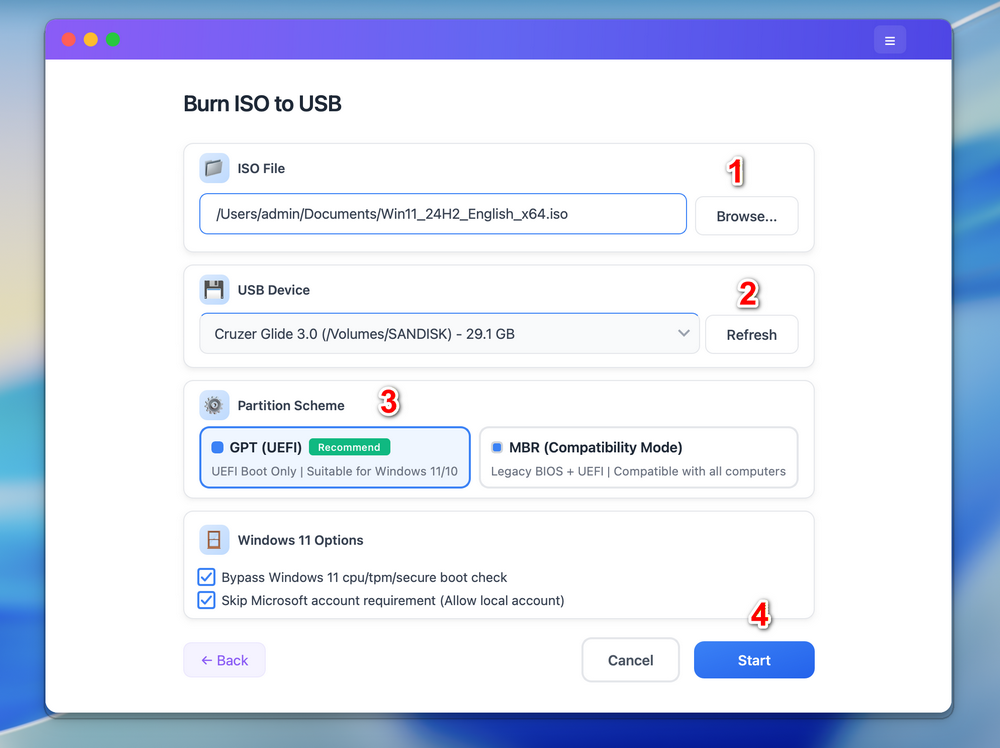
Note: For Windows 11 ISO, the app will automatically patch the ISO so it allows you install Windows 11 on unsupported hardware.
Step 4: Start Burning Windows ISO to USB
Click the Start button located at the bottom to start burning Windows ISO to target USB drive. This will format the USB drive so you should backup the drive first. In addition, please enter the login password to grant the permission to ISO Editor so it can access external drive on your Mac. After that, ISO Editor app will start coping files contained in ISO image to USB Drive. This will be done in 10-20 minutes for a fast drive.
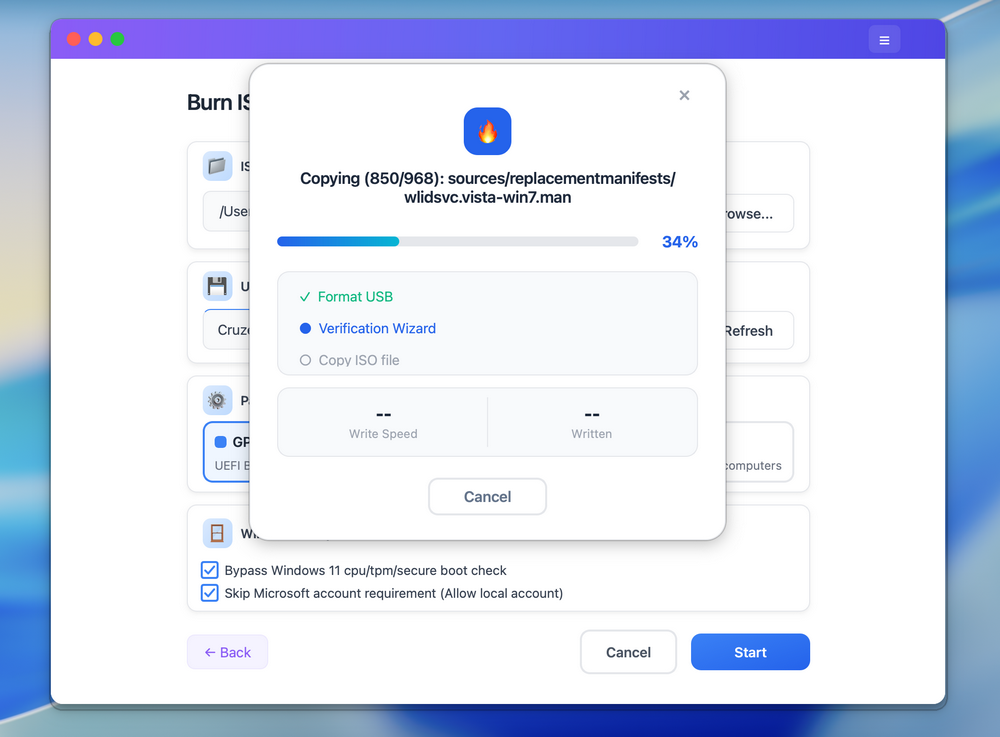
Step 5: Split Install.wim and Make USB Bootable
For latest Windows 10 or Windows 11 ISO, which contains a large install.wim file (> 4GB), UUByte ISOKit will split it automatically at the end of burning process. This make sure the install.wim file sits well on a FAT32 partition after shrinking. This extremely important on Mac as it can not read NTFS partition by deafult. Only FAT32 is available for creating Windows bootable USB.
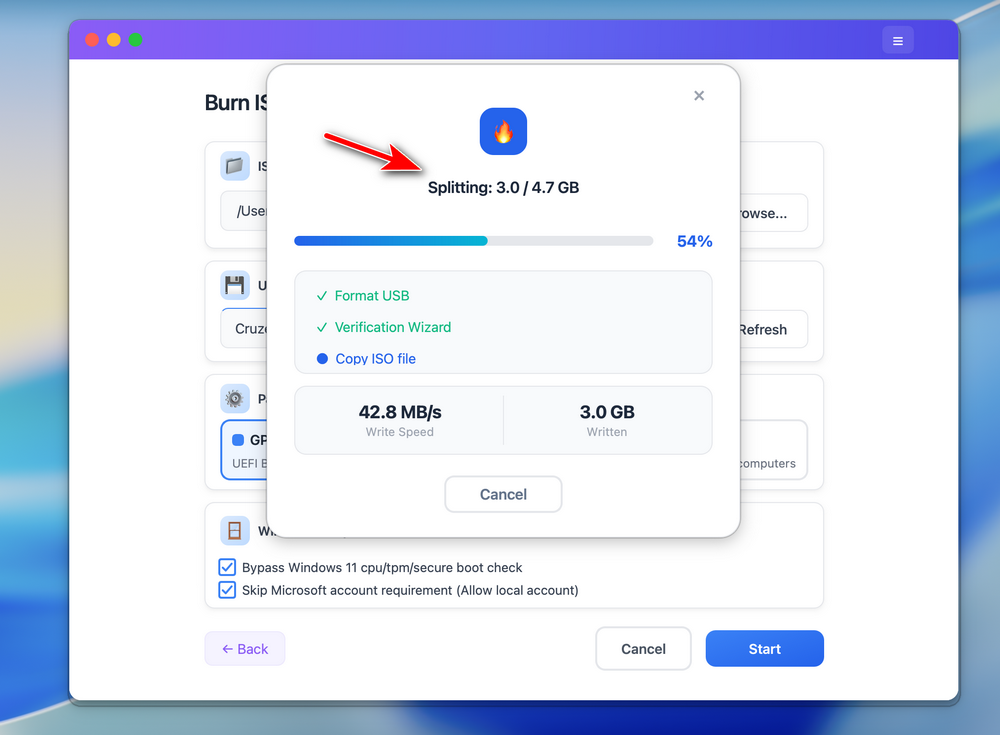
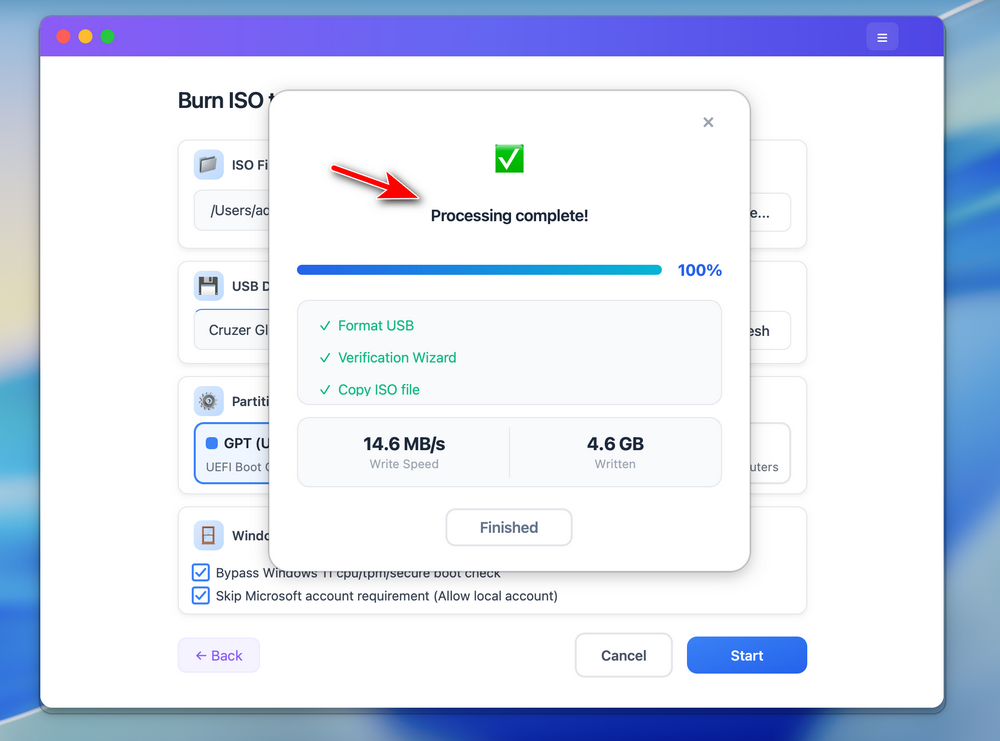
When this task is completed successfully, you will see a notification on the screen something like this:
Part 3: Create a New Windows Partition on Mac
By default, the internal SSD on Mac is formatted to HFS or APFS, two popular file system used by OS X and macOS. Unfortunately, Windows OS can only be installed on a NTFS or FAT file system. Hence, you have to create a new partition for holding Windows OS. We recommend using MS-DOS (FAT) as the target file system..
Warning: Please back up your Mac first to avoid potential data loss!
Now, let's get started on how to create a new partition on Mac.
First, open Disk Utility app and select the APPLE SSD from top left sidebar. Next, click Partition tab on the central top and this will lead to disk partition window.
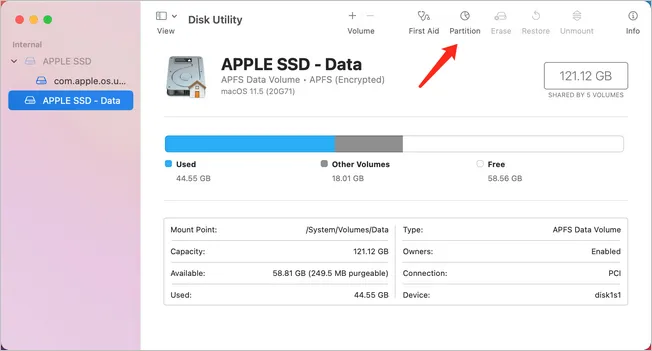
The whole disk is shown as a circle. Please click the '+' button under circle to create a new partition. Now, give a new name to the partition, set a size for it and finally choose MS-DOS (FAT) as target format. Windows 11 reuqires at least 65 GB free space for installation. We recomemnd giving more if you use Windows 11 extensively in future.
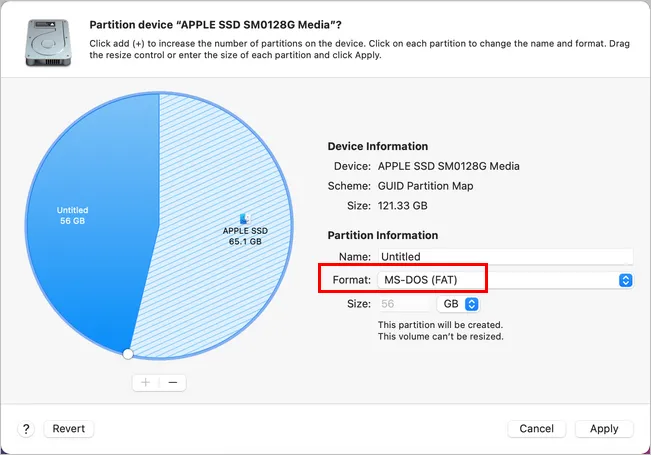
When the above steps are completed, click Apply button to save the changes. After that, a new Windows FAT partition is created!
Part 4: Boot Mac from Windows 11 Installation Media
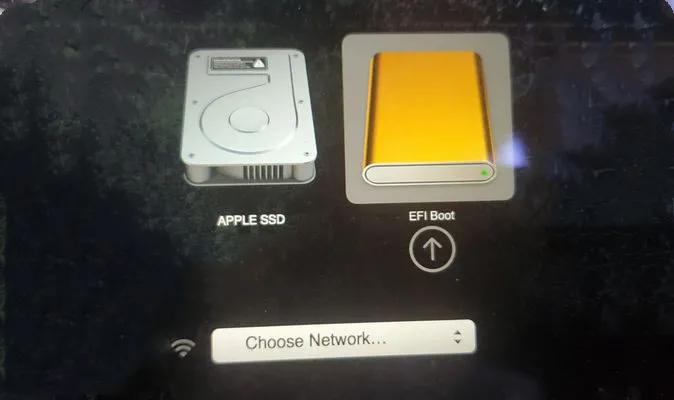
Until now, the preparation work has been done! Please attach Windows 11 installation USB into Mac. After that, reboot the Mac and hold Option key. You will see the EFI boot (Windows 11 Bootable USB) icon in Startup Manager. Click on it to start installing Windows 11 on Mac.
You can now eject the USB from Mac and reinstall OS on a target computer from this bootable drive.
Conclusion
Well, you do have to spend quite a lot of time to install Windows 11 on Mac. This is because Mac is not officially supported by Windows 11. You need to make additional settings to install Windows 11 on unsupported hardware. Fortunately, the above trick will help you fix this annoying issue.

Petty is editor in chief at UUByte and writes various topics about Windows and Mac to help people make the most of current technology.