
Windows 11 is still in beta version and there is no official download from Microsoft, two months after it was publicly announced. However, it is easy to download Windows 11 ISO from Microsoft Insider Build or from file hosting website. The problem is that how to install Windows 11 on an unsupported hardware as Windows 11 has much more strict system requirements. We will provide a few tricks to fix this issue.
Table of Content:
- Windows 11 Hardware Requirement
- How to Check Windows 11 Hardware Compatibility
- [Update]: Simple Method to Clean Install Windows 11 without TPM and Secure Boot
- Preparation: Convert Disk to GPT Partition
- Tutorial: How to Install Windows 11 without TPM
- Tutorial: How to Install Window 11 without Secure Boot
Windows 11 Hardware Requirement
Windows 11 might be a great operating system but not all computers are eligible to support Windows 11. The computer has to meet the minimal hardware requirement in order to run Windows 11 OS, including:
- Processor: 64-Bit CPU with at least 1.0 GHz clock rate and mimimal 2 CPU cores. Here is the official support list for Intel, AMD and Qualcomm
- RAM: At least 4G internal memory
- Storage: 64 GB or more disk space
- Disk Space: At least 64 GB free space for system drive
- Graphics Card: Support DirectX 12 and WDDM 2.0
- Disk Partition: GPT
- Secure Boot & UEFI: Yes
- TPM: Version 2.0
Some of the hardware requirements such as CPU, RAM, disk space and graphics cards are mandatory. You have to replace them with supported hardware if the requirement was not met. However, there are a few tricks available to help you install Windows 11 on unsupported hardware if the last three options in above list (disk partition, secure boot and TPM) failed to meet the requirement. We will share more details in the coming sections.
How to Check Windows 11 Hardware Compatibility
It would be a headache when you check the Windows 11 hardware compatibility by yourself. Microsoft knows it and offers a free tool called PC Heath Check to check the hardware automatically. It is available for free at the following link: https://aka.ms/GetPCHealthCheckApp
If PC Heath Check app is not working; please don't be afraid! We have another free alternative. If you are not able to download it or the app did not work as expected, simply try WhyNotWin11 app, which is a great open-source alternative to PC Heath Check app. Here's how to use WhyNotWin11 app to check Windows 11 hardware requirements.
Step 1. Go to their GitHub repo using the following link: https://github.com/rcmaehl/WhyNotWin11
Step 2. Scroll down to the Download section and get the latest stable release. Currently, you can only run this app on a Windows 8.1 or Windows 10 computer.
Step 3. Fire up the utility, it will run and take some time to go through all the hardware of current PC and match them against the requirements for running Windows 11.
Step 4. Once done, it will show you a detailed list of all the components on your PC that either matches or does not match the requirements to install Windows 11.
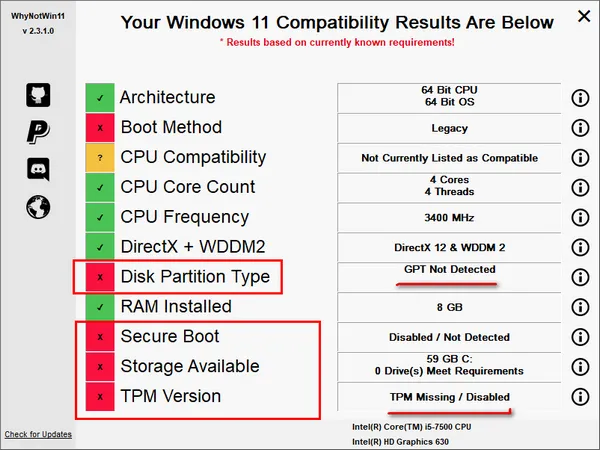
As you can see from the above screenshot, the Disk Partition Type, Secure Boot and TPM of my laptop are not currently listed as compatible for running Windows 11. When you are trying to install Windows 11 without any modification, then you will receive an error, saying this pc can't run windows 11 during installation.
Your PC too may show something similar. Does this mean you will not be able to run Windows 11 on your PC? Absolutely not! Even without TPM or unsupported hardware, you would still be able to install and run Windows 11 on your PC, we will show you how to install Windows 11 on unsupported hardware.
[Updated]: Simple Method to Clean Install Windows 11 without TPM and Secure Boot
This is updated section as a new simple method is available. Rufus, one of the most popular tools for creating bootable USB, got a new update several days after Windows 11 public release on Oct 5 and it is official called rufus 3.16, which adds improments for Windows 11 and have a build-in module to let you create a Windows 11 bootable USB to be used on a PC without TPM, Secure Boot or 8 GB RAM.
You need to first download rufus 3.16 from this link. It is a portable app and no installation is required. Double click the rufus-3.16.exe to open the program. Now, connect a USB drive to the same computer and import Windows 11 ISO into Rufus.
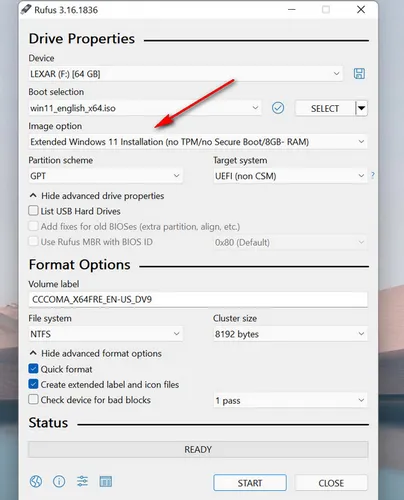
You will see three options this time:
Standard Windows 11 Installation (TPM 2.0, Secure Boot, 8GB+-RAM): This is for PCs and laptops that meet all system requirements of Windows 11.
Extended Windows 11 Installation (no TPM/no Secure Boot/8GB-RAM): This is for PCs and laptops that don't have TPM, Secure Boot or 8GB RAM.
Windows To Go: This is used for creating portable Windows USB drive.
To install Windows 11 on a PC without TPM or Secure Boot, please choose the extended menu from drop-down list and leave other settings in default. After that, click START button to format USB and create Windows 11 installation media from ISO for clean install.
Finally, take out the USB, insert it to target PC, boot from it and start installing Windows 11 on it without TPM or Secure Boot.
Preparation: Convert Disk to GPT Partition (Optional)
No matter what kind of tricks or hacks we are going to apply, we must format the target drive to GPT partition as Windows 11 only supports GPT according to the system requirements listed above. GPT is a new type of partition table that supports storage devices bigger than 2TB. Usually, it works along with UEFI BIOS.
If the partition type is already GPT, which you can see from WhyNotWin11 screenshot, please skip this part. If GPT is not detected, we will tell you how to format the current disk to GPT partition before installing Windows 11.

Step 1: Backup important data on current disk before disk partition to avoid data loss.
Step 2: Type 'diskmgmt.msc' in search box in Windows and run this disk management utility as administrator.
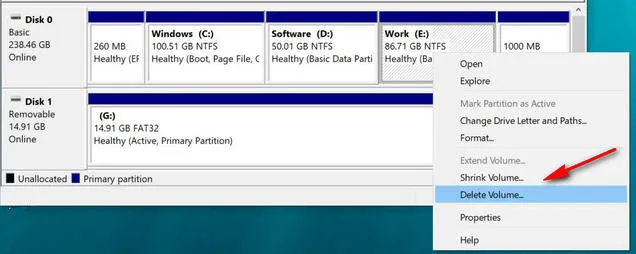
Step 3: Choose a partition and click 'Delete Volume'. This will remove all data and partition information to selected partition.
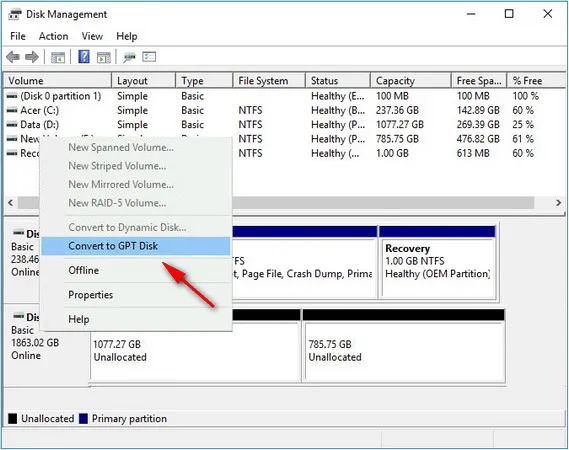
Step 4: Select the empty partition and choose 'Convert to GPT Disk'. This will create a new GPT partition from empty partition.
If you could not covert disk to GPT with Windows built-in tool, then give a try on Hiren's Boot CD and use the stock free DiskGenius software to complete the task.
How to Install Windows 11 without TPM on Unsupported Hardware
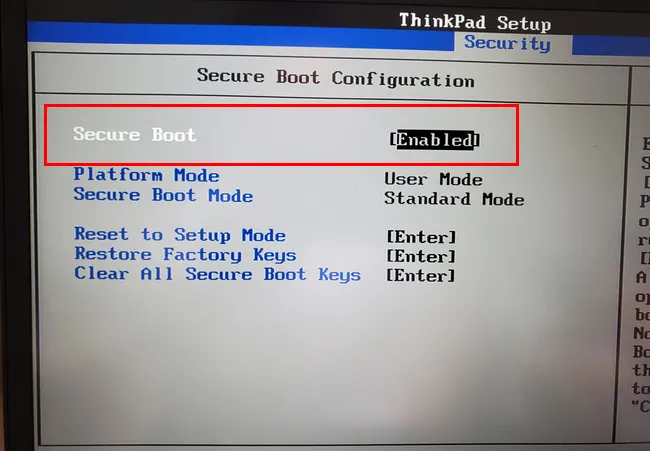
One of the most common issues on computers that can not run Windows 11 is the missing of TPM 2.0 chip. TPM is short for Trust Platform Module. It is an international standard for device encryption. Windows 11 takes advantage of this technology to enhance password security and BitLocker encryption. TPM 2.0 is a new technology only available on modern computers. You can find this information in BIOS -> Security.

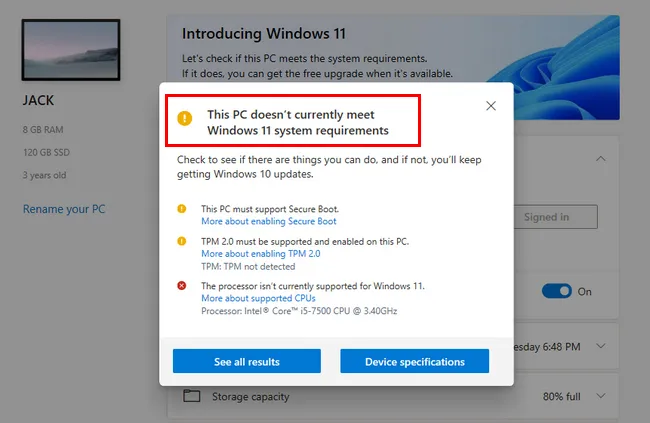
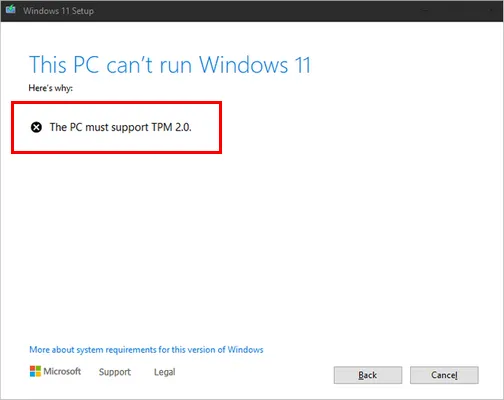
If TPM 2.0 is not available on your computer, you will receive an error, saying This PC can't run Windows 11 as the PC must support TPM 2.0.
Below is the trick to install Windows 11 without TPM 2.0 on unsupported hardware.
Step 1: Download the latest build of Windows 11 ISO. If you are unable to get it, please download Windows 11 from here.
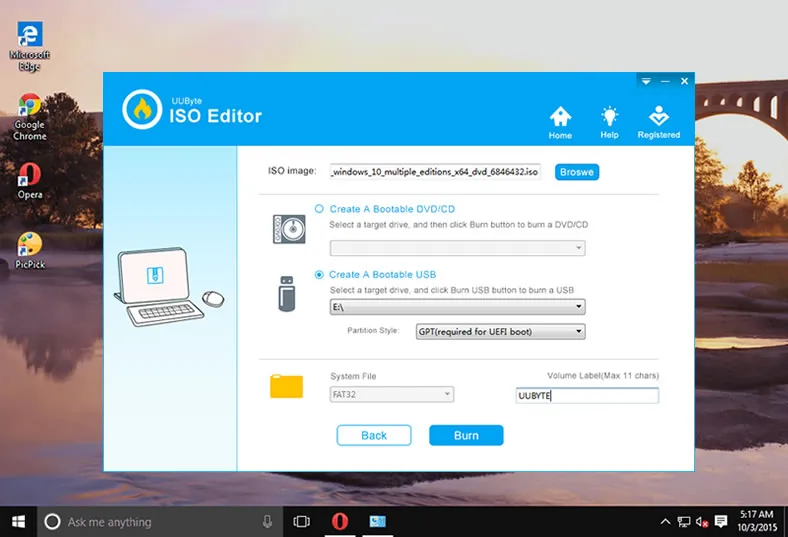
Step 2: After Windows 11 ISO download, you need to create a Windows 11 bootable USB for installation. In our case, we will use UUByte ISO Editor for this task. Here is the step-by-step guide for doing this.
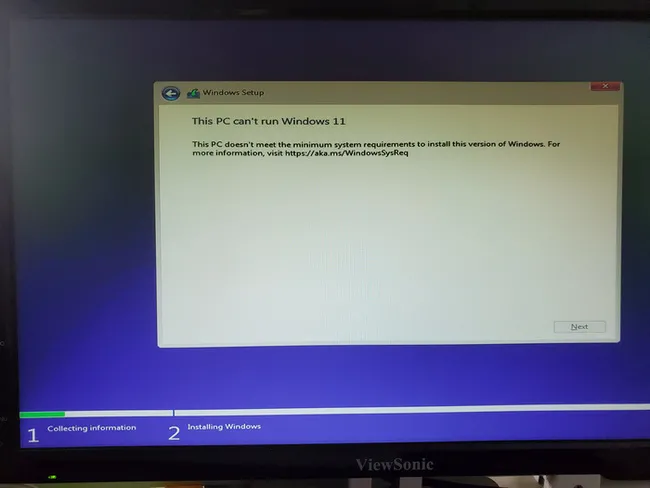
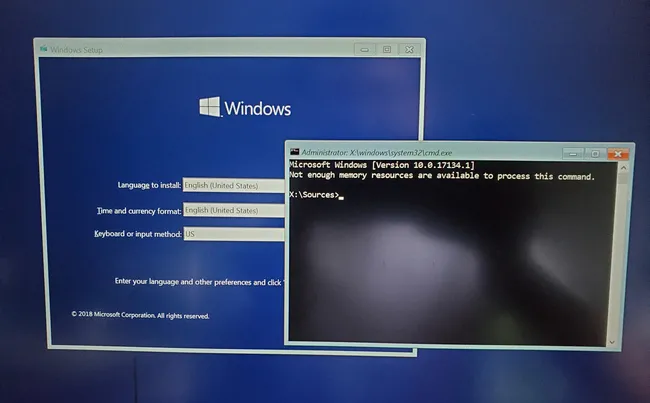
Step 3: Restart the PC and boot from Windows 11 installation USB. Since your PC does not meet the basic requirements to run Windows 11, it will show you a message which says that This PC can't run Windows 11
Step 4: Press they Shift key along with the F10 key on your keyboard on that message screen. This will open the Command Prompt window.
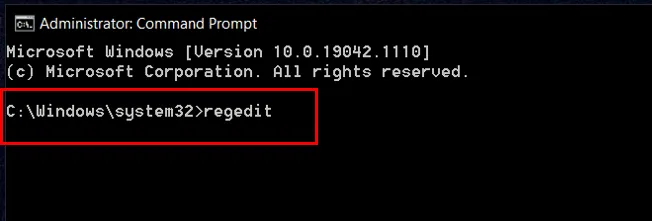
Step 5: In the Command Prompt window, get in C:\Windows\System32 folder and type "regedit" (without the quotes) and press Enter. This should open up the Registry Editor for Windows 11.
Step 6: In the Registry Editor, type the following in the address bar like you would on your browser (without the quotes) "HKEY_LOCAL_MACHINE\SYSTEM\Setup" and then press Enter.
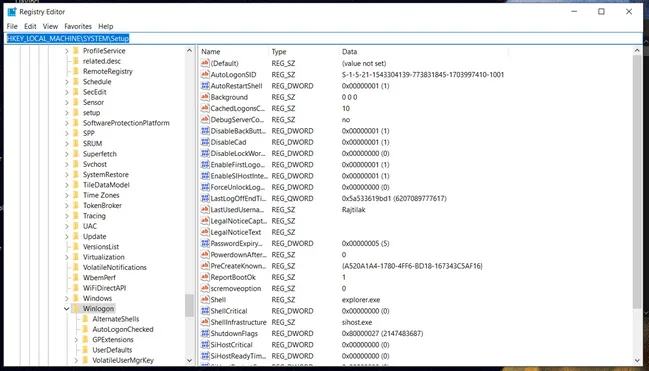
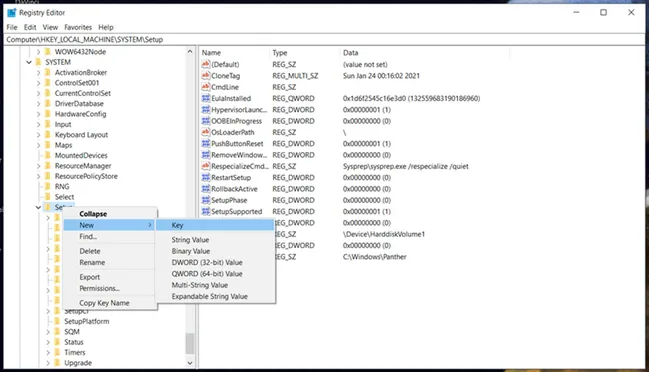
Step 7: On the Setup key page, right-click on the word Setup, select New, and then select Key. This will create a new Key and ask you for a name for this Key, give it the name LabConfig and press Enter.
Step 8: In the LabConfig key, right-click on the Key, select New, and then select "DWORD (32-bit) Value", name it "BypassTPMCheck", and set its value to 1.
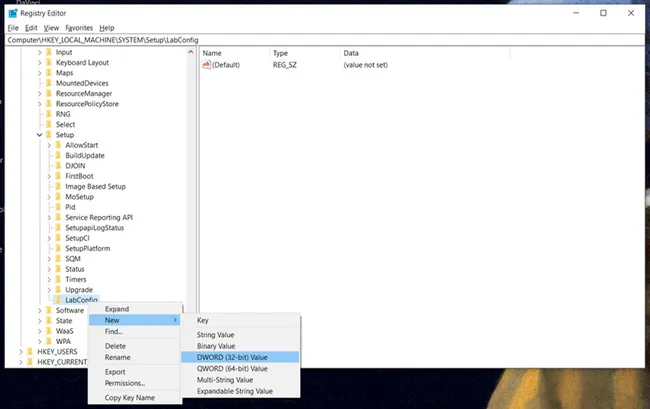
Step 9: Repeat the same process to create "BypassRAMCheck" and "BypassSecureBootCheck". Both of these too should have the value 1.
Step 10: Once done, exit out of the Registry Editor by clicking on the X button on the top right, then close the Command Prompt window by typing Exit and pressing Enter.
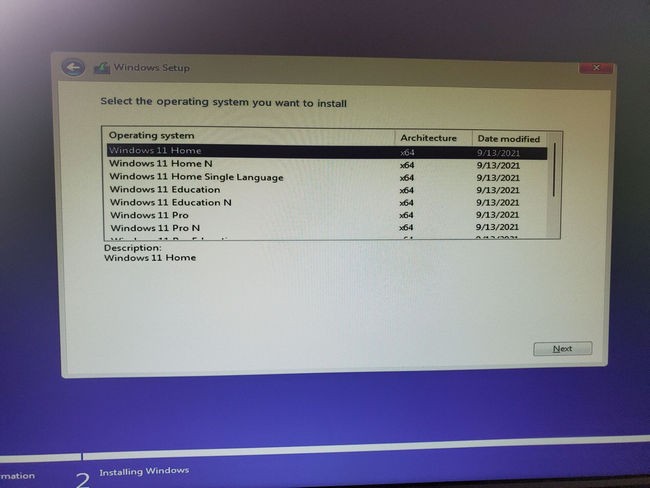
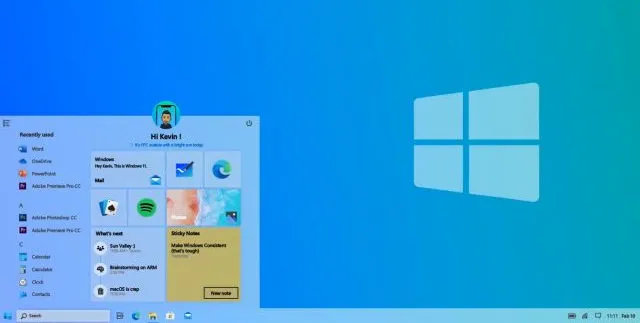
Step 11: If done correctly, you'll see the same message which says that you cannot run Windows 11 on your PC. Press the Back button here and now you should be able to install Windows 11 without any hiccup. You will see the following screen when Windows 11 is installed.
You can try these steps even on the early builds of Windows 11, you don't need to wait for the stable release. However, as mentioned earlier, the performance can be questionable and only you should be able to decide whether Windows 11 is worth running on your PC.
How to Install Window 11 without Secure Boot
Secure Boot is a subsystem of UEFI BIOS. Microsoft says all OEM PCs must turn on Secure Boot in order to install Windows 11 on the PC. By doing this, all software or modules running at booting stage must be signed. If UEFI firmware failed to detect unsigned modules, then Windows 11 OS would be loaded by default. This is a great way to avoid virus or malware during system boot. Please enable Secure Boot in BIOS if it is available in your PC.
If Secure Boot is not available in BIOS, please follow the below trick to install Windows 11 on a PC without Secure Boot.
Step 1: Download Windows 11 ISO and make a bootable Windows 11 USB with UUByte ISO Editor.
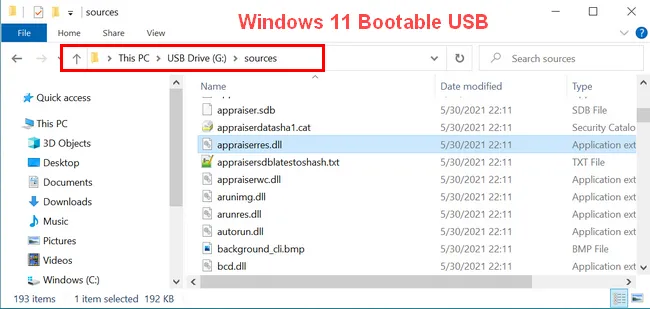
Step 2: Get into the sources folder of USB drive and locate appraiserres.dll.
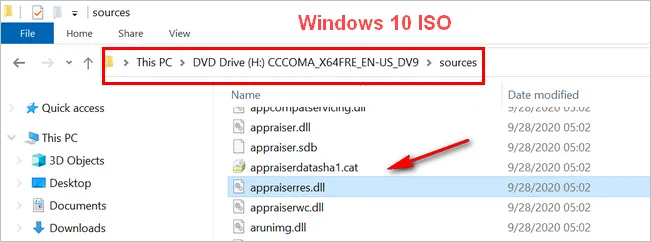
Step 3: Download the latest Windows 10 ISO (21H1) from Microsoft website. Double click the Windows 10 ISO to mount it on Windows 10 and copy the same appraiserres.dll in sources folder to USB drive. This will replace the file from Windows 10 ISO to Windows 11 bootable USB.
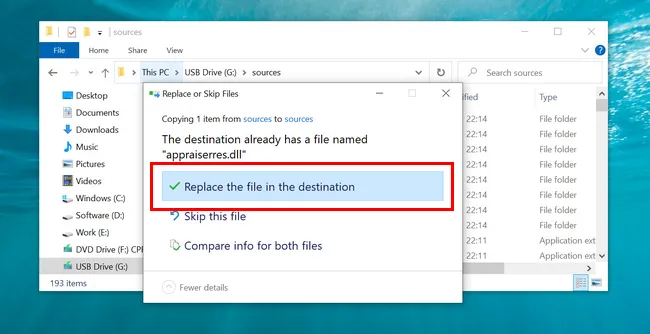
Step 4: Copy appraiserres.dll in sources folder of mounted Windows 10 ISO. Then paste this dll file to the same folder of Windows 11 bootable USB. Please choose Replace the file in the destination to overwrite appraiserres.dll file.
Step 5: Insert Windows 11 bootable USB into the PC and boot from it. You can now install Windows 11 without Secure Boot this time.
You can try these steps even on the early builds of Windows 11, you don't need to wait for the stable release. However, as mentioned earlier, the performance can be questionable and only you should be able to decide whether Windows 11 is worth running on your PC.

Petty is editor in chief at UUByte and writes various topics about Windows and Mac to help people make the most of current technology.