
Microsoft announced Windows 11 this June but the public release is available in late of this year. Currently, the only official channel to upgrade Windows 10 to Windows 11 is through Windows Insider Program, an open software testing campaign backed by Microsoft. Besides this, there are other three tricks you can apply to upgrade Windows 10 to Windows 11. Before moving ahead, make sure the current hardware meets the minimal requirements of running Windows 11 OS.
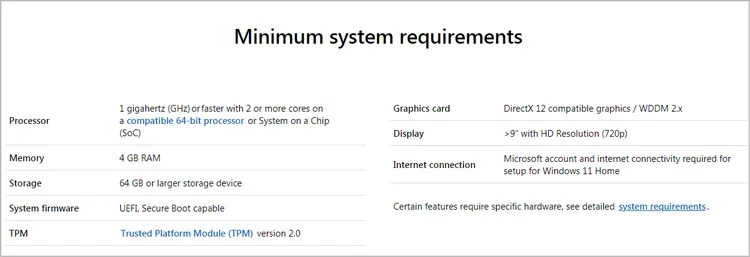
[Tips]: Don't know if your PC is eligible for Windows 11 upgrade? Please move over to this post and get to know how to check Windows 11 hardware compatibility with free tools.
Table of Contents:
Method 1: Upgrade Windows 10 to Windows 11 via Windows 11 Installation Assistant
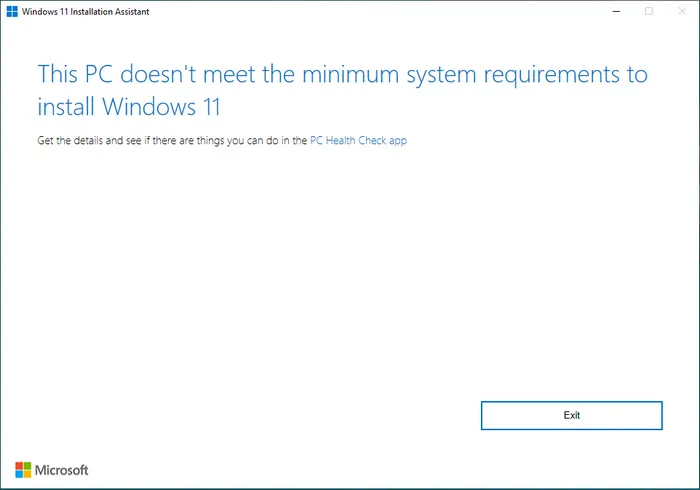
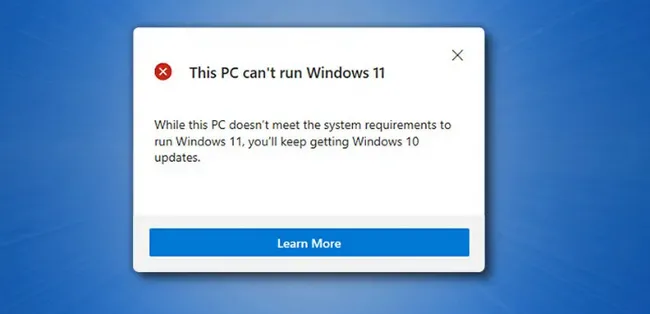
Windows 11 Installation Assistant is the officla tool developed by Microsoft for upgrading Windows 10 to Windows 11. This is the best choice when it comes to install Windows 11 on a device that runs Windows 10. However, the device should meet the minimal requirements of Windows 11. If not, the upgrade will fail (see the screenshot below). In such a case, you have to apply a few tricks to install Windows 11 on unsupported hardware.
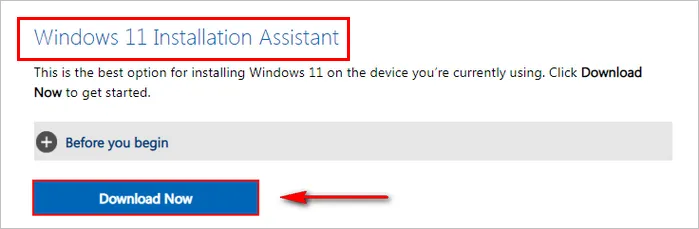
1. To get started with Windows 11 Installation Assistant, please first download it from Microsoft website.
4. Back up your computer before the real upgrade starts.
3. Double click the exe file to open the program. From the first window, click Accpet and install button to continue to the next step.
4. Windows 11 Installation Assistant starts to download latest Windows 11 update. You have to wait sometime for this process.
5. Once the download is finished, this app starts to install Windows 11 on current device automatically. The computer will restart several times during the upgrade process.
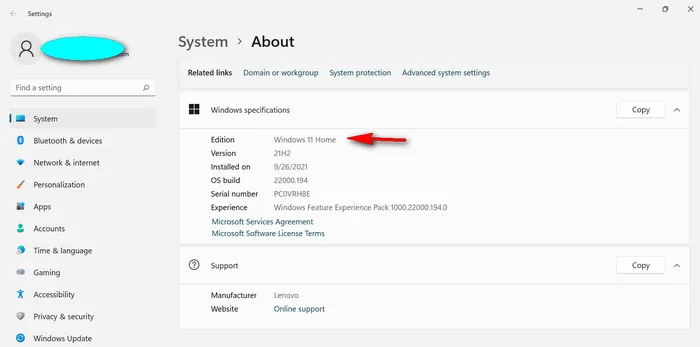
6. After that, you will see Windows 11 is fully installed on your PC. In my case, Windows 11 Home 21H2 is installed on my Lenovo laptop. This means the upgrade has been done successfully.
Method 2: Upgrade Windows 10 to Windows 11 via Windows Insider Program
Windows 11 is a completely new operating system and currently it is in development phase. Up to now (Aug 25, 2021), no official release is publicly available. However, you can get a preview build via Windows Insider Program, a well-known platform for testing Windows and Microsoft products before stable release. This is the only legitimate channel to upgrade Windows 10 to Windows 11.
Requirements:
- Microsoft account.
- A PC full compatible with Windows 11.
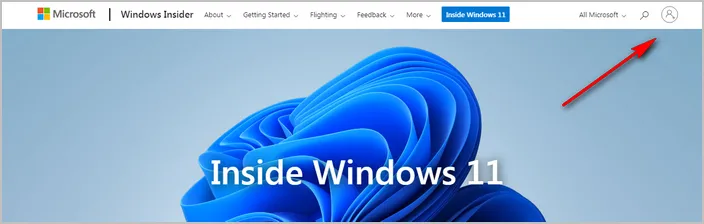
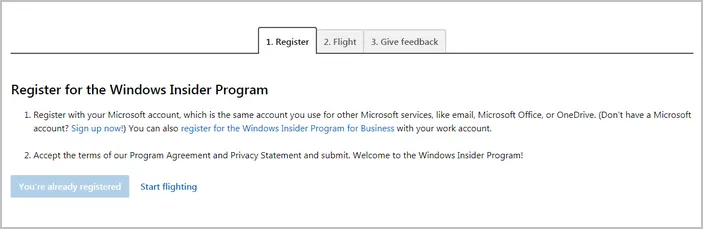
1. Go to Windows Insider Program and enroll into the program by signing in with a Microsoft account. My account has been participating into this program so it shows 'You're already registered'.
2. After registration on Microsoft website, please go back to the Windows 10 computer that you want to upgrade to Windows 11. Then move to Start -> Settings -> Update & Security. Scroll down the page and find Windows Insider Program at left sidebar.
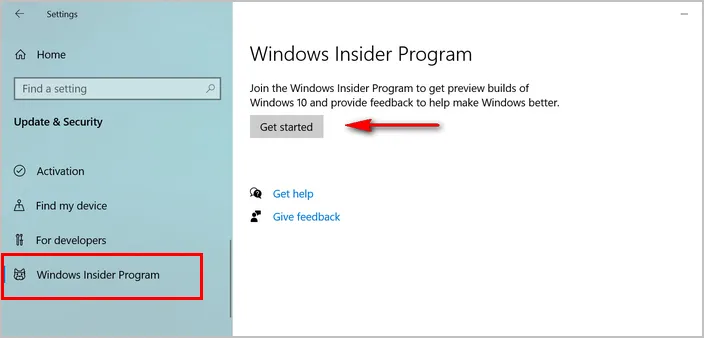
3. Click Get started at the right side and add the Microsoft account you just enrolled into Windows Insider Program. Please input the Email and password to start the verification process.
4. Once logging in successfully, you have to accept the terms and agreements to proceed. After that, the computer must restar to make the changes into effect.
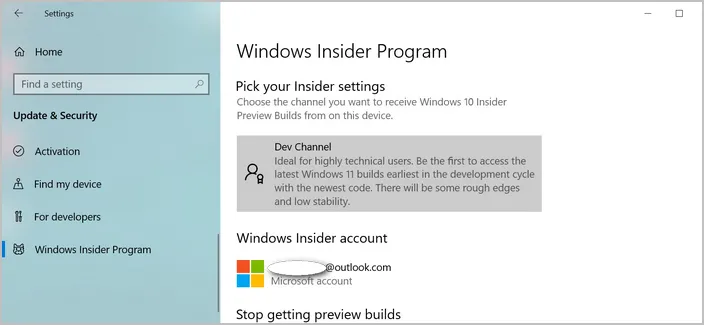
5. Your account information and a new Dev channel are shown up on the Windows Insider Program screen after reboot.
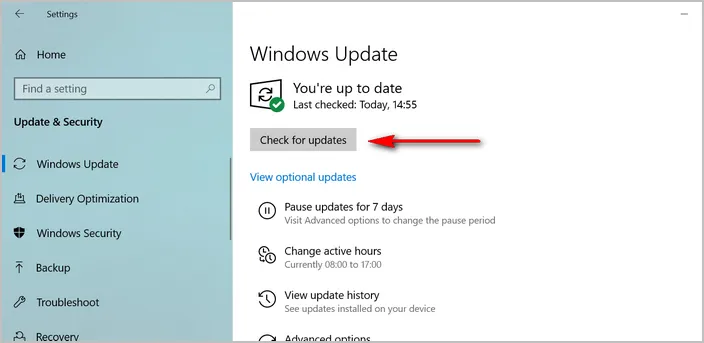
6. At this time, roll back to Windows Update in Settings and click Check for updates to get all Dev and Beta channel updates at the current time.
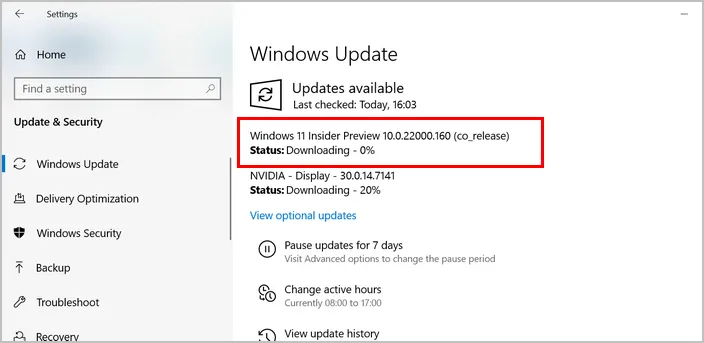
7. Once completed, Windows starts to download drivers and Windows 11 Insider Preview Build as you can see from the following screen. Windows 11 will be installed on this PC after download is completed.
Wait about one hour and you will see the computer is already upgraded from Windows 10 to Windows 11. However, it may take more time if the Internet connection is not good.
Note: Windows 11 is still in beta testing. This means the OS is not stable as Windows 10. It might be not running smoothly or have bugs when using Windows 11. Please be warned and only install Windows 11 earlier version on a backup or test PC.
Method 3: Upgrade Windows 10 to Windows 11 via Stock Windows Update (Stable Release)
This is the simplest way to upgrade Windows 10 to Windows 11. The method utilizes Windows Update program for system upgrade. However, this will work only when Microsoft starts rolling out the Windows 11 stable version for your PC. Here's how you can upgrade Windows 10 PC to Windows 11 using direct upgrade method.
Requirements:
- For Windows 11 stable release only (not available currently).
- A computer meets minimal system requirements of Windows 11.
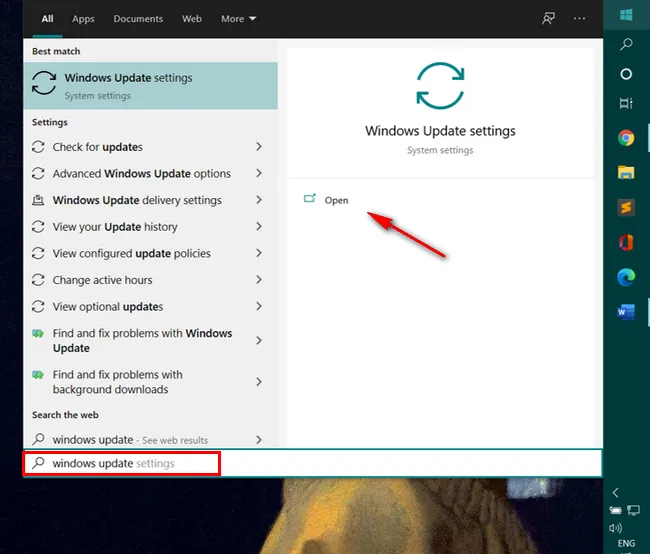
1. Press Start and search for Windows Update, press Open under Windows Update settings as shown below.
2. Within the Windows Update settings page, ensure that you are on the Windows Update tab by clicking on the same from the options on the left.
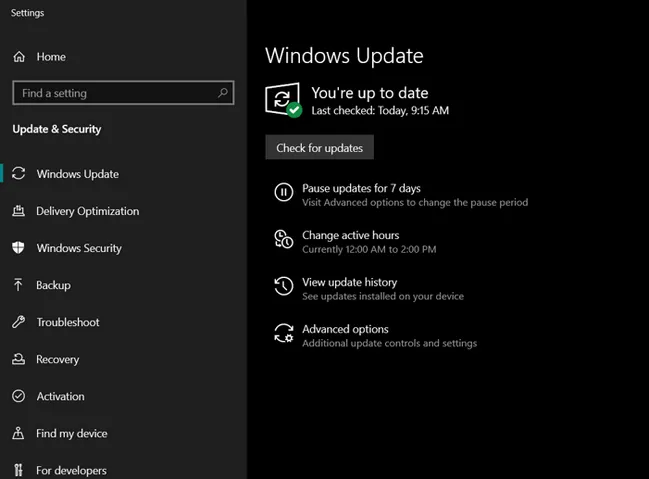
3. Now press the Check for updates button on the right side of the panel. If your PC is eligible for the upgrade, Microsoft will check for all the updates and show it along with any other list of updates for your PC.
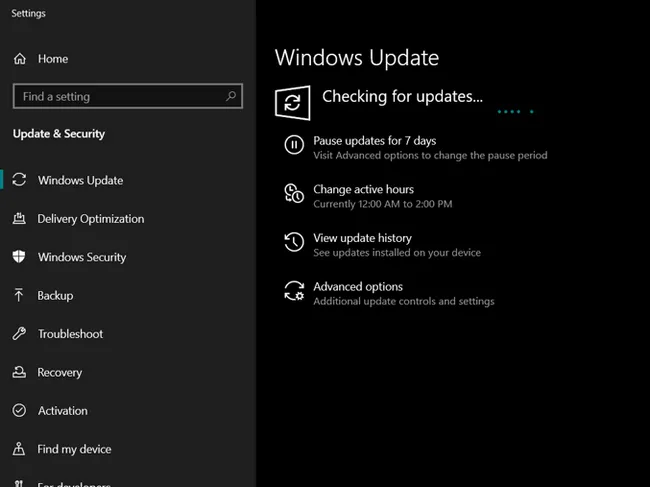
4. Once you can see the update for Windows 11, press that and follow the instructions on the screen. This will let you upgrade Windows 10 to Windows 11 for free.
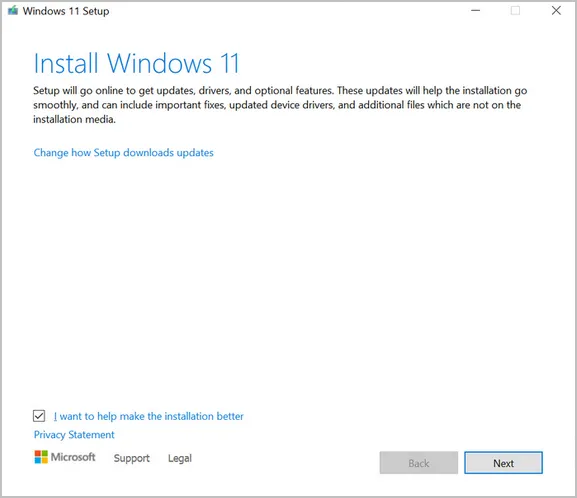
Method 4: Direct Upgrade from Windows 11 ISO
You can upgrade Windows 10 to Windows 11 if you are able to get Windows 11 ISO image file. After that, mount the Windows 11 ISO on Windows 10 and run setup.exe to start installing Windows 11 on this PC. However, if the hardware is not supported by Windows 11, you will see the following error message:
If the PC is full compatible with Windows 11, please go to Windows 11 download portal. After that, scroll down the page and find the option labelled with Download Windows 11 Disk Image (ISO).
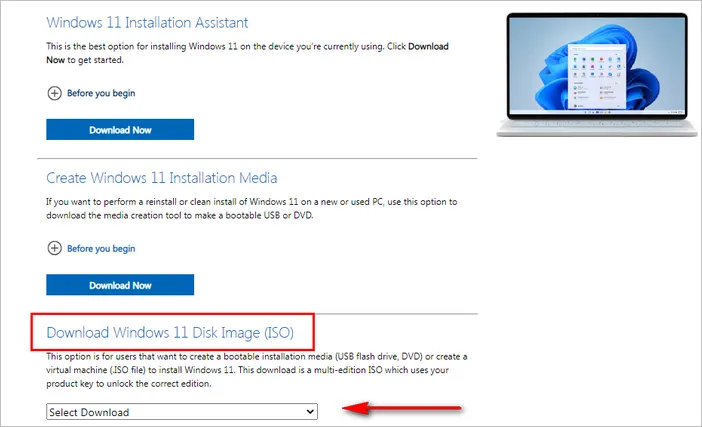
From Select Download menu, please choose Windows 11; then click the Download button and choose a language for Windows 11 install. After that, you will get a direct download link of Windows 11 ISO that only validates for 24 hours.

Once Windows 11 ISO is downloaded on your computer, please double click to mount it. Now, go to mounted drive and click setup.exe to start installing Windows 11 on this PC.
[Warning]: Please backup data and files in C: drive before installation. The new install will overwrite all content in system drive.
Method 5: Upgrade Windows 10 to Windows 11 via Clean Install
Not all PCs meet the minimal hardware requirements of Windows 11, the most common one is missing TPM 2.0 and Secure Boot. Unfortunately, the above methods only work on Windows 11 supported hardware. If you want to install Windows 11 on unsupported hardware, then you should do a clean install and make a few changes to bypass hardware restrictions.
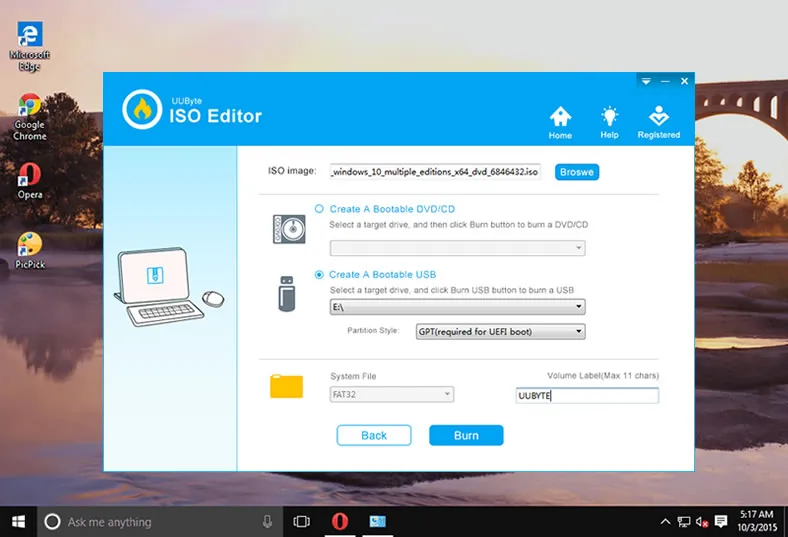
1. Download Windows 11 ISO first. Downliad links are available in here. And then you need to create a bootable USB from Windows 11 ISO. For that, please find a USB with minimum 8GB of space. Remember, all the content of this USB will be lost, so ensure to create a backup now!
2. Download UUByte ISO Editor, the best program for creating Windows 11 installation media , and open the software after install.


3. From the main screen, please choose Burn tab and add Windows 11 ISO into the program later. Now, enable Create A Bootable USB column and select the USB drive you have inserted on the PC. Also make sure choose GPT in Partition Type. This will create a Windows 11 bootable USB that supports UEFI booting scheme.
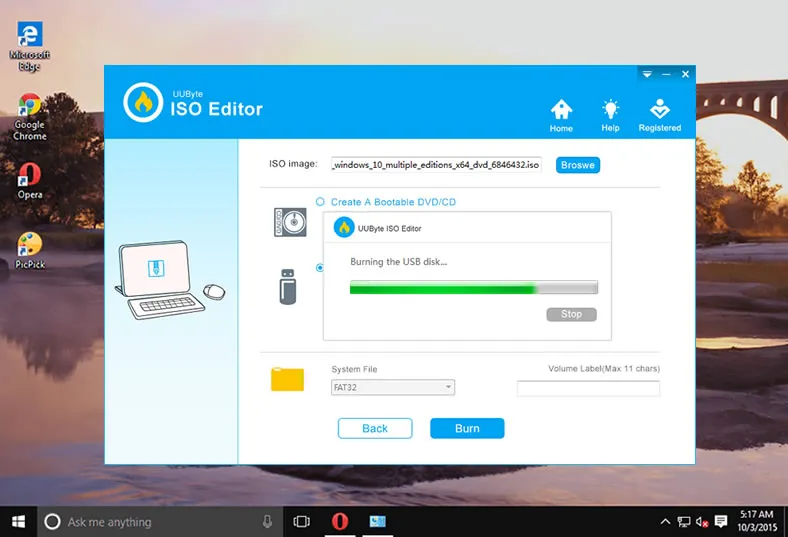
4. Wait about four minutes. Windows 11 ISO will be copied to USB drive and it is now used as a bootable install media.
5. Close all open programs on this PC and restart your PC. Keep pressing special key such as Enter/F12/Del to bring up Windows Boot Menu, where you can select a external device for booting. Below is an example of Gigabyte motherboard.

6. Once Windows 11 boots up from USB, press Install Now to move to next step.

7. Keep following the instructions on the screen. If it asks you for your Windows 11 key, click on "I don't have a product key". Make sure to choose Custom Install when prompted, select an activate partition on the PC where you want to install Windows 11 and press Next.
This should start the Windows 11 installation process. This might take some time, and your system may reboot a number of times. Once done, you will have a fully working Windows 11 on your PC.
Conclusion
This is a complete tutorial if you plan to upgrade Windows 10 to Windows 11. For normal users, we recommend waiting for a while and only upgrading to Windows 11 when Microsoft pushes out the stable release. This is more safe as Windows OS tends to have more issues and bugs even with stable release such as Windows 10.
However, if you are a developer or tech fans, then it is fine to test out the beta versions. Make sure you have backed up important data on current Windows 10 PC before upgrade.

Petty is editor in chief at UUByte and writes various topics about Windows and Mac to help people make the most of current technology.