
Windows 10 is one of the most advanced and most secure operating systems in the world, not to mention the most widely used of all. Whether it's in the business world, for personal use, or specialty areas like gaming, Windows-based PCs are virtually ubiquitous. However, this post is going to cover how to install Windows 10 from USB drive on a Mac computer, which will be much more challenging than doing a Windows 10 install on a PC.
1. Why Windows 10?
First of all, Mac hardware has better support for Windows 10, which offers the most robust choice of applications for desktop computers. That's understandable because of the sheer size of the installed base of Windows 10 desktops and laptops around the world, and it makes Windows 10 platform even more appealing for users considering a switch from Apple or ChromeOS devices.
Another advantage is the vast choice of security tools, both internal and external. Apart from applications like Defender, there are literally dozens of antivirus and other security applications for Windows 10. This makes Windows one of the safest platforms for personal users who don't have thousands of dollars to spend on data security.
But probably the biggest benefit of going with Windows 10 is the large ecosystem of device makers, also known as OEMs or original equipment manufacturers. From HP to Lenovo to Dell to numerous other brands, the hardware choices for Windows 10 are practically inexhaustible, which brings us to the basic hardware requirements to run Windows 10 on a computer.
![]()
2. Windows 10 Minimum Hardware Requirement
Microsoft has defined several parameters are being minimum requirements to run Windows 10. Here they are:
- CPU with a minimum clock speed of 1GHz
- Graphics card that supports DirectX 9 or higher
- RAM: 2GB (64-bit Win10) or 1GB (32-bit Windows 10)
- Hard Disk: 32GB free space
- Display Resolution: 800x600 Pixels
- Internet connection for device setup and ongoing updates
As you can see from the list, the hardware requirement is not as strict as you may think. Basically, you can run Windows 10 on any modern Mac computer that was made after 2011.
3. Download Windows 10 ISO Image File
The ISO file in this context is a disk image file that contains boot information and the Windows 10 OS itself. If you already had a copy of Windows 10 ISO, please skip this part. If not, you can download it from Microsoft's servers to your local hard drive and then burn it to a USB stick to create a bootable Windows 10 installer.
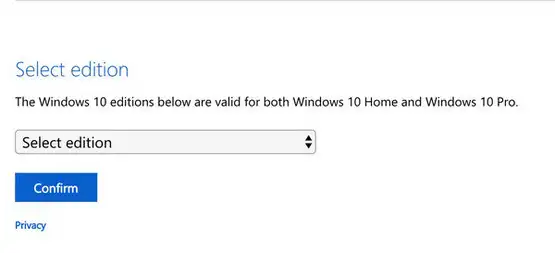
First, open a web browser on your Mac. Then, go to Microsoft's website for Windows 10 ISO downloads . Scroll down the page and select a Windows 10 edition to download. Now, click the Confirm button to start downloading Windows 10 ISO image from web.
Normally, you wouldn't have to verify the ISO because it's directly offered by Microsoft. However, if you feel that the file may be corrupted due to an unstable Internet connection or for other reasons, you can run a hash verification using a tool like MD5 or SHA Checksum.
4. Create Windows 10 Bootable USB Installer on Mac
To install Windows 10 on a computer for the first time, you will need to follow a certain sequence of steps. It's not complicated but you have to follow the correct order for a successful installation. Let's begin.
After downloading Windows ISO, the next step is to create a bootable Windows 10 installer from ISO image. we will be using UUByte ISO Editor to do this task because it is much easier to use and has less error than other tools. You can create a bootable Windows 10 USB on both Windows PC and Mac. Please download and install the correct version. In here, we will demonstrate the process on a MacBook Pro. After installing UUByte ISO Editor on your Mac, follow the steps shown below:


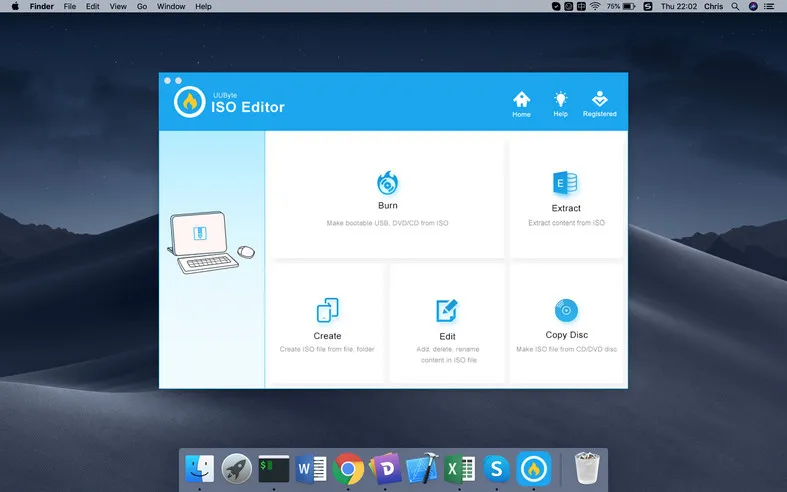
Step 1: Launch UUByte ISO Editor application on your Mac and insert the USB drive into the computer.
Step 2: Click the Burn module option on the main page of the software.
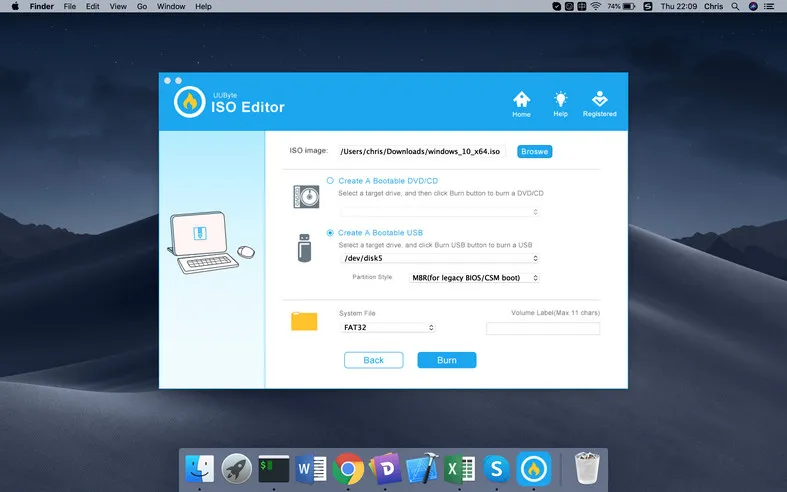
Step 3: On the next page, click Browse to import your Windows 10 ISO file. After that, select your USB drive from the dropdown menu. Finally, click the Burn button to start burning Windows 10 ISO to USB on Mac. You have to wait a couple of minutes for that. Eject the USB drive and close the application when the task is done.
As a versatile application, UUByte ISO Editor can also be used to open, extract, copy, and edit ISO and other disk image files.
5. Install Windows 10 from USB Drive on Mac
Now, a bootable USB is at your hands and is ready for Windows 10 OS installation. Before the installation starts, please back up your important data on Mac first in case unexpected error happens during this part. When the backup is done, you can now follow the steps in below to install Windows 10 on Mac from USB drive.
Step 1: Create a Windows Partition on Mac
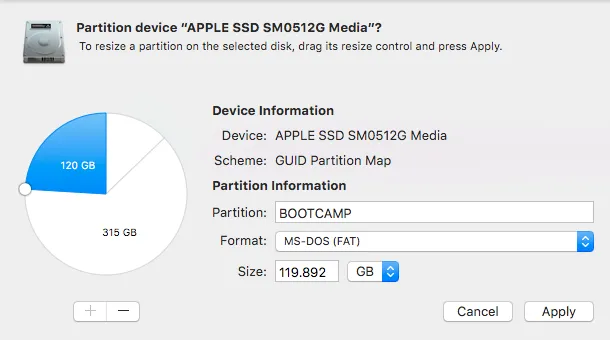
In default, the internal disk of Mac was formatted to HFS+ or APFS, which is only able to hold a Mac OS X or macOS partition. To install Windows 10 on Mac, you have to create a new FAT partition on local disk to be used by Windows 10 OS.
To to this, please run Disk Utility app on your Mac and choose the Apple SSD from the left sidebar. Now, click the Partition menu from the top menu bar. In the following, you have to set a name for the new partition, choose MS-DOS (FAT) in Format field and set a size for Windows partition.
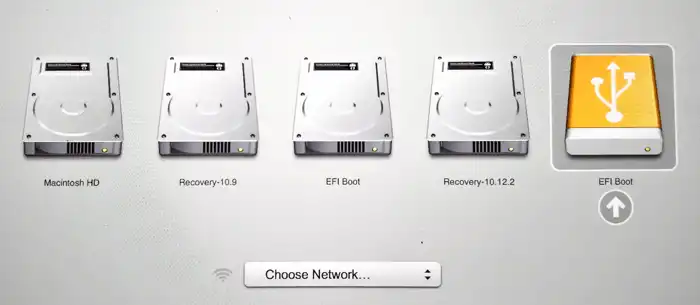
Step 2:Boot Mac from Windows 10 Install USB
Insert the USB installer into Mac computer where you want to install Windows 10 and boot from it. Press Power and Option key at the same time during boot-up to open Startup Manager on Mac. In here, you can choose a temporary booting device for Mac. Please choose the USB drive marked as BOOTCAMP or EFI Boot, which you set in previous step.
Step 3: Windows Setup
Once the Windows Setup screen appears, you will need to go through several steps to install the OS. Just follow the instructions to select the Language/region, currency, time format and other parameters for the setup. When you see the Install Now button, click it.

Step 4: Enter Product Key
At this time, you may need to enter the Windows 10 product key. If you don't have it with you, don't worry, you can activate it later. Just click on 'I don't have a product key' for now.
Step 5: Choose the Correct Edition
Select the appropriate Windows 10 edition and accept the terms of the software license when you see it on the screen.
Step 6: Custom Install
When you see the options for Upgrade vs. Custom, choose the second option. This will install Windows without moving your files and folders.
Step 7: Select a Partition to Install Windows 10
In the next window, you will see your drive partitions. Select the one you created in above step and click Delete, then Yes to confirm. This will delete the old partition and create 'unallocated space'.
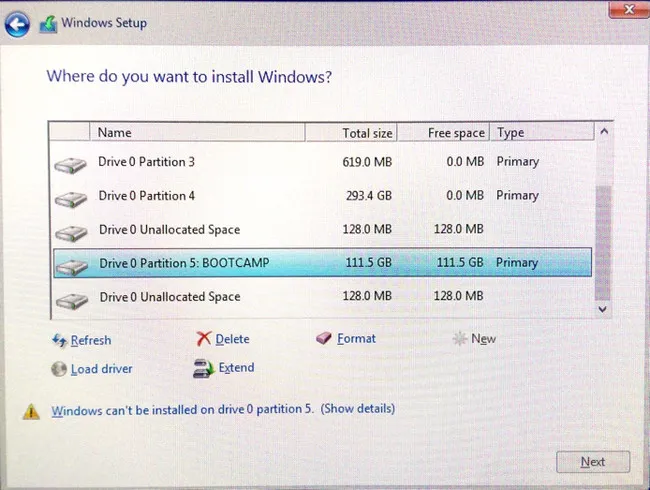
Step 8: Install Windows 10 on Mac
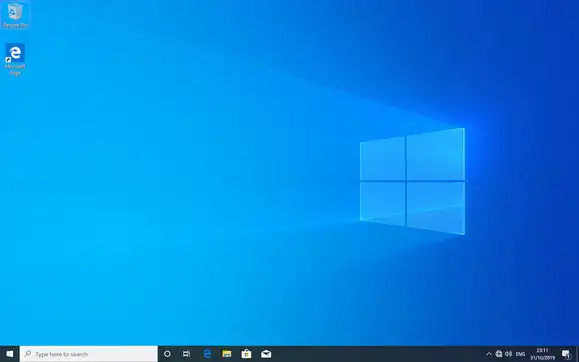
Next, choose the empty partition that says 'unallocated space' and click on Next. This will trigger the Windows 10 installation. Congratulations! You are now ready to use Windows 10 on your Mac as a new installation.
6. Activate Windows 10 and Update Device Driver
If you didn't enter the product key in Step 3 above, you can go to Settings and select Open Activation. Here, you will see 'Change product key', which you need to click on. Please note that if you are reinstalling Windows 10 and it is already activated on this computer, you need not change anything.
Another thing you should set up is updating the device drive. In general, all the drivers and other software updates should be included in the installation package, but if not, you can download them from Boot Camp Assistant or go to the device manufacturer's website and download the latest drivers.
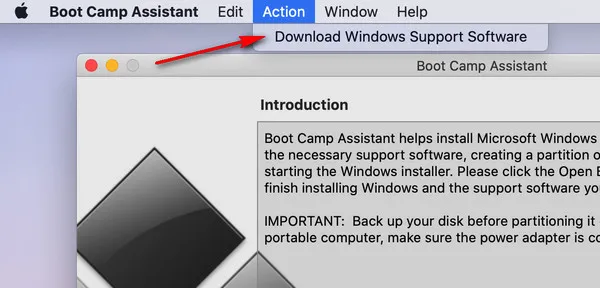
Once the download is completed, double click the setup.exe to install and update all necessary device driver for this new Windows 10 copy.

7. Windows 10 Installation Troubleshooting
USB not recognized as a bootable device. If the usb drive name was not showing in Startup Manager, this means the burning process failed. You have to re-burn Windows 10 ISO to USB and try again.
A media driver your computer needs is missing. This usually happens at the installation process. Eject the USB drive and use another port to test it out.
Conclusion
Installing Windows 10 from USB drive on Mac is a complicated topic and there are so many steps involved. You have to be very careful about it and backup your data in advance. Don't get frustrated if any error happend. Kindly contact us if you need more assistant on this matter.

Petty is editor in chief at UUByte and writes various topics about Windows and Mac to help people make the most of current technology.