
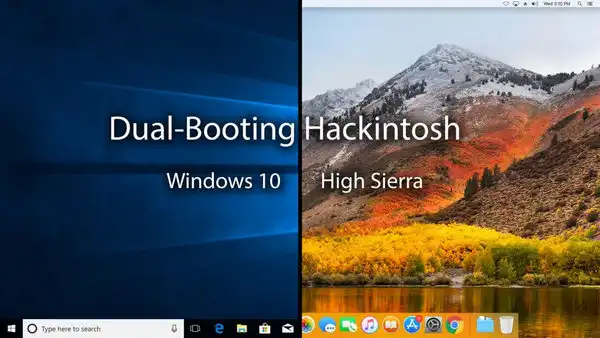
Boot Camp Assistant has been the mainstay of Apple solution to install Windows on a computer. Essentially, it allows you to dual-boot a Mac computer with one partition running Mac and the other running Windows. It's been tremendously useful for Mac users who can't find specific equivalents for Windows apps, which are far greater in number.
Boot Camp Assistant Version History
Over the years, Boot Camp Assistant has gone through many iterations. Since its initial launch in 2006, it has gone through five major iterations and is currently on version 6. Each major version came with the release of a new OS version. For example, Boot Camp 4.0 came with Mac OS X 10.6 Snow Leopard and brought support for Windows 7. Similarly, Boot Camp 6.0 came with macOS 10.12 Sierra and brought support for Windows 10.
Common Issues with Boot Camp Assistant
Unfortunately, Boot Camp Assistant has started becoming more unreliable since the release of macOS 10.12 Sierra, and there have been no updates since August 2016. In addition, Windows 10 has caused several known issues with Boot Camp Assistant as well, especially when trying to install the Windows 10 October Update 2018 edition. Even Apple has a page about it on their support site, but the gist of that is that you are required to move to macOS 10.14 Mojave before the problem can be fixed.
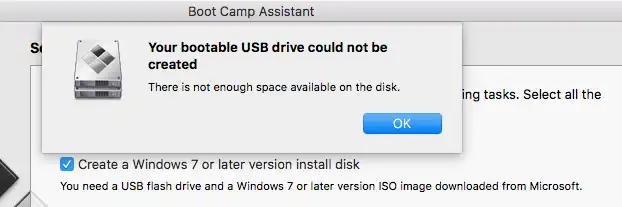
Some of the common issues with Boot Camp Assistant are not enough space on USB, installation errors, startup disk partition errors, file system errors, ISO mounted errors and so on. In most cases, it is either a problem with the Windows 10 installation files or Boot Camp's ability to handle those files and put them on a FAT32 disk, which can only handle upto 4GB.
Certain issues are easy to fix. For example, the ISO mounted error might happen because your Windows 10 ISO file is mounted on Desktop. Simply unmount and Boot Camp Assistant should work fine. Unfortunately, not all fixes are that simple. If you have the FAT32 partition problem, for instance, there's nothing to do but remove the empty partitions that were created by Boot Camp Assistant and then try reinstalling the April 2018 edition of Windows 10.
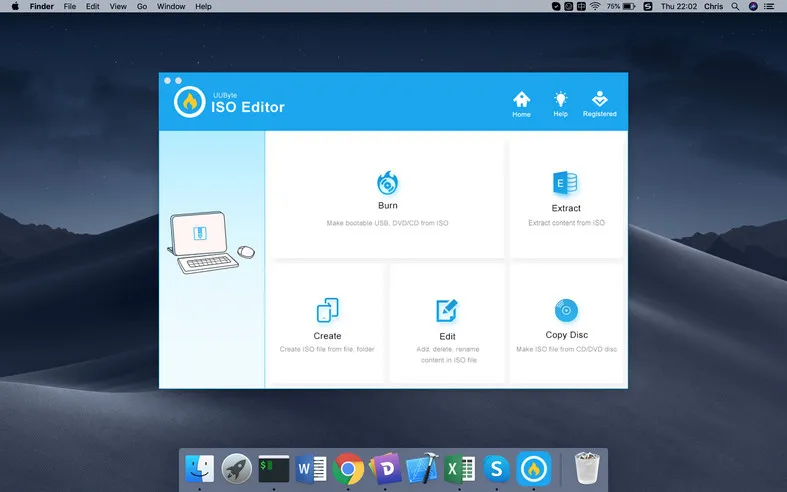
Windows 10 clearly has needs that Boot Camp Assistant can't handle very well. For a modern operating system, you need a modern tool to help you with the installation process. A utility like UUByte ISO Editor will not only allow you to easily create bootable media from an ISO file, but for advanced users it also offers the ability to edit the file, extract from it and perform a lot of other functions.
A Reliable Alternative to Boot Camp Assistant For Creating Windows Bootable USB
UUByte ISO Editor is available for Windows and Mac. This desktop utility is designed to handle complex tasks with ISO files. The best part about it is that you don't need deep expertise with disk image files. Most functions are one-click features that push all the heavy lifting to the background and leave the easy stuff for the user. Let's see how to create Windows 10 bootable USB on Mac with UUByte software.


Step 1: Download and install UUByte ISO Editor on your Mac, and launch the program.
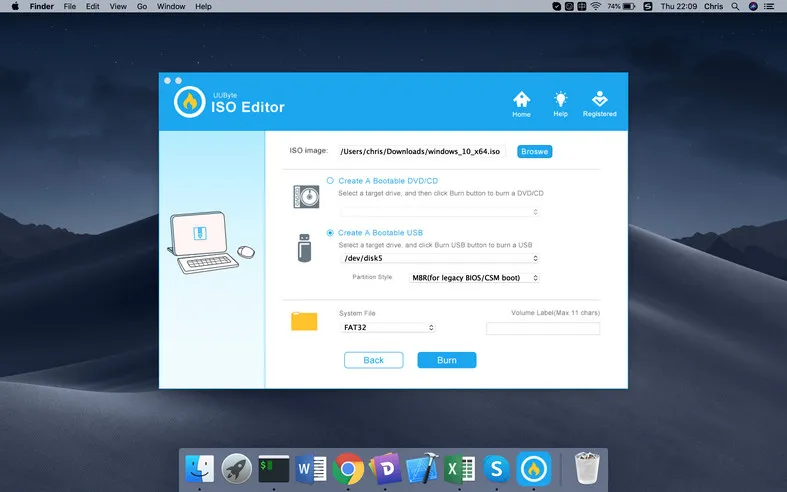
Step 2: Assuming you already have the Windows ISO file, you can use the Browse button in the UUByte software to import it. If not, you can get Windows ISO installation from Microsoft's website. Since you're on a Mac, you will bypass the Media Creation Tool download page.
Step 3: Insert a USB drive into Mac and hit Burn once the USB drive name appears under Create A Bootable USB section. Give a name of the USB and start burning ISO to USB on Mac. You won't need to wait for a long time for this task. However, you should keep the Mac running to avoid the burning process being interrupted.
Your Windows bootable USB will be ready in a few minutes. You can now use it to install Windows on your Mac. That process is not explained here, but we will show you how to boot from a USB drive in Mac.
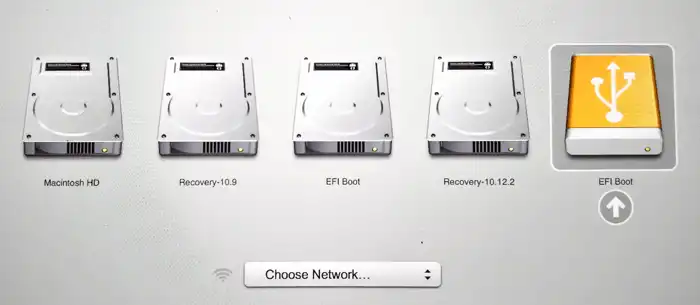
How to Boot Mac from Windows Install USB
The process is different from Windows, and is actually easier to do. All you need to do is insert your USB into the computer and then restart it. When you hear the chime for the startup, press and hold down the Option (alt) key until you see Startup Manager.
In Startup Manager, you can view all the drives that the system can boot from. Your USB should be listed there. The fail-safe here is that it will only list drives that contain boot information. If you have multiple USB devices connected to the PC, they won't be shown there unless they contain boot information. Double-click on the drive to boot from it.
Once you boot from the USB, you can partition the drive and install Windows, including the most recently released version of Windows 10. Just make sure you get the correct version from Microsoft's website.

Petty is editor in chief at UUByte and writes various topics about Windows and Mac to help people make the most of current technology.