
Windows and macOS are two different operating systems. Unfortunately, you may find out that most of popular games and some apps can be only running on Windows OS. If you were a Mac user and want to use Windows from time to time, then this post will be a great help for you. We will share three detailed tutorial about running Windows 10 on a Mac.
Part 1. Different Ways to Run Windows 10 on Mac
Generally speaking, there are 3 available ways to run Windows 10 from a Mac. Each one has its own pros and cons. You should take a breif reading before picking up the right one.
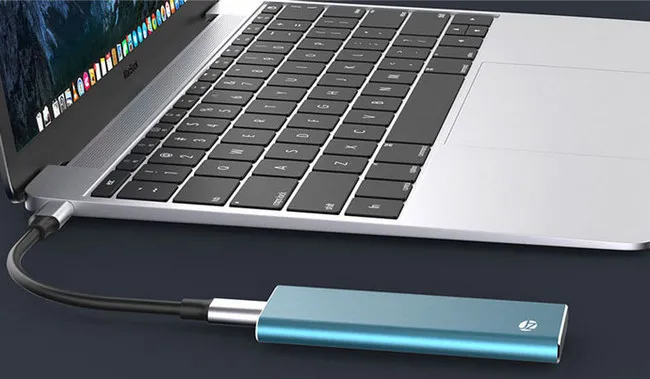
Run Windows 10 Directly from USB Drive on Mac: With the latest WTG technology (introduced later), Windows 10 can be installed to an USB drive. After that, you can run Windows 10 on Mac from that USB drive. This portable Windows 10 on USB drive has most of the features as a regular installation on a PC or latop. This is a great solution to run Windows 10 on Mac if the internal disk on Mac is less than 128GB.
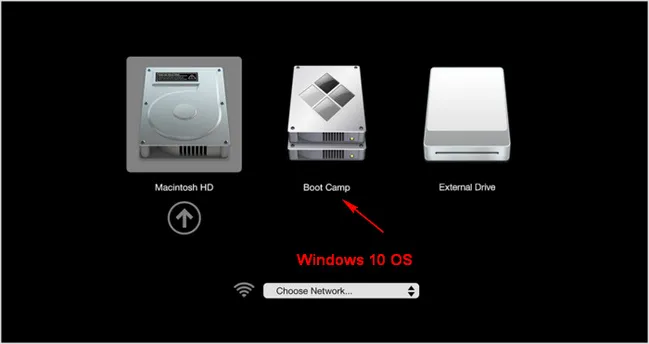
Dual Boot Windows 10 and Mac with Boot Camp: Apple has a built-in app called BootCamp Assistant to help you easily make a dual boot Windows 10 on Mac. You can switch to Windows 10 after reboot. However, it has many restrictions and eats up the internal disk space. Also, it could be more risky and lost user data when one partition crashed.
Run a Windows 10 Virtual Machine on Mac: This is another popular method to run Windows 10 on Mac. There are a few great virtual machien software out there for this purpose, such as Parallels Desktop, VMware Fusion and Virtualbox. Virtual machine is a lightweight solution and have less risk. The only issue is that the running speed is a bit slower and has negative effect when running on other Mac apps at the same time.
Part 2. How to Directly Run Windows 10 from USB Drive on Mac
Our first recommended approach for running Windows 10 on Mac is through a WTG powered USB drive. You can run Windows 10 from the USB drive once it is plugged into Mac. This is more portable and convenient. Most importantly, it does not take any disk space on Mac's internal hard drive or SSD. It is a huge advantage over other possible solutions when SSD volume on Mac is less than 128GB, which is quite common.
What is WTG? WTG stands for Windows To Go, is a new feature available in selected Windows OS. It helps you to create a portable Windows 10 USB drive so that you can directly run Windows 10 from a Mac or Windows PC.
Pros of WTG: Windows To Go was specially created for those users who frequently travel to multiple places because of business needs. In that case, it is really a headache to carry a heavy laptop with you, all the time. Since WTG can be installed on a USB or external SSD, it gives you portability to carry it in your pocket wherever you go.
How to Create a Portable Windows 10 USB Drive
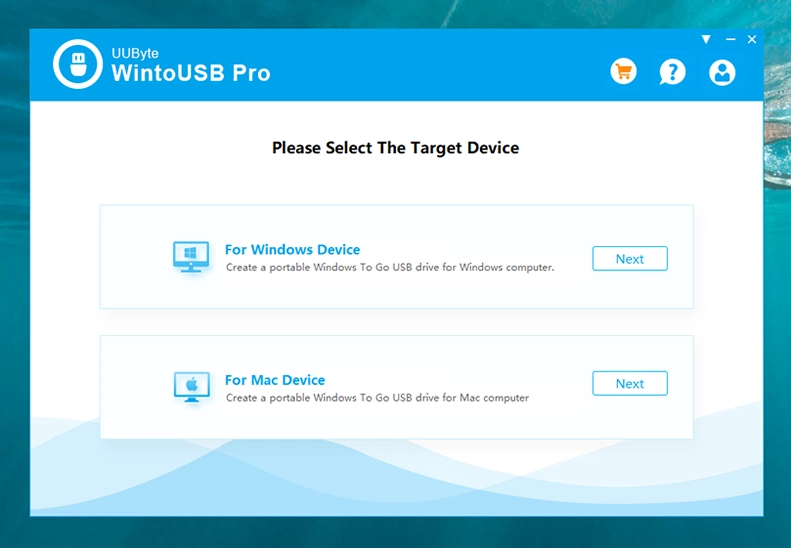
Step 1: Download and install UUByte WintoUSB Pro on a PC or a Windows virtual machine on Mac.
Step 2: Insert a USB drive and launch WinToUSB Pro. From the first screen, choose "For Mac Devices". This allows you creating a WTG USB drive for usage on Mac.
Step 3: Tick the box saying "From Windows Image File" and click the folder icon to load Windows 10 ISO image file into the program. You can also download a copy from here.

Step 4: Select the USB drive letter you just plugged in from the drop-down menu. We recommend using a USB 3.0 or 3.1 drive for pleasant user experience.

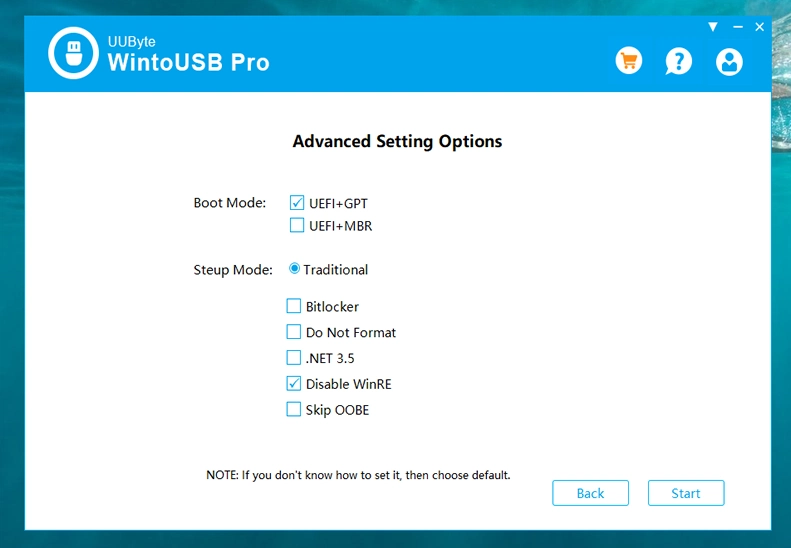
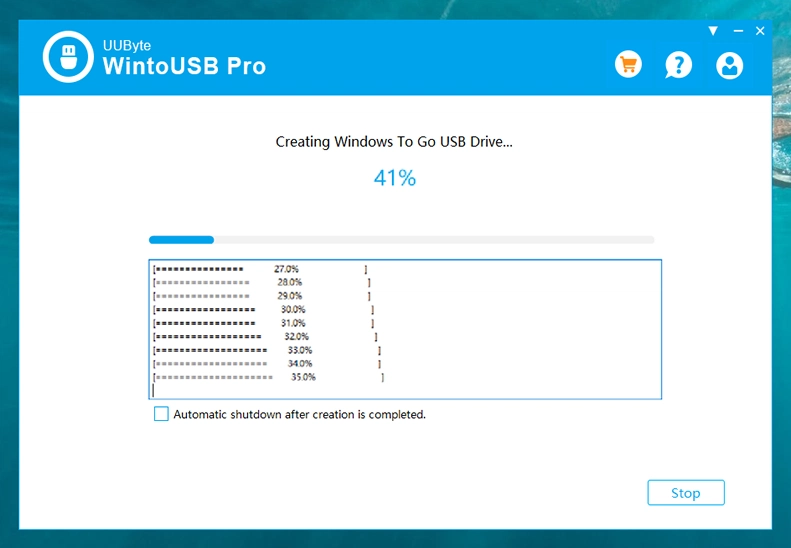
Step 5: WintoUSB will automatically analyze the ISO image file and make recommendation based on it. So go with the default option and start creatign a portable Windows 10 USB.
Step 6: Inserted this WTG USB drive into the Mac and boot from it. You will see Windows setup screen at first boot and follow the instructions to install Windows 10 to USB drive.
Step 7: To access the portable version of Windows 10 from USB, you need to restart Mac and then press and hold the Option key to access Mac Startup Manager. Now click the device name (EFI boot in default). Finally, your Mac machine will start running Window 10 from USB.
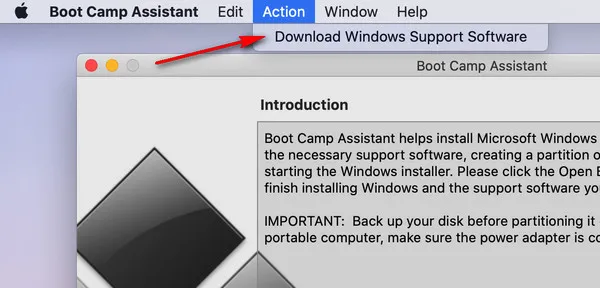
Step 8: After getting into Windows 10 desktop on MAC, you have to install some missing drivers such as network drive, Bluetooth drive, etc...Just go back to Mac and open Boot Camp app; then click on the Action tab on top menu and then select Download Windows Support Software. Now, choose WTG as the destination to save the files.
Step 9: When the download is completed, restart Mac and boot into Windows Partition. Go to WindowsSupport -> Boot Camp folder and run setup.exe to install required device drive.
Pros
- Ultra portable and convenient.
- Save money as only a USB drive is required.
- Not occupying any space on Mac internal disk.
- More safe by isolating WTG USB drive and Mac drive.
Part 3. How to Run Windows 10 on Mac with Boot Camp Dual Boot
Boot Camp is the inbuilt app on maOS that will help you run Windows 10 on Mac. It is usually referred as dual boot utility because you can access macOS and Windows 10 on the same machine. But you can't run both the OS together which means, whenever you want to switch to the access the desirable OS, then you need to reboot the Mac.
Step 1: Open the Application folder and go inside the Utilities section and here you will get the Boot Camp Assistant, just open that.
Step 2: Next, click on the Action tab and further click on Download Windows Support Software. Thereafter, all the necessary drivers required for Windows 10 to run on Mac will start downloading.
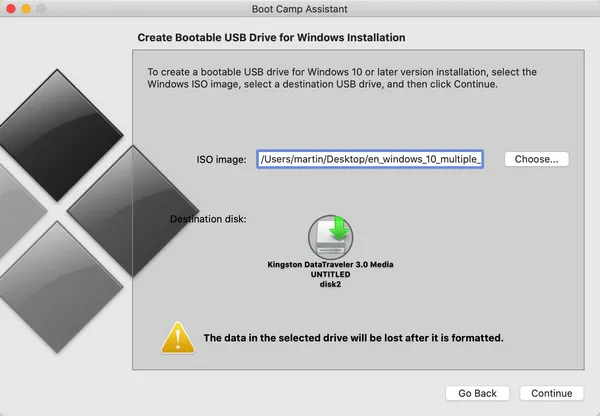
Step 3: Now, insert the USB drive that contains Windows 10 ISO file and soon, Boot Camp will ask you to set the size needed for Windows to run on Mac. Perform the task and then the Boot Camp will start creating a bootable Windows 10 USB drive.
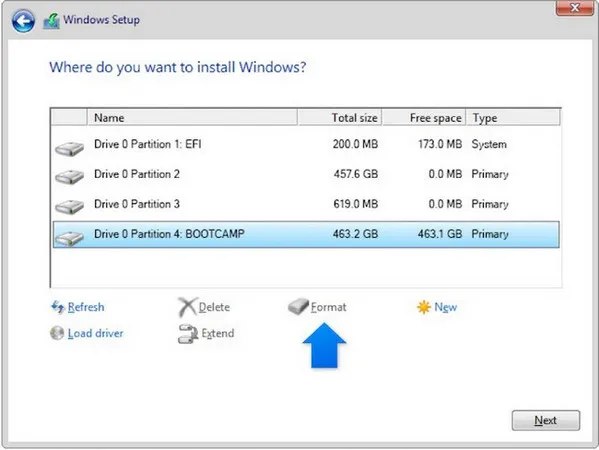
Step 4: After the completion of the above process, your Mac will reboot and you will be directed to the installer section. Here you need to select the Boot Camp as partition and further click on the Format button.
Step 5: Now, click on the Install button and then follow the on-screen instructions to install Windows 10.
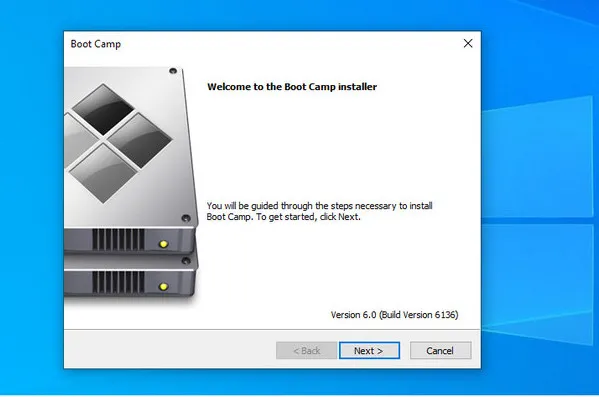
Step 6: Once the installation gets completed, your Mac will reboot and you will be directed to Boot Camp Installer window, follow the instructions carefully to install Boot Camp.
Step 7: Again your Mac will reboot and you need to press and hold the Option key at this time to select the boot order, i.e. Windows 10 or Mac.
Cons
- Eat up internal disk storage on Mac.
- Mess up the whole drive if Windows or Mac partition was broken.
- Boot Camp is not stable and has many potential errors.
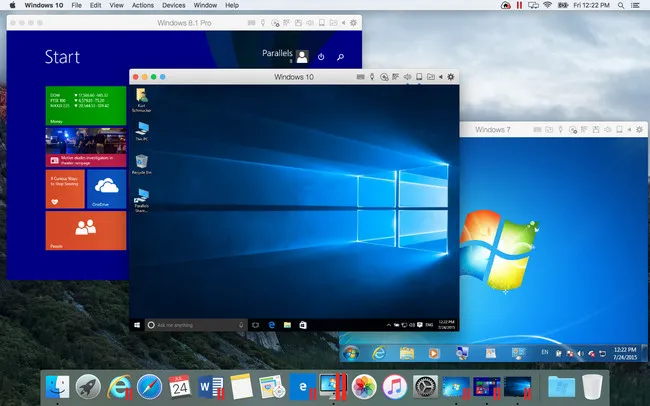
Part 4. How to Run Windows 10 Virtual Machine on Mac
Virtual Machine is yet another efficient solution to run Windows 10 on Mac. This is a more widely choice of normal users as it is easy to get started and has no risk. There are matured Virtual Machine software such as Virtua Box, Parallels Desktop, VMware Fusion and many more. Here, VMware Fusion is taken as an example due to its popularity and ample features.
Step 1: Download and Install VMware Fusion on your Mac.
Step 2: Drag Windows 10 ISO file from the download section or from the folder where you have kept the ISO file and then drop it in VMware Fusion.
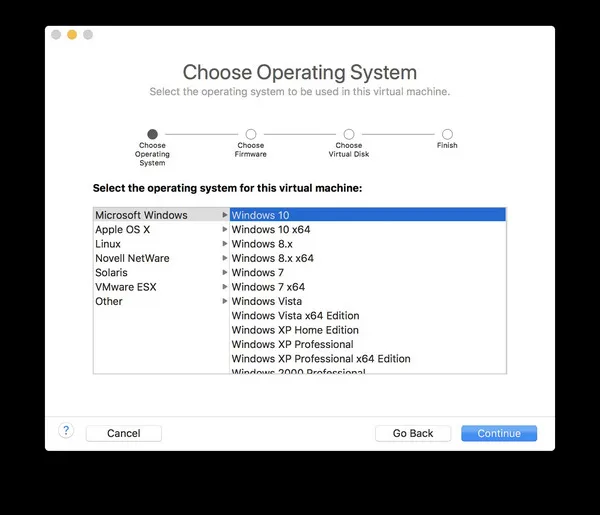
Step 3: On the main interface of VMware Fusion, you will get few options, select Windows 10 version and then click on the Continue button. If the key is asked, then select an option without key.
Step 4: Next, select More isolated option and further click on the Continue button. All the settings have been done and now you need to click on the Play button to install Windows Virtual Machine.
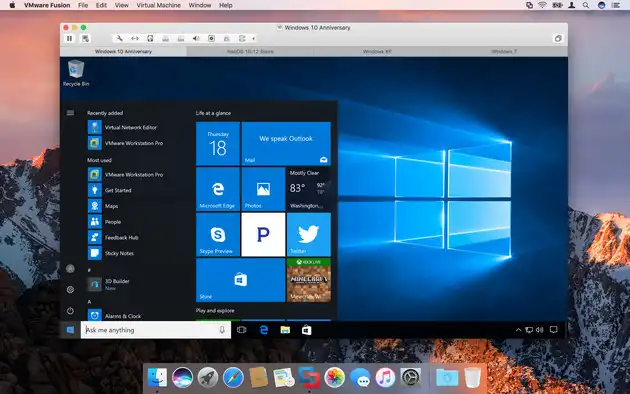
Step 5: Once the installation process is done, you can access Windows 10 on Mac via VMware Fusion.
Cons
- Advanced features are in Premium version.
- License/ subscription fee is expensive ($199).
- Still use disk space on internal drive of Mac.
- Slow down other app's performance when running virtual machine.
The Bottom Line
Running Windows 10 on Mac from USB drive is much more superior than Boot Camp dual boot and virtual machine. The performance is guranteed and there is no risk for data loss. It should be your first consideration when using Windows 10 less frequently or for gaming. If you have enough disk space on Mac's internal disk, then it is still fine to dual boot Windows 10 and macOS with Boot Camp. If you want to do this in a simple way, running a Windows 10 virtual machine is your best bet.

Petty is editor in chief at UUByte and writes various topics about Windows and Mac to help people make the most of current technology.