
Apart from regular Windows OS commonly seen in PC or laptop, Microsoft has also launched a feature called Windows To Go (also known as WTG) in order to run a portable version of Windows OS from external USB drive. It is a portable operating system which can be used on any device without changing your preferred settings again and again, in the form of a USB drive.
The Portable Windows To Go USB is the first choice of regular travelers. Because carrying a WTG USB is handy rather than carrying a bulky laptop. And if you are also looking for such an solution to run Windows 10 or Windows 7 from USB drive at any place then WTG is the best choice for you. However, you should create a portable Windows USB first. We will demonstrate all the details in Part 2.
Part 1. Requirement for Running Portable Windows OS from USB
The apps may be running very slowly on a portable Windows USB if the requirements were not fullfilled correctly. To have a pleasant experience of running a portable version of Windows from USB drive, please take a look at the following conditions.
Requirements
- USB 3.0 drive or portable SSD. And Microsoft's certified WTG USB is preferred.
- ISO image file. It could be Windows 10, Windows 7 or Windows 8.
- Proper software to put Windows OS on portable USB drive.
- A Windows PC or laptop in good conditions.
Part 2. How to Create a Portable Windows USB
When you get everything prepared, then the next step to pick up the right software to create a portable Windows USB drive from image file. We will list the best three software for this task. Please choose the one you like most after reading the full steps.
Method 1: PowerShell Commands
PowerShell is the inbuilt Microsoft's scripting language in Windows OS that helps you automate the task in a batch of text commands. For creating a portable Windows USB drive, you can use the dism utility in Powershell to get the job done. Let's go to the steps and make sure to execute them very carefully. Otherwise, you may fail to create a portable WTG USB.
Step 1: Open the search bar in your PC and type 'powershell] and run it as administrator.
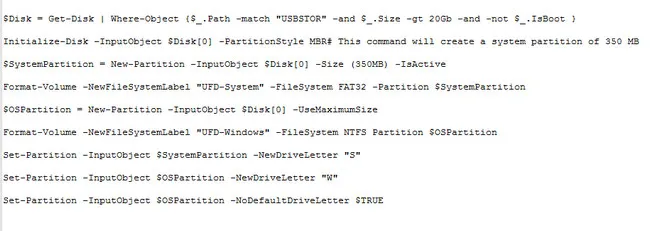
Step 2: Now type the following commands to partition an MBR (Master Boot Record) disk, so that you can use it with FAT32 or NTFS formatted OS. It will support computers that use either UEFI or BIOS firmware.
Step 3: The below line of command will help you to deploy Windows OS files to the USB device you have inserted. Make sure to set the index number correctly to a valid Enterprise OS image in the .WIM file.
dism /apply-image /imagefile:n:\imagefolder\deploymentimages\mywtgimage.WIM /index:1 /applydir:W:\
Step 4: Now, move the necessary boot files into the USB device using bcdboot command line. This command helps to match the boot components, architecture, and OS versions.
W:\Windows\System32\bcdboot W:\Windows /f ALL /s S:
Here, the /f ALL selected to transfer boot components for UEFI and BIOS on the USB disk.
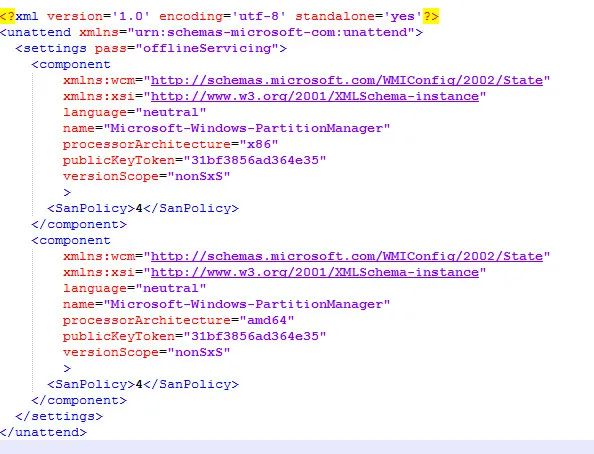
Step 5: Now Apply SAN policy—OFFLINE_INTERNAL - "4" by creating a san_policy.xml file to prevent a system from automatically executing the internally connected disk.
Step 6: Now save the san_policy.xml file into the WTG USB drive by running the following line of command:
Dism.exe /Image:W:\ /Apply-Unattend:W:\san_policy.xml
Step 7: Create an answer file namely unattend.xml to disable the use of WRE (Windows Recovery Environment) with WTG. And then save it into the sysprep folder on the Windows To Go USB drive (e.g. of the path is, W:\Windows\System32\sysprep\).
This method proves to be working on all Windows ISO files but it could be a nightmare if you had no prior experience with text command. If you are looking for the easiest way to create a portable Windows USB drive, you can go with UUByte WintoUSB Pro.
Method 2: UUByte WinToUSB Pro
UUByte WinToUSB Pro is the one-stop solution for creating portable Windows USB drive. You don't need to type any command during the whole process and all steps are done in a well-designed visual user interface. So it is much easier than PowerShell commands in above section. Let's dive into the steps on how to use this nice software to create a portable version of Windows from USB.
Step 1: Download and install UUByte WinToUSB Pro on a PC.
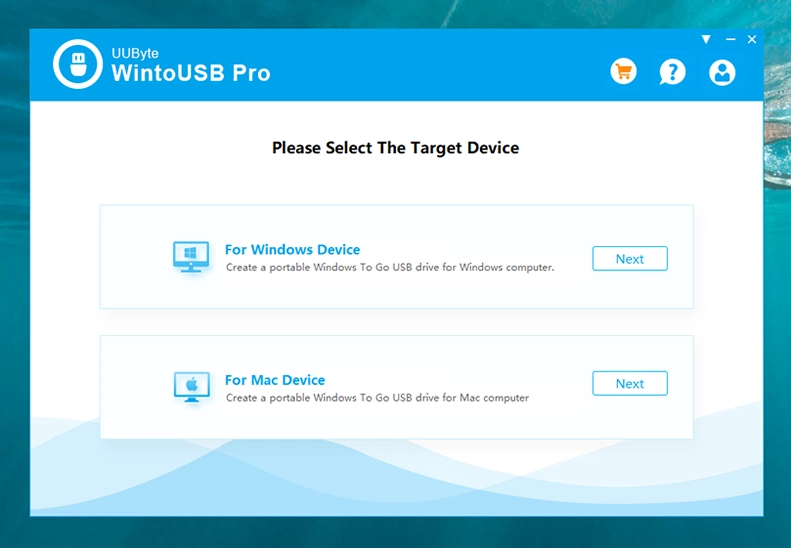
Step 2: Launch WintoUSB Pro and insert a USB drive to your PC. Once the program opened, choose "For Windows Device" from the main window. Then click "Next" to proceed.
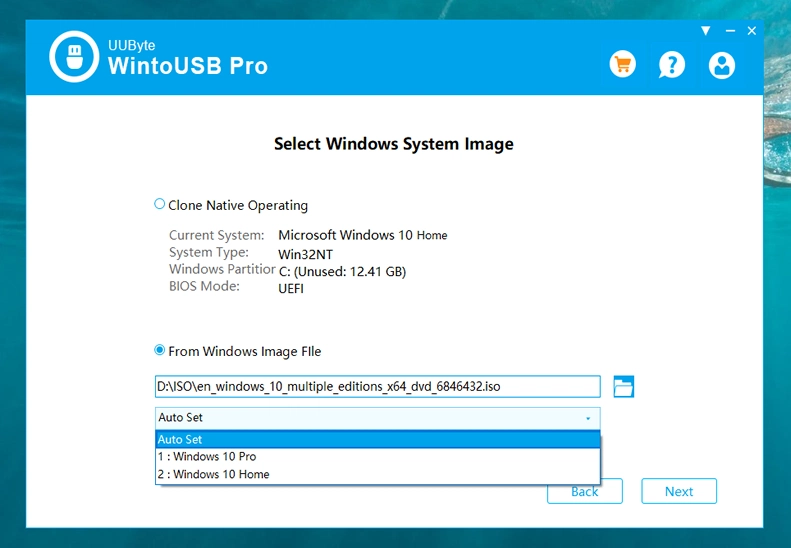
Step 3: Now, select the option saying "From Windows Image File " and click on folder icon to load Windows ISO image from your PC.
Step 4: Select the USB Drive from the drop-down menu. You will be prompted to backup the data on USB drive. If you did not do that so far, you can do that now else just go with the Yes button.

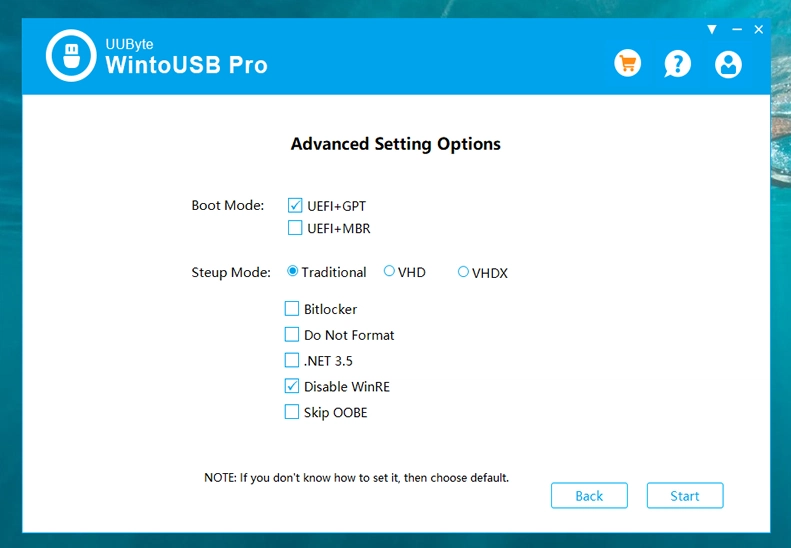
Step 5: Follow the default option in "Advanced Settings Options". It says UEFI + MBR.
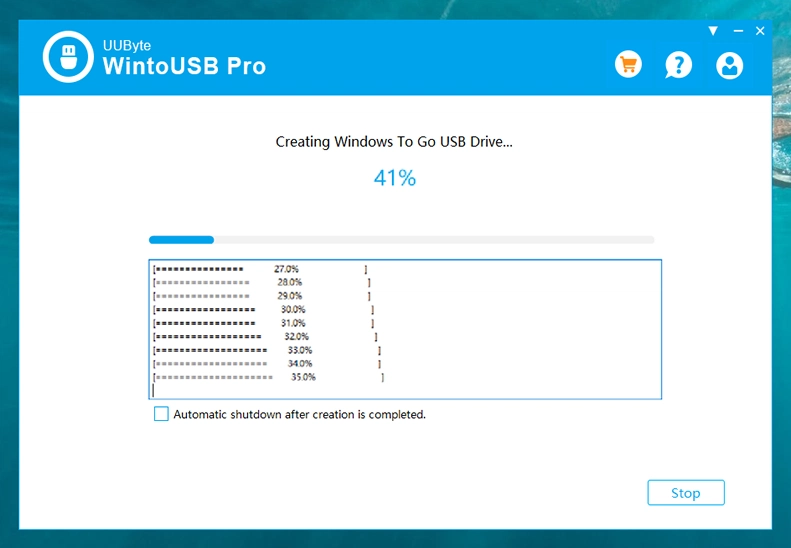
Step 6: Give some time to complete the process of creating a portable Windows USB for you. It may take a few minutes to an hour, depends on the data transfer speed of USB device.
UUByte WinToUSB Pro is the super-fast tool to create a Windows To Go USB device. With this tool, you don't need to write a single line of code. It is as simple as creating a normal bootable device.
Method 3: GImageX
GImageX is a free GUI wrapper of dism command we introduced in Part 1. This will dramatically reduce the usage of long text command. However, it is only able to process .wim file, which is a part of Windows ISO image. So you have to mount and extract the content from ISO file first. The tool is also capable to mount, splt and export WIM files. And for your convenience and easy understanding, we have separated the process in multiple phases. Let's execute it step by step.
Phase 1: Make a bootable USB
Plugin a Microsoft certified WTG USB device to your system and then execute the following lines of code one-by-one in command prompt with admin privilege.
diskpart
list disk
select disk 1[Replace 1 with the number given to your connected USB]
clean
create partition primary
select partition 1
format fs=ntfs quick
active
exit
Phase 2: Mount or Extract Windows ISO Image File
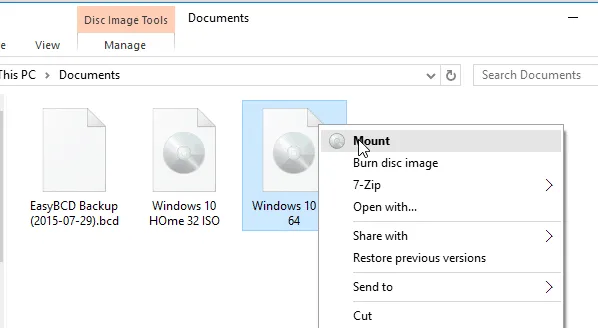
To access install.wim files, you need to mount Windows image files. To do so, just right click on the ISO file and choose the Mount option from there. If this does not work, then you should download other ISO editing software to extract the content from ISO.
Phase 3: Run GImageX to Create a Portable Windows USB
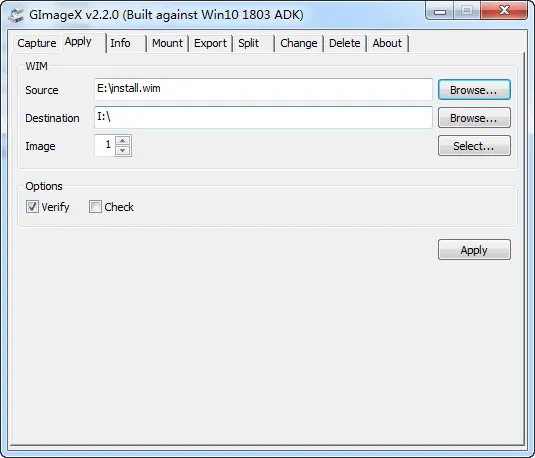
Download GImageX latest version from the official site and then install it on your PC. Now launch the tool and click on the Apply menu. Inside, to set the source path, click Browse button and select install.wim file from your computer. And then, you need to provide the Destinate path. Here, click on Browse button and select the plugged in USB which you have inserted. Now cross-check everything and click on the Apply button to automate the process for creating a portable Windows USB.
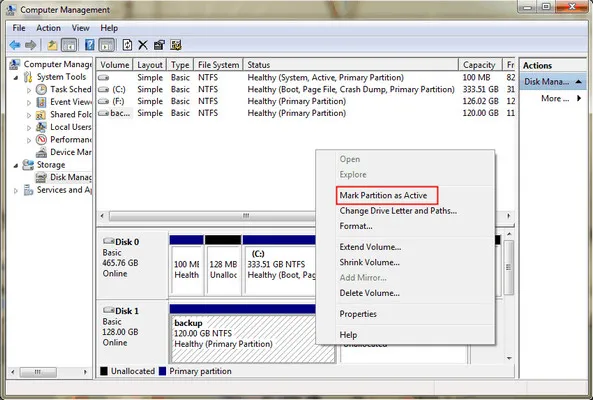
Phase 4: Make the USB Partition Active
Open command prompt with admin privilege. Now enter the command compmgmt.msc. It will open Computer Management window. Click on Storage and then go to Disk Management. Right-click on the USB drive and select Mark Partition as active.
Phase 5: Create Boot Entries for the WTG USB drive
Open Command Prompt again with admin permission and run the below code one by one, by replacing the X with your USB drive letter.
X:
cd Windows\system32
Now enter the below command to create the boot entries having EFI directory. Make sure to replace X with the drive letter of your USB device.
bcdboot.exe X:\Windows /s X: /f ALL
Using GImageX, you can create the portable Windows USB but you need to go through a list of commands. If you love to play with coding, then this method would be convenient for you. Else you can use WintoUSB Pro instead.
Part 3. How to Run Windows 10/7/8 from USB Drive
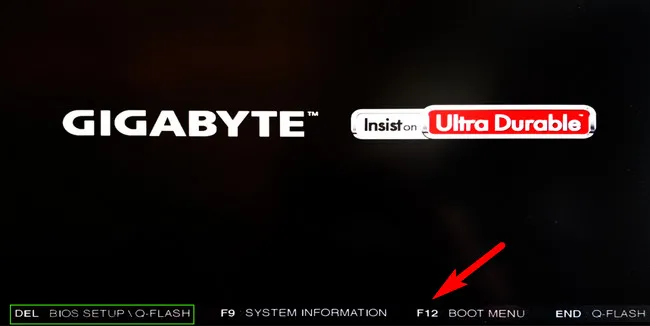
After creating a portable Windows USB device, you need to insert the USB in the computer on which you want to access the portable OS. Now press Alt+Del Key to restart the computer and then press the F12 key to open the Boot Menu. (Function key may vary for different PC manufactures).
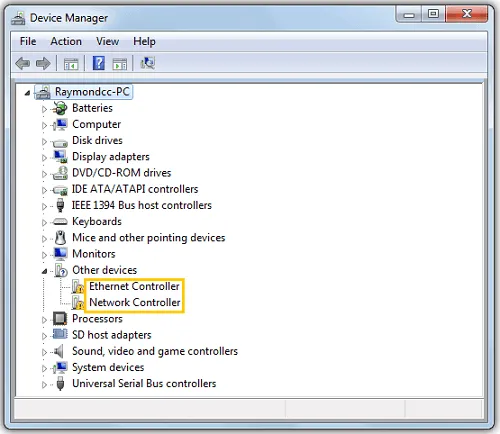
You will see Windows 10 installation screen once the target computer boots from WTG USB as the above step only puts Windows 10 OS files on to the USB. You have to finish the installation process before using this portable Windows as normal. Once the computer gets into Windows desktop, you have to install the missing drivers to make it working properly. You will see a question mark for those drivers in Device Manager.
Part 4. FAQ and Troubleshooting
How Much Time for Writing ISO to USB: For USB 2.0 drive, it may take up 2-3 hours to complete the ISO writing process. For USB 3.0/3.1 drive, it takes up to one hour. For portable SSD, it only needs a couple of minutes.
How Much Time for Installing Windows on USB: For USB 2.0 drive, it needs 15 - 20 minutes. For USB 3.0/3.1 drive, it takes about 10 minutes. For portable SSD, it is 2-3 minutes.
Windows Image File Not Supported: You will receive this error when using dism command. Please switch to UUByte WintoUSB Pro instead, which supports all Windows versions.
USB Drive Not Detected: Make sure USB driver is installed properly on your computer.
Final Words
It is not an easy to run a portable version of Windows from a USB drive. The most time-consuming part is how to put Windows OS on USB drive. With PowerShell, you don't need to depend on a third-party tool and it is totally free. The third method using GImageX is another easy option to create a WTG USB. But both methods need to run multiple lines of command. And if you want to run Windows from USB drive without any hassle, then it's better to go with UUByte WinToUSB Pro.

Petty is editor in chief at UUByte and writes various topics about Windows and Mac to help people make the most of current technology.