
As a web designer that heavily replying on Mac ecosystem, there are sometimes that want to give a try on latest games on Windows. However, I have no plan to build or buy a new PC for occasionalgaming scenario because it could cost several hundreds dollars. But now, with the introduction of Windows To Go (WTG) technology, it is super simple to run Windows OS on a Mac from a portable USB drive, which saves money and easy to get started.
Besides, you might came across the situation where you don't get the access to your PC. In such condition, either you need to format the OS or need to restore the backup. In either case, your flow of work gets affected.
But what, if you get the solution to continue working without the interruption of defected OS files or any unwanted situation? Yes! It is possible with the help of Windows To Go, which is ready to use as a portable operating system.
1. What's Windows To Go?
Windows To Go (WTG) is an enterprise feature embeded into Windows OS since Windows 8. This advanced function allows users booting and running Windows OS from USB based drives by creating a Windows To Go Workspace. In short, it can be regarded as a portable booting device that runs Windows. And this would be a great help for those users who travel a lot or have the need to use Windows apps on Mac from time to time.
And because you can burn Windows ISO to a USB, it is easy to carry along while you are travelling. Please note, it doesn't replace the existing OS but create a WTG workspace and using the existing resources, it allows you to access most of the features like a typical Windows operating system such as the latest Windows 10.
2. Windows Version That Supports Windows To Go
According to Microsoft Windows To Go documentation, only a few advanced version of Windows OS is supposed to create a Windows To Go USB drive natively. Well, this is a big hurdle that prevents people adopting this new feature as there are few people using Windows 8 or Windows 10 Enterprise Edition.
Official Support List :
- Windows 8 Enterprise
- Windows 8.1 Enterprise
- Windows 10 Education
- Windows 10 Enterprise
Don't get discouraged when you first heard about the cruel reality. There are many unofficial ways you can take advantage of in order to create a portable Windows USB on Windows 10/8/7 Home or Pro edition. I will share the full tutorial in below section.
3. Windows To Go Supported ISO File
In fact, not all Windows 10 ISO image are supported by Windows To Go technology. Microsoft declares only Enterprise Edition ISO image has the ability to be working on with Windows To Go. The official list is shown as following:
Official Supported ISO Image :
- Windows 8 Enterprise
- Windows 8.1 Enterprise
- Windows 10 Enterprise
Please take a break and relax. The above limitation no longer exists dur to the technology improvement in recent two years. Currently, we can use any Windows ISO image file to create WTG USB drives without any issue by using third-party Windows To Go Creator software.
4. Windows To Go Compatible USB Drive
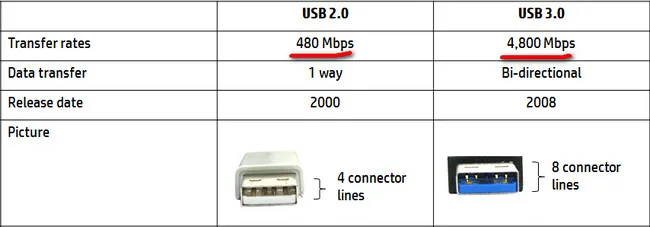
Not all USB drivers are equal to create a Windows To Go USB. The hardware standard of WTG compatible USB is much more strict than traditional USB drive, which requires much faster reading and writing speed in order to run Windows smoothly from external USB.
We highly recommend using USB 3.0 or 3.1 connected external drive and portable SSD is more welcomed if budget is not an issue. However, the default Windows To Go Create that comes with Windows OS is only able to recognize WTG Certified USB drives and there is no such a restriction if you are using third-party software for creating Windows To Go USB drive. This means it has no porblem to create WTG device from non-certified USB drive.
The other thing is that installing Windows generally takes around 20GB of space. So if you want to create a portable Windows drive that works nicely, you must choose the external drive with enough space.
Recommended List of WTG USB Drive:
- Any Portable SSD with USB 3.0/3.1 Port
- Samsung Bar Plus USB 3.1
- SanDisk Extreme Go USB 3.1 Flash Drive
- IronKey Workspace W300, W500 & W700
- Spyrus Secure Portable Workplace
- Kingston DataTraveler Workspace for Windows To Go
5. Two Ways to Create Windows To Go USB Drive
There are two different ways to create a Windows To Go USB drive. One is through the official Windows To Go Creator shipped with Windows 8/8.1 or Windows 10 Entreprise Edition, which can be only working with certified Windows ISO and USB drive. The other is by using third-party tools, which has no limitation and is able to support all Windows ISO and USB drives.
The Official Way to Create Windows To Go USB Drive
To start the process, you have to be ready with three essential things, the first one is to get a verified Windows To Go USB device; the second is download certified Windows 10 or Windows 8 Enterprise ISO image and the third one is finding a computer that supports Windows To Go.
Step 1: Insert the certified WTG USB drive to a valid PC through USB port.
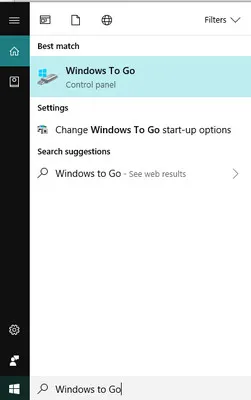
Step 2: Type Windows To Go in search bard on your computer and lauch Create Windows To Go Workspace wizard.
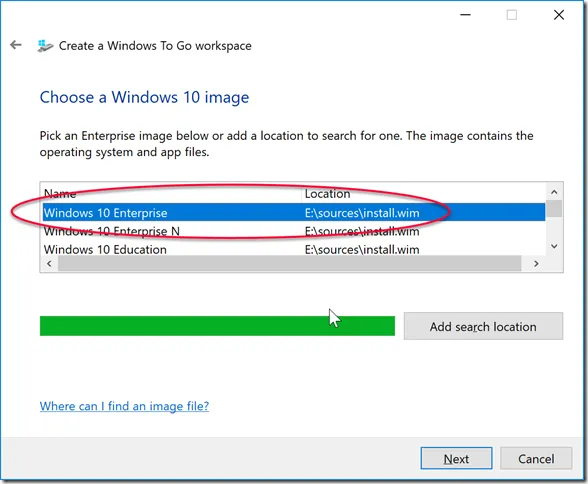
Step 3: Windows will search the USB drives being connected to the computer by default. Please choose the inserted USB and click on the Next button to go ahead.
Step 4: Click on the Add search location menu and browse the OS file from the computer. If the ISO file was mounted, it will show up on screen automatically.
Step 5: After that, you have to click on the Next button again and there you will get the option to encrypt your USB with BitLocker. However, it is completely an optional feature which can be set later as well. If you want to secure your external drive now, you can provide the password there. Else, click on the Next button and wait for the process to complete.
Until now, a WTG USB drive is ready and you should connect the drive to another computer that you are going to use this WTG USB and install Windows on it.
Use WintoUSB Pro to Create Windows To Go USB Drive
If you are unable to create a WTG USB drive using the official tool, then we suggest giving a try on UUByte WintoUSB Pro. It i s a profesional third-party tools that removes the restrictions from creating Windows To Go USB. You can make a WTG from a wide range of Windows ISO image, such as Windows 10 Home, Windows 10 Pro or Windows 10 Edution. Besides, it also supports non-certified USB drives. So it is a much better tool than the default Windows To Go Creator. In addition, it is also capable of cloing the running Windows OS to external USB drive and make it bootable, too.
Step 1: Plug in a USB based exteranl drive (USB, HDD, or SSD).
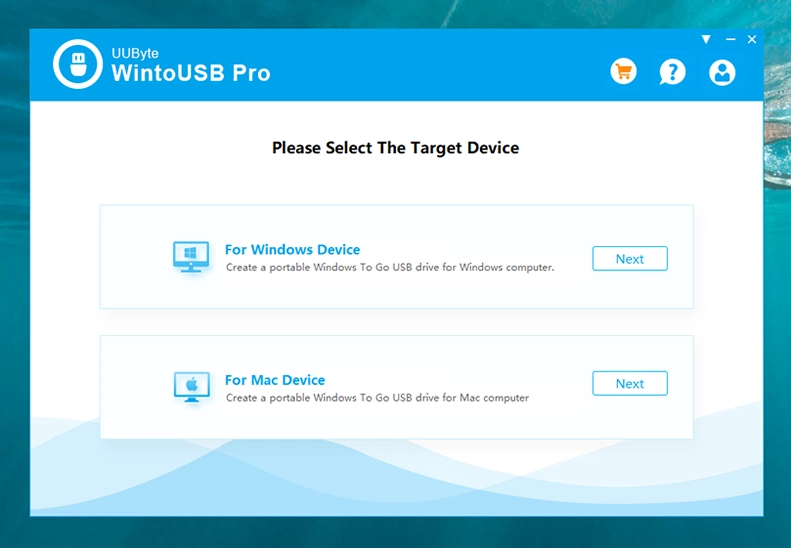
Step 2: Download a copy of WintoUSB Pro and install the application on any PC. At this time, please choose "For Mac Device"
Step 3: Import Windows ISO image file from local computer by clicking the folder icon.
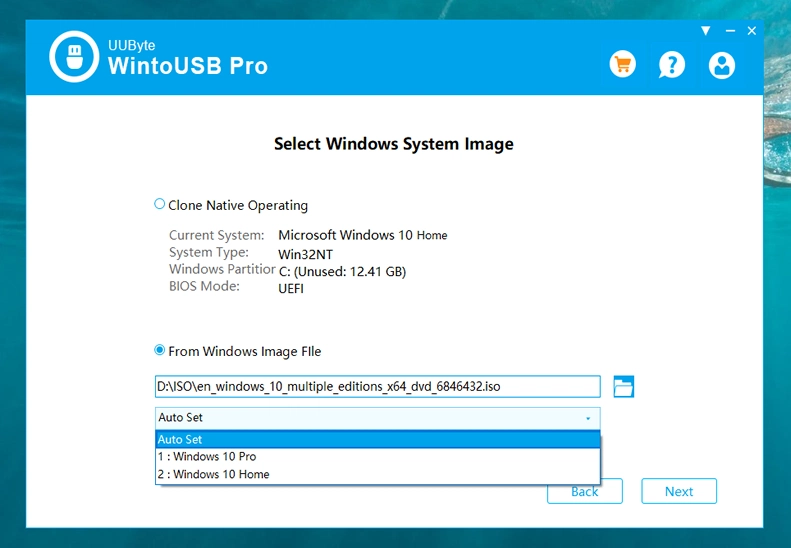
Step 4: From the drop-down menu, find the USB drive name and select it.

Step 5: You will be presented with a couple of advanced settings. Leave it as default if you were not familiar with those technical details.
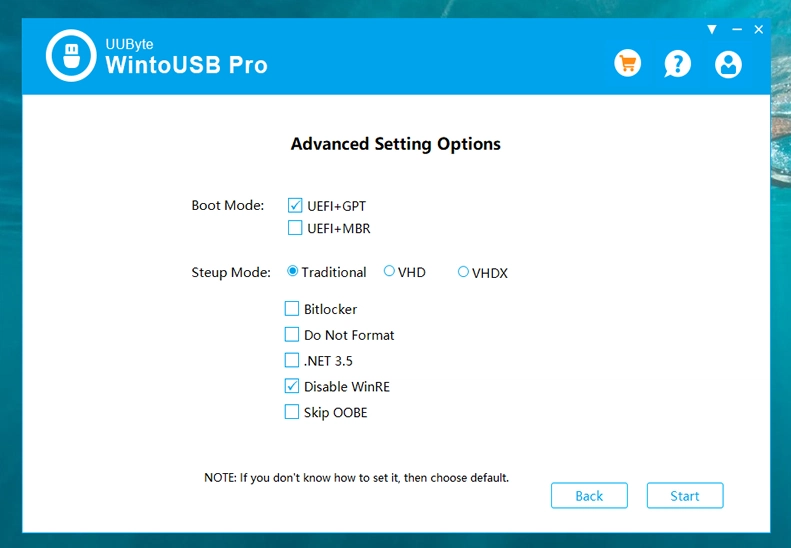
Step 6: Click the Start button to create a Windows To Go USB drive with WintoUSB Pro. For a USB 3.0 drive, it should be done in less than 15 minutes.
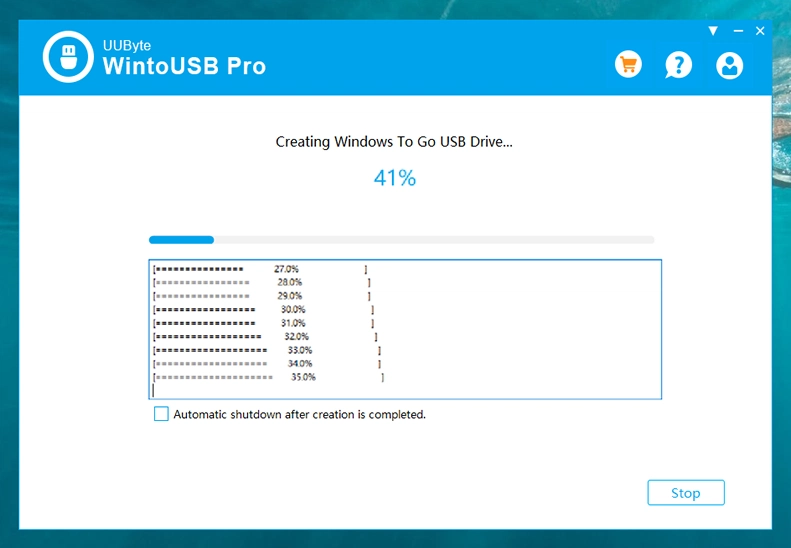
Once the above process is finished, a working Windows To Go USB drive is successfully created. As you can see, it is much easier to do with UUByte WintoUSB Pro.
6. How to Boot PC from WTG USB Drive
Once you have created a WTG device, it's time to boot your computer from it and start the Windows installation process. Currently, you have two options to boot a WTG USB on a computer.
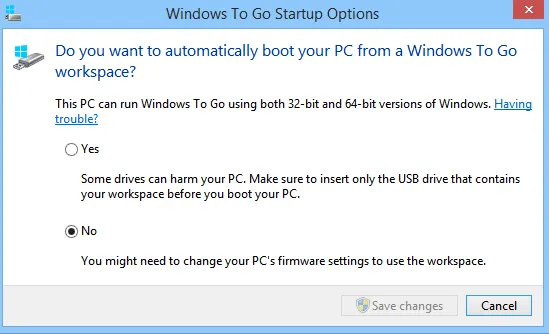
Change Windows To Go Startup Options: open Windows search bar on your PC and type Windows To Go Startup. Go with the second result (Change Windows To Go Startup Settings), select Yes inside and then save the changes. Please note, whenever your computer will start, by default, it will look for the external drive to boot up.
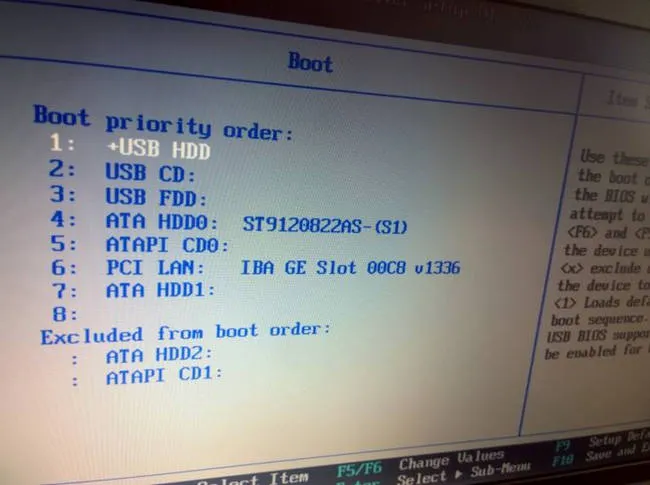
Change Boot Order from BIOS: Press F2 or other function keys during bootup on your PC to go inside BIOS setup. Navigate for Boot section and find Boot priority order and then select USB as the 1st boot choice.
7. How to Use Windows To Go USB Drive
Now, we are going to the final step of this time-consuming task. The USB drive is still not usable until now because Windows OS is not installed yet. You have to complete this process before using this WTG USB.
Step 1: When your computer first boots from Windows To Go USB, Windows installation setup program will appear on the screen.
Step 2: Please select the language, time zone and add a new user account during the installation process. You will be asked to input a product key to activate Windows. If you don't have one, please skip this part during installation.
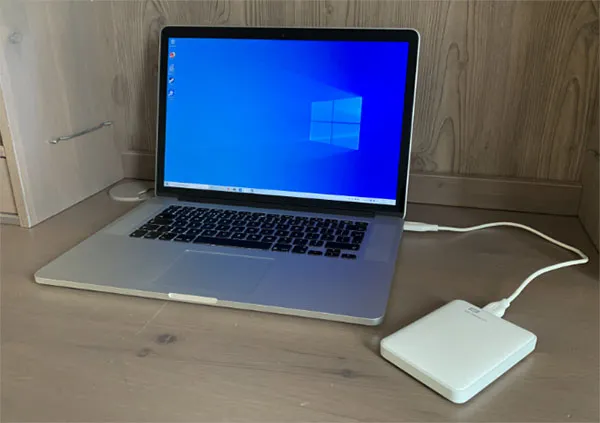
Step 3: You have to wait about 10 minutes, may be longer, before Windows installation is done. Now, you are able to get into desktop.
Step 4: Please go to Windows Device Manager and find the hardware with missing drivers. The most important is network driver. Please download and install the driver to make the WTG fully functional.
Summary
Hopefully, the above-given information helped you make a portable Windows To Go USB drive. However, the built-in WTG Creator provided by Microsoft, restrict you to create WTG USB using other versions of Windows OS. Also, it enforces you to choose the certified WTG USB drive.
To overcome all these limitations and to get a wide range of flexibility, we recommend using UUByte WintoUSB Pro instead. It has full support for all Windows versions and non-certified USB drives. Also, it has a much faster reading and writing speed. This will save you a lot of time during the creation process.

Petty is editor in chief at UUByte and writes various topics about Windows and Mac to help people make the most of current technology.