
Sometimes you lose access to existing OS and look for an alternative. But unfortunately, you don't get any option rather formatting the drive. Also, if you love travelling, then carrying a laptop along with you is such a headache. To overcome these problems, Microsoft released a new feature called Windows To Go (WTG) , which offers a seamless way to run Windows directly from USB drive. This is a great solution for traveling workers, system administrators and contractors.
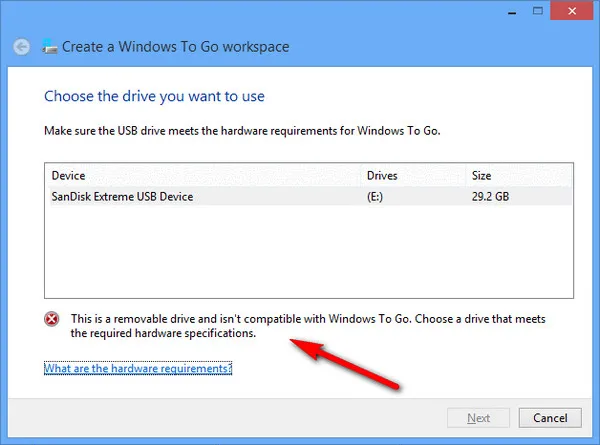
But the issue is that the official Windows To Go feature can only install Windows OS on WTG certified USB drives according to Microsoft documentation. On top of that, you can only install a limited edition of Windows OS on that verified USB. And if you try to experiment with a non-certified USB flash drive through Control Panel, you will get the following error message: "This is a removable drive and isn't compatible with Windows To Go. Choose a drive that meets the required hardware specifications".
But no need to worry at all, because here, we have provided a 100% working method to create Windows To Go with a non-certified USB flash drive. So let's go inside to know the trick.
What's Windows To Go?
Windows To Go, in short, it is called WTG, is a portable operating system that can be installed on an external USB or hard drive. And then you can run Windows on any computer as a portable OS and can perform the same task as you do with a regular Windows OS on an internal hard disk. Currently, the feature is officially supported in a limited version of Windows OS such as Windows 8 Enterprise, Windows 8.1 Enterprise, Windows 10 Education & Windows 10 Enterprise.
About Windows To Go Certified USB
A WTG certified USB is different from a normal USB device. Certified USB is specially built to read and write the OS files at high speed. It is enabled to execute input and output operations for a large number of files per second which is needed to run the OS smoothly.
Pros of Certified USB Drive
- Optimized reading and writing speed for running Windows OS .
- Support multiple ramdon I/O operations at the same time.
- More durable because of special design by manufacturer.
- Work nicely with built-in Windows To Go Workspace Creator utility.
Cons of Certified USB Drive
- Only available from limited brands and models (IronKey, Kingston, Spyrus, Super Talent and Western Digital).
- Much more expensive for the same volume .
- The official recommendation list discounuted and no future update.
Simply put, it is hard to get a certified USB drive these days and even you managed to do that, it is much more expensive than non-certified USB drivers, which is also capable of running Windows OS.
The truth is that there are more user friendly solution other than the official tool from Microsoft. There are a couple of third-party software that supports creating Windows To Go device from non-certified USB drives such as Samsung Bar Plus, SanDisk Extreme Pro. They are much cheaper and easy to get one. We will share the details in next part.
How to Create Windows To GO Drive on Non-certified USB
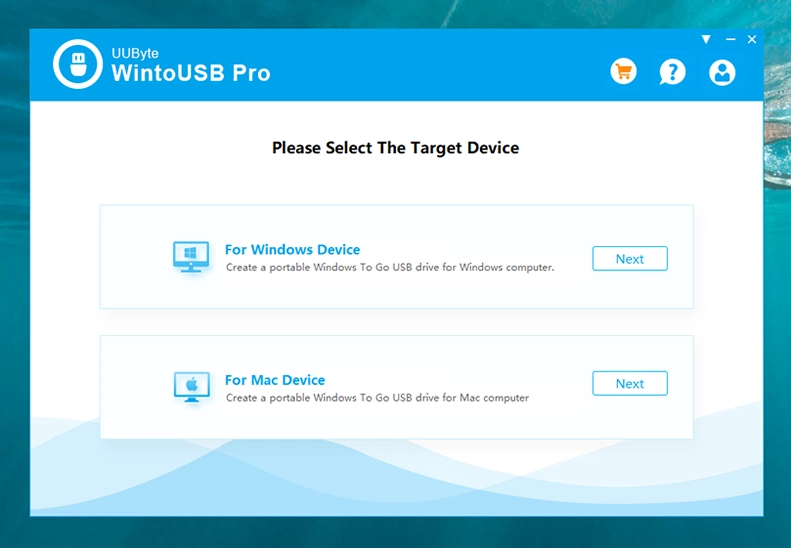
Legally, Microsoft allows creating Windows To Go drive on certified USB only. But no need to worry, because there are many alternatives available to create WTG on non-certified USB. And here, we are going to create portable Windows To Go device with a non-certified USB device by using UUByte WintoUSB Pro.
It is a professional utility that allows you to create Windows To Go drive in easy steps. Let's see, how you can create a WTG portable drive with a non-certified USB drive.
Step 1: Get ready by downloading and installing UUByte WintoUSB Pro setup file from this website.
Step 2: Connect the USB drive to the PC and click the first option after launching WintoUSB Pro.
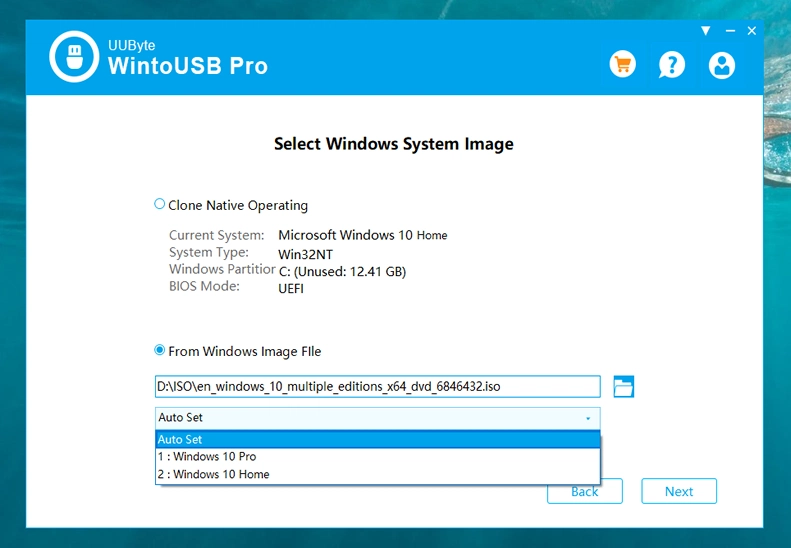
Step 3: Inside the interface, check "From Windows Image File" and click the folder symbol to browse the ISO image source from your computer and then select the OS version from the drop-down given immediately below to "Image File" section. Click on the Next button to go ahead.
Step 4: It will ask you to select the destination disk, just click on the refresh icon given beside and then select your inserted USB using the drop-down menu.

Step 5: You will get a pop-up message immediately and there, Now, press the Yes button and wait for some time until the tool format the selected USB device.
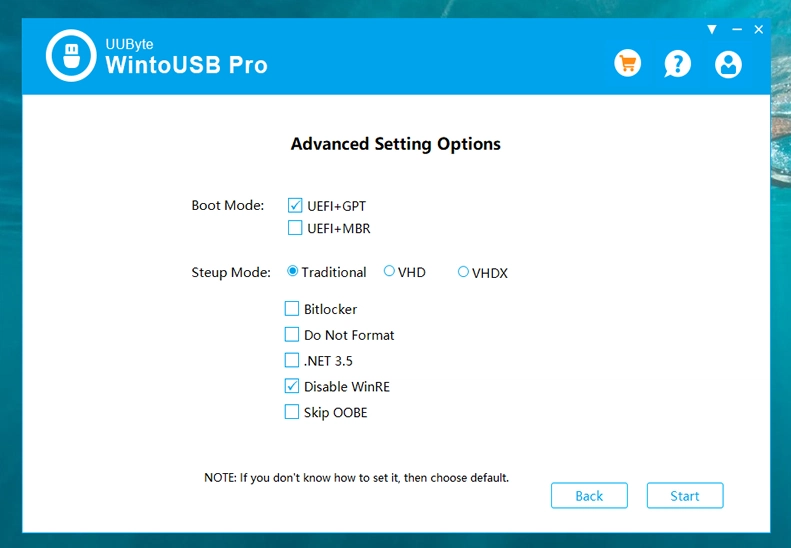
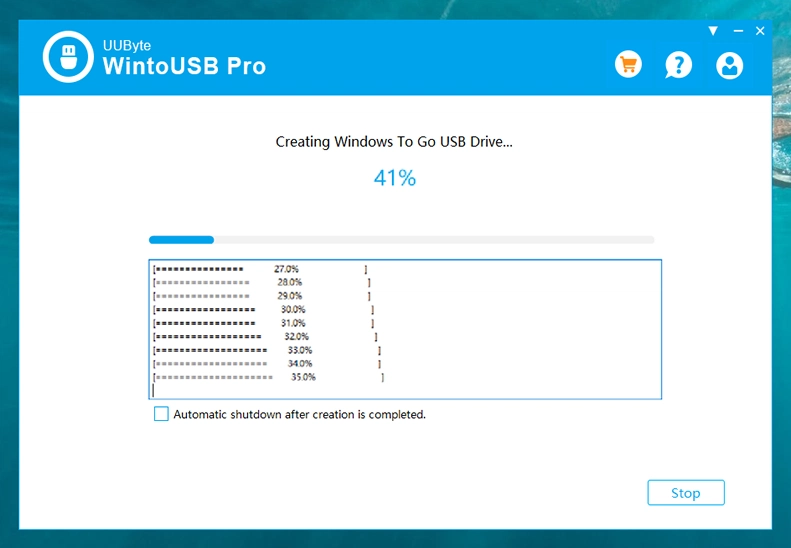
Step 6: After completing this process, navigate to Boot Mode and Setup Mode, you need to leave the default options. Finally, click on the Start button to allow WintoUSB Pro to burn Windows ISO file to inserted USB drive. It may take a bit longer time in copying the files, which depends on the speed of your chosen USB.
Now you ready with a Windows To Go on a non-certified USB flash drive that can be used on any computer by changing the booting preferences of that machine.
WintoUSB Pro is the super easy tool to create Windows To Go on both certified USB and non-certified USB drives. Itl also allows you to create a WTG portable device using any edition of Windows OS like Win7, Win 8, Win 10 or Windows Server.
How To Install Windows To Go on Non-certified USB Drive
The above process has successfully written Windows OS files to the destination USB drive. To fully run Windows from external USB, you have to finish the installation process first. Please instert the Windows To Go USB on a working computer and change the boot order in BIOS. This will allows this computer booting from USB this time instead of the internal hard drive.
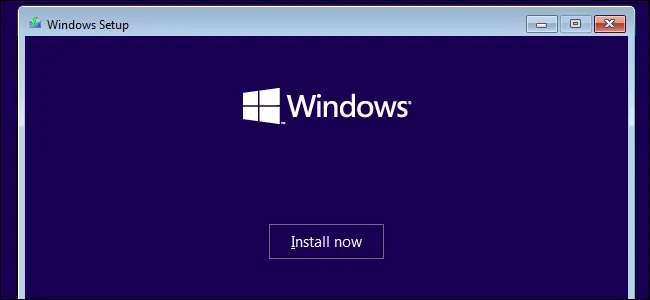
Now, Windows installation wizard starts and you need to wait 1-3 minutes before seeing the visual user interface. Once the Windows setup window shows up, click the Install Now button to start Windows installation process. Usually, it will take 10 minutes or so to complete the installation on a USB 3.0 flash drive.
After installation, you can now run Windows from non-certified USB drive as it was on an internal drive. However, it could be a big laggy on USB 2.0 drives. Plus, if some of the hardware were not working very well, it means the device driver is missing. Just go to the official site and install the driver as required.
Wrapping Up
Hope the above tutorial helped you successfully create a Windows To Go device with a non-verified USB drive. However, apart from the built-in Windows To Go Creator, UUByte WintoUSB Pro is the best you could find, which gives you full flexibility to create a portable Windows USB. Let us know if you want to experiment with some other methods.

Petty is editor in chief at UUByte and writes various topics about Windows and Mac to help people make the most of current technology.