
Since the introduction of Windows 11, Microsoft has made it extremely easy to upgrade Windows 10 to Windows 11 by providing a handful of useful tools. Windows 11 Installation Assistant is one such tool which makes that entire updating process a breeze.
What is the Windows 11 Installation Assistant
Windows 11 Installation Assistant is the official app developed by Microsoft that is used to update a Windows 10 PC to Windows 11 without data loss. It first checks your PC for compatibility required by Windows 11 OS, and if it passes the check, then Windows 11 Installation Assistant starts to upgrade the PC to Microsoft's latest operating system, Windows 11.
Windows 11 Installation Assistant is simple and easy to use, and is targeted towards non-technical users. Unlike when you are doing a clean install using a bootable USB, you don't need to boot into your PC using this tool since it can be used directly from the desktop.
In this article we will show you how to use Windows 11 Installation Assistant, what troubleshooting steps you can perform if the tool stops working, and a couple of alternative tools, in case it doesn't work for you for some reason.
How to Use Windows 11 Installation Assistant for Windows 11 Upgrade
Before you start using Windows 11 Installation Assistant, there are a couple of things you need to remember.
First, you should have a valid Windows 10 license and the current PC must meet all the requirements of running Windows 11. In addition, the computer must have the latest edition of Windows 10 at least Windows 10 2004. Lastly, this device must have 9GB of free space on the internal hard drive.
Once you have checked all of these conditions, you can read the following instructions to know how to use Windows 11 Installation Assistant tool for system upgrade.
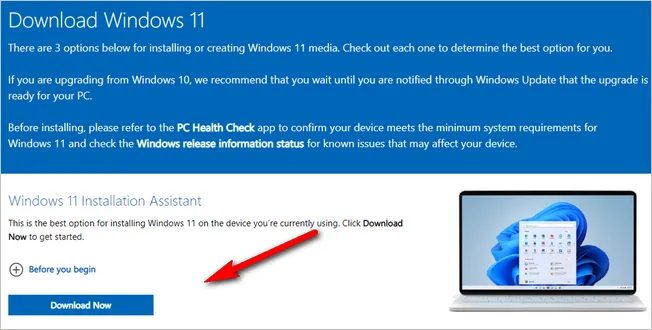
Step 1. Head over to the official page for downloading Windows 11; then click on Download Now button and save the tool on your desktop.
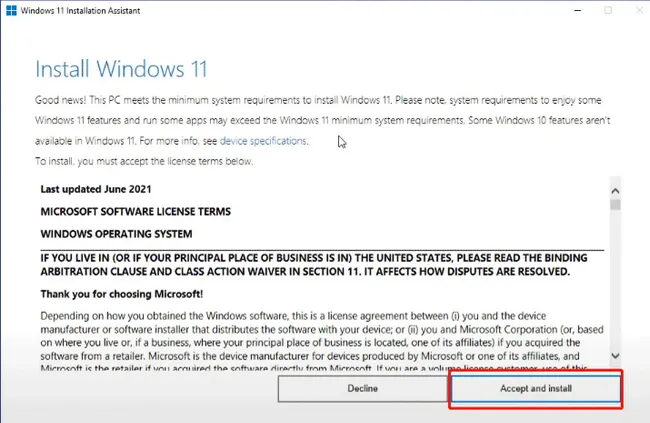
Step 2. Double click on the EXE file to launch Windows 11 Installation Assistant. At this time, it first checks if the computer meets all the requirements of Windows 11.
Step 3. If the computer passes the check, it will show a license agreement window where you need to click on Accept and Install.
Step 4. Now, the tool will start downloading Windows 11 ISO file. This might take a while depending on your internet speed.
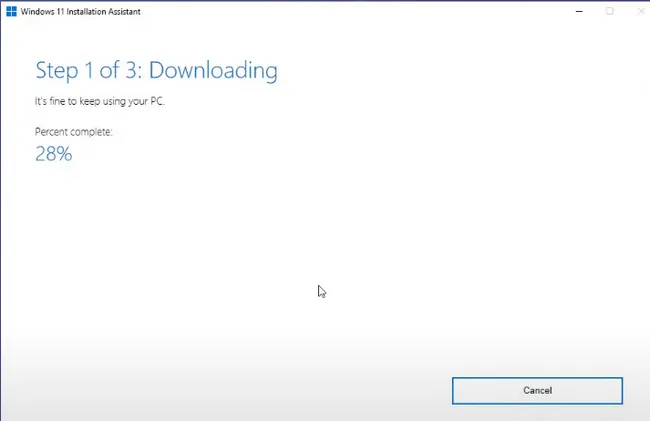
Step 5. Once the files have been downloaded, Windows 11 Installation Assistant starts installing Windows 11 on this PC automatically. Just make sure your computer is not turned off during the entire process, and close and save any open work that you might have
Step 6. After the process completes, it will give you the option to restart your computer. Click on the Restart Now button, but make sure your computer is plugged in to a power source.
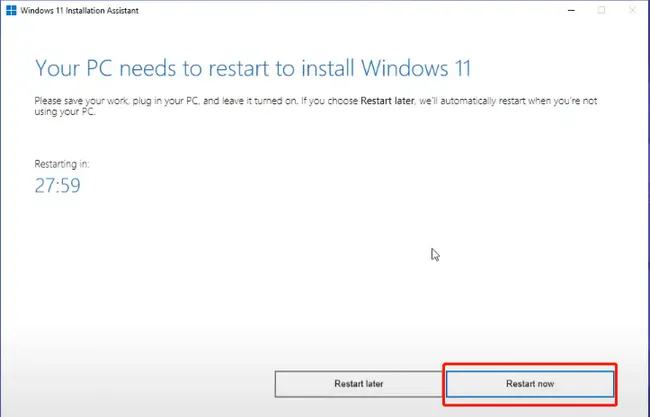
Step 7. Your computer will start working on the updates, it might restart a number of times automatically but you don't need to do anything other than just waiting patiently. Once the process ends, Windows 11 will be successfully installed on your computer.
Windows 11 Installation Assistant Troubleshooting
At times it may happen that the Windows 11 Installation Assistant tool stops working, or refuses to open. The window will show up on the screen for a couple of second, then close automatically. This will happen every time you try to open the tool. There is a simple solution for this problem which we will be discussing here.
Right click on the EXE file of the Windows 11 Installation Assistant that you had downloaded and click on Properties from the context menu the pops-up.
From the Properties window that opens, click on the tab named Compatibility. Under Compatibility Mode section, check the option that says "Run this program in compatibility mode for:". After that, select the option for Windows 7 from the dropdown below this checkbox.
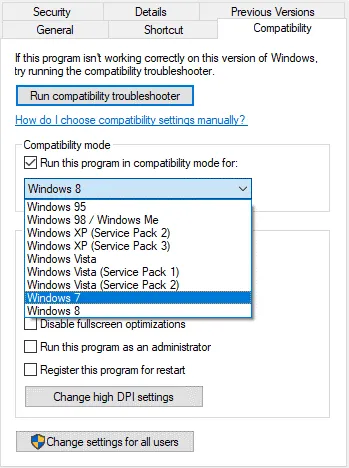
Once done, click on Apply, then click on OK for the changes to take effect. In majority of the cases, these steps solve the problem.
Windows 11 Installation Assistant Alternatives
In case the troubleshooting steps given above does not work for you, then you can use some other alternative tool instead of Windows 11 Installation Assistant in order to upgrade to Windows 11.
Windows 11 Installation Assistant Alternative #1: Windows 11 ISO Download
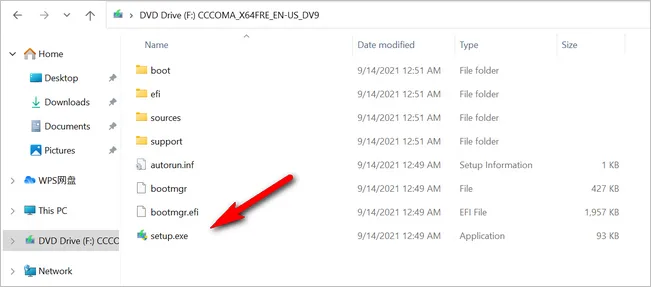
This is more of a service from Microsoft than a tool. You can download the ISO image files for Windows 11 from Microsoft's own website. Once you have the ISO file, you can double click on it to open it like a folder, and click on setup.exe to start the upgrading process.
Windows 11 Installation Assistant Alternative #2: Media Creation Tool
Windows 11 Media Creation Tool is the official tool from Microsoft for doing a clean installation of Windows 11 on a PC. It hels you create a bootable USB for Windows 11. Then you can then boot the PC from USB and start installing Windows 11 on your PC.

Windows 11 Installation Assistant Alternative #3: Bootable USB Creator
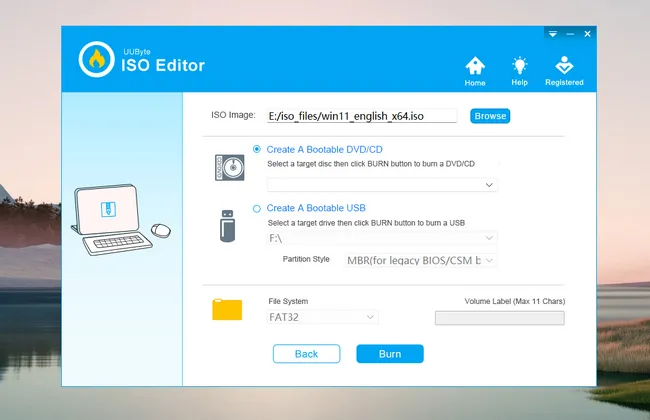
Media Creation Tool is greta but it still has bugs and issues. However, there are dozens of similiar tools availale for the same purpose, including UUByte ISO Editor, Rufus, UNetbootin and so on. They are all called bootable USB creator, a type of system utility aimed to create bootable USB from Windows ISO. They are much more user-friendly and take less time for the same job when comparing to Media Creation Tool.
Now you should be able to upgrade the PC to Windows 11 with the help of Windows 11 Installation Assistance tool.

Petty is editor in chief at UUByte and writes various topics about Windows and Mac to help people make the most of current technology.