
Now that Windows 11 is officially out from beta, everyone can download and install it to give it a spin. However, it is still in its nascent stage and thus, can be full of bugs. Also, for those whose PC does not support Windows 11, they too can bypass hardware checking to install Windows 11 on unsupported PC. But what if you do not like what you see, yet, and would like to go back to using Windows 10? Here are 3 methods using which you can downgrade from Windows 11 to Windows 10.
Warning: Please back up data saved on Windows 11 before downgrade starts.
Downgrade Windows 11 to Windows 10 from Stock Go Back Feature
Windows 11 has a stock feature to let you roll back to Windows 10. However, it can be applied only if it is within the first 10 days that this computer was upgraded to Windows 11 from Windows 10. Beyond that time perid, it will not work. Although this method isn't supposed to delete your data files, it would be best if you would still back them up first.
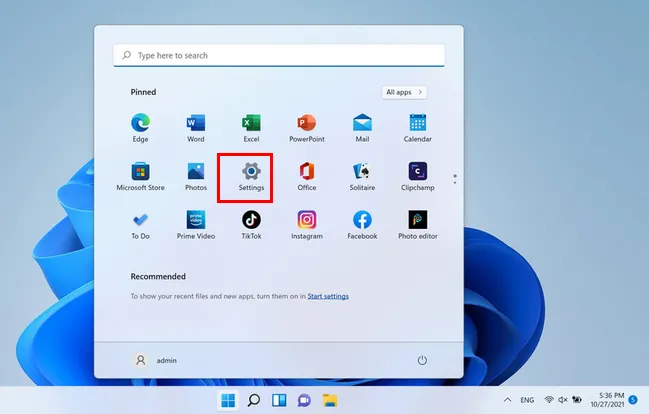
First, click Start menu located at the bottom of Windows 11 desktop and open Settings app from there. This will bring up a new window called System.
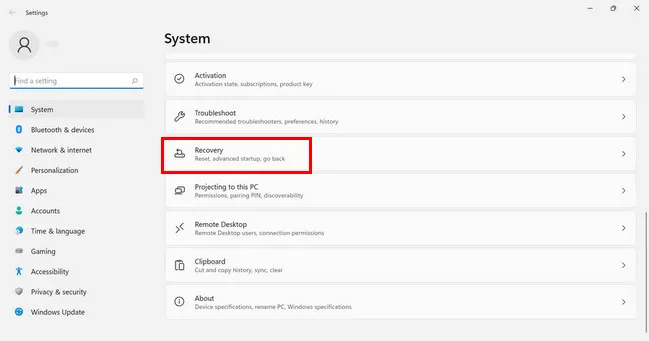
Under System tab, Go over to Recovery menu by scrolling down the page a little bit.
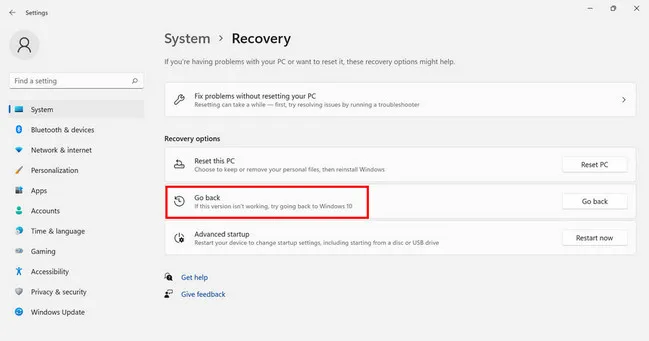
Inside Recovery you'll find the button that says Go Back, that's exactly what it does. It takes you back to Windows 10. Click on this button.
This will show you another window containing reasons because of which you might be reverting to Windows 10. Select a reason and click Next.
Finally, it will thank you for trying Windows 11. Click on the Next button here. Now it will begin the process of downgrading Windows 11 to Windows 10. Once the process completes, your PC will restart, and go to a Windows 10 desktop this time.
How to Downgrade Windows 11 to Windows 10 via Clean Install
As the name suggests, this method is for those who have been using Windows 11 beyond 10 days, but would still want to downgrade Windows 11 to Windows 10. In this case, the first method will not work, you can try the second method to check if it does. If it doesn't, you can go ahead with a clean Windows 11 install. And this will be 100% working. However, do note that this method has high chances of data loss, so don't forget to take a backup of your data.
Step 1: Download Windows 10 ISO file from the Microsoft.
https://www.microsoft.com/en-us/software-download/windows10
Step 2: Use a tool like ISO Editor to create a bootable USB for Windows 10 using the ISO file you just downloaded. For that you need to download ISO Editor and install it on your PC.


Step 3: Now, insert the blank USB flash drive . Next, open the ISO Editor utility, then click on "Burn ISO" button and the "Browse" button to select Windows 10 ISO image.
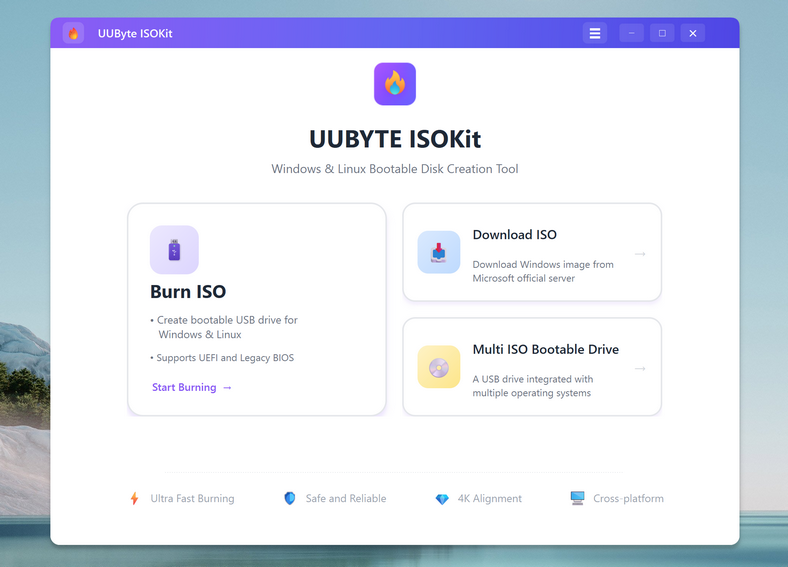
Finally, click on the "Start" button to create a Windows 10 bootable USB from ISO file.

Step 4: Restart the PC and boot from Windows 10 install USB with the help of Quick Boot Menu.

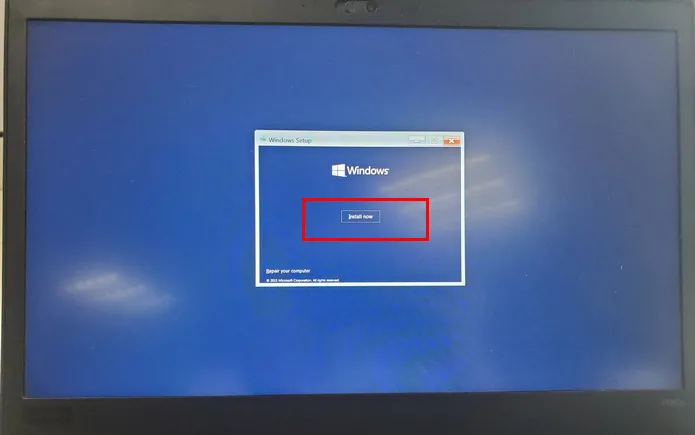
Step 5: Once the PC boots up into Windows 10 setup, you'll see an Install now button. Click on that and follow the instructions on the screen to clean install Windows 10 on your PC.
These are two effective ways to help you downgrade Windows 11 to Windows 10. Make sure back up the important data and files before getting started!

Petty is editor in chief at UUByte and writes various topics about Windows and Mac to help people make the most of current technology.