
While installing Windows on Mac via Boot Camp is easy and straightforward, the process of migrating Boot Camp partition is a different story. This is a very necessary step when switching to a new Mac. Creating a new Boot Camp partition results in a complete reset of current Windows 10 settings and apps. Hence, a lot of Mac users are seeking a more safe way to copy boot camp partition from old Mac to new Mac.
In fact, there are ways to pull this off, but many of them are unknown to many folks or require some technical knowledge. With that in mind, we are here to help. In this guide, we are going to walk you through the steps on how to migrate a bootcamp partition to a new Mac. Keep in mind that you cannot use Time Machine to restore or migrate a Boot Camp partition to a new Mac machine, so don't waste time on it.
Winclone: Clone and Migrate Boot Camp Partition The Easy Way
Winclone is the most popular software when it comes for Boot Camp backup, restore and migration. You can easily migrate a Boot Camp partition to a new Mac in minutes. The app is powerful, easy to use, and compatible with all macOS versions. However, it is not free as it now costs $49.99 for a lifetime license. Basically, this is best solution out there for Boot Camp migration.
Note: To make the process much easier, you need to create a Winclone image of existing Boot Camp partition on old Mac. Here is how
Part 1: Create Boot Camp Clone on Old Mac
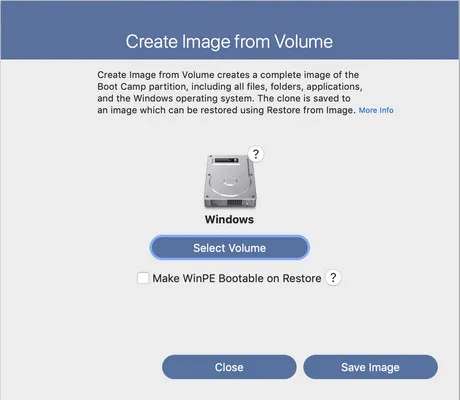
Step 1: Open Winclone and then select 'Create Image from Volume'.
Step 2: Select where you want to save the image and click 'Save Image'.
Step 3: Enter a name for it and hit 'Save'. Now a Boot Camp copy is generated.
Once the backup process is done, you need to create a Boot Camp partition on new Mac and then restore Winclone image to that partition. Here is how.
Part 2: Migrate and Restore Boot Camp Partition on New Mac
Step 1: Open Disk Utility on your Mac and then select the disk from the left-side bar.
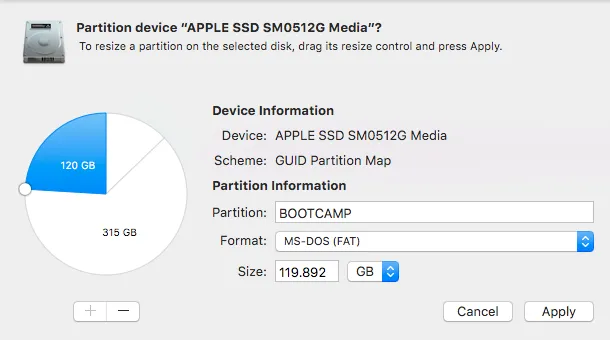
Step 2: Click the partition button. From here, click "+" below the pie graph and a new partition should be created. Select desired partition size by dragging the handle on the slice to your liking, and change the name to BOOTCAMP, set the format to MS-DOS (FAT) and hit Apply. Make sure the partition volume is large than the one on your old Mac.
Step 3: From the confirmation window, check which partitions will be added, erased, and resized and hit Done to finish creating a Boot Camp partition on new Mac
Step 4: Once you have a Boot Camp partition on your new machine, restore the Winclone image to it. To do this, select Restore Image from the Winclone main user interface and select the image you created.

Step 5: The destination should be your newly-created Boot Camp partition and hit the Restore Image button. The restoring process should begin and migrate old bootcamp partition to new Mac.
Termial: A Free but Complex Solution to Migrate Boot Camp Partition to New Mac
Terminal is a powerful weapon when completing advanced tasks on Mac. If you want to play around with some command lines, then you can use a Terminal utility to migrate your Boot Camp partition to a new Mac. However, the process might be a little bit complex to some users, so make sure you follow our steps carefully below.
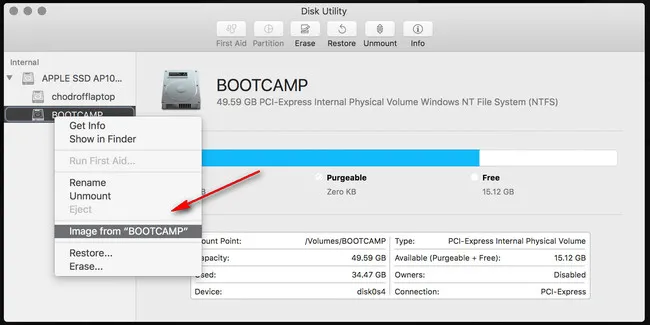
Step 1: First off, you need to get the image from current Boot Camp partition. To do this, open Disk Utility, then right-click on BOOTCAMP partition from the left-side bar and select 'Image from BOOTCAMP'. Save this file to somewhere on your Mac.
Step 2: Copy this file to your new Mac and it should serve as a dmg backup file. From here, you need to convert that file into a byte by byte format that the dd Utility can recognize.
Step 3: In this case, we are going to use hdiutil to convert your dmg file. To do this, open Terminal on your Mac and run the following command:
hdiutil convert -format UDTO -o BOOTCAMP.img BOOTCAMP.dmg
Step 4: Now, run Boot Camp on your new Mac and re-install Windows 10 through it. Once you are done, reboot your Mac and boot it back in and open Disk Utility.
Step 5: From here, right click on your Boot Camp partition and select Get Info from the list. From here, you should see all the information about BootCamp disk.
Step 6: Open Terminal and run this command (rdisk0s4 is the name of your BootCamp disk):
sudo dd bs=1m if=BOOTCAMP.img of=/dev/rdisk0s4
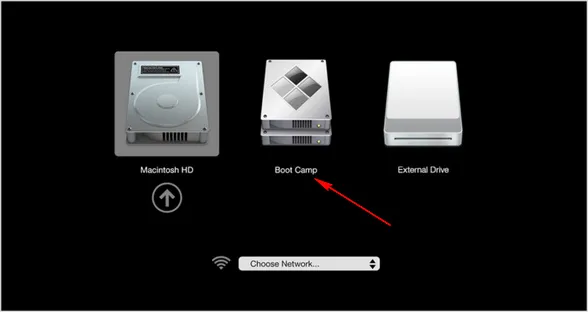
Step 7: This may take several minutes to complete. Once it is done, reboot your system and press Option + R while your device is booting up and select Windows Boot Camp partition.
Parallels Desktop: An Indirect Method to Transfer Boot Camp Partition to New Mac
Parallets Desktop is a well-known macOS virtual machine software. If the above solutions do not work for you, then you can import Boot Camp partition into Parallels Desktop virtual machine and transfer BootCamp partition to new Mac.
Step 1: First off, you need to create a virtual machine based on your current Boot Camp partition. To do this, open Parallels Desktop > File > New > Use Windows from Boot Camp, then follow the on-screen instructions to complete the setup. Once you are done, start your new virtual machine and let Parallels Tools do the rest of work.
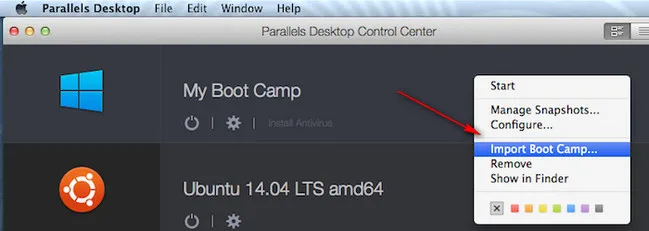
Step 2: Open Parallels Desktop Control Center and right click on your newly-created virtual machine and select 'Import Boot Camp...'.
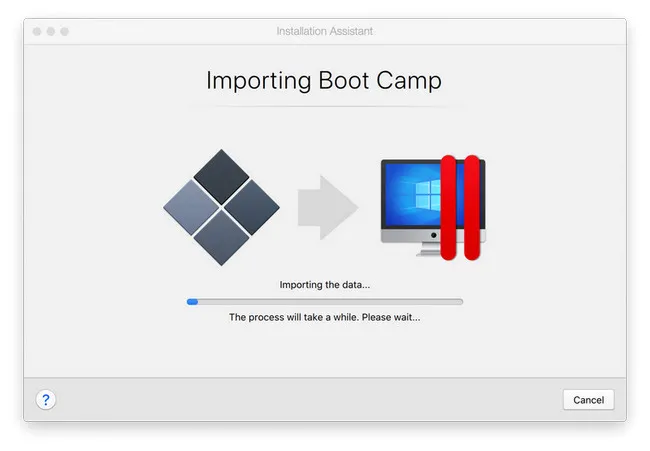
Step 3: Parallels Desktop will now import your selected Boot Camp to the virtual machine and let you know when it is done. Now, you can transfer Parallels Desktop virtual machine to r new Mac using an external drive. make sure Parallels Desktop is installed on your new Mac.
If you do not have an external drive, you can use the File Sharing feature on macOS. To do this, head over to System Preferences on both of your Macs, then select Sharing > File Sharing. Now, open Documents > Parallels folder on your old Mac and copy your Boot Camp Windows partition. Once you are done, open the Finder on your new Mac, then login with your guest Mac credentials > Documents > Parallels > paste the Boot Camp file to the guest Mac.
Summary
Migrating Boot Camp partition to a new Mac could be tricky task if you planned to use command line option to get it done. However, it is a lot of easier when you chose a premium solution such as the dedicated app Winclone or virtual machine software Parallets Desktop.

Petty is editor in chief at UUByte and writes various topics about Windows and Mac to help people make the most of current technology.