
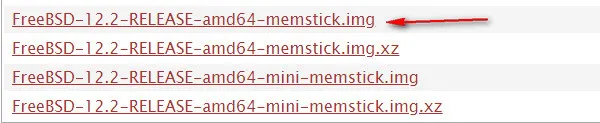
IMG is a raw disk format similiar to ISO, which is largely used for compressing operating system files in to a single one. We know some of the well-known OS are using .img as the release file, such as FreeBSD and Raspberry Pi.
Unlike ISO, it is much more challenging to burn .img to USB drive due to technical limitation. In this article, you will know to create a bootable USB drive from .img file for different operating systems in the market, including Windows, Mac, and Linux. So, no matter which OS you are using, just move to the particular section and then perform the burning task. So, let's begin the journey.
Burn IMG to USB via DMG Editor (Recommended)
Honestly, there are dozens of img burning software that are still active in nowadays but it is really hard to find the best if you are new to this field. Our work is to make sure the best candidates are listed in here. So we go with the best one first.
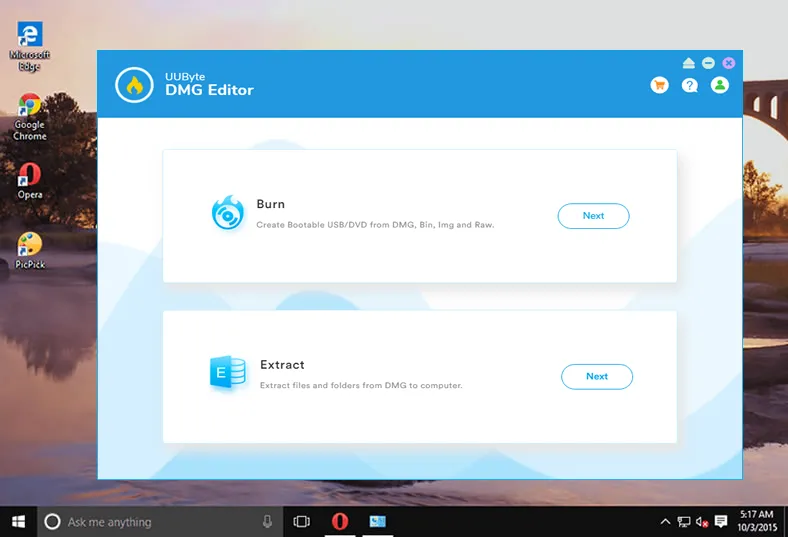
DMG Editor is a powerful disk image burning tool that works on latest Windows and macOS under graphics user interface. The feature makes it differerent from others is that it supports more than 10 image file formats such as IMG, ISO, DMG, ZIP, BIN. Moreover, it is an user-friendly program because the interface is very smooth that helps the users to get the result quickly.


Step 1: Software Download
Download UUByte DMG Editor and Install it on a PC or Mac. Now, insert the USB drive on that computer and launch UUByte DMG Editor.
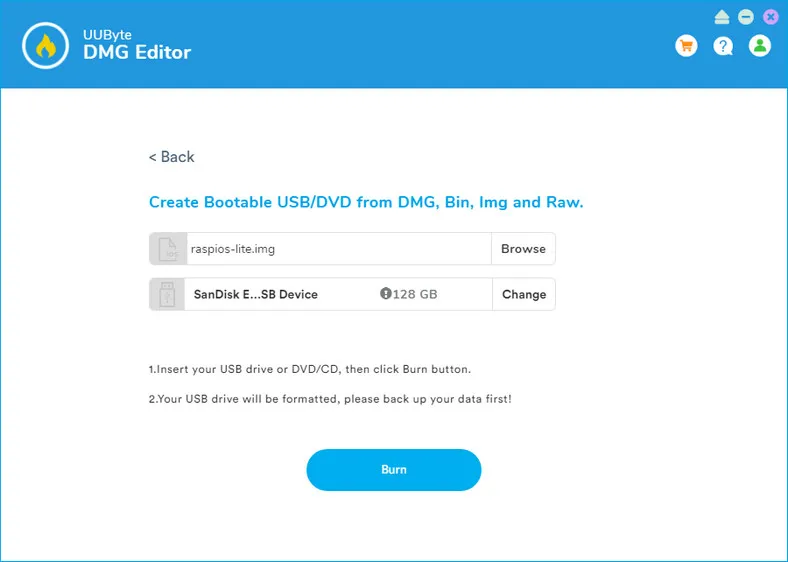
Step 2: Import .img File
On the main interface, you will see Browse button, USB drive icon, and Burn button. Now, click Browse button and then upload the img file. Move to USB drive section, where you need to confirm that the correct USB drive is selected.
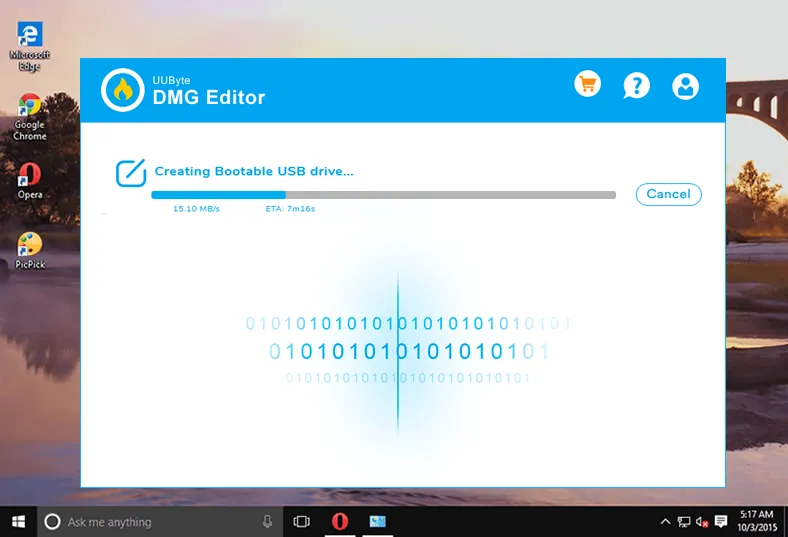
Step 3: Burn IMG File to USB
click Burn button to start burning .img file to USB drive. Your job is done and within 3-5 minutes the task will be accomplished successfully.
UUByte DMG Editor is one of the greatest image burning software that is embedded with advanced features so that both Windows and Mac users can burn any image files comfortably. Apart from burning the .img file, you can extract the same and can customize it as per your convenience. Hence, it is a complete package to handle disk image file.
For Windows: Burn IMG to USB via Win32 Disk Imager
Win32 Disk Imager is a free open-source tool hosted on SourceForge that enables Windows users to write a raw image file to external drive. Through this utility, you can burn .img files to a USB drive, SD Card, CF card, and many more. So it is a very popular software for embeded development. Besides image burning, it is also capable of backing up external drive as a raw disk image.
Step 1: Download Win32 Disk Imager and install it on your computer. The file size is 12MB, so the download process will be completed in no time.
Step 2: Launch Win32 Disk Imager and it will automatically start detecting the .img file on your computer. However, if you want to manually upload a .img file, then click on the folder icon and then upload the file.
Step 3:You need to select the USB drive, so make sure that you have inserted the USB drive to your computer properly and then click on the Devices section listed in the main interface of Win32 Disk Imager to select your USB drive.
Step 4: After that, click on the Write button. Soon, a progress bar will appear on the screen and it will show the transfer speed.
Step 5: Once, the process gets completed, a pop-up window will appear stating that write is successful. Now, close the application and then remove the USB drive.
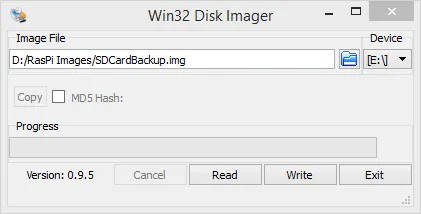
Win32 Disk Imager supports Windows as well as Linux OS, so if you access anyone, then this tool is ideal to burn .img to a USB drive. The interface is very smooth and the installation process takes very little time. However, Win32 Disk Imager does not support the macOS.
For Linux: Burn IMG File to USB Drive via Command
Linux is an operating system that mostly runs on command-line. So, if you access Linux and hold a good grip with the commands, then this method will help you to burn .img to USB drive successfully. In this method, you just need to follow the commands and your job is done.
Step 1: Connect your USB to the computer and then launch Terminal app.
Step 2: Find out the name of the USB drive and for that, type the command listed beneath.
ls -l /dev/disk/by-id/*usb*
Step 3: You will get the list of drives attached to your computers, such as sdb, or sdb1. Now, you need to unmount the USB drive through the command.
umount /dev/sdb
Step 4: The final step, i.e. write raw disk to USB and the command is:
dd if=/path/to/file/downloaded of=/dev/sdb
Note: Here, sdb denotes the name of the USB drive and you should change it to the right one detected in the second step.
Linux commnad line is very useful because it gives the perfect result. But, if any mishap happens, then you won't get the result. So, before choosing this method, think twice, and if you are not comfortable with the terminal, then you can go with Win32 Disk Imager.
For Mac: Burn IMG to USB Drive in Terminal App
Mac users can easily burn .img to USB drive via Terminal app. It is also a command-based method similiar to Linux. Mac supports both img and dmg file and it treats equally, the only difference is that the img file was earlier used in Mac and now dmg is in trend. Terminal is an inbuilt utility of Mac that enables the users to perform ample tasks smoothly.
Step 1: Insert the USB drive on your Mac and then launch the Terminal that is listed in the Application section followed by the Utilities.
Step 2: Now type the command to figure out the name of the USB drive.
diskutil list
Step 3: Thereafter, you will get the list of drives and the name of the USB drive will be represented as dev/disk3
umount /dev/sdb
Step 4: Now, unmount the USB drive through the command.
diskutil unmountDisk /dev/diskZ
Note: Here, Z is the name of the USB drive and you must provide your USB drive name by replacing alphabet z.
Step 5: You need to burn .img to a USB drive and the command for the same is listed below.
sudo dd if=inputfile.img of=/dev/rdiskZ bs=1m
Step 6: Your job is done and to remove the USB drive type the command provided below.
diskutil eject /dev/diskZ
This command-line method of Mac is very effective for burning IMG file to USB but it is applicable for those users who have good knowledge of commands. If you make any mistake in any command, then you will not get the result. So, if you are a mere novice, then better skip this method and go with UUByte DMG Editor.
The Bottom Line
These are the 4 efficient methods to burn .img file to USB drive. If you are a Windows user, then both UUByte DMG Editor and Win32 Disk Imager are good for you as it is a light software that gives the best result. However, if you are a Linux user, then the command-line is an ideal method for you. But if you are using Mac to burn .imge file and need an instant result, then UUByte DMG Editor is perfect for you. Now, select the tool as based on your OS and start creating a bootale USB from IMG file.

Petty is editor in chief at UUByte and writes various topics about Windows and Mac to help people make the most of current technology.