
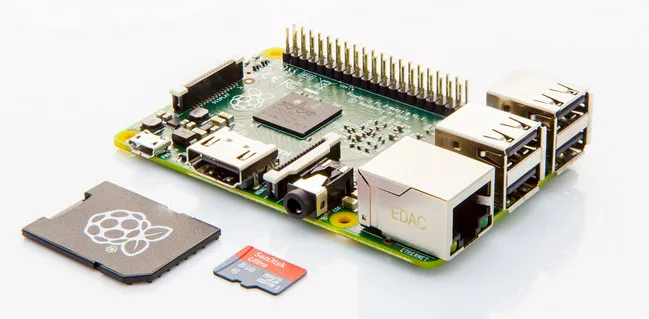
Secure Digital Card (SD Card) is mostly used to store the files and media on mobile devices like smartphone or tablet but in new technological era, various Single-Board Computers (like Raspberry Pi) or Small Board Computer (SBC) are coming out and this boosts the demand of SD Card because it can run a target OS from SD card for computing and programming, which is more affordable when comparing to desktop computers and laptops.
To extent the functionality of those mini computers, you have to install an OS on it via SD card. And most of Raspbian and other operating systems are distributed via .img file, a well-known file type for OS installation. You need to burn .img file to SD Card and thus it will become a bootable one and then you can insert it on Raspberry Pi or other similar mini computers to access the features of macOS. As you may be not aware of, we have done a similar topic for Windows PC, now it is time to introduct a full tutorial on how to burn .img file to SD card on Mac, which is slightly different from Windows.
Get Yourself Prepared First
Before getting started with burning process, there are a couple of things you should prepare for.
Download .IMG File: Always download the OS installation file from official channels. Download from third-party resources may cause file corruptions or contain virus/malware/adware/spyware.
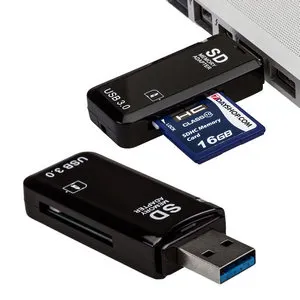
Buy SD Card Reader or USB Adapter: Most of Mac computers from 2016 and later don't have SD card slot in default. So you have to buy or borrow an SD card reader to use it on Mac. Make sure the card reader is compatible with your card, which can be SD, SDHC or SDXC.
Format SD Card on Mac: The SD card is formatted to exFAT in default when it is shipped but some of the OS like Pi OS can only boot from FAT file system. So you need to format the USB drive to MS-DOS (FAT). You can do this in Disk Utility app.

Method 1: Burn .IMG File to SD Card on Mac with DMG Editor
UUByte DMG Editor supports burning a bunch of images files to SD card, including IMG, ISO, BIN, ZIP and many more. And the SD Card will be bootable after burning. Honestly, it is one of the best tools on Mac for creating bootable media devices for OS installation. You can hardly find any competing apps like UUByte DMG Editor as Mac has a strict policy for app distributions.
In addition, this application has a polished UI so you can completes the task in no time. Moreover, it supports the latest macOS like Big Sur, Catalina and Mojave. Now, let's see how to use UUByte DMG Editor to burn .img to SD card on Mac.


Step 1: Install and Run DMG Editor on Mac
First, you need to download and install the latest version of UUByte DMG Editor on a Mac. Make sure drag the app icon to Application folder so you can open the app from Launchpad.
Step 2: Plug SD Card into Mac
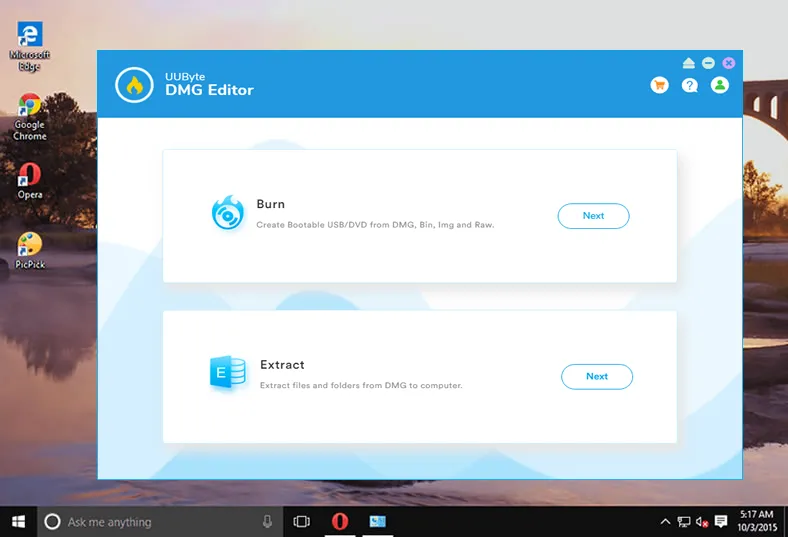
Now, insert the SD Card on Mac and then launch UUByte DMG Editor. On the home page, you will get Burn and Extract options, click on the Burn button at this time.
Step 3: Load IMG File
Add IMG file by clicking on the Browse button. Also, ensure that your SD Card is highlighted which means that the application has detected the SD Card.
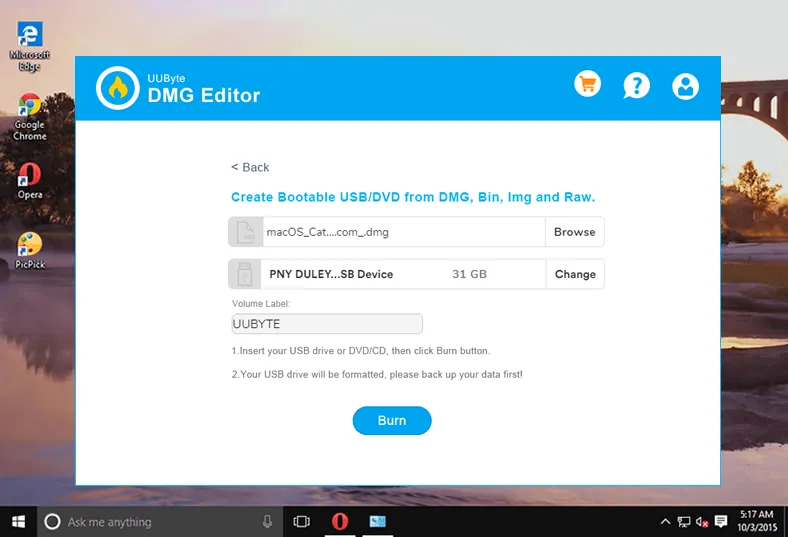
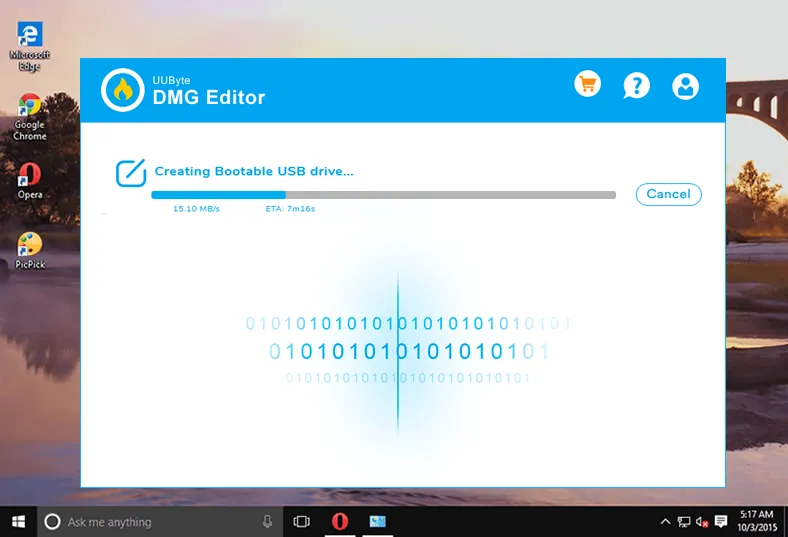
Step 4: Start Burning .img File to SD Card on Mac
Click on the Burn button to commence the process and once it is done, you will get the successful message on Mac screen. Next, close the application and then remove SD Card from Mac. Now, your bootable SD Card is ready and you can use it on a mini computer such as Raspberry Pi.
The application is embedded with a decompressing engine that help the users to extract the data from image file on any operating system. Moreover, the process is very fast and the writing speed is 5 times more than other tools. In short, UUByte DMG Editor is such an application that can burn any image file at ultra-speed.
Method 2: Burn .IMG File to SD Card on Mac via SimplyBurns
SimplyBurns is a single-purpose image burning applicationl that supports Mac OS X 10.6 and above. It is an open-source application hosted on SourceForge that supports 5 burning processes at the same time. Apart from burning the image files, it is also capble of burning audio and data files to CD /DVD.
Step 1: Download and Install SimplyBurns on your Mac.
Step 2: Insert the SD Card on Mac and then open the application.
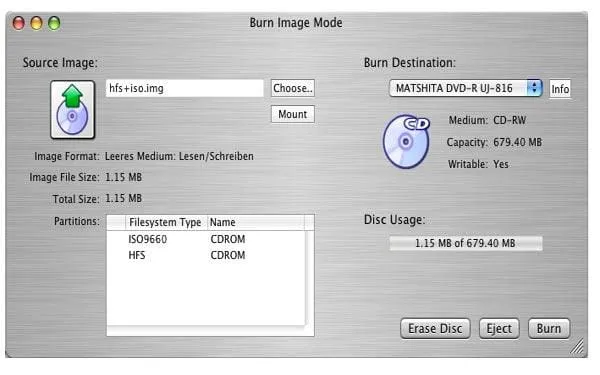
Step 3: At the main interface, click Burn Image menu and you will get a few options, such as Burn Destination and Source Image.
Step 4: Click on the Choose button that is listed at the top of the main interface to import the IMG file.
Step 3: After completing the above task, click on the Burn button. Now the process is started and you can see the status in the progress bar. Once it is done, close the application and remove the SD Card from Mac.
SimplyBurns has a smooth interface with limited burning options, it is greatly used to burn CD/DVD for the media player. In short, you can say, it performs the burning process of image file together with ripping, creating, and copying the media files.
Method 3: Run dd Command to Write .img to SD card on Mac
If you want to write a .img file to SD Card on Mac using command line tool then this method is an ideal choice for you. It is free and no addition tool to be installed along with it. Just make sure you are comfortable with text commands and take the risk because the entire steps are based on commands, which is a much different process from GUI app.
Step 1: Insert the SD Card in Mac's slot or use the card reader to make the SD Card readable by Mac.
Step 2: Launch Terminal app and keep the .img file on the current directory for smooth operation.
Step 3: Now, type the command to get the list of drives associated with your Mac.
diskutil list external
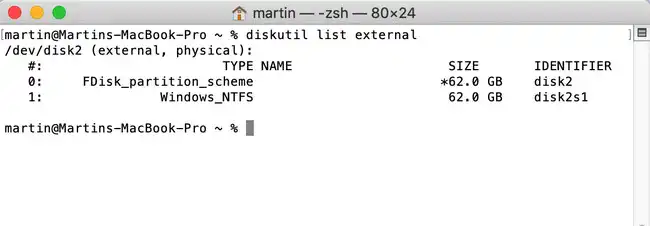
Step 4: Through the above command, you can figure out the drive name associated to your SD Card is disk2.
Step 5: After getting the disk number of the SD Card, you need to unmount it through this command.
diskutil unmountDisk /dev/disk2
Step 6: Now, you need to write .img file to SD Card and the command is listed below.
sudo dd bs=1m if=path_of_your_image.img of=/dev/rdisk2
Step 7: Now, press the Return key to execute the command and if the admin password is asked amid the task, then do as it asks.
Step 8: Once the process is completed, remove the SD Card on Mac using the below-mentioned command. That's it; your job is done and your bootable SD Card is ready to use.
sudo diskutil eject /dev/rdisk2
dd command is pretty simple but is applicable for those users who have in-depth knowledge of commands. So, if you are a mere novice, then you should go with the other methods that have already been provided in this article to burn IMG file to SD card on Mac.
Method 4: Write IMG file to SD Card on Mac via Win32 Disk Imager
If you are using a Windows Virtual machine on Mac, which is pretty common among Mac users, then Win32 Disk Imager is a solid option to burn IMG file to SD card. It reads and writes the image files effectively as a Windows only application. The user interface is intuitive as it has no additional features for non-burning related tasks.
Step 1: Download and Install Win32 Disk Imager on Virtual Machine. The file is compressed, so you will have to uncompress it using the tool.
Step 2: Insert the SD Card on your Mac, and then launch Win32 Disk Imager from Windows virtual machine.
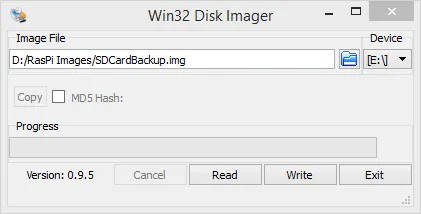
Step 3: Move to Device section; click on it and then select your SD Card. Thereafter, click on the folder icon to upload the IMG file into the program.
Step 3: After completing the above settings, click on the Write button. The process will take some time and once it is completed, you can close the application and then eject the SD Card.
Win32 Disk Imager is a simple image burning application that supports the Windows platform only but Mac users can also access the features of this application in a Windows virtual machine. Win32 Disk Imager has ample features and a smooth interface that will help you to complete the task efficiently.
Closing Words
The above are the best four applications that are suitable for burning IMG file to SD Card on Mac. If you are well versed in the commands, then you can go with the dd command option. However, if you want the task to be done in a much easier way, then you can choose UUByte DMG Editor or SimplyBurns. Now, the choice is in your hand and you can choose the one that meets your requirements.

Petty is editor in chief at UUByte and writes various topics about Windows and Mac to help people make the most of current technology.