
I have been playing with Windows 11 Beta on my laptop since the day Windows 11 was available via Windows Insider Build. It is working fast and the UI is much more beautiful than previous editions. Unfortunately, this Windows 11 laptop suddenly ran into Blue Screen of Death after updating graphics driver. And this problem could be solved after several hours of researching. I have to reinstall Windows 11 to latest stable version to fix it according to the users who managed to work it out.
The complete process of reinstalling Windows 11 from USB can be very lengthy and daunting if you were doing it at your own for the first time. We have created this tutorial to keep the non-technical users in mind and explain each step in great details so that you know what you are doing and why you are doing it, and it becomes extremely simple for you to follow each step.
Content Index:
Take a Full Data Backup of Computer
There are 2 sources from which you need to take a backup of files and folders that you would like to retain. First, you need to backup USB flash drive using which you would prepare the bootable USB for Windows 11. This is because in the process of creating a bootable USB, the entire USB will be formatted and you would end up losing everything you have in there. Second, you need to backup the computer since C drive would be formatted in the process of reinstalling Windows 11.
The best way to go about it is to attach a large volume USB flash drive or portable hard drive to computer, manually locate all the files and folders that you would like to backup, and then copy paste them inside a separate folder on that external hard drive. Same goes for the data inside that USB. If you have very less amount of data that you need to backup, you can back them up to Google Drive, or any other storage that you may have on the cloud.
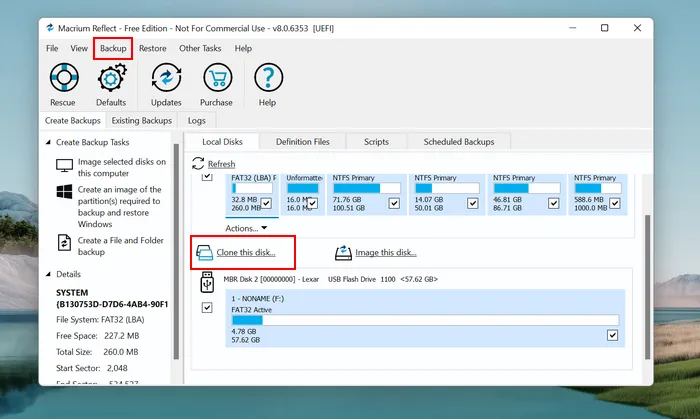
For a complete drive backup or clone , it is more recommended to use a backup software instead, such as Macrium Reflect Free, AOMEI Backupper and Acronis True Image. They will back up data in an automic mode, including system settings, programs and personal files. Plus, you can restore lost files if things went wrong during the installation process.
[Tips]: If you are unable to get into the computer, please create a bootable rescue disk, boot from it and take a full back up of important files under Windows PE. Some of famous result disk program includes Hiren's BootCD PE and Macrium Rescue Media Builder.
Create Windows 11 Bootable USB for OS Reinstall
A bootable disk is the media we are going to use for operating system installation. To resinstall Windows 11 from USB, we must create a Windows 11 bootable USB first. We will be using ISO Editor utility from UUByte for this purpose. This powerful app helps burn ISO image onto USB flash drives and create bootable USB from them.
Besides ISO burning feature, ISO Editor can also create new ISO image files, edit existing ISO images, and extract files from them too. They have a free trial version available on their website, you can give this utility a try and experience how useful it is.
To create the bootable USB you need 2 things. One is Windows 11 ISO image file. You can download it from Microsoft website.The other is ISO Editor software from UUByte website.


Once you have both of them, follow the below steps to create a Windows 11 installation media for later use.
Step 1: Install ISO Editor on your computer. If you can not access the computer, please do it on other computer or a Mac.
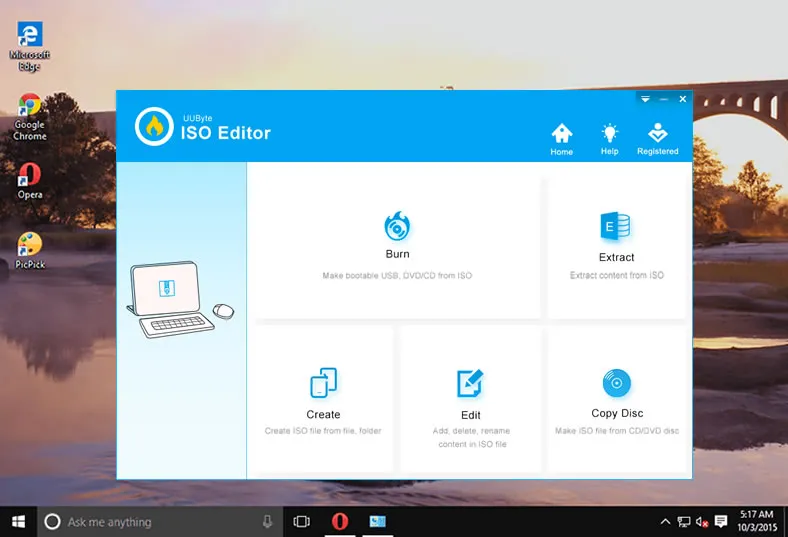
Step 2: Once you have installed ISO Editor, fire up the utility and insert a USB flash drive. Now, click on Burn on the first window. This will take you to a new window.
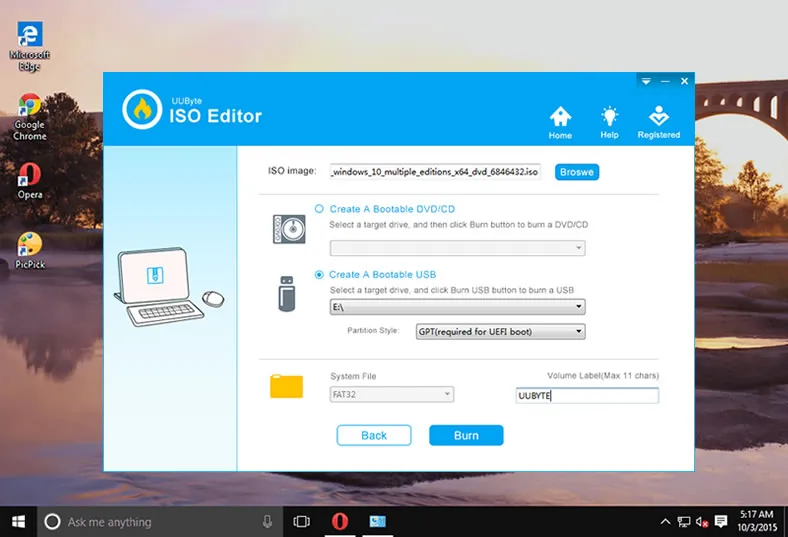
Step 3: Click on the Browse button and add Windows 11 ISO image file. After that, check the option that says Create A Bootable Drive, and choose the correct USB drive name. Under Partition Style, select GPT from drop-down menu. Enter Windows 11 in the Volume label and finally, click on the Burn button to start the process.
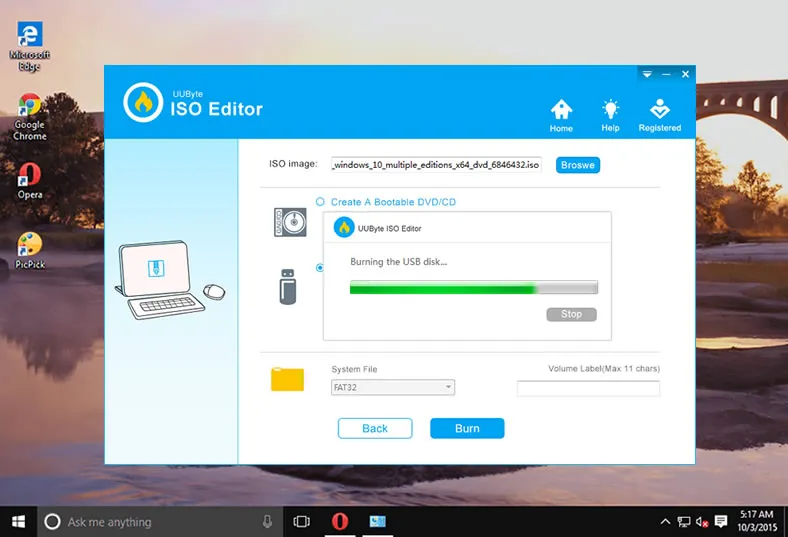
Step 4: The burning process might take 5-10 minutes to complete. Once done, close ISO Editor app and take out Windows 11 bootable USB.
Now that we have successfully created a bootable USB flash drive for Windows 11 ISO, we will learn how to boot your computer using this USB installer.
Boot PC from Windows 11 Install USB
Most of computers boot from internal hard drive or SSD by default. To reinstall Windows 11 from USB, you have to change the boot order and let the computer boot from external USB drive so Windows 11 installation wizard will be loaded and you can move on to install Windows 11 on target device..
Step 1: Shut down the target computer and insert Windows 11 bootable USB flash drive into it.
Step 2: Now, turn on the computer and open Boot Menu, a very useful system utility that let you choose a temporary device. To do that, you need to start tapping a special key (F12/ESC/F8/F10) on keyboard . Th key varies among different brands. Here is the full list.
Remember, you do not need to wait for the Windows logo to appear, start tapping the special key as soon as you press the power button, and keep holding on it until you see boot menu. Also, the key to get into the boot menu may differ as per the manufacturer of your computer, if F12 doesn't work simply search on Google to check the proper key combination for the particular maker and model of the computer and repeat the same with new key combination.
Step 3: Once Boot Menu appears on the screen, move to USB drive by using the arrow key. Next, click Enter to let the computer boot from Windows 11 USB drive instead of hard drive.

Step 4: Once done, this should restart the computer, and this time, it will boot from USB flash drive. Please wait for a few minutes for Windows 11 Setup Wizard to appear and then move to the next section to know how to clean install Windows 11 from USB drive.
Reinstall Windows 11 from USB Drive
Now that you have come this far and started Windows 11 Setup Wizard, the rest of the process is extremely simple and you don't need to do much other than click on a few buttons and enter a few information. Let's begin.
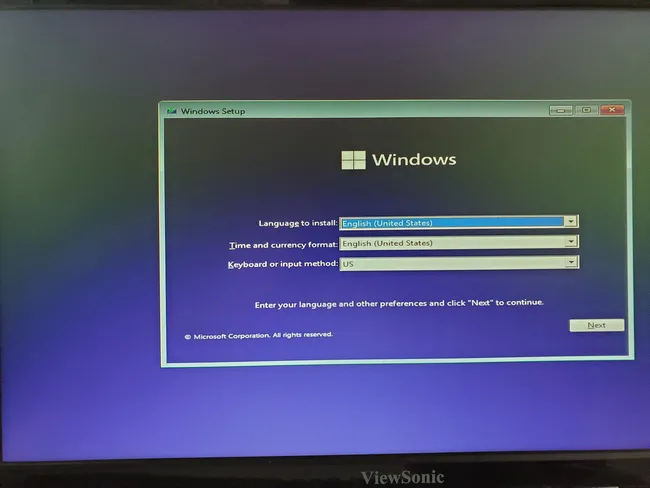
Step 1: On the Windows 11 Setup window, please choose a language, time format and input keyboard.
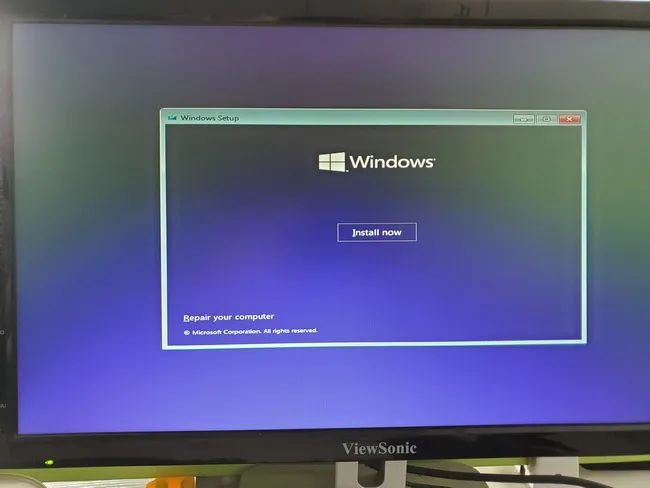
Step 2: Click on Install Now button on the next window.
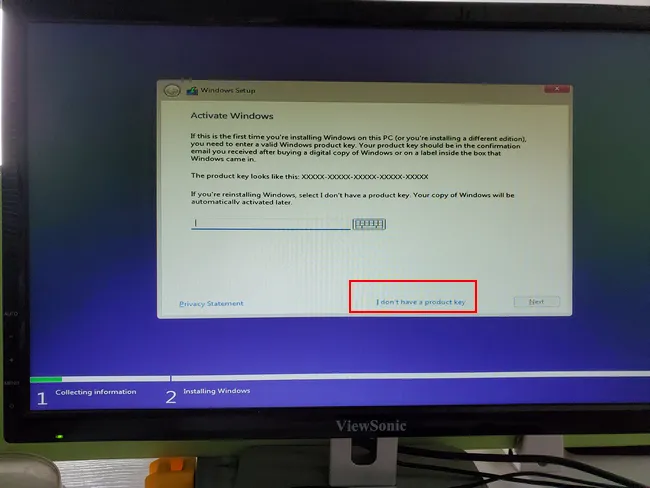
Step 3: You will be asked to enter Windows product key. If you had one, enter the same and click on Next. If you do not have the product key, click on the link that says "I don't have a product key" and move to the next window, you can activate Windows 11 later after reinstallation is finished.
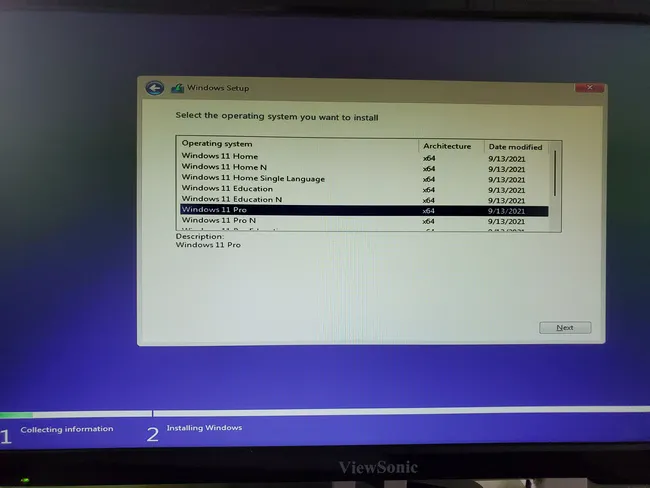
Step 4: Now, choose an edition of Windows 11 that you would like to install. This will depend on the product key that you have or is planning to purchase.
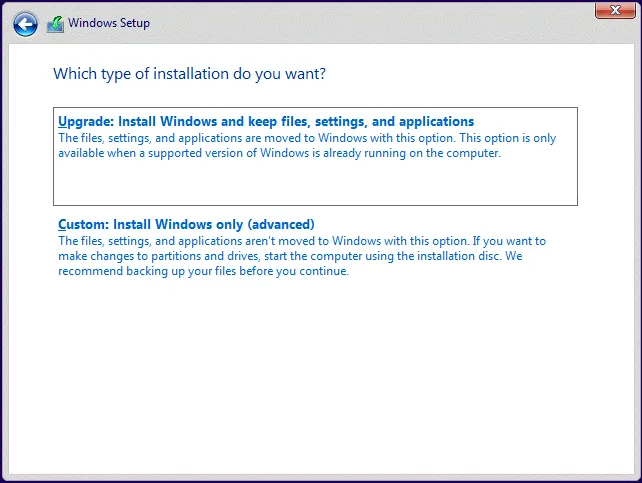
Step 5: Accept Microsoft license agreement by clicking on the I Agree button. It will ask you to select what type of installation you would like to opt for Windows 11. Choose Custom: Install Windows only (advanced) here.
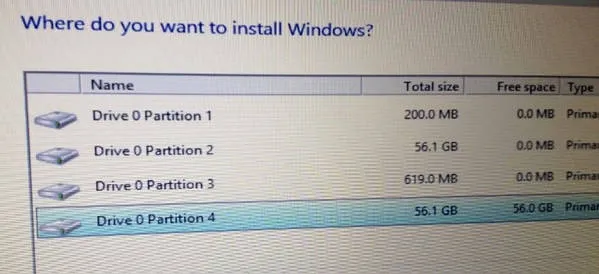
Step 6: Select the location/drive where you would like to install Windows 11. This should be your C drive, unless you would like to install it somewhere else.
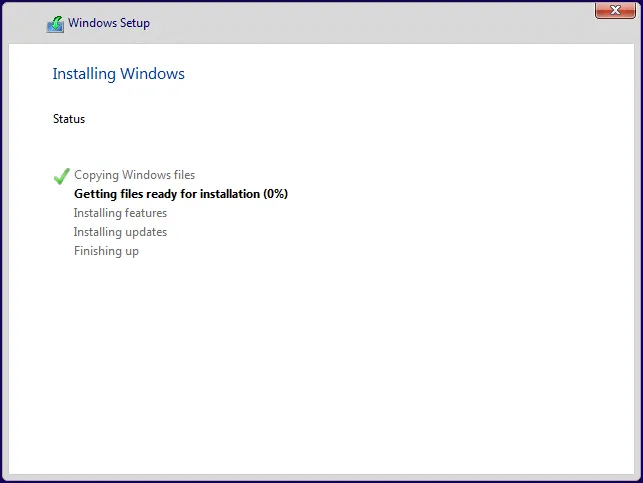
Step 7: This should start the installation process. Remember, it is a lengthy process, and your computer may restart a couple of times. You do not need to do anything now.
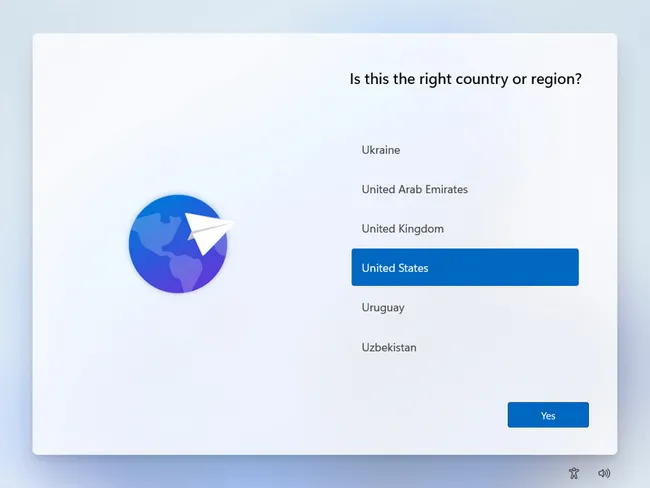
Step 8: Once the process completes, you'll be asked to enter Country/Region. Select the same and click on Yes. Now choose the keyboard layout, then click on Yes. Next, it will ask whether you would like to add a second keyboard. If not, then click on Skip.
Step 9: Now, simply follow the instructions on the screen to set Windows 11 up and create a new PIN for login. Once done, it will prepare to install Windows 11 on this computer. Finally, you'll be welcome to the Windows 11 desktop and you're done!
After Windows 11 is installed on the computer, you need to install the missing drivers where you can find in Device Manager section. You can do this from manufacturer website. We would suggest you to read the entire post first, and then attempt to reinstall Windows 11 from USB flash drive. That way, you would be prepared to know what comes next, and plan everything accordingly. As mentioned earlier, the entire process is pretty time consuming. So do not start working on it if you have a deadline to meet. If you come across any issues while installing, please contact us and you would definitely get an solution.
Troubleshooting Manual
Reinstalling Windows 11 is a very long and complex task that involves multiple subtasks. It would not be that easy and the chance is high when you ran into issues. This is possible even for tech veteran. Hence, it is necessary to offer a common troubleshooting guide in here.
Q: Windows 11 installation setup not started after selecting USB
A: Please go to BIOS settings and check if Secure Boot is enabled or not. If yes, then you have to disable Secure Boot during Windows 11 installation as it validates on-board hardware and blocks computer booting from unrecognized devices, such as USB flash drive.
Q: This PC can't run Windows 11
A: Simply put, the current hardware does not meet the system requirements demanded by Windows 11, which has a much higher standard than Windows 10. This is mostly due to the lack of TPM 2.0 or unsupported CPU model. However, you can follow this trick to bypass Windows 11 hardware checking.
Q: USB not seen as a bootable device
A: If the USB drive was not recognized as a bootable device in BIOS or Boot Menu, this means ISO burning failed or you are using a corrupted ISO image. Please make sure Windows 11 ISO is downloaded from Microsoft website and re-burn the ISO to USB again.

Petty is editor in chief at UUByte and writes various topics about Windows and Mac to help people make the most of current technology.