
If you have ever used a computer with an SSD in it, you would know how fast it is compared to traditional hard drives. It's not only the operating system that is fast but all the application becomes much faster. It can give new life to your old computer.
If you have decided to give Windows 11 a try but have an old computer, or one with a traditional hard drive, it is best to move Windows 11 to an SSD in order to experience the complete power of Windows 11. If you are worried about data loss, then it is no longer a problem. In here, we will show you how to migrate Windows 11 on current computer to a new SSD and not just install a fresh copy of Windows 11 on your computer. This process is called disk cloning and it is quite advantageous.
What Will You Need?
Before you begin the actual process of moving Windows 11 to a new SSD, you need to cross out every pointer in the below checklist:
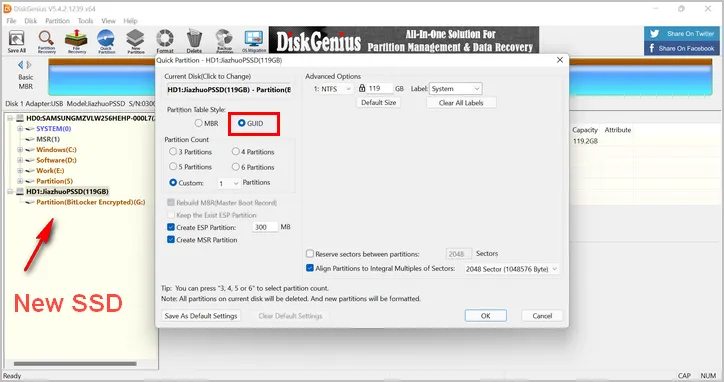
Format the new SSD. Windows 11 can be only installed on a partition with GPT partition table. Hence, we suggest formatting the SSD to GPT and NTFS file system. This can be done with the help of free DiskGenius software (Quick Partition). If it is not a new SSD and you have data in it, this is a good time to take a full backup first.
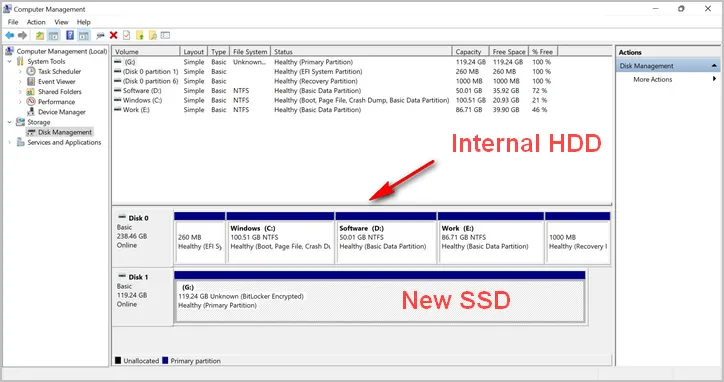
Check SSD Connection. Make sure the SSD is connected properly to the computer using a USB or a SATA cable, or if it is it's in a disk bay within your cabinet in case you are using a desktop computer. You can see the drive in Disk Management utility if it everything goes fine.
Once you have got these out of the way, you can start the process of moving Windows 11 to the new SSD.
How to Move Windows 11 to New SSD
The process of moving Windows 11 to a new SSD might look complicated at first. However, we have jotted down all the steps in detail so that you know what you are doing and why you are doing it. Just follow along the instructions and you will do just fine:
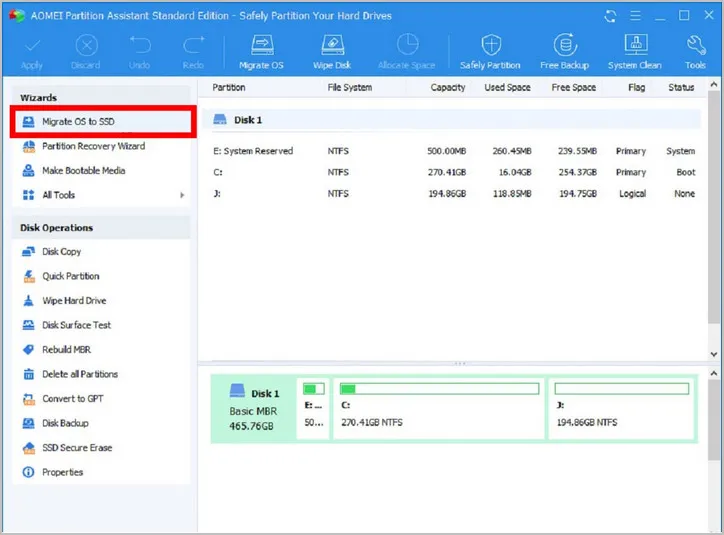
For moving Windows 11 to the new SSD, we will be using a software called AOMEI Partition Assistant. This utility is used not only for cloning hard drives, but also to make bootable media, resize, move, delete and merge partitions, create Windows To Go drives, create new partitions, shred files and a lot more. Even though it is a paid software, they have a free version available on their website, albeit a few functional restrictions. But you don't need to worry about them since the free version is good enough to be able to move Windows 11 to new SSD.
At the beginning, please go to desktop of current OS and download AOMEI Partition Assistant Free Edition install it and then launch the utility. You'll be greeted with a window.
On the right side of this window, you'll see your old hard drive and new SSD listed. On the left side of this window, you will see a number of options. One of these options would be Migrate OS to SSD. Click on this option and a new window will open up showing you the details of the process of moving Windows 11 to new SSD.
Now you will be asked to select the disk space. Select the space on your new SSD that is unallocated, then click on the checkbox to confirm that you would like to delete all partitions on the new SSD and migrate system to target disk.
Next, you will be gives an option to resize the partition on your new SSD. If you have a smaller SSD, I would suggest using the entire drive. Otherwise, you can create a new partition. Once done, click Next to continue. Finally, click on Finish in the pop-up window that appears after successfully resizing the partition.
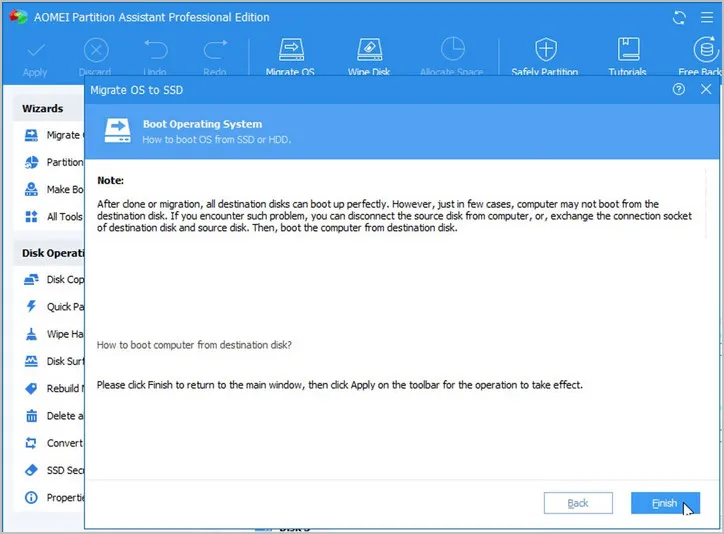
This will force the program back to the main window. Here, you need to click on the Apply button on the top left side of this window to ensure that all the changes you just made takes effect. After that, click on Proceed and then start moving Windows 11 to the new SSD. You may need to restart the computer once, choose Restart into Windows PE mode if given an option.
When the process completes, close AOMEI Partition Assistant app, disconnect the new SSD and shutdown your computer.
Optionally, you can take out the old hard drive and attach the new SSD where you moved Windows 11. Ensure that you are properly grounded while doing this otherwise you might end up damaging your computer with static electricity. You can keep the old hard drive if you want to, irrespective of whether you would like to retain the old hard drive or keep just the new SSD you need to go to the BIOS settings and change the boot order by moving the SSD to the top of the list.
Finally, save the changes you made in your BIOS settings and boot up your computer normally. If everything was done properly, your computer should now be working on Windows 11 from the newly installed SSD. If you had decided to retain the old hard drive, this would be a good time to format it.
Please note that Windows 11 supports GPT, which is not available on the free version of this utility. Also, whether you would like to move Windows 11 to your new SSD, or if you would like to install a fresh copy of Windows 11 is completely your decision. However, we would suggest you to move Windows 11 to new SSD since it spares you from installing all the existing program all over again, on top of that you won't lose any existing data that was on the old hard drive.

Petty is editor in chief at UUByte and writes various topics about Windows and Mac to help people make the most of current technology.