
I was so excited when Windows 11 was first announced. I wanted to try Windows 11 so badly. I had a Dell Inspiron laptop with 8GB of RAM, a dedicated Radeon graphics card, I was pretty sure that would have been more than sufficient to install Windows 11 on my laptop. But my dreams came crashing down when I downloaded PC Health Check app from the Microsoft website, and it showed me that my laptop isn't compatible with Windows 11 since it doesn't have Secure Boot. I didn't even know the words Secure Boot until then.
But I didn't give up. I kept searching for workarounds and hacks on how to install Windows 11 without Secure Boot. Looking at the search volume I realized that I was not the only person searching for a solution. And finally, I found it. The solution, that too not just one solution but a couple of them. My experience in IT told me that its best to find multiple solutions to a single problem because when it comes to computers, what works for everyone might not work for me. So, I decided to jot them down.
If you are reading this, chances are you too are facing this issue and in dire need of a solution. That is why I am sharing my notes here which will explain, in detail, multiple methods of installing Windows 11 on unsupported hardware without Secure Boot. The last method is for people having older computers with legacy BIOS.
Method 1: Creating a Tailored Windows 11 Installation USB to Bypass Secure Boot Check
There is a famous utility called Rufus. It is usually used to create bootable USB devices for Windows computers, Linux Live CDs etc. However, in our case we will be extending this functionality to create a bootable Windows 11 USB that skips the Secure Boot check while installing Windows 11 on your computer.
The developer at Rufus, Pete Batard, was kind enough to include the option to skip Secure Boot check while creating a customized bootable USB for Windows 11 since the release of Rufus version 3.16 along with a few other nifty features for installing Windows 11 on unsupported PCs.
However, you'll need a couple of things before you start with this method. A blank USB flash drive at least 8GB in size and the Windows 11 ISO image file. You can download the ISO image file from the Microsoft website normally. Now, go the actual process.
Download the latest version of Rufus from their website and launch it. This tool doesn't need to be installed; it comes as an EXE file from which you can launch the tool by double-clicking on it.
At this time, plug in the blank USB flash drive in your computer. On the main window of the Rufus utility, below Device section there should be a dropdown. Select the blank USB flash drive from it. Next, click on SELECT button to load Windows 11 ISO file from the computer into Rufus.
Now, it comes to the most important settings. Below Image option, choose the option that says Extended Windows 11 installation (no TPM/no Secure Boot/8GB-RAM) from drop-down list. This will create a Windows 11 installation USB that bypass TPM, Secure Boot and RAM checking.
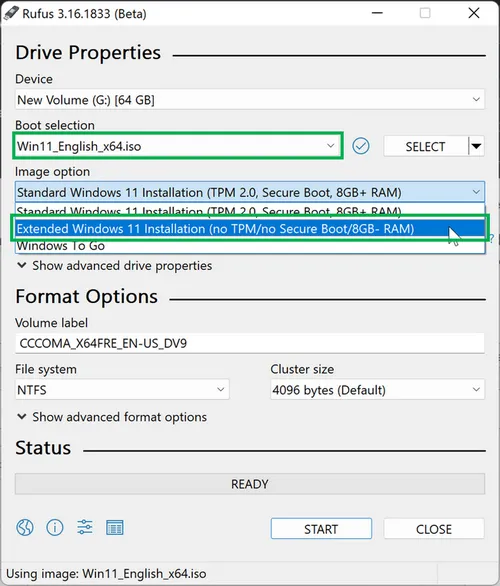
Under Partition scheme, choose MBR if your computer has legacy BIOS, or GPT if it has UEFI. Next, below Format Options, provide a suitable Volume label. You can leave the rest of the settings to their default state.
Finally, click on START. This should start the process of creating Windows 11 bootable USB. Once done, you can boot your computer using this USB and install Windows 11. At this time, it will automatically skip the Secure Boot check and no error pops up.
Method 2: Modify Windows 11 ISO Image
I have seen many success cases with Rufus. But there are problems with it, too. On old PCs, Rufus does not work.So, here comes the second option.
This needs a third prerequisite along with a blank USB flash drive and the Windows 11 ISO image file as mentioned in the previous method; a bootable Windows 10 USB flash drive. Yes, you read it right and it's not a typo, you need a Windows 10 bootable USB for assistance. If you don't know how to create one, try UUByte ISO Editor. Windows 10 ISO file is easily available on the Microsoft website.
In this method, we would replace install.wimfile in the Windows 10 bootable USB with the install.wim file from the Windows 11 ISO image file. Don't worry, I'll tell you how it is done, in detail. So, just follow the instructions and you'll do just fine.
Right click on the Windows 11 ISO image file and then click on the option Mount from the context menu.
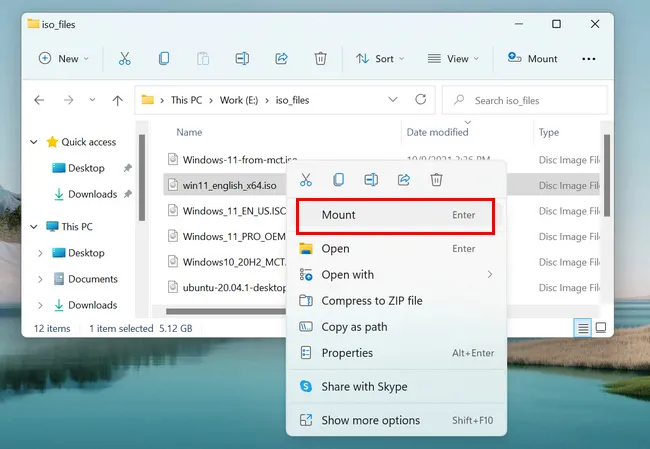
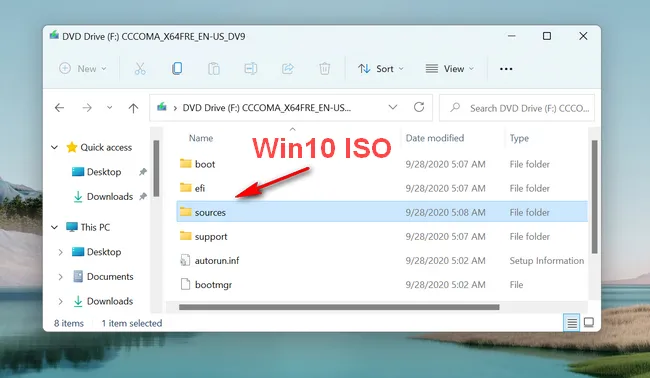
That should open the Windows 11 ISO image file like a regular folder. Inside it, you'll see another folder called sources. Go inside the sources folder and look for the file called install.wim. Once you have found it, copy it and paste it on your desktop and close this Explorer window for the Windows 11 ISO image.
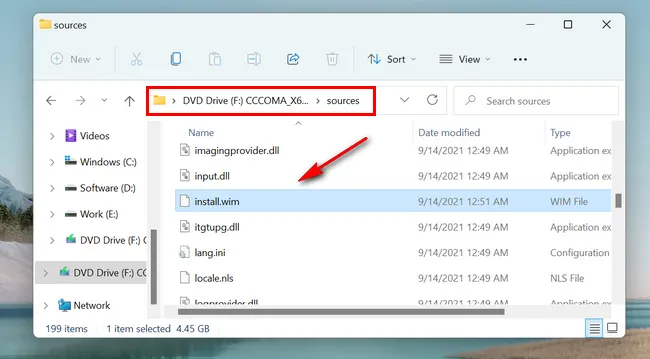
Next, plug in the Windows 10 bootable USB flash drive in your computer. Look inside this bootable Windows 10 USB flash drive and you'll see a folder named sources, similar to the Windows 11 ISO image.
Copy and paste the install.wim file copied from Windows 11 ISO image inside to this folder. There should be a install.wim file already present here, so it would ask you for your confirmation on whether you would like to overwrite the existing install.wim file. Click on Replace the file in the destinatio and wait it to be done.

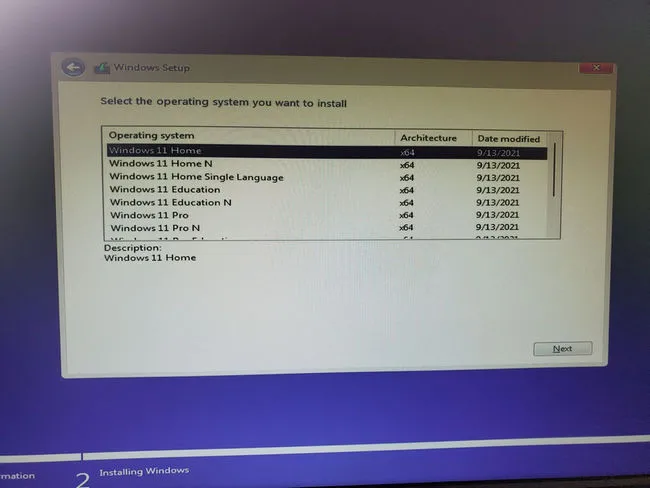
Now, close everything and boot the PC from the modified Windows 10 bootable USB. It will give you an option to install Windows 11 instead of Windows 10. Go for that option and it should install Windows 11 on unsupported computer without checking for Secure Boot.
Method 3: Modify Windows Registry
If you are in IT, or an advanced user, then you should go for this method directly. It saves time as you just need to modify the Windows Registry to bypass Secure Boot check while installing Windows 11. The prerequisites for this method are pretty simple, the Windows 11 ISO image file and that's it. You don't need anything else for this method. Isn't that convenient?
However, be warned, if you are not an experienced user then do not try this even if the previous methods didn't work for you, or else not only will you not be able to install Windows 11 but you'll end up with a computer that doesn't work at all. Instead try the next methods listed below.
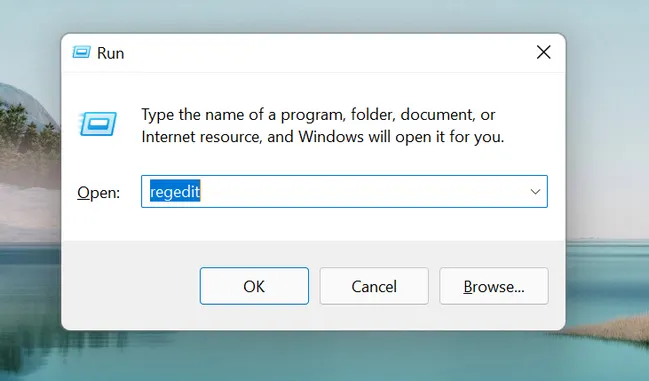
Open Windows Registry Editor by pressing Win+R and typing 'regedit' in the Run box.
Go over to the following directory from navigation bar of left-side panel.
Computer\HKEY_LOCAL_MACHINE\SYSTEM\Setup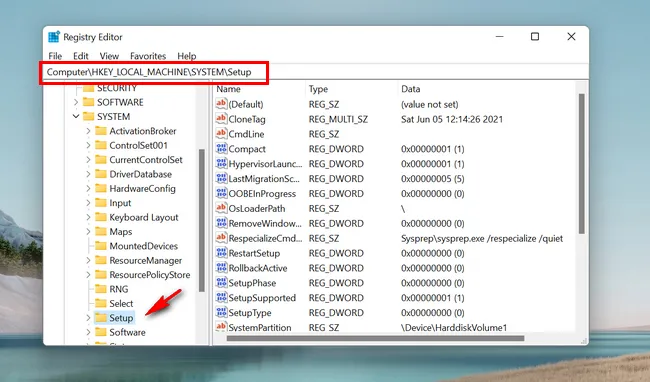
On the pane on the right side of the window, right click on an empty area, then click on New, and finally click on Key.
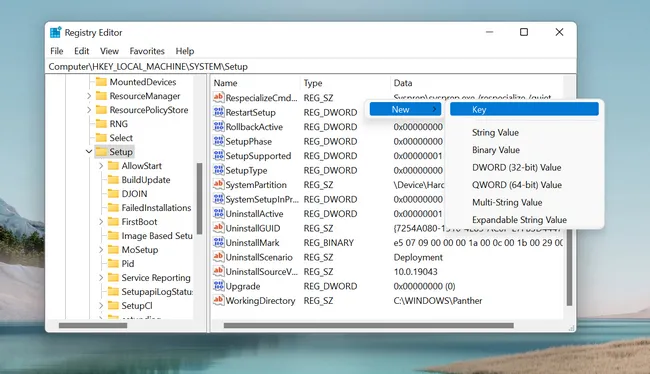
This should create a new Key below Setup on the pane on the left. Rename it to LabConfig. Remember, there's no space between Lab and Config, it's just one single word. Now, click on LabConfig, then right click on any empty area on the pane on the right side of the window, then click on New, and click on DWORD (32-bit) Value. Remember, you need to select 32-bit even if you have a 64-bit computer.
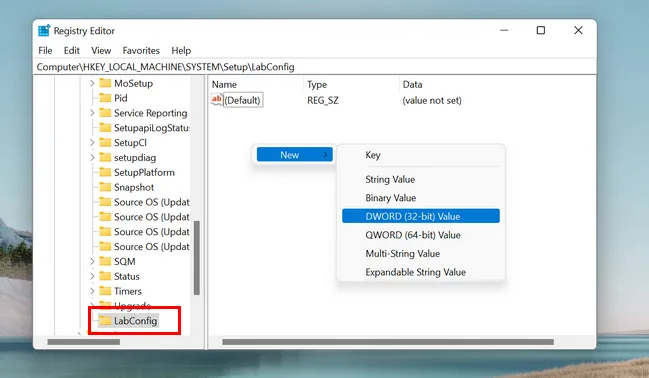
That should create a new entry on the right pane, rename it to BypassSecureBootCheck. Again, it's a single word and there are no spaced in between. Once done, double click on BypassSecureBootCheck to edit it, and input 1 for the Value data in the box that pops up, and then click OK.
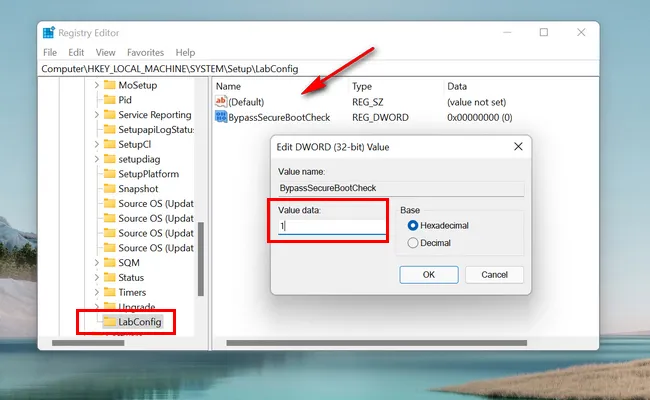
Now, close Windows Registry Editor and restart the computer. This should refresh Registry entries and those changes will take effect.
Finally, once the computer has restarted, go over to Windows 11 ISO file you had downloaded from the Microsoft website and run setup.exe to start Windows 11 installation process without Secure Boot check since we have already modified Windows Registry.
Method 4: Install Windows 11 without Secure Boot for Legacy BIOS
There are a number of workarounds for users with older models of computer having legacy BIOS. These are not full proof, so I am writing a couple of them here instead of just one single method. You can search on the internet if you need more information in detail on how to implement these methods on your computer. Remember, each pointer given below is not a single step to an entire process but the entire process itself.
At first, you need Windows 10 and Windows 11 ISO file.
After that, create a new folder and copy all files and folders from Windows 11 ISO image to it.
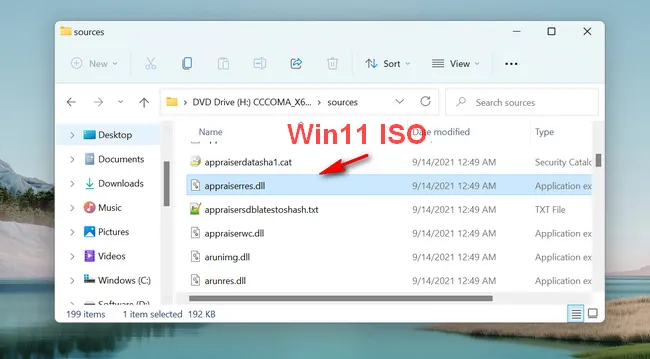
Since then, copy and paste the entire sources folder from Windows 10 ISO image file to replace the sources folder located in the new created foldler.
Copy appraiserres.dll file in sources folder from Windows 11 ISO image file and paste it to the same location in new folder and then run setup.exe from there. That's all!.
Summary
No matter which method you choose to install Windows 11 without Secure Boot, please remember that these workarounds or hacks might not give you the option to upgrade to Windows 11. So, you may end up having to do a fresh install of Windows 11 on your computer. Which is why, it is always a good idea to backup your personal files because you would surely lose them if you do a clean installation of Windows 11.

Petty is editor in chief at UUByte and writes various topics about Windows and Mac to help people make the most of current technology.