
The first time I installed Windows 11 on my computer, I was forced to connect the computer to Internet in order to add a Microsoft account for sign-in. I ended up logging in with a Microsoft account instead of a local account. This is quite annoying for so many reasons.
First, with a Microsoft account my username and password are saved on a Microsoft website and not locally on my computer, which doesn't sound quite secure. Moreover, in case you forget your password, which is quite possible considering the number of passwords we have to remember each day, to reset your password you need to head over to the Microsoft website. So, if you do not have an active internet connection, you'll be stuck with a locked computer.
Then I started to search on the internet about how to install Windows 11 with a local account, and I found out that this would be possible if I could bypass the network connection checking during a clean install of Windows 11. But how would you bypass the network requirement while installing a fresh copy of Windows 11? That's what I am about to share with you. Remember, this process works for both Windows 11 Home and Pro version.
How to Clean Install Windows 11 without Network Connection
For clean install, you should first prepare for a Windows 11 bootable USB for OS installation. You can do this with the help of Windows 11 Media Creation Tool that can be downloaded from the Microsoft website.
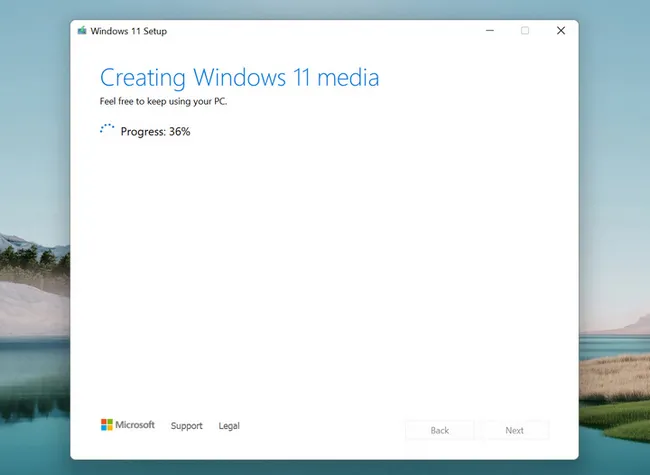
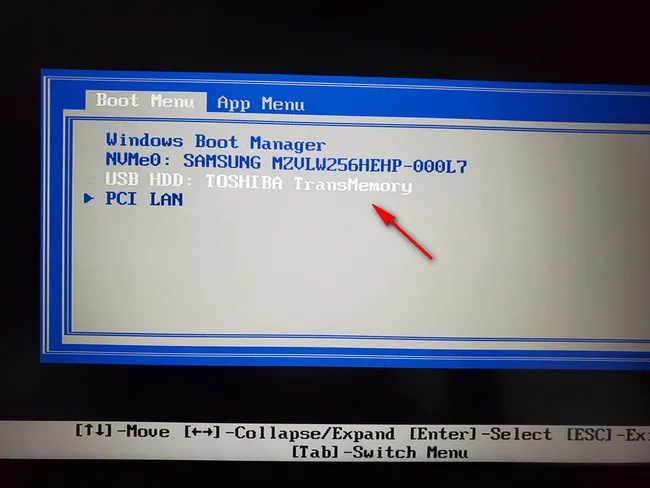
Media Creation Tool will download Windows 11 ISO from remote server and burn ISO to USB to make it bootable. Once the USB is ready, boot the computer from this Windows 11 install media. You can do this by opening Boot Menu or changing boot order in BIOS. In our example, I completed the task with Boot Menu.
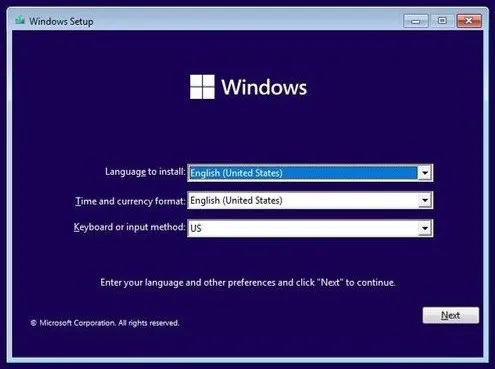
Wait for about one minute, you'll see Windows 11 setup window where you need to select the language, time, currency, and keyboard settings. Choose the appropriate options and click on the Next button to continue.
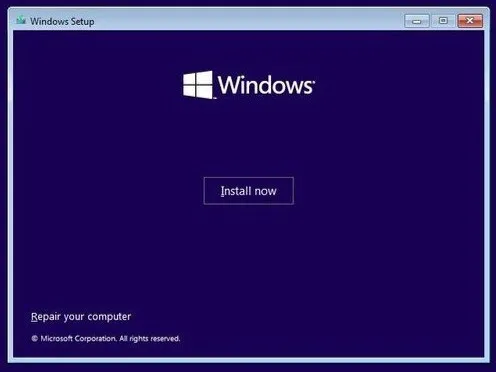
In the next windo, click on the Install Now button. This should start the installation process for Windows 11.
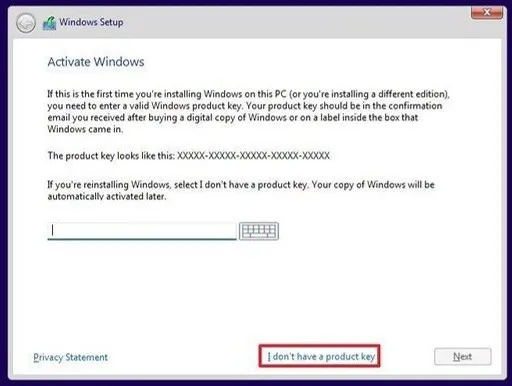
In the new opened window, you'll be asked to enter the product key for Windows 11 activation. You can click on the link that says "I don't have a product key" located towards the bottom of the window.
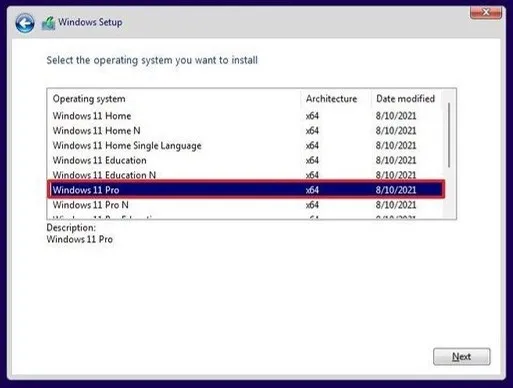
Now you need to select the edition of Windows 11 that you want to install. For example, in my case I am installing Window 11 Pro. Click on the respective option and click Next to continue.
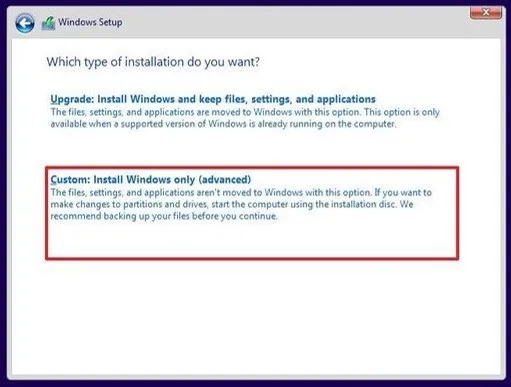
After that, please accept the license agreement on the next window and click on the option that says "Custom: Install Windows only (Advanced)" to continue with the installation.
At this stage, select a partition where you would like to install Windows 11. I have a single partition on my hard drive, so in my case I chose Drive 0. Once you have selected the correct drive, click Next to continue. Once done, Windows 11 will start getting installed. This will take some time so you can grab a cup of coffee while it is getting installed. Your computer might restart a couple of times, this is normal and let it work on its own.
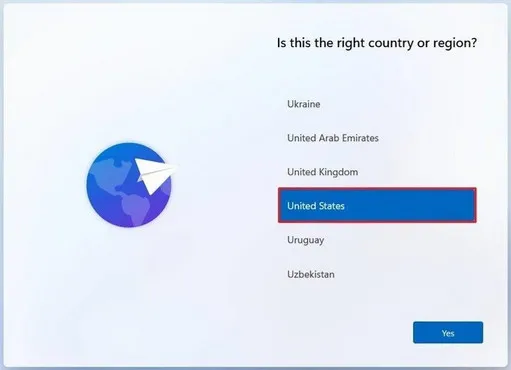
When Windows 11 has been installed on the computer, there are a few addtional steps to complete the Windows 11 setup. This is where you need to trick Windows 11 into believing that you don't have an internet connection. On the first window of Windows 11 setup, select your respective region and click on the "Yes" button to continue.
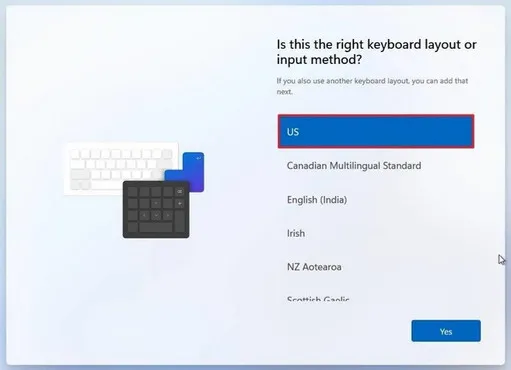
In the coming part, you need to select a keyboard preference and click on the "Yes" button to continue.
In the next window, click on the "Skip" button to move to the next step without adding a second keyboard.
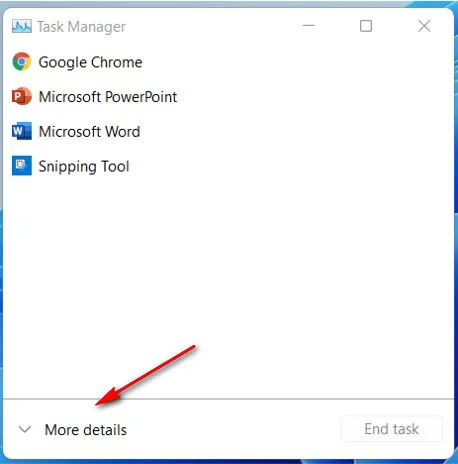
Now comes the tricky part. You'll now be on the window which will ask you to connect to a network. Here, you need to press Shift + F10 keys on your keyboard together. This should open a Command Prompt window. Here, you need to type "taskmgr" (without the quotes) and press Enter. This will open Windows Task Manager. Here, you need to click on the "More details" button.
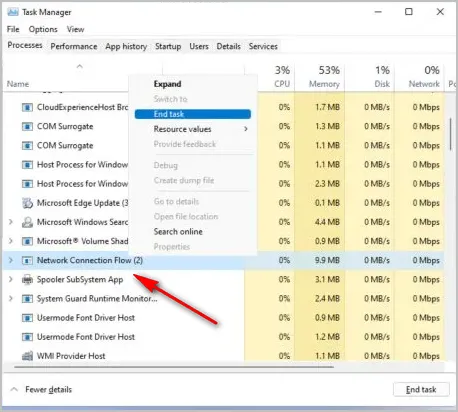
You'll get a list of programs running. From there you need to click on "Network Connection Flow" and click on the "End Task" button.
Now, close the Task Manager using the X button on its window and continue with the installation of Windows 11. This time, it will now bother you about connecting to the internet. All you need to do is to follow the instructions on the screen.
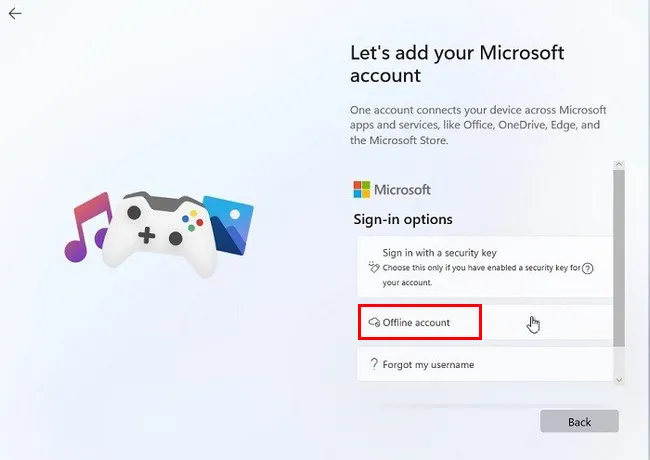
When you are asked to register with a Microsoft account, you can click on Sign-in options and choose the option to offline account (local account) instead of a Microsoft account and you are good to go.
That wasn't so difficult, was it? It's a good idea to keep this article open on a phone or another device while you are installing the fresh copy of Windows 11 on a computer since performing each step correctly is very crucial, and there are too many steps to remember.
If you get confused midway through the installation, or if you forget a step in between, it will ruin all the good work you did so far, and you may have to install Windows 11 once again from the beginning. Once you have successfully installed a fresh copy of Windows 11, make sure connect the computer to internet and update Windows 11.
One word of advice, weigh the pros and cons of using a local account instead of a Microsoft account before you decide to bypass network connection during clean install of Windows 11. Only after that should you go ahead with the method mentioned in this tutorial, otherwise, you should simply follow the instructions on the screen.

Petty is editor in chief at UUByte and writes various topics about Windows and Mac to help people make the most of current technology.