
Can I install Windows 11 on Mac with Bootcamp?
Yes. However, not all Macs are eligible to do this. Only the Mac with Intel chip is capable of installing Windows 11 directly on Mac, thanks to the Bootcamp app.
Windows 11 requirements suck and those requirements are not letting you install windows 11 on a mac. The official method that you can use to install Windows 11 on Mac is via bootcamp app if your Mac is powered by an Intel processor. For Apple Silicon M1 processor, you have to try installing Windows 11 on M1 Mac with the help of Parallels desktops 17.
In here, we will introduce two methods to install windows 11 on Mac with Bootcamp. I hope this will be helpful to you.
Method 1: Install Windows 10 on Mac with Bootcamp and Upgrade to Windows 11 Later
If you decide to install Windows 11 on a Mac, you should know that it is possible. In this method, I will install Windows 11 on a Mac with Boot Camp. This is an official method (at least partially) and there are no worries about harming the Mac.
Note: Be sure to make a backup of your Mac with the help of Time Machine.
Step 1: Download Required Files
Officially, many MacBooks and MacBook Air are not supporting windows 11 directly. So, in order to install Windows 11 on Mac, we need to install Windows 10 with Bootcamp app first. After atht, we can upgrade Windows 10 to Windows 11. This means we have to download both Windows 10 and Windows 11 in ISO files. Or you can use the Windows 11 Installation Assistant, it is up to you.
Download Windows 10 ISO: https://www.microsoft.com/en-us/software-download/windows10
Download Windows 11 Installation Assistant: https://www.microsoft.com/software-download/windows11
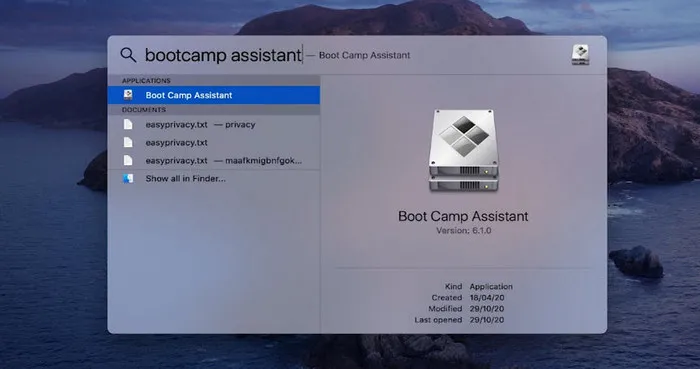
Step 2: Run Boot Camp Assistant App
Once the ISO files are downloaded, run the Boot Camp Assistant app on the Mac. You can find it program in Applications > Utilities or search for Boot Camp Assistant by pressing Command + Space and type 'Boot Camp Assistant'.
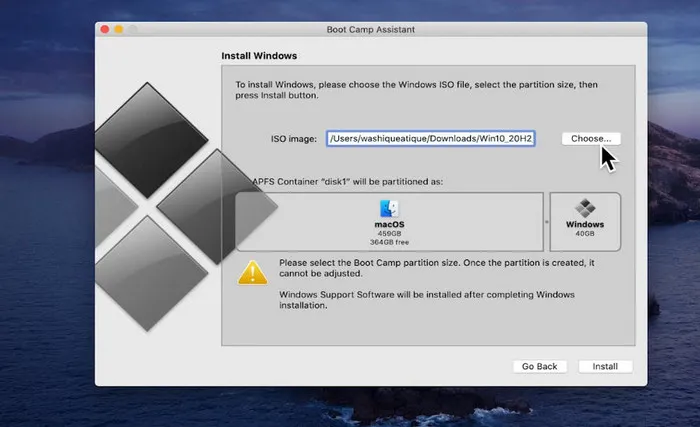
Step 3: Import Windows 10 ISO into Bootcamp
Wait a couple of minutes after Bootcamp is opened. This will clean up the system cache. Click the Continue button at the first screen.
In the new window, click Choose... button to add Windows 10 ISO into the app. Then, celect the Boot Camp partition to install Windows 10. Be sure to save space for MacOS. The amount of division depends on your storage size. However, the minimum storage that Windows 10 requires is 42 GB but since we are planning to upgrade Windows 10, make it at least 62 GB. If you want to install different programs and games on Windows, you need more space.
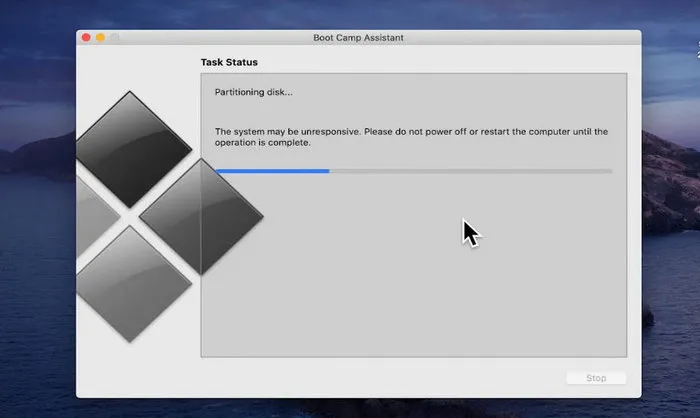
Step 4: Install Windows 10 on Mac with Bootcamp
After selecting the ISO file and partitioning the storage space, click Install. Boot Camp Assistant will download Windows files. After that, you need to enter your Mac password. Your Mac will then restart and you will be taken to the Windows installation page. After restarting the device, you will see the Windows logo and the Windows installation screen.
- Select the language, time, and date along with the keyboard language and input language, and click Next.
- You will then be taken to the Windows Activation page. If you have the original Windows that has the purchase serial number, enter it. Otherwise, click I do not have a product key.
- In this step, select the version of Windows that you want to install. Mostly I would choose Windows 10 pro version.
- On this page, select I accept the license terms option and click Next.
- After rebooting, the Windows logo will be displayed. The installation process is completed again and the device turns off and on. Then you can choose the settings you want and click Next.
- Create an account for Windows 10. Entering a name is mandatory, but choosing a password is optional.
- At this point, you can enable Microsoft Voice Assistant, Cortana. You suggest clicking the Not now button now and activating it later through the settings.
Windows will now complete the installation process and you will be taken to the Windows home screen.
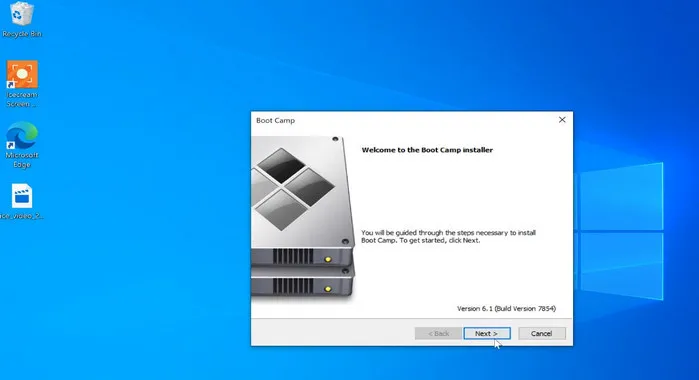
In the Welcome to Boot Camp installer window, click Next and accept the agreement. Then click on Install. If there were pending updates being displayed, please install the updates as well. Finally, make sure to restart Windows 10 to apply the changes.
Step 5:Update Bootcamp Drivers (Optional)
Be sure to run the Apple software update to avoid potential driver issues with Windows 10. You can access the Apple software update from the system tray on the taskbar. Then click on Boot Camp and check for updates.
Step 6:Upgrade Windows 10 to Windows 11
Until now you have followed the above trick to install windows 11 on Mac using Bootcamp. However, your Mac is not be compatible to run windows 11 without hacking. Anyway, install the PC health check app on Windows 10 to check which part of your computer is not compatible with Windows 11.
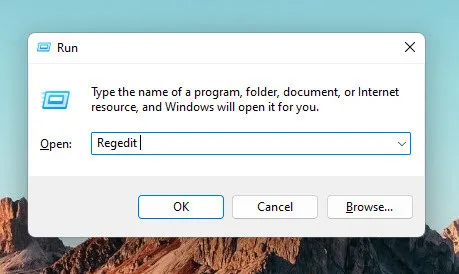
1. Open the Run dialog box and type or 'regedit' and press enter to open Registry Editor.
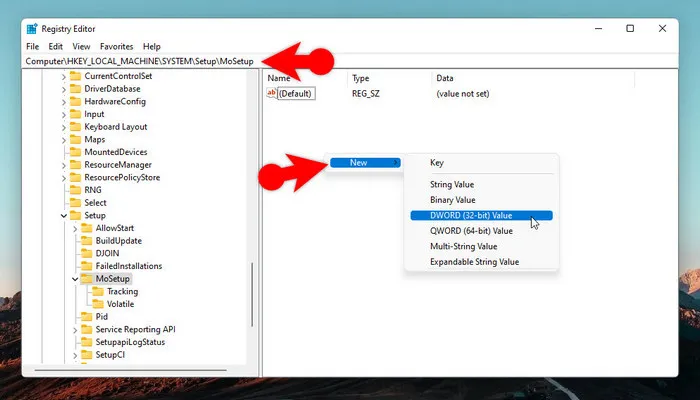
2. Go to HKEY_LOCAL_MACHINE\SYSTEM\Setup\MoSetup and right click on it. Then choose New and click on the DWORD (32-Bit) Value.
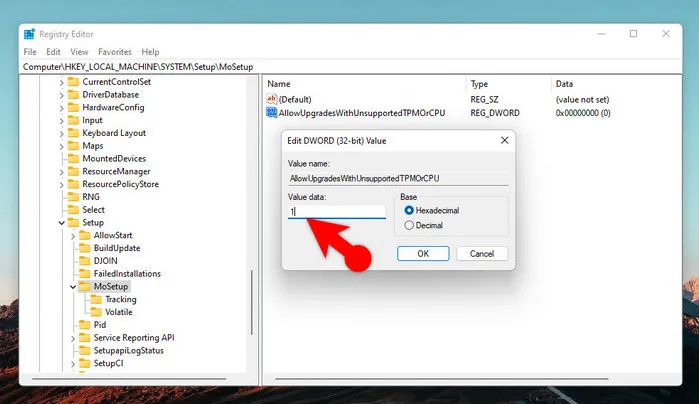
3. Set the Value name to AllowUpgradesWithUnsupportedTPMOrCPUchange its value data from 0 to 1.
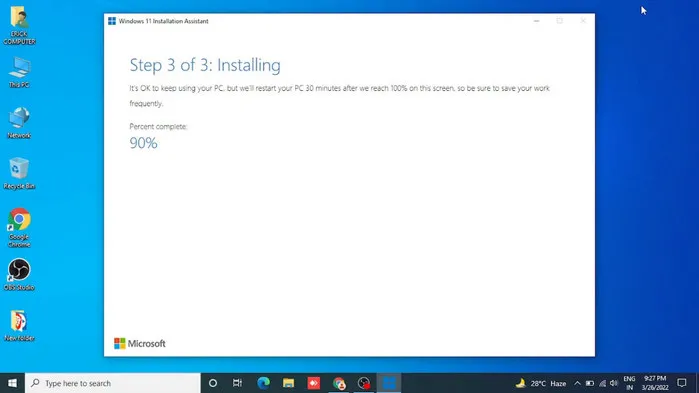
Next, I am assuming that you already have the Windows 11 Installation Assistant, so double click and run it. After you run the application, you have to wait until it should download Windows 11 from Microsoft servers.
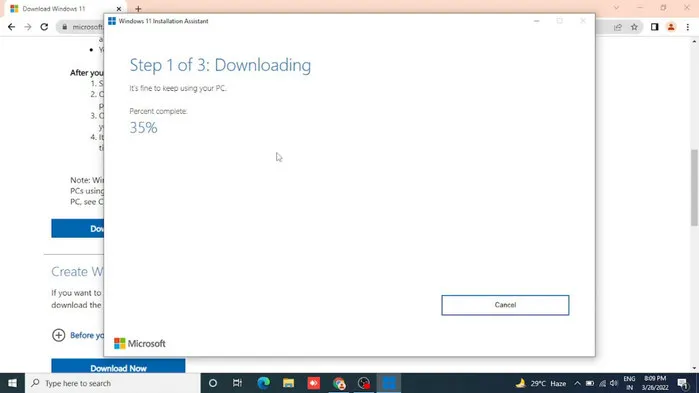
Once it downloaded Windows 11, it's going to verify that it is valid and is not corrupted.

In the next step, it is going to upgrade Windows 10 to Windows 11. You don't have to do anything. Windows 11 Installation Assistant will do everything for you.
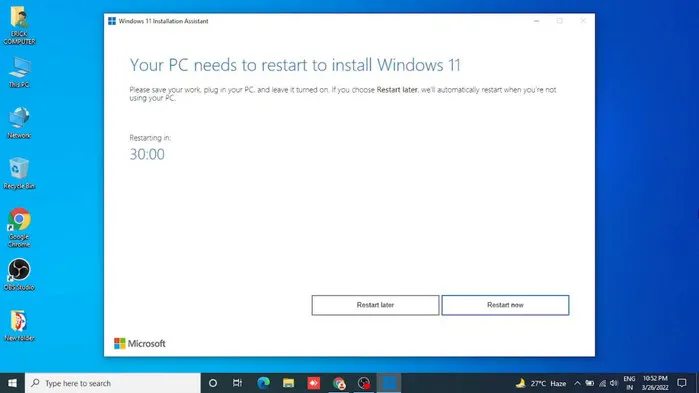
Once everything is done click on restart now, it's going to install the updates. Once the updates are installed, you will be in Windows 11.
Method 2: Install Windows 11 on Mac Using Boot Camp Assistant Directly
Compared to the first method it is a direct approach to installing Windows 11 using the Bootcamp Assistant. It is not like it's not time-consuming, it is but it is less time-consuming compared to the first method.
Let me explain how this method works. First we are going to make a bootable Windows 10 USB in Bootcamp. After that, we will delete the install.wim from the bootable USB and replace it with the one in Windows 11 ISO. That is!
[Updates] For macOS Big Sur and Monterey users, Bootcamp is no longer supported to create bootable USB. Instead, go ahead with UUByte ISO Editor instead.
Step 1:Prepare for Required Files
- Windows 10 ISO Latest Version
- Windows 11 ISO Latest Version
- An 8 GB USB Flash Drive
Step 2:Attach the USB and Launch the Boot Camp Assistant
Connect a USB flash drive to the computer and open Boot Camp Assistant app.
Step 3:Add Windows 10 ISO
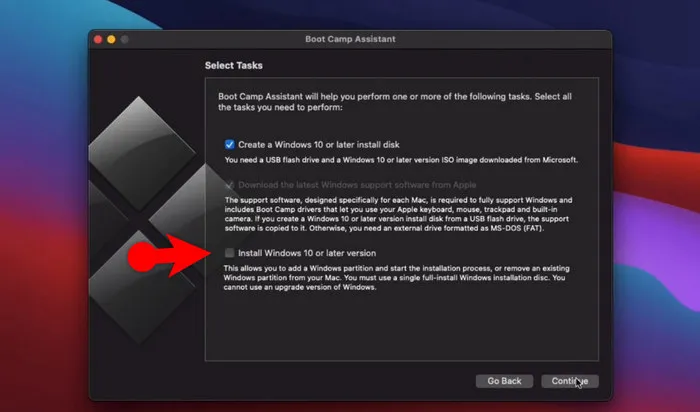
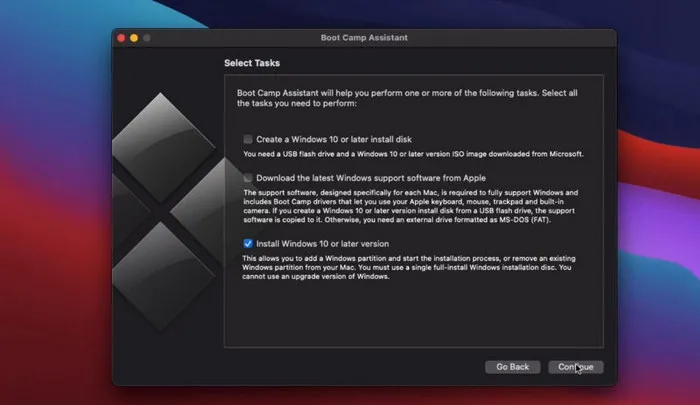
For the first time when the Boot Camp Assistant is launched click continue. In the next step, all the below three options will be selected by default. You have to uncheck only the third option and click continue.
- Create a Windows 10 or Later Install Disk
- Download the Latest Windows Support software from Apple
- Install Windows 10 or Later Version
By default, if the Boot Camp Assistant detects the Windows 10 ISO and the USB drive, it means you can click on Continue.
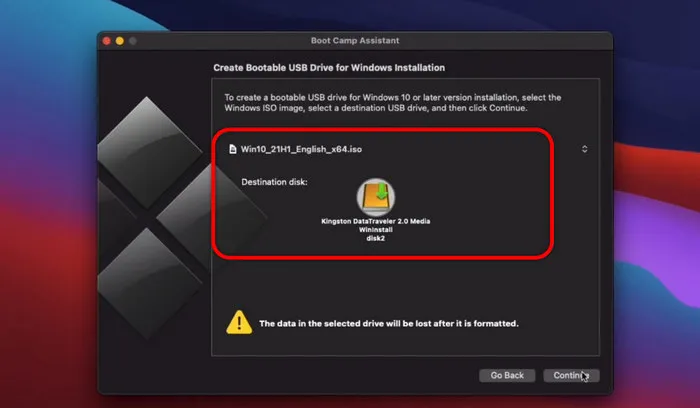
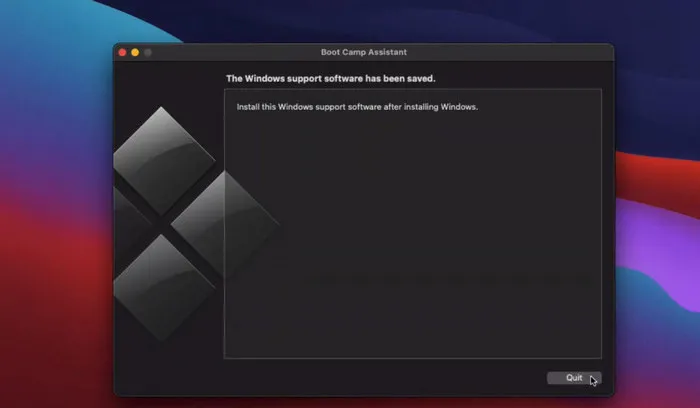
After that, you have to wait and make sure that you are connected to the internet. In this step Boot Camp Assistant is going to create a Windows 10 Bootable USB and it will download the required files for Boot Camp from Apple Servers. That's why an internet connection is required. Once everything is done, click on Quit.
Step 4:Mount USB
After performing the last step, check if the USB flash drive is mounted or not. If it is mounted you are good to go, if it is not mounted, take out the USB and reattach it to Mac again.
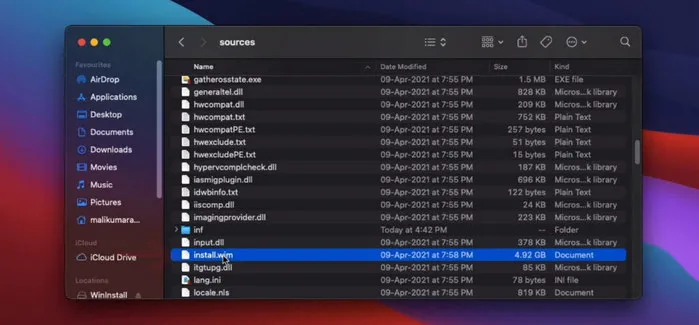
Step 5: Delete Install.wim File from USB
Once the USB Flash drive is mounted, you have to open it. Go to the sources folder and find the file called install.wim and delete it from USB.
Step 6:Copy Install.Wim in Windows 11 ISO and Paste to USB Drive
Double click the Windows 11 ISO image to mount it. You will see the mounted volume in Finder's sidebar. After that, go to the sources directory and find install.wim file. Next, paste the file to sources folder of bootable USB.
Step 7:Install Windows 10 or later
After the install.wim file of Windows 11 is copied inside the USB flash drive, you have to open the bootcamp Assistant once again. You can open the boot camp assistant by following Step 2.
Click Continue, and this time uncheck the first two options and make sure that the third option is selected, and then click Continue. The third option is for install Windows 10 or Later version.
Step 8:Create a Partition
Since this time, we are about to install windows 11, the Boot Aamp Assistant asks to enter the amount of storage for Windows. Once you have configured the amount of storage for Windows, click Install.
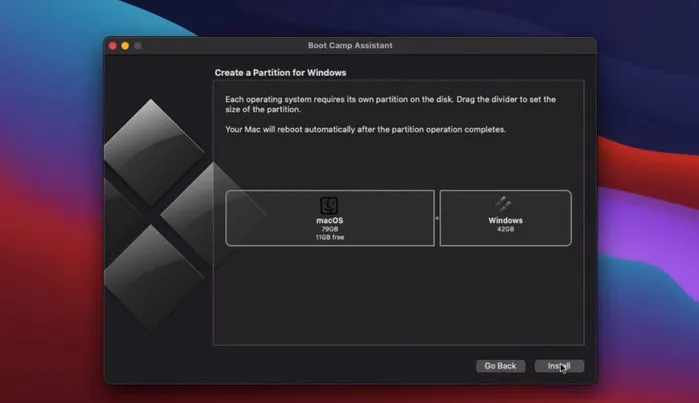
This part is going to take time because it's going to partition your hard drive. Once the partition is done, your computer will restart and it will boot itself from the USB flash drive.
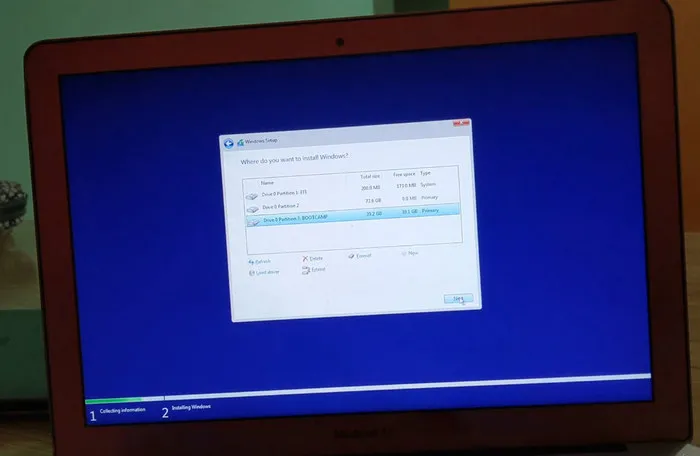
Step 9: Install Windows 11 on Mac
Once your computer restarts, you will be on the installation page of windows 11. This is a very important step. You have to select the correct partition known as boot camp to install Windows 11.
After that, you have to wait and follow the other basic steps of installing windows on a PC.

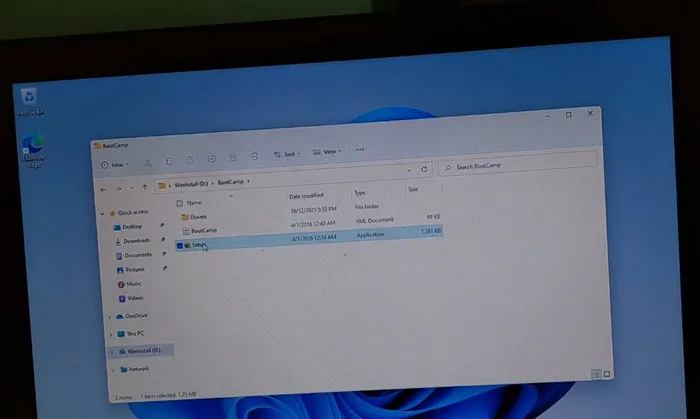
Step 10:Install Boot Camp Drivers
We just installed Windows 11 on Mac, but yet we have not installed the Bootcamp Assistant drivers from the USB that was downloaded earlier. So open the USB flash drive, go to the Bootcamp drivers and double click on the installer install it. Once the installation of the Boot Camp drivers it's done, your PC is going to restart itself.
Conclusion:
Feel free to use any of the methods that you are comfortable with to install Windows 11 on Mac with Bootcamp.
However, if you ask for my suggestion, I would go for the second method. Because it is less consuming compared to the first method. In the first method, you have to install Windows 10 on your computer then you have to upgrade that to Windows 11. That is quite taking a lot of time and storage. But at the same time, the second method is quite simple and less time-consuming and it will be installed only once. And don't forget that it's not going to take a lot of storage.

Petty is editor in chief at UUByte and writes various topics about Windows and Mac to help people make the most of current technology.