
Can I install Windows 11 on a M1 Chip Mac (Apple Silicon)?
The simple answer is No (till the time we wrote this post Mar 28, 2022).
According Microsoft documentation, Windows 11 has no native support for Apple M1 ARM chips, only Qualcomm Snapdragon ARM chips are supported. In addition, Windows 11 also requires TPM 2.0 and Secure Boot, which is also not available on Macintosh computers.
From our researching, the only possible way is to install Windows 11 on a M1 chip Mac (Apple Silicon) as a virtual machine. macOS and Windows 11 dualboot is impossible! If you are interested in this solution, please stay tuned!
Qualified Virtual Machine Software for Installing Windows 11 on M1 Mac
Not all virtualization software are capable of running Windows 11 on M1 Mac. As far as we know, you can only install Windows 11 on M1 Mac either with Parallels Desktop or VMware Fusion. There are couple of reasons why other virtualization software are not supporting Windows 11 on M1 Chip.
The first reason is that M1 is an ARM-based processor and Oracle have not built and ARM version of VirtualBox.
The second reason is about TPM 2.0. Windows 11 compulsively requires TPM 2.0, which is a high level of hardware security module.
What is Parallels Desktop?
Parallels Desktop is a dedicated virtual machine software for Macintosh that allows the users to easily emulate and install a guest operating system on macOS. One of the operating systems that can be emulated is Windows. You do not even need to reboot the Mac in Parallels Desktop and you can use Windows whenever you want.
In simple words you can install multiple operating systems on your Mac with Parallets Desktop app (also known as Guest OS).
What is VMware Fusion?
VMware is a tech giant in desktop and cloud virtualizationa area. It provides virtualization software for desktop operating systems, including Windows and Mac. And VMware Fusion is the latest virtualization solution for Mac users. Just like Parallels Desktop you can determine the amount of hard drive, RAM, snapshots and more. Recently VMware has released VMware Fusion for M1 but installing Windows 11 ARM version is a bit tricky. I will provide a link where you can learn How to Install Windows 11 ARM in VMware Fusion.
In this post, we will show you how to install Windows 11 on a M1 Mac by using Parallets Desktop, which is much simpler than VMware Fusion.
Quick Summary:
- 1. Download and install Parallels Desktop 17
- 2. Download Windows 11 ARM Edition (VHDX)
- 3. Create new Windows 11 Virtual Machine in Parallets Desktop 17
- 4. Start installing Windows 11 on M1 Mac
- 5. Add TPM 2.0 chip to run Windows 11 on M1 Mac flawlessly
Get Started: Download Required Files
In order to install and test windows 11 on M1 Mac you need to download the required files first.
Download Parallels Desktop 17: Parallels Desktop 17 is the only version that supports running Windows 11 on M1 chip. So, you need to download Parallels Desktop 17 first. By default, Parallels Desktop 17 is not free, but you can get a 14 days trial. Once you are satisfied with the performance of Parallels Desktop 17 running windows 11, then you can upgrade to a paid plan.
Download Windows 11 ARM Edition: When Microsoft released windows 11, they also released an ARM edition of windows 11 to the insider preview users. Up until now Microsoft have not released an ISO For Windows 11 ARM edition, but yet you can get the VHDX file to run and test windows 11 on M1 Mac. It is around 10 GB and you must be part of the Insider Preview to download the file. So go on and create an insider preview account right away and download Windows 11 ARM editions.
How to Install Windows 11 on M1 Mac with Parallets Desktop 17
Step 1: Install and Run Parallels Desktop 17
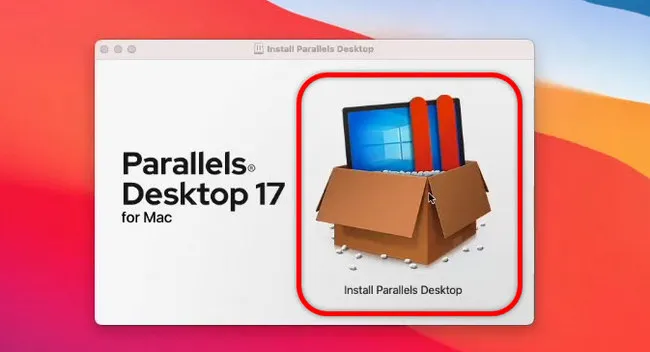
You need to download Parallels Desktop 17 app and then double click on the DMG file to begin the installation. Once the installation wizard is opened, click on the Install Parallels Desktop.
Then macOS will warn you that the downloaded app is downloaded from the internet. Are you sure about installing the app on mac, simply click Open to go on. After that, Parallels Desktop 17 asks you to grant permission to access Downloads folders, then you have to wait for the installation files to be downloaded from cloud.
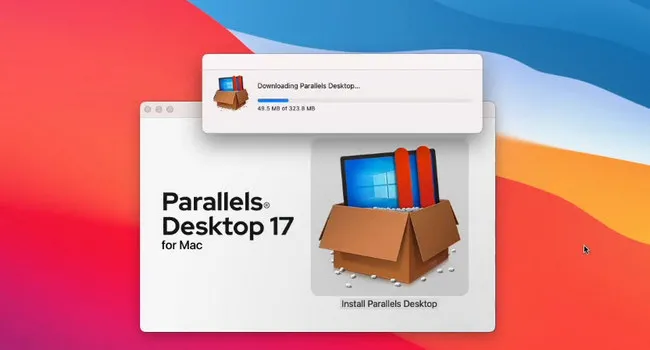
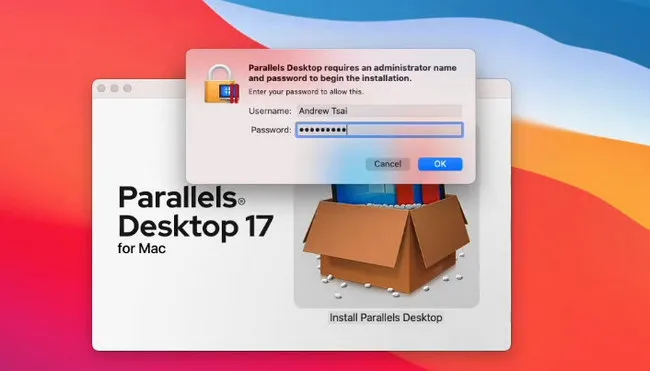
It is time for you to wait until Parallels Desktop 17 fetch files form the cloud. Next, enter the credentials to allow the installation process to be completed.
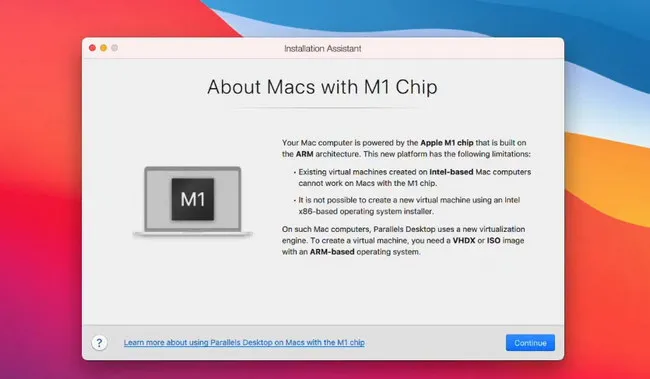
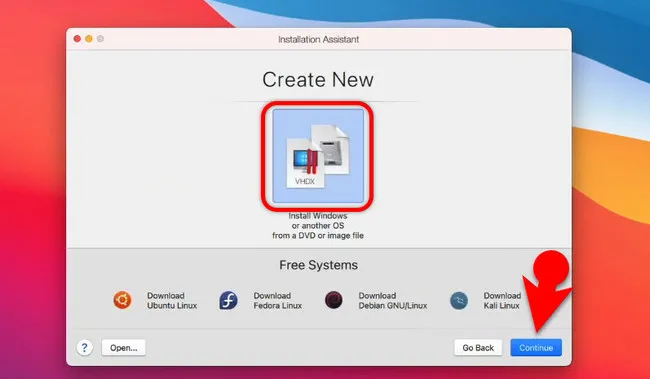
Once the installation is done, the Parallels Desktop 17 will be launched automatically. In the Install Assistant window, it tells you that you can't run Windows X86. The only way to install Windows 11 on M1 Mac is to use an ISO image or a VHDX file for ARM-based guest operating system.
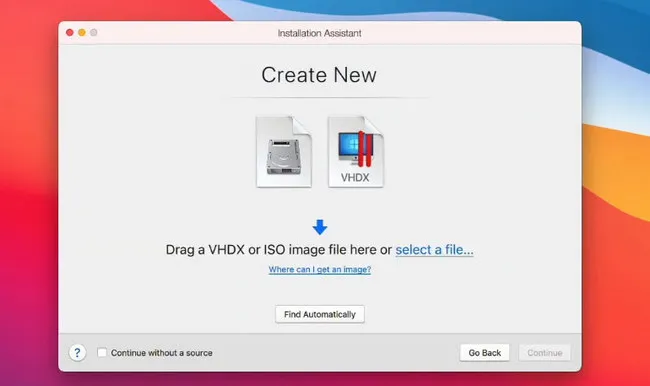
Step 2: Import Windows 11 VHDX File
After downloading and installing Parallels Desktop 17 in your Mac, you need to locate and import windows 11 VHDX image. But before that click the Continue button at the bottom.
If the VHDX file is at the same folder of Parallets Desktop app, then it will be detected by default. If not, you have to manually import the image into the app.
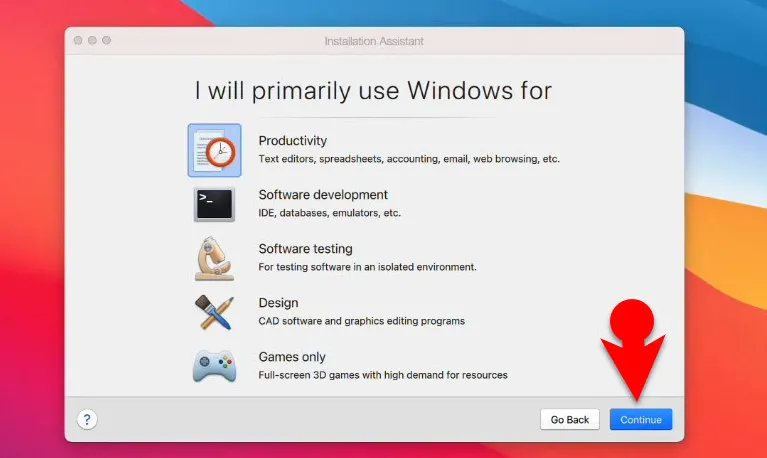
Step 3: Choose A Reason for Installing Windows 11
On the next step you need to choose a primary reason for installing Windows 11. it could be for productivity, software development, design or gaming.
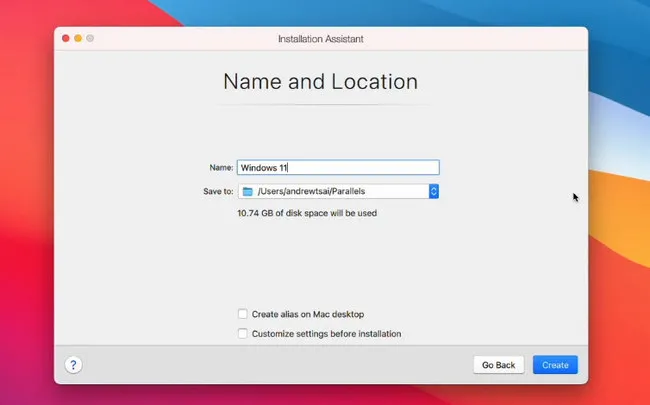
Step 4: Choose a Location to Save Windows 11 Virtual Machine
In this step you need to provide a name for this Windows 11 virtual machine and choose a location to save it.
Step 5: Download Windows 11 Upadtes
Once the creation of windows 11 virtual machine is done, click on Continue to start running Windows 11 on M1 Mac.
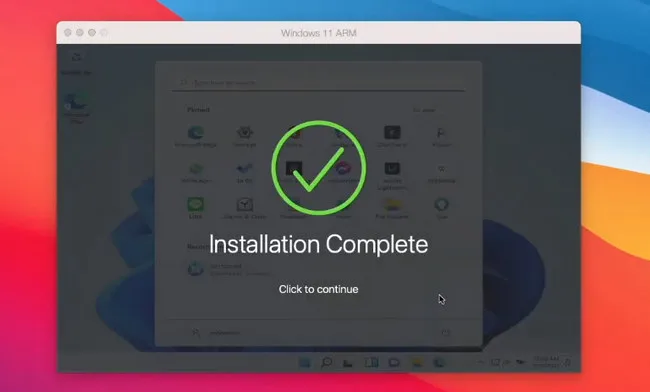
By default Parallels Desktop 17 is going to full size your screen, and it will start downloading the latest updates of windows 11.

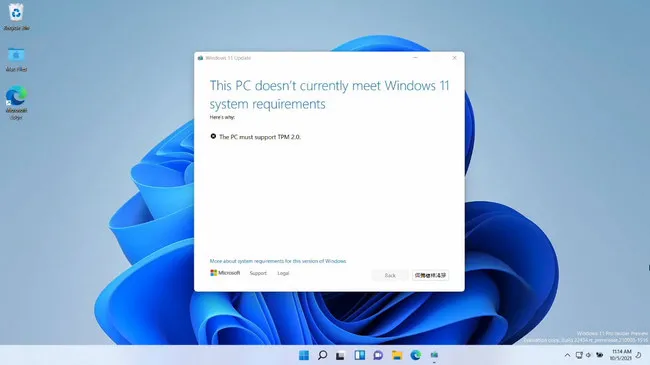
Fix TPM 2.0 Issue in Parallels Desktop 17
As we know, TMP 2.0 is required to run Windows 11 on any platform, no matter it is a physical machine or virtual machine. Until now, we have not configured TMP in Parallets Desktop app. As result, you will notice an unusual error caused by TPM 2.0, saying this PC does't currently meet Windows 11 system requirements as it must suport TPM 2.0. We will let you know how to fix this in the following section.
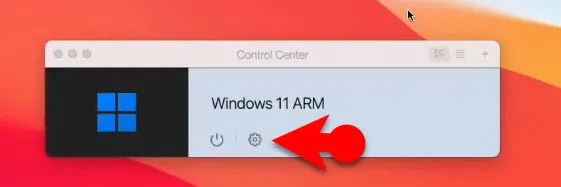
The good news is that virtual TPM is configurable in Parallels Desktop 17. This feature is also available in free trial.. In order to fix the TPM 2.0 issue, you need to shut down Windows 11 first. When Windows 11 is powered off, click on the Parallels Desktop on the menu bar and choose open Control Center.

Next, click on the settings icon so you can configure a few options for this virtual machine.
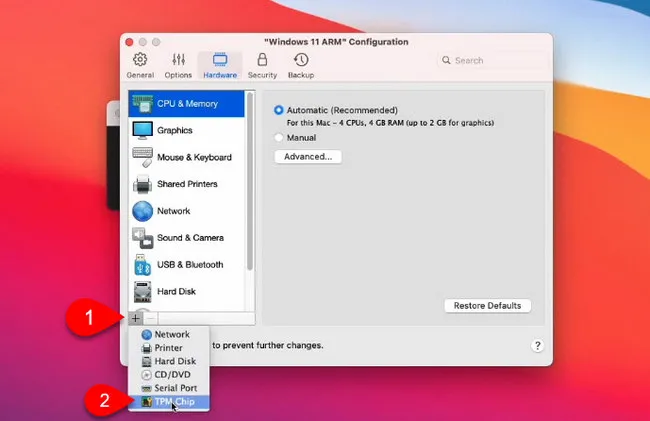
There are a couple of tabs in configuration panel. At this thime, you should move to hardware tab to add TMP module for Windows 11 virtual machine.
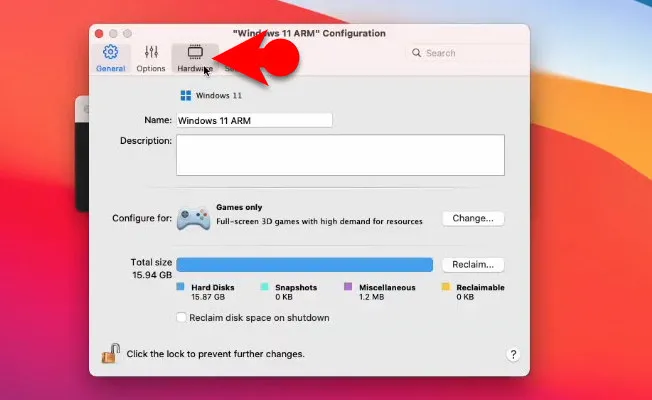
At the bottom click on the plus icon, then select TPM chip from the drop-down menu..
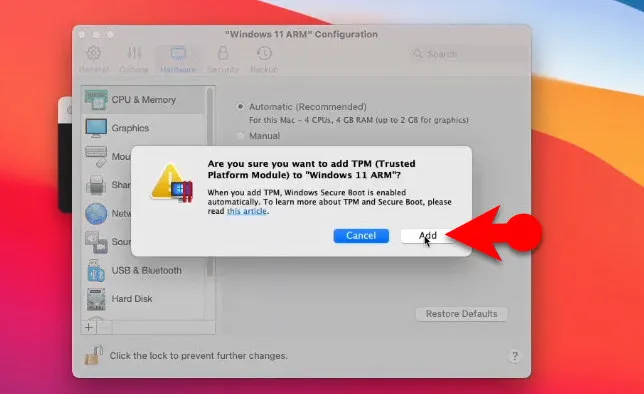
There will be a new pop-up window to ask if you really want to add a TPM to this Windows 11 ARM machine. Please confirm the operation by clicking the Add button. This will add a new TPM chip to Windows 11 guest operating system. Finally, you are ready to power on the virtual machine and start enjoying Windows 11 on a M1 Mac.
Summary:
If you are trying to install windows 11 on a M1 Mac, then Parallels Desktop and VMWare fusion are the only methods you could choose from. There is no Boot Camp Assistant support currently with the M1 chip, it means there is no dual boot.

Petty is editor in chief at UUByte and writes various topics about Windows and Mac to help people make the most of current technology.