
Creating a Windows 11 bootable USB is not difficult at all when you were on a Windows PC. However, the task becomes more challenging on a Linux machine. Fortunately, we are able to find a couple of software to get the job done, including GParted, Ventoy, Disks and WoeUSB.
If you want to know how to create a Windows 11 bootable USB in Linux, just follow our simple and step-by-step procedure. However before starting the step-by-step guide, you need to get the following things.
- Windows 11 ISO File
- An USB flash drive with at least 8GB storage.
Points to be Noted
Ubuntu: I am using Ubuntu Linux in this tutorial to create a Windows 11 installer media.
Partition Style: Whenever you are going to format a physical drive, there are two partition styles you can choose from. It is either Master Boot Record (MBR) or GUID Partition Table (GPT). True, there are differences between MBR vs. GPT. For example, GPT is better at large volumes of storage and performing repairs on a system. However, there's no major reason to choose one over the other.
For this post the 1st and 2nd methods are used to create a GPT partition style for Windows 11. However, the 3rd and 4th methods are used to create a MBR bootable USB for Windows 11.
How to Create Windows 11 Bootable USB in Linux with GParted
GParted is a free utility for editing and managing disk partitions in Linux. It supports various file systems and it is able to create new partition, delete partition and resize the existing partition. In our first example, we will use GParted app to create a Windows 11 bootable USB.
Before getting started, please attach an USB flash drive to the computer.
Step 1: Install GParted
There are two ways in Ubuntu that you can install GParted, Ubuntu Software and Terminal.
Open the software is like a store where you can graphically download any application from within it. However, in my experience Ubuntu software is a lot slower compared to the terminal. So, I prefer using terminal instead of Ubuntu software. In order to install GPartedusing the terminal type that below command and press enter.
sudo apt install gparted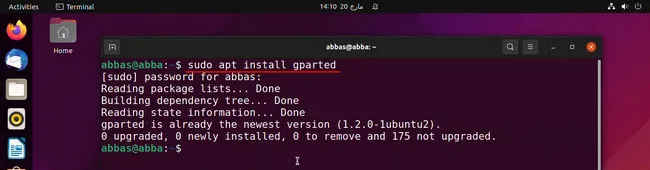
Step 2: Select the USB
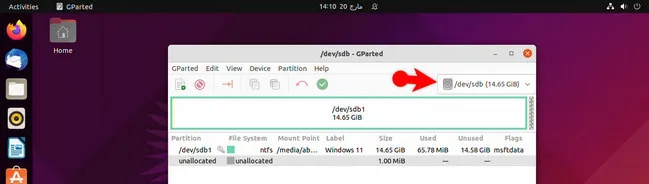
After installation, you can launch the application from Launchpad. From the top panel you have to select the USB flash drive flash drive. Now, go to the devices menu and choose create a partition style.
Step 3: Format USB Drive
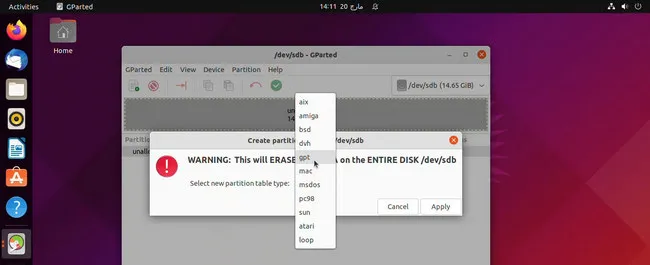
In the partition style menu, you need to choose gptfrom the pop-up list. Once you did that one click on Apply to save the change. This is going to remove everything on the USB flash drive so back up your files first.
Step 4: Create New Partition
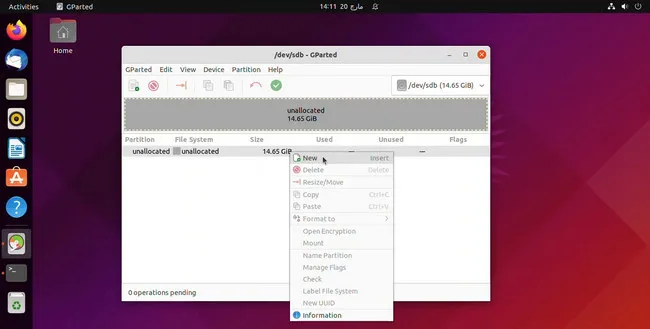
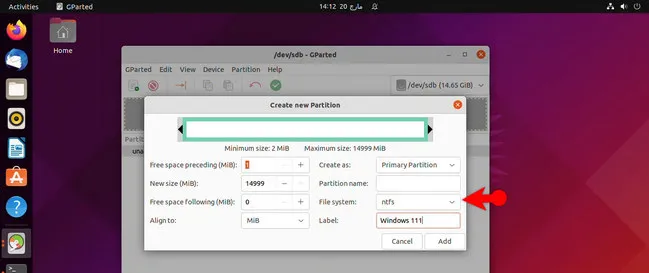
After choosing the correct partition style, it is time to create a partition and choose a file system for the USB flash drive. FAT32, NTFS and exFAT are fine for Windows 11. However, NTFS is mostly common in windows so you have to select NTFS as the target file system. In order to create a file system for the USB, right click on the unallocated and select New.
In the front of file system, select NTFS and I have also labeled the USB flash drive as windows 11. Once you are done, click on Add.
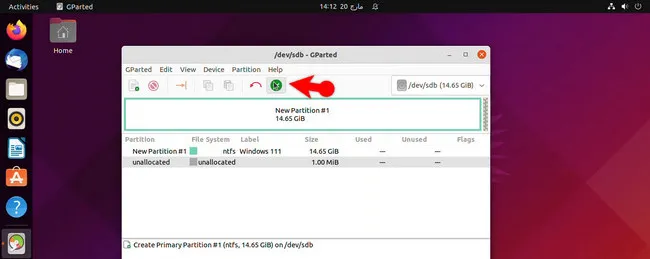
Good news is that you have configured every setting up until now, however the settings have not yet applied, so click on the tick icon to save the changes.
Step 5: Mount Windows 11 ISO and Copy Files to the USB
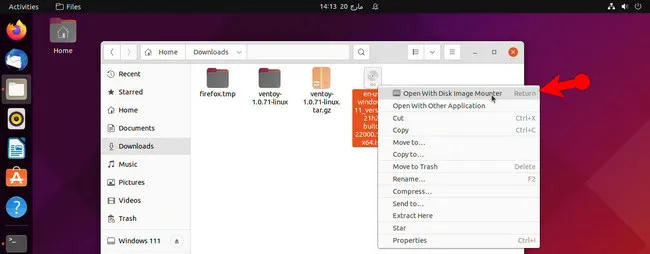
Everything is ready and we are good to go to copy the files from the windows 11 ISO image inside the USB. However, the windows 11 ISO has not yet mounted so right click on the ISO and select Open With Disk Image Mounter.
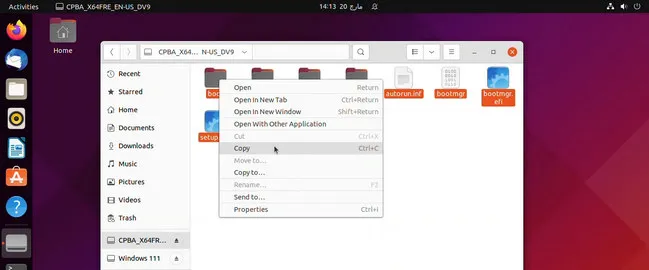
After mounting the Windows 11 ISO, copy all the files and paste it inside the USB Flash Drive.
How to Create Windows 11 Bootable USB in Linux with Ventoy
The second tool that I am highly recommending to create a bootable USB for Windows 11 is Ventoy. Just like GParted, Ventoy is also very flexible and powerful. The most important feature is that Ventoy is able to create a multi-boot USB without formatting the drive again and again.
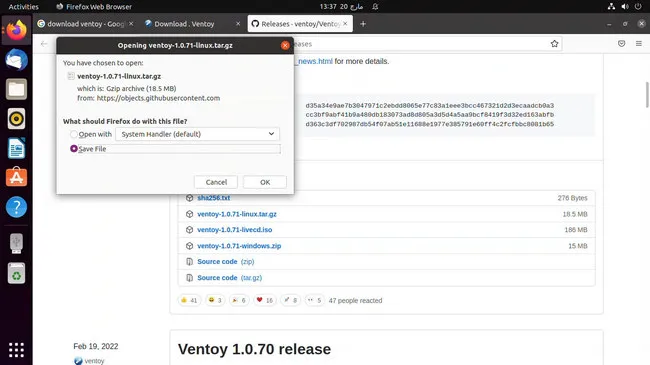
Step 1: Download Ventoy
Ventoy is available both for Windows and Linux. Please download Linux version of Ventory (ventoy-1.0.71-linux.tar.gz) from this link.
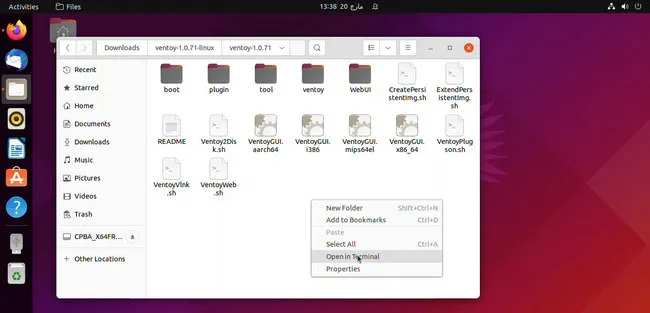
Step 2: Extract and Launch Ventoy
After downloading the file, you need to extract it. After extraction, open the folder right click on it and choose Open in Terminal.
Inside the Terminal type 'sudo sh VentoyWeb.sh' and press enter.
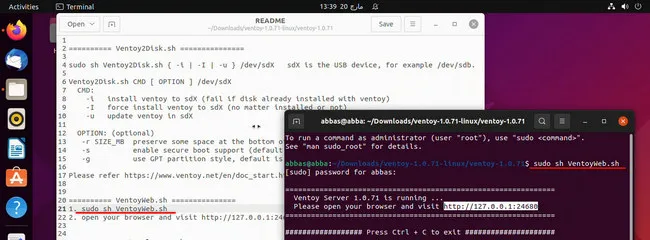
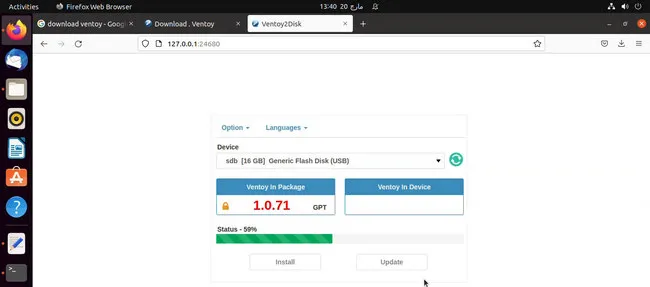
After executing that command, Ventoy is going to provide you an IP address, you have to copy that IP address and paste it in your favorite browser. On the below screenshot you can see that the Ventoy has detected the USB flash drive, the partition is style is MBR and it is ready to go if I click on the Install button.
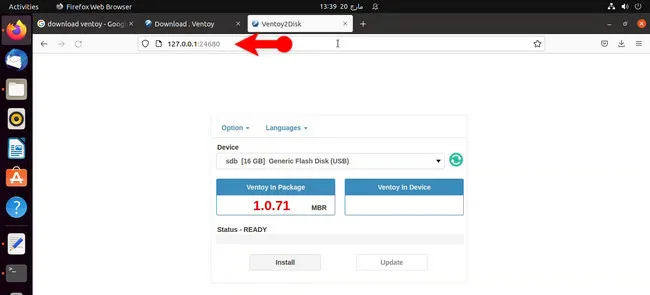
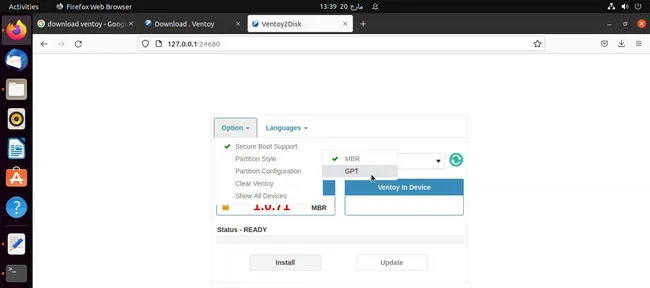
Step 3: Change Partition Style
However, I prefer windows 11 in a GPT partition style so I need to change that. To change the partition in style, click on Options -> Partition Style and choose GPT.
Step 4: Create Windows 11 Bootable USB
You can also configure other settings like secure boot too that is if you want. Once you are ready click Install and it is going to create a Windows 11 bootable USB for installation.
Step 5: Copy Windows 11 ISO to Ventoy USB
The moment the USB flash drives creation is done, you can close your browser and press control + c on the Terminal to close the currently running server of ventoy. The final step is to copy the windows 11 ISO files into the USB. That is!
How to Create Windows 11 Bootable USB in Linux with Disks App
Ubuntu has a built-in feature that you can use it easily to create a bootable USB for Windows 11. This is called Disks.
Step 1: Run Disks App
To launch the Disks app, click on the Launchpad and search for 'disk'. Before opening the Disks utility, make sure that the USB is connected to the computer.

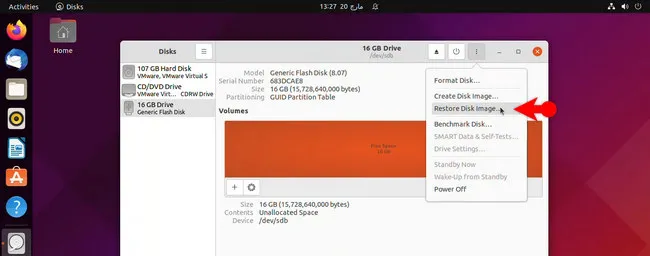
Step 2: Restore Disk Image
After launching the disks, select the USB flash drive, and then click on the three dots at the top. After that you have to choose Restore Disk Image.
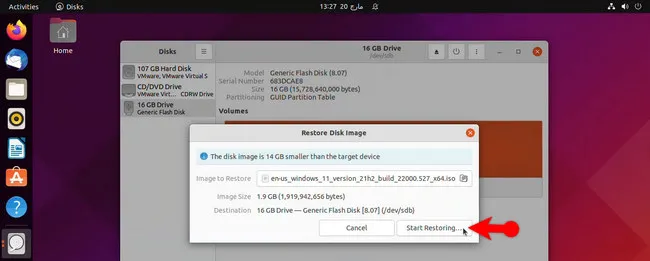
From the new window, you have to locate the windows 11 ISO image and click Start Restore... . Enter the admin password and this will start burning windows 11 ISO to the USB. Wait until the files are copied into the USB drive.
How to Create Windows 11 Bootable USB in Linux with WoeUSB
The last tool we recommend in this post is WoeUSB, a dedicated system utility for making Windows USB installer on GNU linux platform. It supports legacy and UEFI booting.
Step 1: Install WoeUSB
Type the below commands one by one in terminal.
sudo add-apt-repository ppa:tomtomtom/woeusbsudo apt update && sudo apt install woeusb-frontend-wxgtk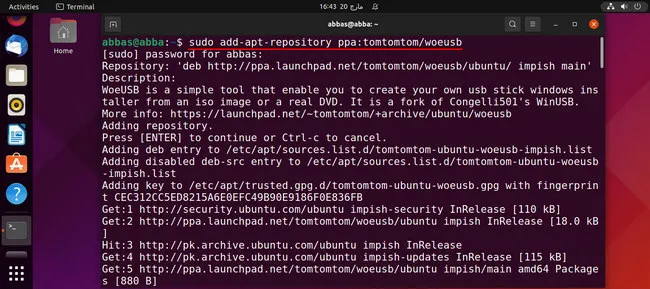
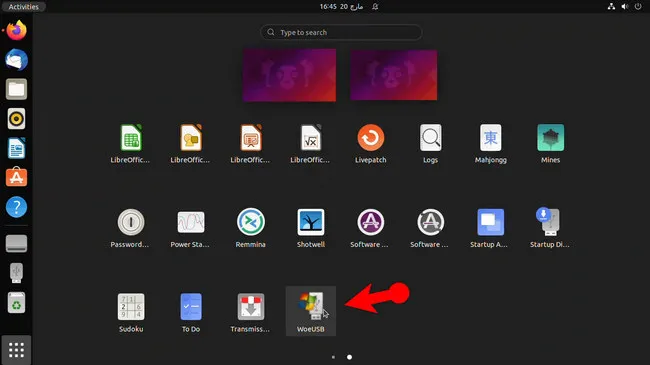
Step 2: Open WoeUSB App
To launch the WoeUSB, go to the Launchpad, search for WoeUSB and open it.
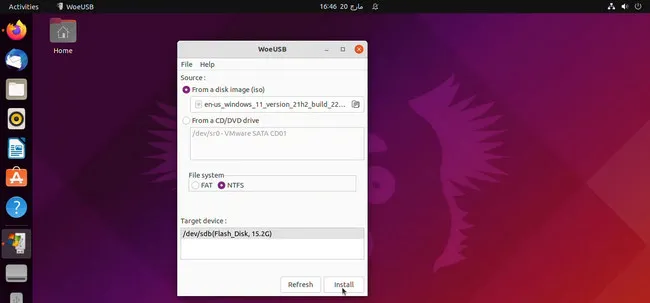
Step 3: Configure the Settings
Under the Source: menu click on the file icon and locate the windows 11 ISO image. Once the ISO is selected, you have to pick up the file system, and then choose the USB just plugged in and finally click Install button to start making a bootable Windows 11 USB.
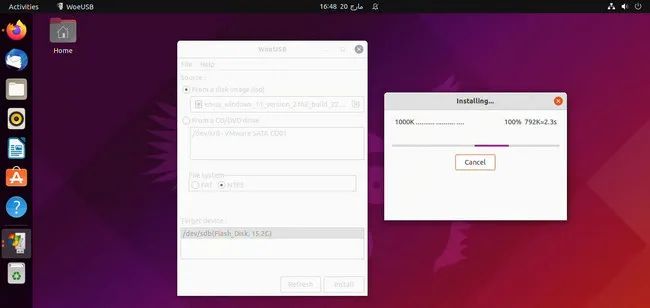
And here is the process of copying Windows 11 ISO files to the USB. Once it is done, you will get a bootable USB for Windows 11 installation.
Conclusion
There are other several methods that you can use to create a Windows 11 bootable USB in Linux. However, among them the one that I prefer mostly for anyone that is GParted, specifically if you are using Ubuntu. Other methods are also cool.

Petty is editor in chief at UUByte and writes various topics about Windows and Mac to help people make the most of current technology.