
Windows 11 is great but it is not perfect yet even after several months of official release. We found some apps are not working well in Windows 11. Hence, some of the Windows 11 users might want to create a Windows 10 virtual machine to run those problematic apps or test new apps.
Virtualization is a very powerful and full-fledged technolog. In this post, we will show you how to build a new Windows 10 virtual machine on a Windows 11 PC for free.
Prerequisites:
Before diving into the details, you need to prepare for a couple things in order to create a Windows 10 virtual machine on Windows 11. There are including:
- Enable virtualization feature in BIOS.
- Download Windows 10 ISO image.
- 8GB of RAM.
- 100 GB free storage.
Enable Virtualization From BIOS
The first step for every user who want to try virtualization on their computer, they need to make sure if virtualization feature is enabled in BIOS. Please follow the below steps to turn it on.
Power off the Windows 11 computer, and press the BIOS key (Google it if you don't know). In my case I am using a Lenovo IdeaPad 320 series, which it has one key recovery. When I click with the pin on the one key recovery, it will take me exactly to the place where I can choose to go to the BIOS.
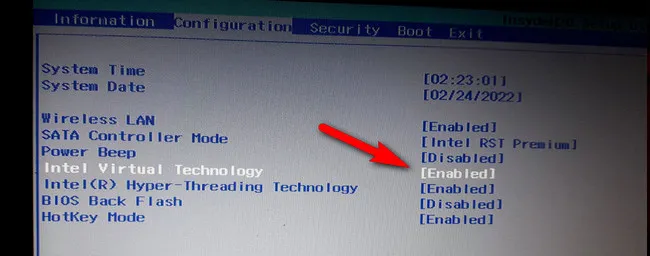
Once landed in BIOS settings, navigate to the Configuration tab and enable virtualization technology on this PC.
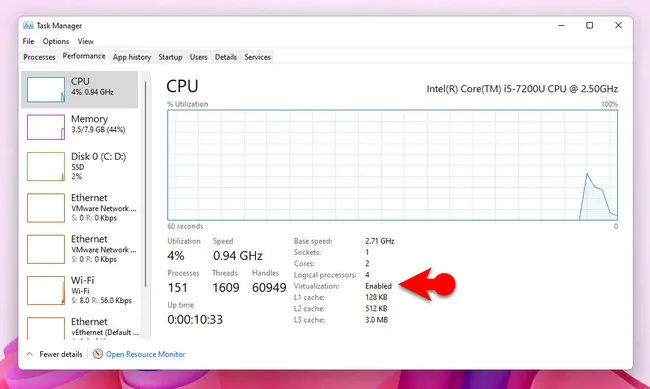
After enabling the virtualization from BIOS, but the computer normally. To check if the virtualization is enabled, open Task Manager > Performance tab there you will see if it is enabled or not.
Download Windows 10 ISO Image
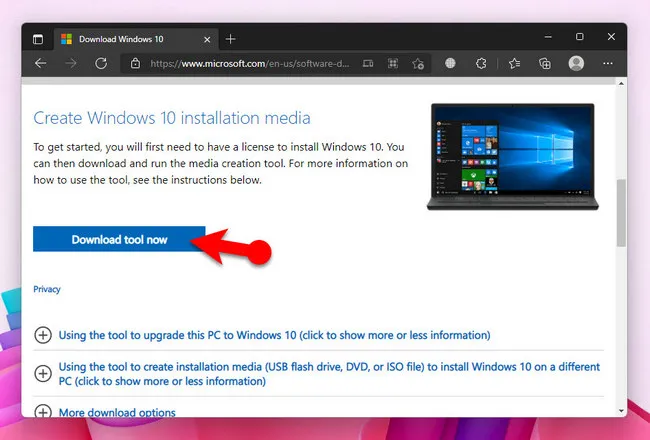
The second step which is really required for you to do is download the Windows 10 ISO image. The simplest method that you can use to download Windows 10 ISO image is to use the windows media creation tool. Download and install it on a computer, also make sure that you have a very fast Internet connection.
Create a Windows 10 Virtual Machine in Windows 11 with Hyper-V
Hyper-V is a built-in feature in Windows 11 for creating virtual machines. You don’t need to download and install additional software to complete this task. We are going to demonstrate this new technology at first place.
Step 1: Turn on Hyper-V
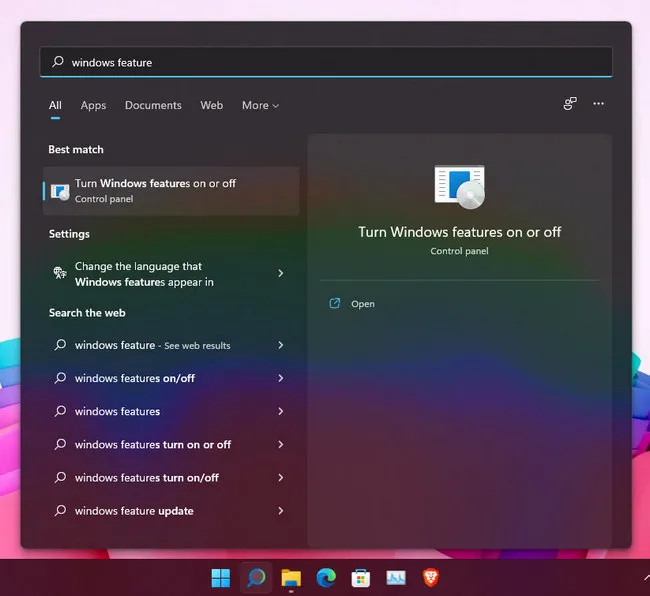
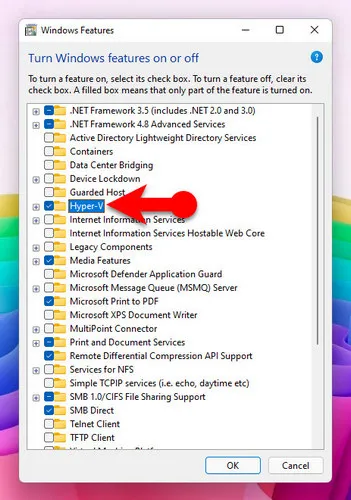
In order to create a Windows 10 virtual machine on Hyper-V in windows 11, the first step is to enable itin windows 11. Now, click on the search icon at the taskbar and open Windows features.
The moment windows feature is opened, you have to find out Hyper-V and check its box fully stop after that one click OK at the bottom.
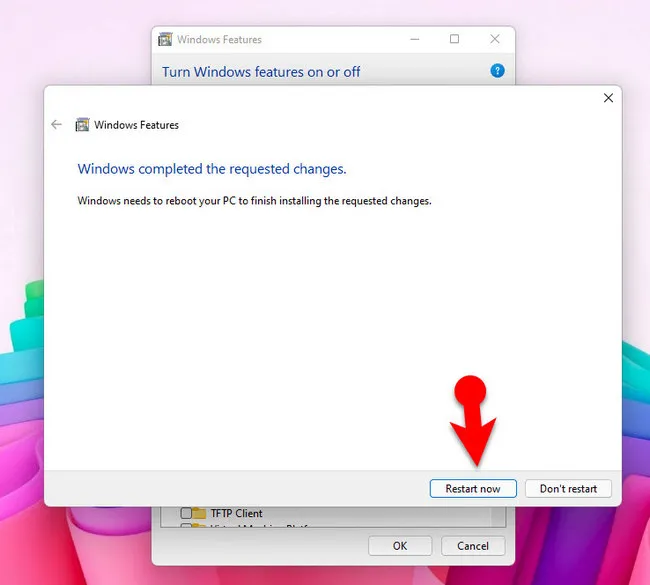
Windows is going to search and download required packages from the Internet. Once it's ready it's going to apply the changes.

Now that everything is ready, close all of your other works on your computer and click on Restart now.
Step 2:Open Hyper-V Manager and Create a New Virtual Machine
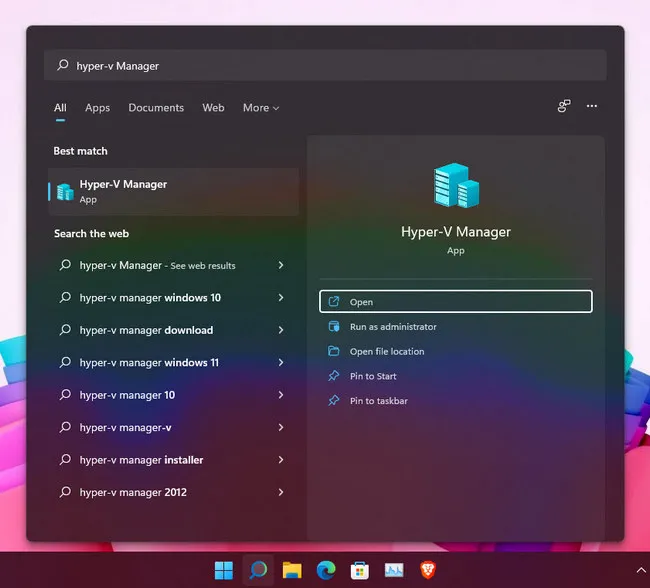
To open Hyper-V, once again click on the search icon in the taskbar and search for Hyper-V manager to lancuh the app.
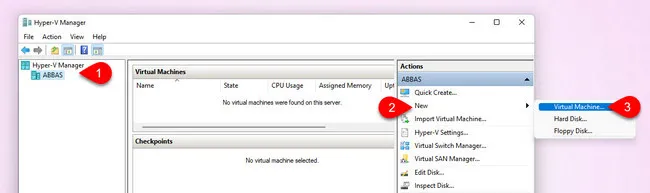
To create a virtual machine with Hyper-V Manager, the first first step is to click on your user name and then click on New and choose Virtual Machine...from pop-up menu.
Step 3:Begin Virtual Machine Settings
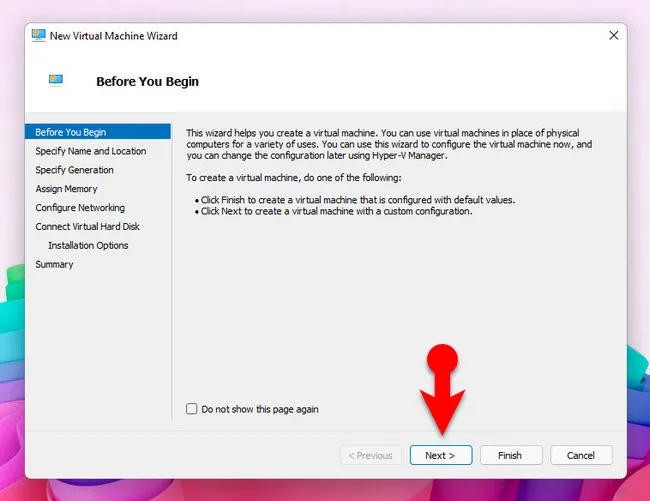
Now we are officially on the stage where we are ready to create a new Windows 10 virtual machine in Hyper-V. The first window that you are seeing is known as before you begin where Microsoft explained details about how virtual machine works.
Step 4:Specify VM's Name and Location
This is the place you need to provide a name for virtual machine and then click on browse and save it in a desired location. You can also leave the location as with the default settings, it's up to you.

Step 5:Select Generation
You need to specify a generation for Windows 10. There are two generation in Hyper-V manager.
Generation 1: Support 32 and 64-bit off operating system.
Generation 2: Only support the 64-bit operating system.
The 32- and 64-bit differences between generation 1 and generation 2 are only the surface of differences among them. However, in terms of features compatibility among the generation 1 and generation 2; refer to the Microsoft official website and read about them in detail.
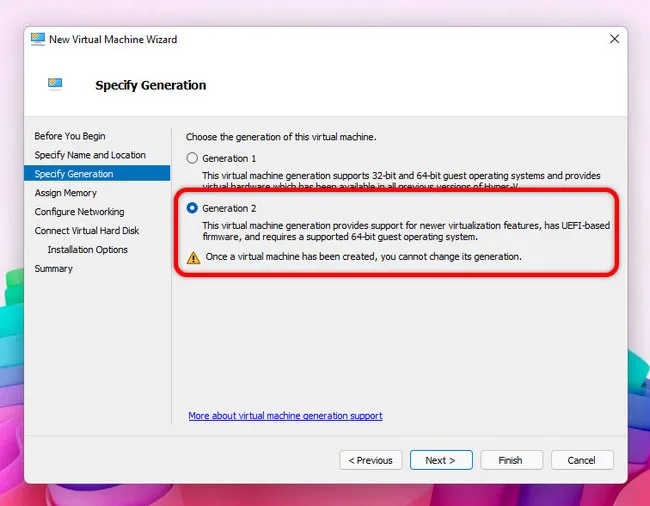
Also, if you are confused about which generation you have to choose, the answer depends on your operating system's version. In my case I am going to install the windows 10 64-bit operating system, so I'm going to choose generation 2. However, still if you are confused there is a full detailed guide about which generation you have to choose in Microsoft official website refer to it and read it from this document.
Step 6:Assign RAM
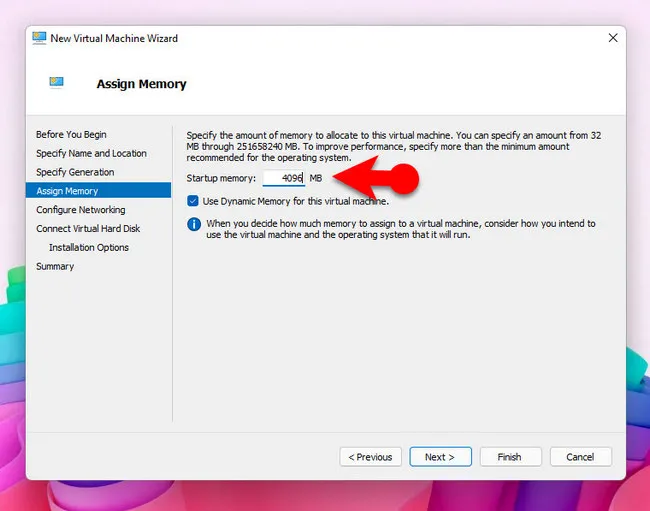
You need to assign memory size to the virtual machine, for a better performance I'm going to provide 4 GB of RAM to this new Windows 10 virtual machine.
Step 7:Configure Networking
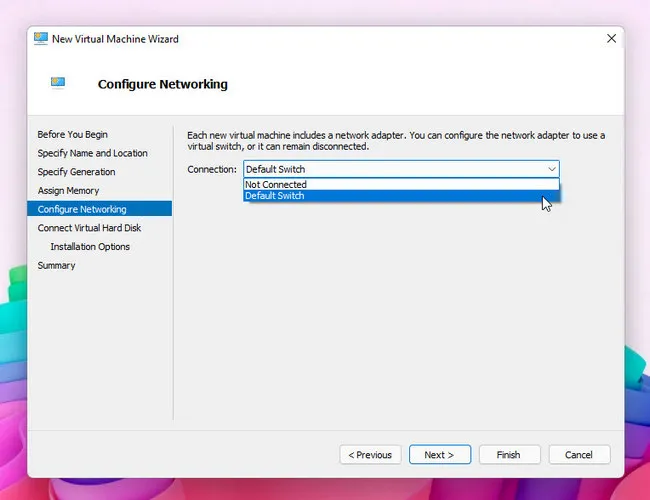
On the configuring network window click on the drop-down menu and choose Default Switch.
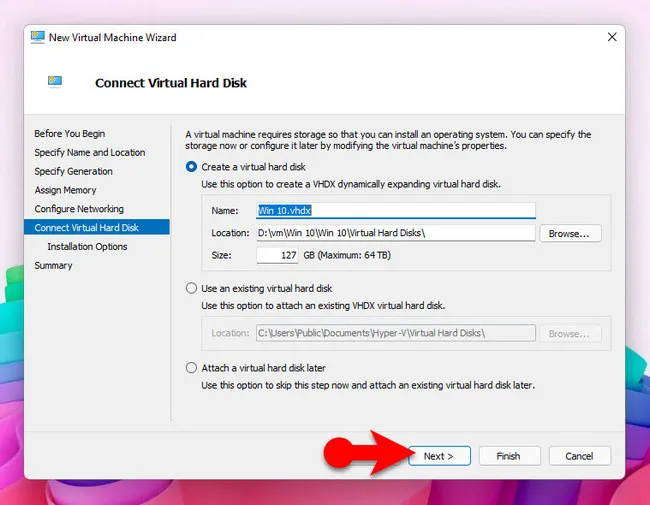
Step 8:Create Virtual Hard Disk
You need to connect a virtual hard disk to hold the virtual machine. Currently, there are 3 options here. Since we are creating a new virtual machine, you have to choose Create a virtual hard disk, provide a name to the hard disk, save it into another location if you want and finally configure the size. Once you already click Next move to the next step.
Step 9:Add ISO to Virtual Machine
On the installation options page, choose the second option and then click on the browse and locate the Windows 10 ISO.

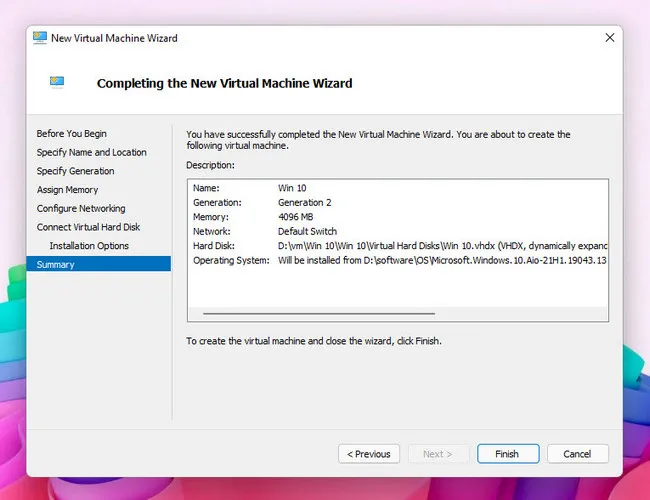
Step 10:Review the Settings
Finally review all the settings that you have yet configured for the virtual machine, if everything is OK simply click Finish.
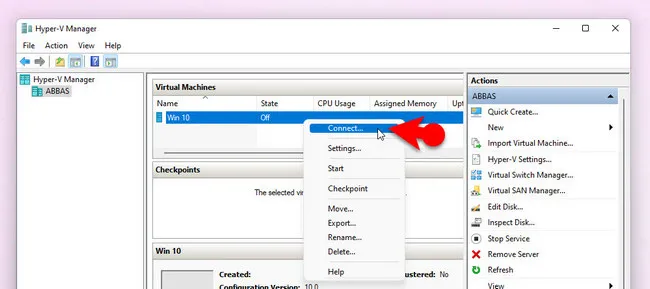
Step 11:Boot Virtual Machine from Windows 10 ISO Image
It is time for you to boot the Windows 10 virtual machine from Hyper-V Manager. Right click on the virtual machine and then click Connect....
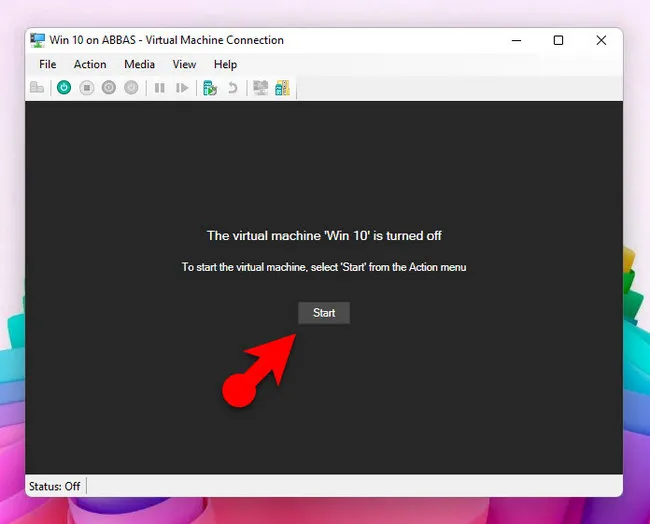
Step 12:Start Installing Windows 10
It is time to begin the installation process of Windows 10 on Hyper-V manager, so click Start button and begin the Windows 10 installation process.
Create a Windows 10 Virtual Machine in Windows 11 with VMware Workstation
Another famous name which is providing virtualization software for is VMWare. VMWare is a giant tech company. The software in our tutorial is VMWare Workstation 16 Player, one of the best virtual machine software on earth.
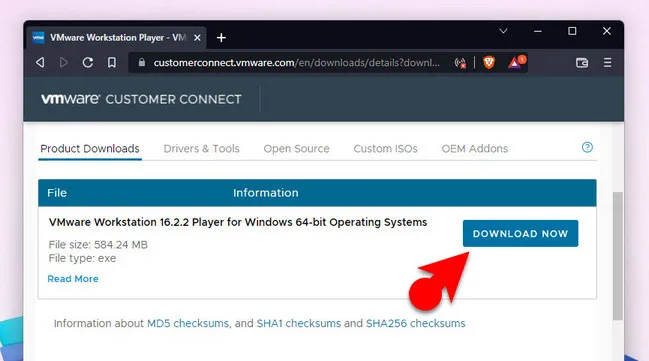
Step 1: Download VMWare Workstation 16 Player
So, you get my clue, we need to download the VMWare workstation 16 player first. Here is the direct download link.
Step 2: Install VMWare Workstation 16 Player
After downloading the VMWare workstation player, you have to install the application. Fortunately, this task is easy, all you have to do is double click on the installer and follow the instructions on the screen, that's all.
Note: At the same time in one PC, you cannot run Hyper-V and VMWare Workstation Player together. So, if you want to work with VMWare, you have to turn off Hyper-V. However, if you want to work with VMWare and VirtualBox, there is no issue it will work without any problem.
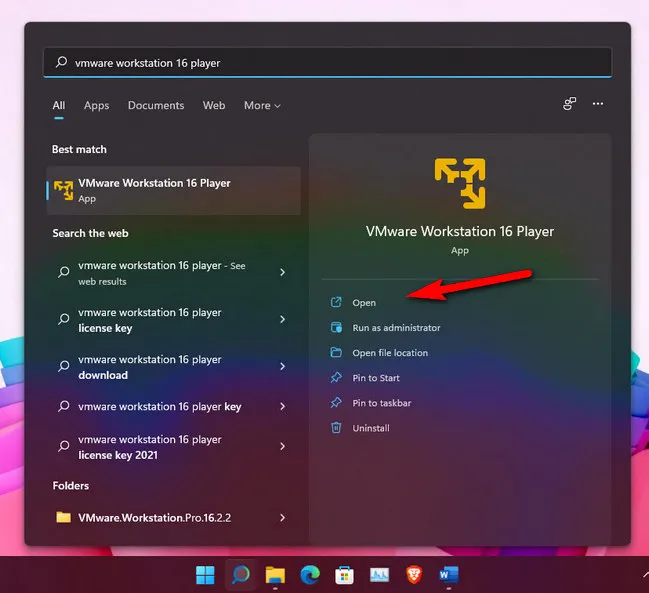
Step 3:Open VMWare workstation 16 player
After installing the VMWare workstation 16 player, click on the search icon at the taskbar and search for VMWare workstation 16 player and open it.
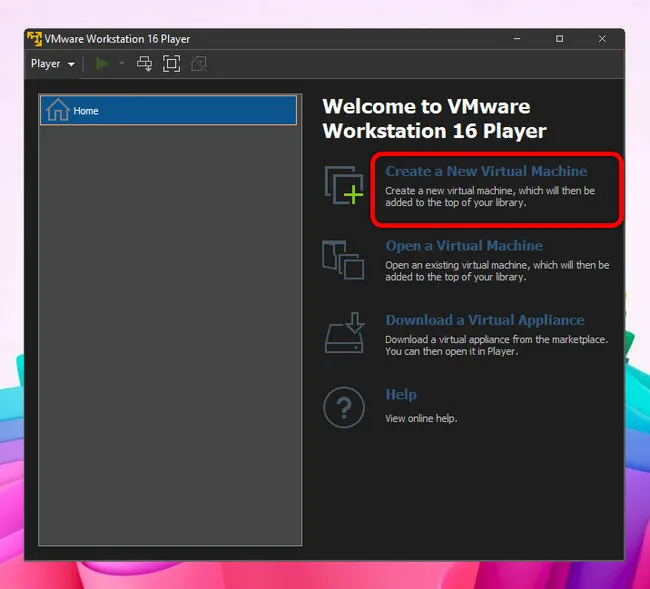
Step 4:Create a New Windows 10 VM
To create a new virtual machine, on the right panel of VMware Player choose Create a New Virtual Machine.
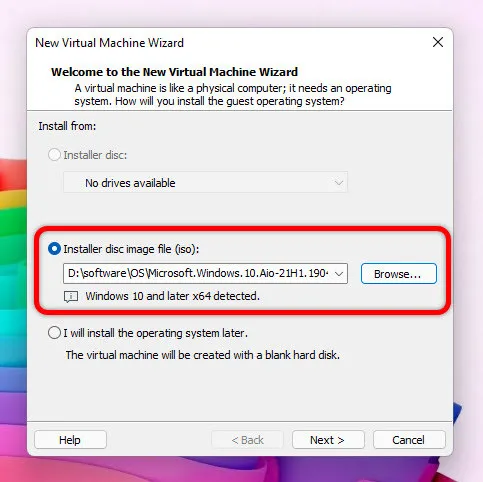
Step 5: Import Windows 10 ISO Image
For the next step you need to choose the Windows 10 ISO image, so choose the second option and import the Windows 10 ISO image.
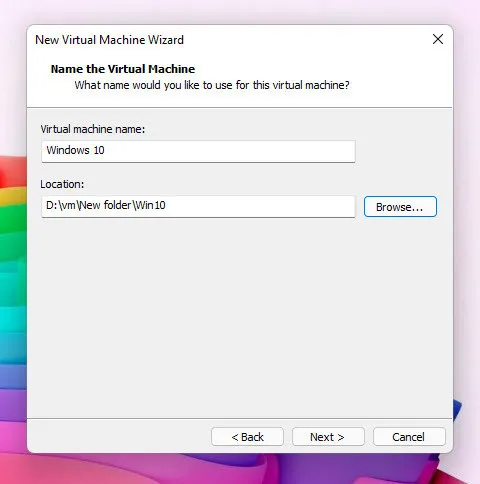
Step 6:Set Name and Location
You can go with the default provided name of the VMWare, or simply type Windows 10 for your virtual machine. I'm going to change the default location from the document's directory into a VM directory in the drive D. You can go with the default location the VMWare to save the files. It is up to you.
Step 7: Add Storage
How much amount of storage do you need for your virtual machine? Jjust enter the amount and choose the first option which is store virtual disk as a single file. Then click Next.

Step 8:Increase RAM Amount
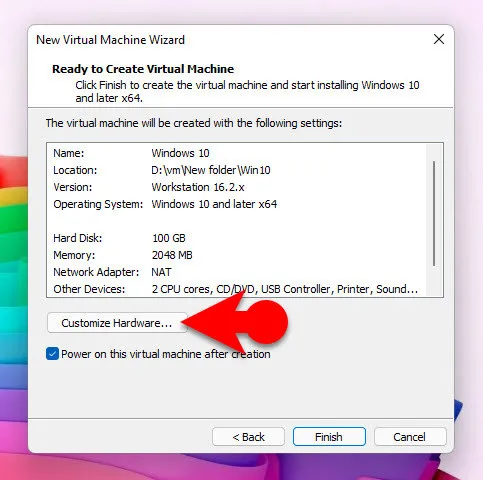
We are in the final step to create our virtual machine for Windows 10 and windows 11. However, I want to increase the amount of RAM for the virtual machine so click on Customize Hardware....
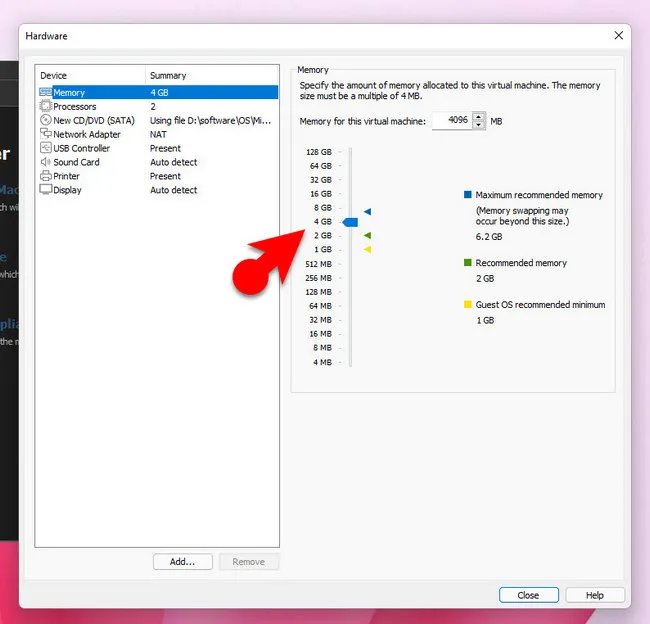
From the memory panel, increase the amount of RAM from 2GB up to 4GB and click Close.
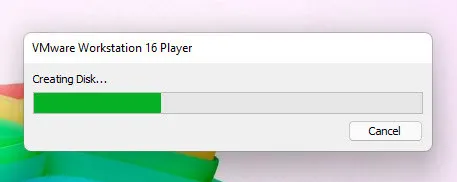
Wait a moment until the VMWare player should create a virtual disk for Windows 10 virtual machine.
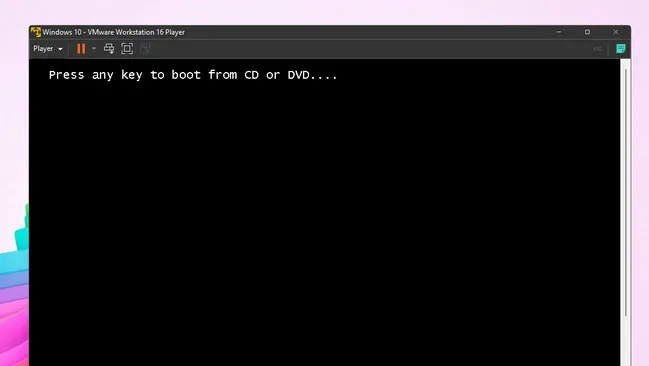
Step 9:Start Installing Windows 10 in VM
The moment creating disk is finished, the virtual machine will power on and you will be on the window we are the ISO of windows 10 is saying 'Press any key to boot from CD or DVD....'.
Summary:
To create Windows 10 virtual machine in windows 11, make sure to enable virtualization from the BIOS. Then enable Hyper-V or download VMWare workstation player. After creating a new virtual machine profile, then start installing Windows 10 OS to virtual disk from ISO image.

Petty is editor in chief at UUByte and writes various topics about Windows and Mac to help people make the most of current technology.