
Question: Can I upgrade my Windows 7 PC to Windows 11 directly?
Simply put, the answer is NO! Microsoft does not support direct upgrade from Windows 7 to Windows 11. However, you can upgrade Windows 7 to Windows 10 first and then upgrade Windows 10 to Windows 11 as Microsoft suggests.
When Windows 11 was first released, I wanted to give it a try on my spare laptop. It had Windows 7 installed on it, and I wanted to check if I could directly upgrade to Windows 11. I copied the Windows 11 setup files, edited the \sources\cversion.ini file, and a few more other steps found on the internet. But in the end, I was utterly disappointed as Microsoft won't let my Windows 7 directly upgrade to Windows 11.
Does that mean you are stuck with Windows 7? Absolutely not. You can upgrade to Windows 11 indirectly. First, you need to upgrade your copy of Windows 7 to Windows 10. Then, from Windows 10, you can easily upgrade to Windows 11.
If you want to upgrade a Windows 7 computer to Windows 11 too, you can follow this tutorial and you will not have to face the difficulties that I did.
First, Upgrade Windows 7 to Windows 10
Before you begin, please backup all the data on your Windows 7 computer. This is a must because even though you'll be given the option to retain your personal files, there is no guarantee that it would work.
Now, head over to Microsoft Windows 10 downloads page and download Windows 10 installation media creation tool.
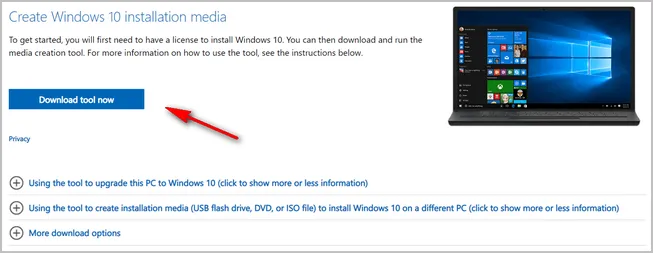
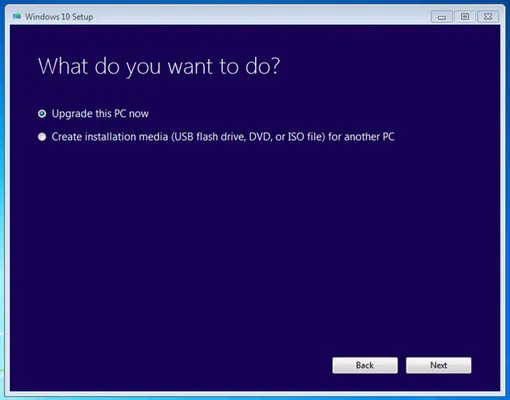
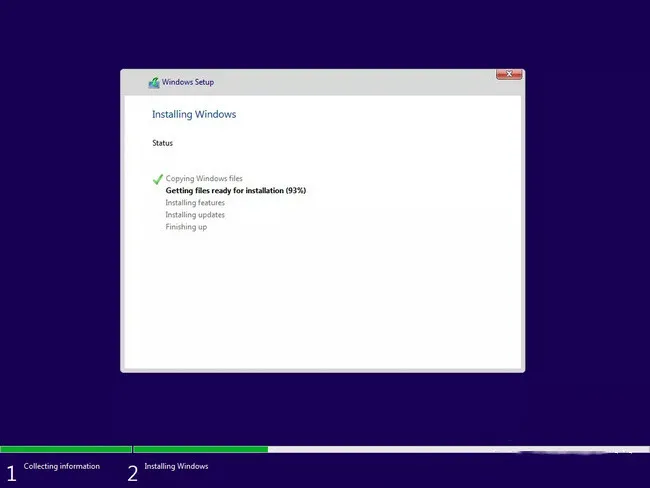
Once downloaded, launch the tool by double clicking on the EXE file. Then simply follow the instructions on the screen till it asks you whether you would like to upgrade to Windows 10. In this window, select Upgrade this PC now and click Next.
Windows 10 setup program asks whether you would like to retain personal files or start fresh. My personal suggestion would be to start fresh since there have been numerous instances where the first option didn't work well, and the user ended up having to do a fresh install all over again. Make sure you already made a backup in advance.
This should start the upgrading process. Simply follow the instructions on the screen and you should be able to upgrade Windows 7 computer to Windows 10 in less than one hour. Upon completion, you'll receive a digital license for Windows 10.
From this time on, the first part of upgrading Windows 7 to Windows 11 is done. Now, move to the second part of this tutorial.
Secondly, Upgrade Windows 10 to Windows 11
In this part, I will show you how to upgrade Windows 10 operating system now installed on your computer to Windows 11 for free. There are 3 simple ways to go about this. First, the normal way where Microsoft offers to upgrade Windows 10 to Windows 11 through Windows Updates; Second, by using Windows 11 Installation Assistant, and third, by creating a Windows 11 installation USB. We will explore all of these options and you can choose the one that suits you best depending on their pros and cons.
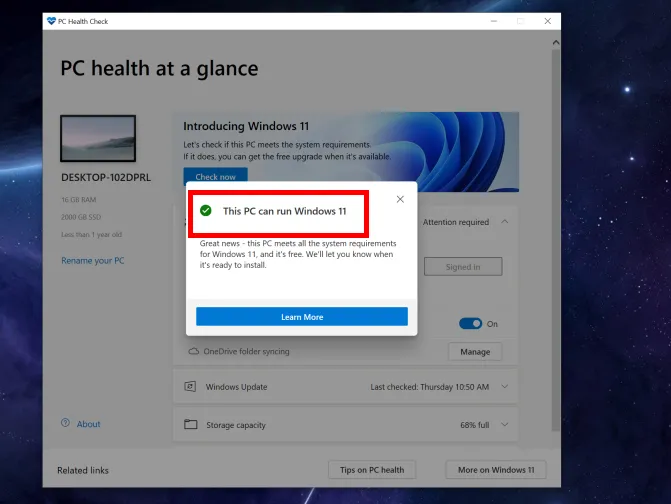
Before going ahead, please download PC Health Check App from Microsoft website to check this computer meets the basic requirements to install Windows 11 or not. If this PC is fully compatible with Windows 11 system requirements, then follow the methods list below. If not, please move over to this post, which tells you how to install Windows 11 on unsupported hardware.
Method 1: Through Regular Windows Updates
Microsoft offers Windows 11 upgrade for free to all of its Windows 10 users. This is the easiest way to avail the upgrade. However, the only challenge is that there is no set time by which you will receive the update since Microsoft is rolling out these updates in phases. If you are willing to wait, then you can use this method as shown below:
Click on the windows Start button, then head over to Settings. In Settings, click on Update & Security.
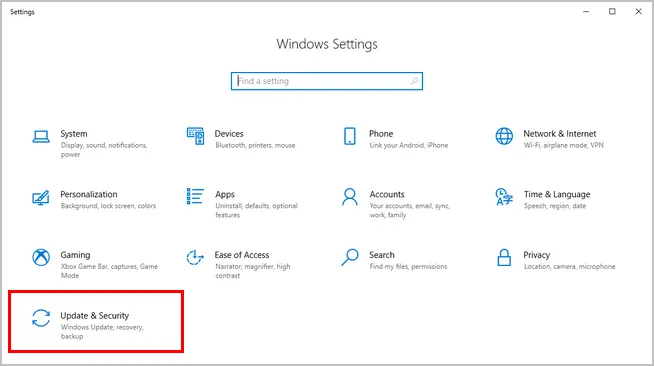
Inside Update & Security, click on Windows Update from the pane on the left. In this window, click on Check for updates button. If Windows 11 update is available, the update will be downloaded automatically. Once downloaded, click on Restart Now button to start the upgrade process.
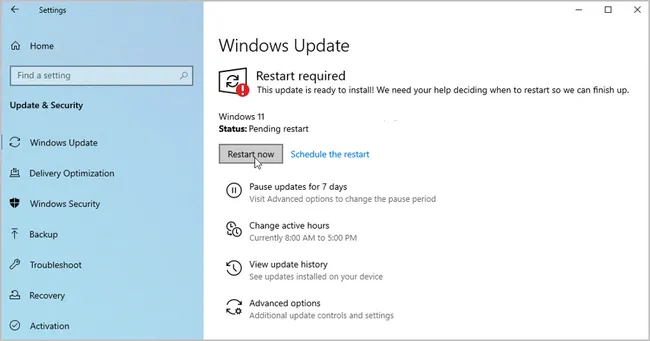
From then onwards, follow the instructions on the screen and you would successfully install Windows 11 on your computer. If the update is still not available, come back the next day and check once again, and eventually you'll receive the free update.
Method 2: Use Windows 11 Installation Assistant
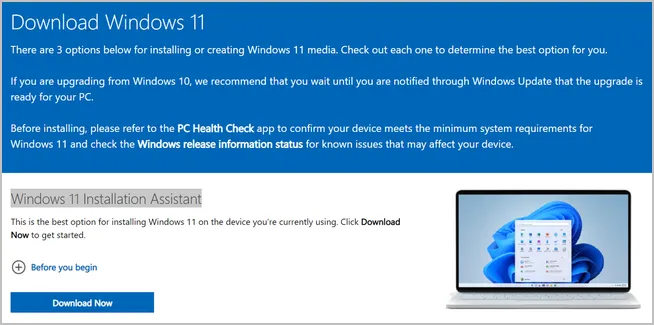
If you are not willing to wait for Microsoft to hand over the update to you, you can use the Windows 11 Installation Assistant to install Windows 11 on your computer.
Head over to the Windows 11 downloads page. Look for Windows 11 Installation Assistant, then click on the Download Now button underneath that section.
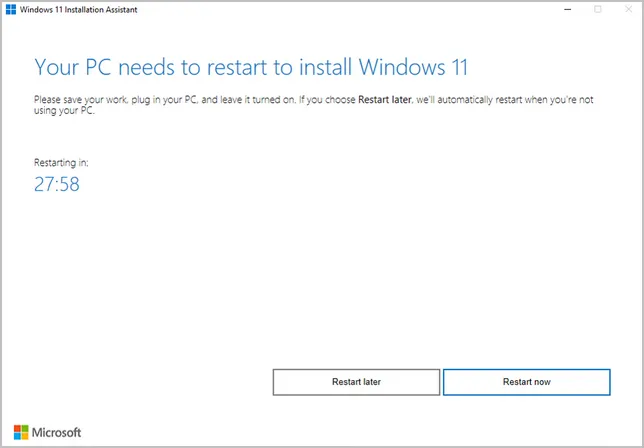
After download, double click on the Windows11InstallationAssistant.exe file to launch the program. Then, click on the Accept and install button to start the upgrade process.
At some point of time, Windows 11 Installation Assistant asks you to restart the computer. Save all your work and click on Restart now.
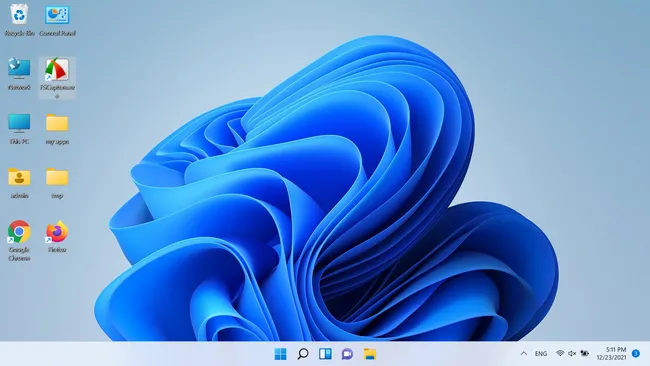
Once the computer restarts, you'll login to Windows, and the setup will continue. At the end of it, you'll be at a new Windows 11 desktop.
Method 3: Clean Install Windows 11 from USB
If for some reason the previous 2 methods failed, don't worry, we got you covered. In those rare cases you can try upgrading to Windows 11 using it's ISO image file by following this method.
Go over to the Microsoft Windows 11 downloads website and scroll down to Download Windows 11 Disk Image (ISO) section and select Windows 11 from drop-down list as shown below, then click on Download button.

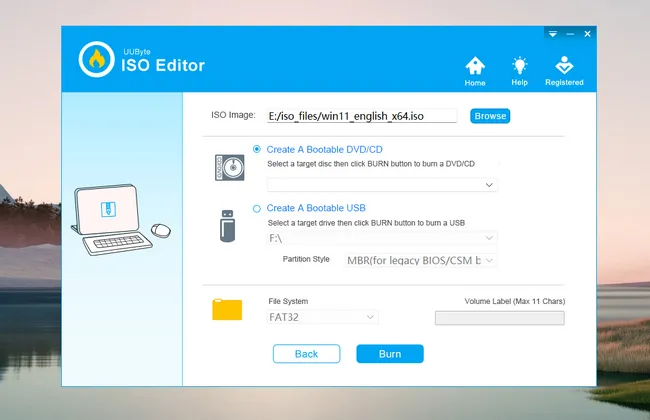
To create a Windows 11 bootable USB from ISO, we need to download ISO burning program to complete the task. In here, we will be using ISO Editor in our case. You can download the program from the following link:


Run ISO Editor app from desktop and continue by clicking the Burn button. This will open up a new window for creating bootable USB. You need to import Windows 11 ISO and select USB drive you connect to the computer. When the two steps are done, click Burn button at the bottom to make a Windows 11 bootable USB installer.
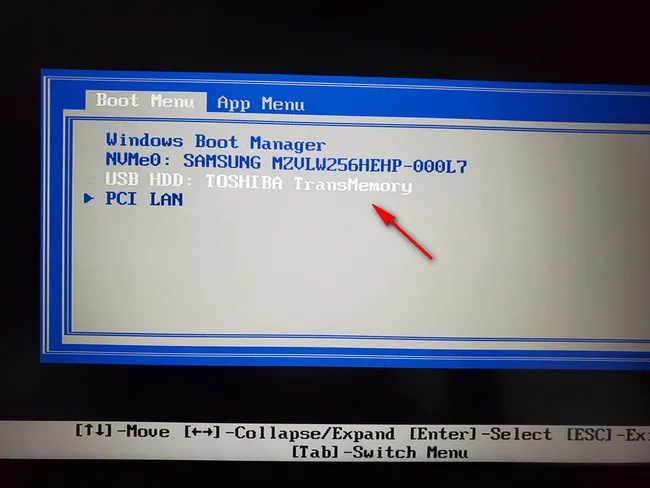
Now, you have a Windows 11 bootable USB. The next step is to boot your computer from it. You can set USB as the default booting device from Boot Menu or BIOS settings.
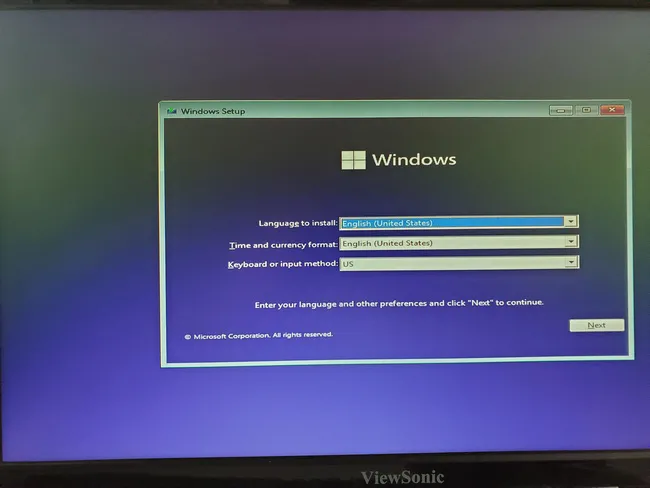
Wait about 30 seconds and Windows 11 setup utility will be displayed on the screen. At the beginning, you have to choose a language, time zone and keyboard.
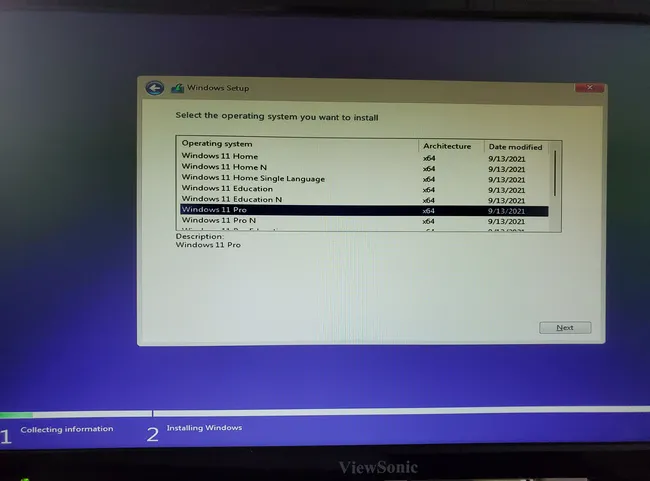
After that, pick up a Windows 11 edition you want to install.
Finally, follow the instructions on the screen to install Windows 11 on this computer.
You'll find a number of tutorials on the internet which will claim to help upgrade from Windows 7 directly to Windows 11. Trust me, they don't work. I have tried them all and finally had to resort to the methods I have shown here. After using these methods, I was able to upgrade my computer from Windows 7 to Windows 11.

Petty is editor in chief at UUByte and writes various topics about Windows and Mac to help people make the most of current technology.