
Last year, Apple announced its new Mac lineup with tons of new things and improvements. However, the biggest change coming to the new Mac is Apple's M1 chip. The new processor promises a big performance boost when compared to the Intel counterparts, but there are some drawbacks, which lies in the fact that you cannot upgrade RAM as it is built directly into the chip. Also, the process of running macOS from external drive is different. With that in mind, we are here to help.
On Intel-powered Macs, you can easily up boot your Mac from an external SSD drive. This will let you run two copies of different macOS on a single machine. This is great for testing new staff. However, the same procedure for Apple M1 Mac is a different story.
In this guide, we are going to show you how to run M1 Mac from an external bootable drive (SSD or USB). Before we proceed, there are a couple of things you need to know about booting M1 Mac from external drive.
Notice: The approach only works for external drive with Big Sur 11.1 installed. If you attempt to run M1 Mac from other versions of macOS bootable drive, then you should see an error message.
A List of Required Resources
- External drive with Thunderbolt 3 support.
- USB Type-C drive (16GB+) for creating macOS installer.
- macOS Big Sur installation app or dmg file.
Part 1: Format External Drive to APFS
macOS can be only kept on drive formatted by HFS+ or APFS file system. For latest macOS, APFS is more recommended as there are a lot of improvements that has been added. Usually, an external hard drive, SSD or USB is formatted by FAT32 or exFAT by default. You have to format it to APFS in order to start up M1 Mac from those devcies. Fortunately, this can be done in less than a minute on your M1 Mac with the help of Disk Utility app.
The process will erase everything on your drive, so make sure there is nothing important on it or you have already backed up your drive before proceeding.
To format an external drive on M1 Mac, you can follow our steps below:
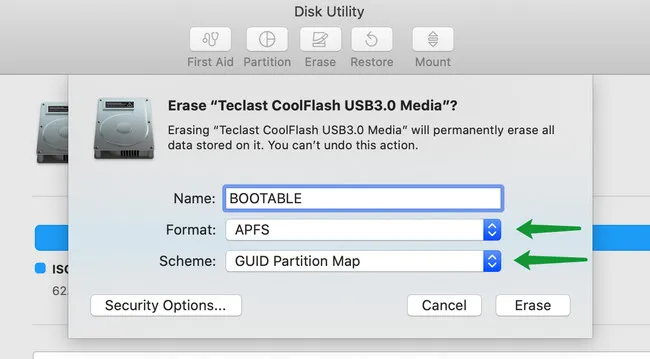
Step 1: Open Disk Utility on your Mac and then select the drive you wish to use for the bootable external storage. (make sure that's the external drive instead of your Mac's internal drive).
Step 2: Now hit Erase and click the Format drop-box and choose APFS as target file system from the list. Also make sure GUID Partition Map is selected for Scheme option.
Step 3: Enter a name for your drive and hit Erase. This process will format the drive to APFS, an improved file system designed for latest macOS.
After the formatting task is done, please move to next part for creating a macOS bootable drive. This is mandatory for running macOS from external drive on a Mac powered by Apple Chip.
Part 2: Create macOS Bootable USB Installer
To run a M1 Mac from an external drive, you first need to create a bootable macOS drive. To get the job done, you need to a M1-driven Mac running macOS Big Sur 11.1 or later, as older versions won't work. Plus, you need an external drive that supports connecting over Thunderbolt 3. The new M1 Mac also includes 2 USB-C ports, but you won't have much luck with this port.
Generally, there are two different ways to create macOS bootable drive on Mac. First is using Terminal app with combined text commands. The other is via third-party app with graphics user interface. We will introduce both methods in this section.
Create macOS Big Sur Bootbale USB in Terminal App
First, download a copy of macOS installation app from Mac App Store. Only a couple of new releases are available in this way, such as Big Sur, Catalina and Mojave. After that, insert a USB drive and get the drive name with ls command (ls /Volume).
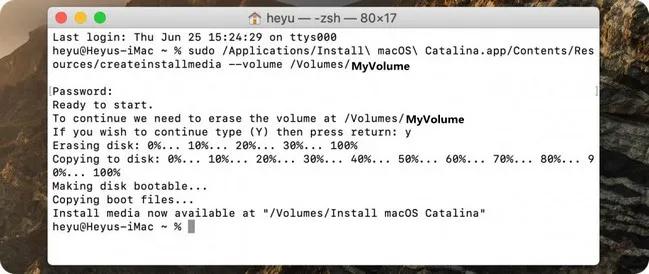
Assuming the USB drive name is INSTALLER in this case. Now, open Terminal app and type the following command to create a macOS Catalina bootable installer. MyVolume is the volume name of USB drive
sudo /Applications/Install\ macOS\ Big\ Sur.app/Contents/Resources/createinstallmedia --volume /Volumes/MyVolume
For creating bootable USB drive from other versions of macOS, please refer to this page.
Create macOS Big Sur Bootbale Installer Using DMG Editor
DMG Editor is one of the best GUI based programs that is able to create macOS bootable installer from dmg file. It burns macOS DMG file direct to a USB drive and the whole process goes comfortably within 3-5 mouse clicks. Not a single command gets involved for this task. Basically, it is a effecive and time-saving app for this task.
Download the dmg install of UUByte DMG Editor and drag the app icon to Application folder. Now run this app from Lanuchpad and insert an USB drive.


Click Burn menu at the welcome screen. Now, click Browse button to load macOS dmg file into the app.
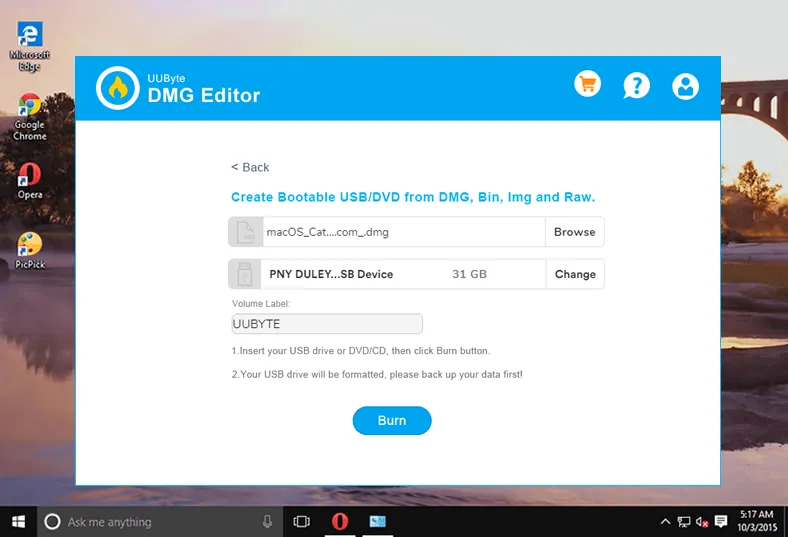
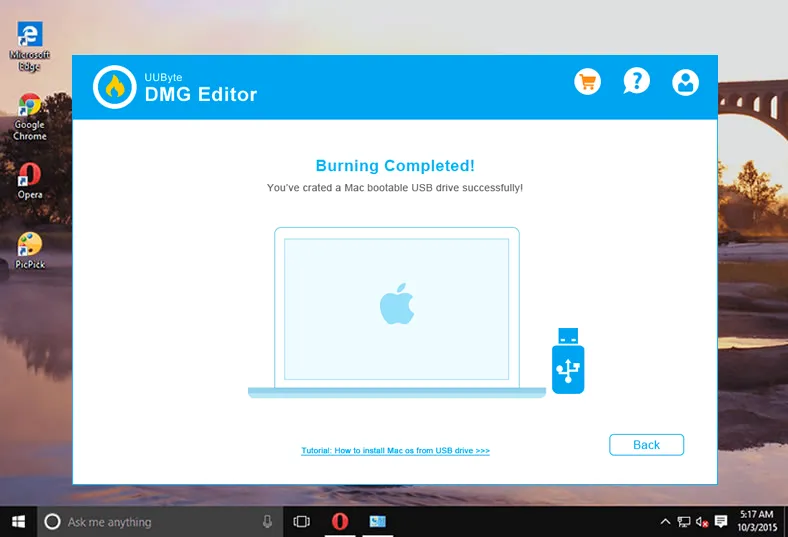
You will see the USB name displayed in second column. If it is correct one, then leave it without change. If not, click Change button to pick up the right USB drive. This is the basic settings for the whole task. Finally, hit Burn button to start making bootable macOS USB installer from DMG file.
Part 3: Install macOS to External Drive
Once your drive has been formatted, it's time to install macOS Big Sur to external drive so that your Mac can boot from it. There are two methods you can use to do this, but we are going for the easiest one in this tutorial. Here are the steps:
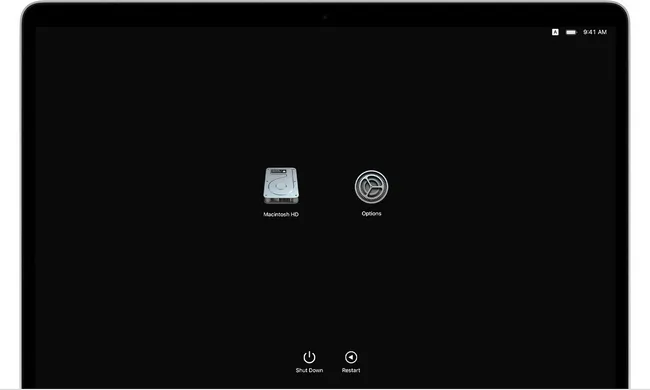
Step 1: Turn off your Mac machine and then turn it back on by pressing and holding the Power button until you see the startup screen.
Step 2: Now select the Options icon and then you will be prompted to enter your username and password to proceed.
Step 3: From here, select Reinstall macOS and follow the on-screen instructions.

Step 4: Select the APFS-formatted external drive you want to be as a bootable one and proceed with hitting the Continue button.

Step 5: Follow the instructions to the end. After that, an instance of macOS will be installed to target external drive.
Part 4: How to Start up M1 Mac from External Drive
Your Mac will boot from internal drive by default. It is neccessary to make certain changes to let your M1 Mac start up from an external drive that has macOS installed.
Step 1: Connect your external drive to Thunderbolt 3 port on M1 Mac.
Step 2: Shut M1 Mac down and keep pressing Power button during the process. Release the button when you see a message "Loading startup options".
Step 3: Click on Options icon from screen and choose the volume on external drive to boot it up. M1 Mac will restart automatically and boot into partition of external drive.
The Bottom Line
Running a Mac machine from an external drive is not new. However, the process of doing it on a M1-powered Mac is different. However, you still can easily get it done with steps.

Petty is editor in chief at UUByte and writes various topics about Windows and Mac to help people make the most of current technology.