
macOS 11 Big Sur is an advanced Macintosh operating system that you can install on your Mac. It has got tons of new features to enhance the user experience, like making safari browser 50% faster, new features of messages, Air Pods improvements, new-design sidebar in mail and photos, widgets in the notification bar, and many more.
Apple announced this new software on 22 June at WWDC. And this time, Apple did a big challenge and released the macOS 11 Big Sur along with iOS 14, iPadOS 14, tvOS 14, and watchOS 7. Meanwhile, Apple highlighted all the new features, changes, and improvements to the current software. You can download this new operating system from various sources now. Unfortunately, some Macs can't receive macOS 11 Big Sur update and they can't install the new operating system. In this article, we will discuss how to install macOS 11 Big Sur on an Unsupported Mac with easy steps.
Part 1: Official List of Big Sur Supported Mac Models
macOS 11 Big Sur Developer Beta is available to download. But you have to check your Mac compatibility first. If you have the below-listed Macs then you don't have to install macOS 11 Big Sur as these models will receive an update for macOS Big Sur automatically.
- MacBook 2015 and later
- MacBook Air and Pro Late 2013 and later
- Mac mini 2014 and later
- iMac 2014 and later
- iMac Pro 2017 and later (all models)
- Mac Pro 2013 and later
Part 2: Unsupported Mac Models of Big Sur (Not Eligible for Direct Upgrade)
On the other hand, if you have the below-listed Mac computers then you can install macOS Big Sur on those models as they are unsupported officially. You have to do some hacks to let Big Sur running on unsupported Macs.
- MacBook Air 2012
- MacBook Pro 2012 and Early 2013 MacBook Pro
- 2012 Mac Mini
- 2012 and 2013 iMac
Part 3: How to Install macOS Big Sur on an Unsupported Mac
Before the installation, make sure that you take a backup of your Mac on an external hard disk as you will lose all your data when you install the new operating system. There are several backup software like Time Machine, iCloud, Dropbox, and many more. Once you have taken a backup follow the instructions below to install macOS Big Sur on your unsupported Mac.
Step 1: First you need to download two files from the links below to complete the macOS 11 Big Sur installation on your unsupported Mac.
- macOS Big Sur PKG installer: https://developer.apple.com/macos/
- macOS Big Sur PKG install hack: https://forums.macrumors.com/simple-installer-hack-zip.926156/
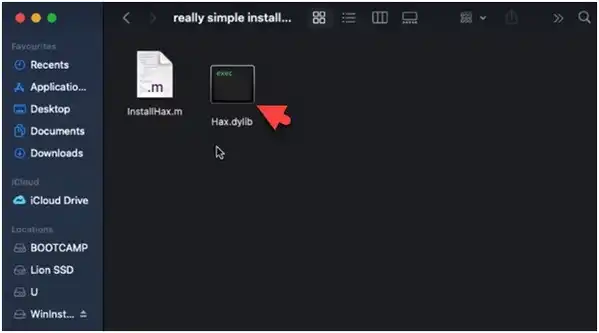
Step 2: After you have downloaded these two files, unzip the hack and copy the hax.dylib file and then paste it to home folder.
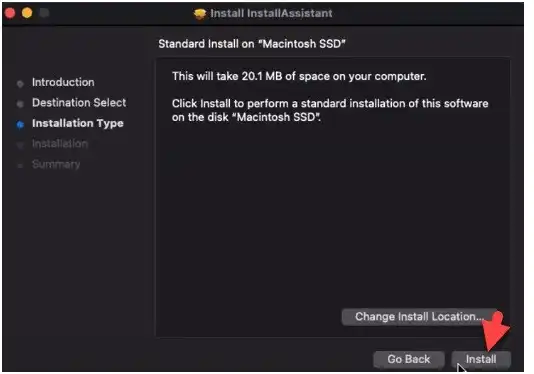
Step 3: Click on Install Assistant.pkg to install required contents to your Mac. Make sure that you have enough space on your hard disk as the file will take 20.1 MB size on your computer.
Step 4: Now go ahead and tap on the Install button to install the software on the disk 'Macintosh SSD'. Once you click the 'Install' button then it will ask you to enter your password. Next, click the 'Install Software' button.
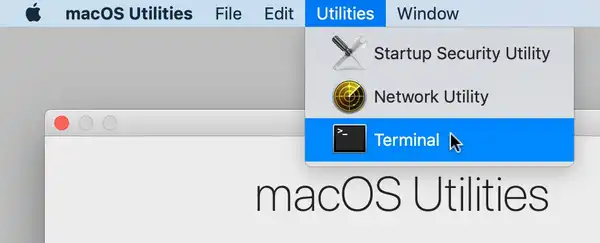
Step 5: Next, you have to boot your computer into Recovery mode. You can do that by pressing Command + R immediately on startup until Recovery option appears. In case if you have no recovery partition, you can press down Command + Option +R to get into Internet Recovery. After that, go to Utilities -> Terminal and type 'csrutil disable', followed by pressing the Enter button on your keyboard.
Step 6: Type the following two commands in the terminal. Once you apply the first command, type your login password, and then input the second command.
sudo defaults write /Library/Preferences/com.apple.security.libraryvalidation.plist DisableLibraryValidation -bool true
launchctl setenv DYLD_INSERT_LIBRARIES $PWD/Hax.dylib
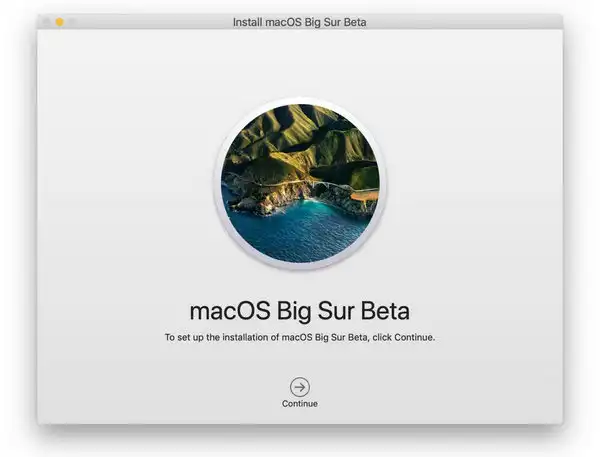
Step 7: Next, run the macOS 11 Big Sur installer app that you installed from InstallAssistant.pkg a while ago. Now click on the 'Continue' button and follow the instructions to complete the installation process.
Step 8: The installation will take about 30 minutes approximately. Once the installation is successful you will see the macOS 11 Big Sur wallpaper on your Mac screen. That's it, you have installed macOS Big Sur on your unsupported Mac successfully.
Follow the above-mentioned method to install macOS 11 Big Sur on unsupported Mac devices. The method is quite easy; you just have to focus on the command line and other installation procedures.
Part 4: Alternative Method to Install Big Sur on an Unsupported Mac
The above tutorial is for users who still have access to their device. However, if your Mac is unable to boot into Desktop or you are using a Hackintosh, then you should follow the alternative method instead. In this part, we will show you how to create a macOS Big Sugr bootable USB on a Windows PC and install macOS Big Sur on unsupported Mac by using that bootable media.


Step 1: Make a full backup of important files on your Mac.
Step 2: Download a copy of UUByte DMG Editor and follow the instructions to install it on your Windows PC.
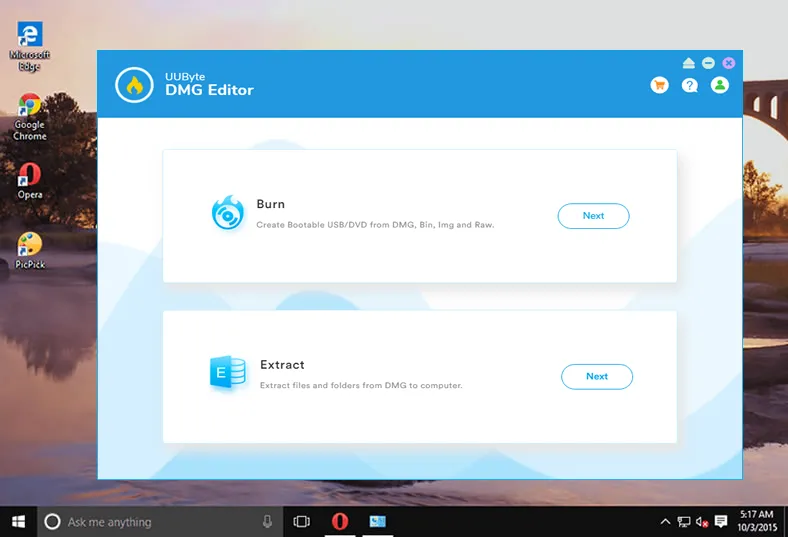
Step 3: Insert a USB flash drive into PC and open UUByte DMG Editor. Now, click the Burn tab to get into the new window.
Step 4: You will see three options on Burn windows. Please import macOS Big Sur DMG file into the program and choose the USB drive name. You can also set a new name for that USB drive. And this is optional.
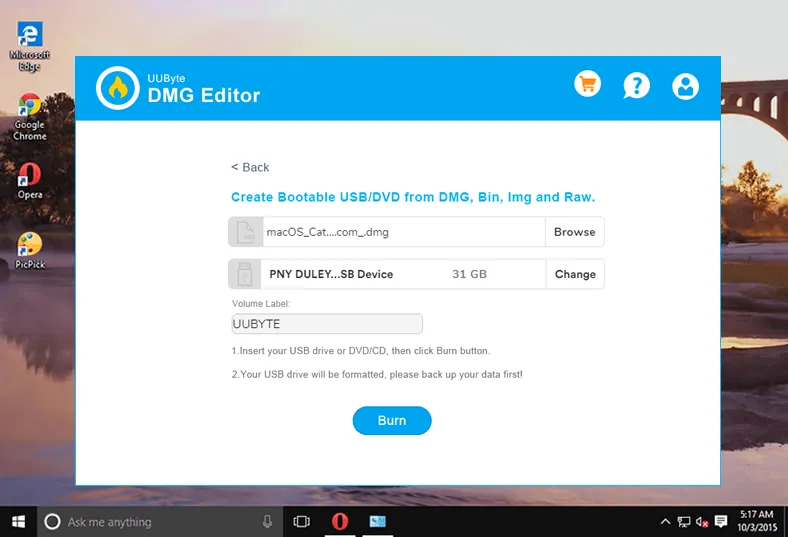
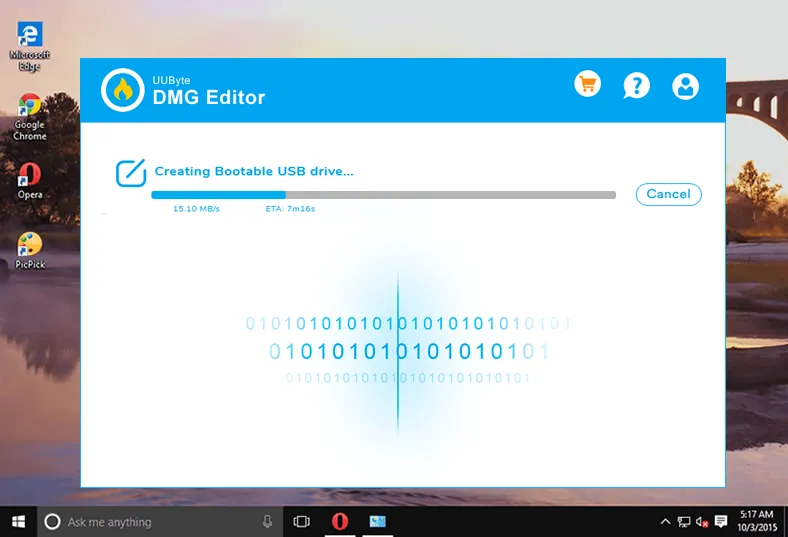
Step 5: Once the setting process is completed, just click "Burn" button located at the bottom to start burning dmg file to USB on your PC. You should wait about 10 minutes for this task.
Step 6: Plug Big Sur bootable USB on your Mac and press Power + Option combine keys to open Startup Manager. At this stage, you are able to select a booting device. Click on the USB drive and start Big Sur installation process.

This part is mainly for Windows users who want to install Big Sur on an unsupported Mac. The most important step is to create a bootable USB drive.
Troubleshooting:
If your system is showing any error message while installing the macOS Big Sur you can try these methods to fix it.
- Restart your Computer and continue with the installation.
- Make sure that your Mac’s date and time is correct.
- Check your Hard Drive to see that you have enough free space to carry out the installation.
- Make sure that the version of macOS Big Sur is up to date including the macOs installer
- Run first aid on your startup disk before installing macOS Big Sur to check any system files are damaged or not.
Summary
You can see that it is not hard to install macOS Big Sur on an Supported Mac. Make sure that you key in the right command lines which are mentioned above, as typing a wrong command can harm your system. Enjoy the great features that come with the macOS Big Sur on your unsupported device!

Petty is editor in chief at UUByte and writes various topics about Windows and Mac to help people make the most of current technology.