
While it has been for 10 years, Windows 7 until now is still one of the most popular operating systems that are wide-used in nowadays. Though Microsoft put a lot of efforts to push user upgrade to Windows 10, there are many users who refuse to upgrade to Windows 10, which is not stable as Windows 7, mostly due to the auto-update feature. In addition, Windows 7 also has good support for old computers or out of date hardware.
So If you are using Windows 10, but want to downgrade to Windows 7 or simply install Windows 7 on a new hard drive, this guide will show you detailed instructions to do so. To install Windows 7 from a USB pen drive, you first need to make a bootable flash drive, including an installation file to install a fresh copy of the Windows 7 OS.
Install Windows 7 from USB Part 1: Backup Product Key
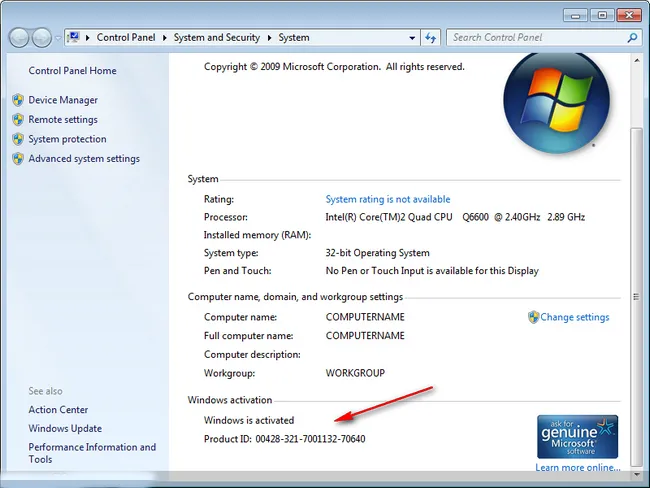
A valid Windows 7 license key could be a great help when it comes to ISO download and activataion. From Microsoft's licensing policy, you can activate different devices using the same product key. However, only one device will be allowed for usage. It means you need to deactivate Windows 7 license key before using it on a new hard drive. So the first step in here is to backup the license key for further usage. Copy the key and save it in a document.
If you want to keep the original Windows 7 installation, then it is required to purchase additional product key to activate a new copy.
Install Windows 7 from USB Part 2: Download Windows 7 ISO
To install Windows 7 from a bootable USB, the first step is to get or download Windows 7 ISO, which is pretty stricky now as Microsoft no longer supports Windows 7 in near feature and it recommends people upgrading to Windows 10. If yo already had the origin Windows 7 Install DVD, please skip this part. If not, then take a look at the following methods for downloading Windows ISO.
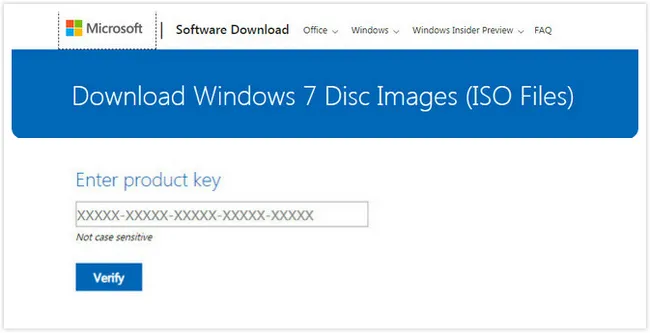
Download from Microsoft.com: It is still possible to directly download Windows 7 from Microsoft website. However, you have to input the product key to before download. If the key is not valid or do not have a key, then use the alternative download method shared below.
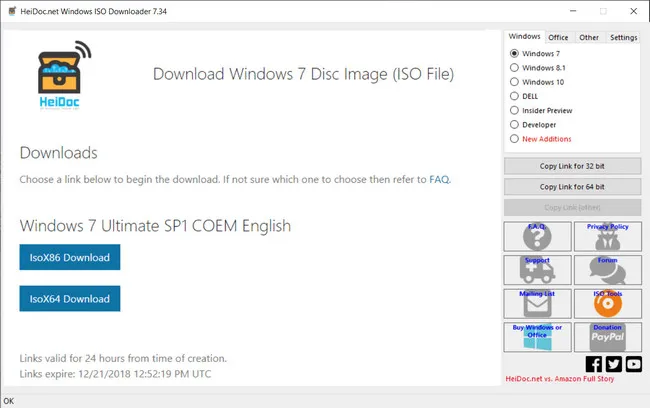
Download Using Third-party Tool: Windows 7 ISO is still hosted on Microsoft remote server. However, the download links are not visiable in human eyes.
The link can be obtained programatically via Microsoft API. And HeiDoc Windows ISO Download Tool is the one that still works in 2019. First, download the .exe file and open the program. You have to wait about 2 minutes before the ads disappears. Then select Windows 7 from the right sidebar. From the pop-up list, choose the right Windows version and language. Once the setting is done, click the download button to get started with ISO download in default browser.
Install Windows 7 from USB Part 3: Burn ISO to USB
As we mentioned, you need a bootable USB drive to install Windows 7 on your computer. This can be achived by burning Windows 7 ISO to USB with third-party programs like UUByte ISO Editor. Copying ISO file to USB won't make it bootable even you decompress the file. There are some important information to be written to USB before copying the installation files. In this part, we will use UUByte image burning software for this task. It is simple to use and has a beautiful user interface.


Step 1: Download UUByte ISO Editor software from the link above. You should choose the right version for your needs. Since you just want to create a USB pen drive, the free version is fair enough.
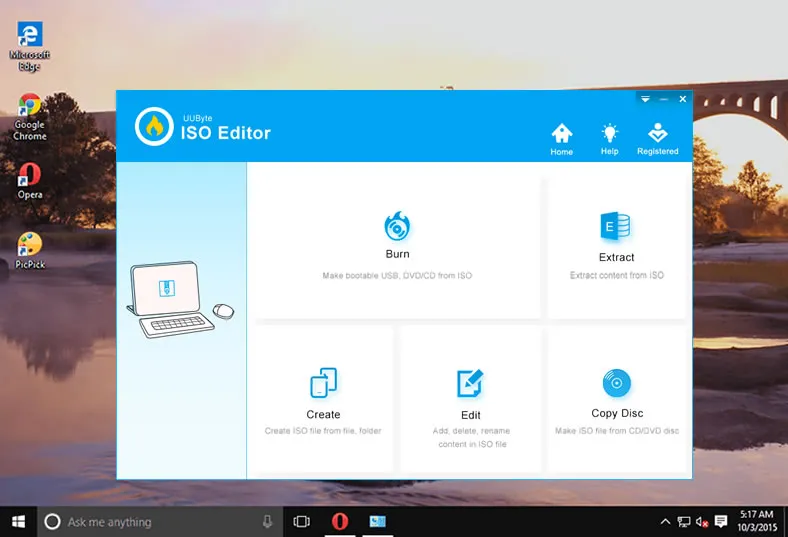
Step 2: After the installation is done, launch the software and click "Burn" button. When you are prompted, browse to the folder storing Windows 7 ISO file. You can download Windows 7 ISO from the official Microsoft.com
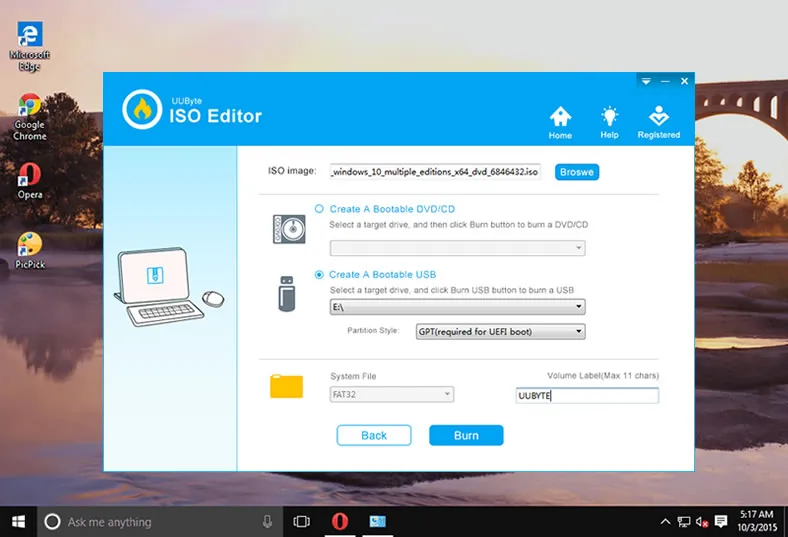
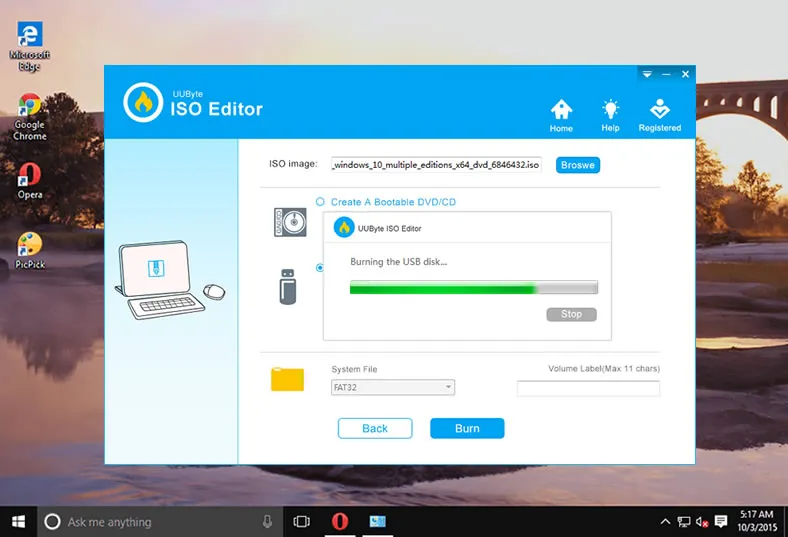
Step 3: Connect USB drive into your computer and the software will automatically detect it. Choose the 'Create A Bootable USB' option and set a name as new volume label. When you are ready, click 'Burn' to start the process. Once the burning task is done, the USB becomes bootable now, which can be used for Windows 7 installation.
Install Windows 7 from USB Part 4: Start Installation
Once you have successfully created a Windows 7 USB drive, then follow these steps to install Windows 7 from USB on a new hard drive.
Step 1: Connect bootable Windows 7 USB drive into Windows PC or laptop.
Step 2: Boot the computer into BIOS mode by press DEL key or F2 key, depending on the model. In BIOS Settings screen, use the Navigation key to head to Advanced Setup then hit Enter.
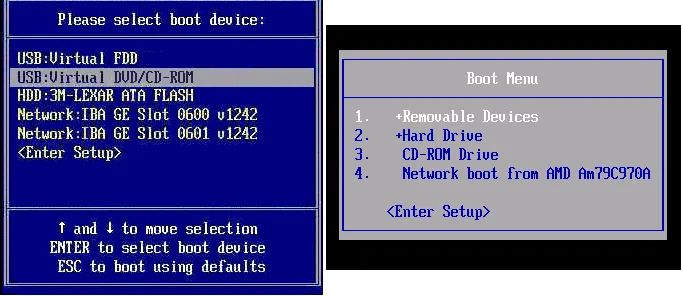
Step 3: From there, choose USB drive as the 1st priority and select 2nd option as the Hard disk. Change the setting by using the page up & page down key from the keyboard. Hit the F10 key on the keyboard to apply the change.
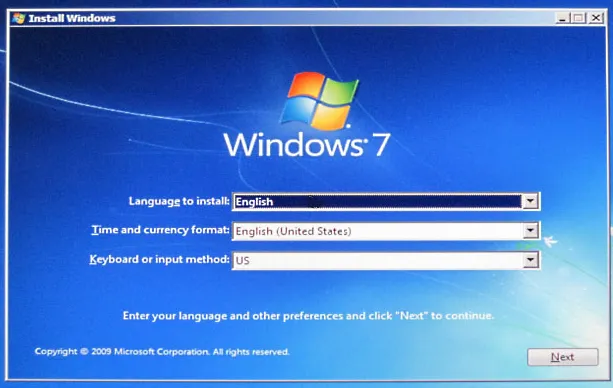
Step 4: Your computer will reboot and the installation will now get started. Windows 7 OS will start loading. On the first screen of the setup wizard, choose your language, date & time format and keyboard and click on Next. Windows Setup will now begin.
Step 5: Tick on the box of License Terms and click on Next. Click on Custom Installation for a fresh Windows 7 Installation. On the next screen, choose the partition to install Windows 7. It must be a logical disk. Before installing Windows 7 on that disk, remember to format it first by click on Format option.
Step 6: The setup will copy all the files from your USB pen drive to the chosen partition. When done, your Windows computer will automatically restart. Quickly unplug the USB from your computer.
Step 7: Type in the name of your account and click on Next. Set a password to log in your Windows computer (optional). If you do like it, you just press on Skip. Choose Your current location, then set Date and Time for your computer.
Install Windows 7 from USB Part 5: Troubleshooting
There are two many steps involved in this process and you may come across certain types of issues if you are not sticky to follow the instructions. It is OK and not a big issue at all as the computer gets smarter and smarter. Here are a few frequently asked question about Windows 7 installation.
Q: How long it takes to download Windows 7 ISO
A: The ISO file is about 2G so usually takes less than one hour to download the entire ISO image. Besides, the download speed is much faster when using file downloader tool other than the web browser.
Q: Product Key is Invalid when downloading from Microsoft website
A: For legit product key, you have to deactivate the key in advance before download. After that, it should be fine to obtain the download link from Microsoft.
Q: USB Not Showing up in BISO
A: The USB should be fine once it is completed the burning process. This issue is largely due to broken USB port. Please plug it into another USB port and try again.
Q: Disk Error with black screen during booting
A: First, make sure the burning process is successful. You will get such an error in UUbyte ISO Editor after completion. Second, please disable secure boot and switch to legacy boot in BIOS.
The Bottom Line
That is how to install Windows 7 from USB on new hard drive. But, to get the process to be successful, you need a USB pen drive that was created by UUByte ISO Editor software. Creating a bootable flash drive is not difficult. You simply follow the mentioned steps above with UUByte ISO software and you can then do it with ease.

Petty is editor in chief at UUByte and writes various topics about Windows and Mac to help people make the most of current technology.