
Windows 7 is still a popular desktop OS favored by millions of users across the globe. There are various reasons why users want to install Windows 7 on Mac, and since Windows and Mac are two different products from two completing companies, it is quite challenging to do such cross-platform installation due to technology barrier.
With a bootable Windows USB, you will not only have the ability to install, but also repair Windows 7 on Mac. A bootable USB will give you the speed, convenience and portability you need to make such installations, and they are also easy to take care of compared to installation discs. Whether or not you are a techie, you can use the steps outlined below to install Windows 7 on Mac without problems at all.
Honestly, Boot Camp could be our first choice for installing Windows on Mac as dual boot, but it has too issues and errors according to our testing result and user feedback. So we will pick up another method to do this to avoid wasting time on Bootcamp as it does not working in most of the times.
Part 1: Download Windows 7 ISO on Mac
Before we get started installing Windows 7 on Mac, the first step is to get or download a Windows 7 disc image. You can rip it from Windows 10 installation DVD or download the trial from Microsoft web site. Don't worry too much. This is much easier on a Mac computer.
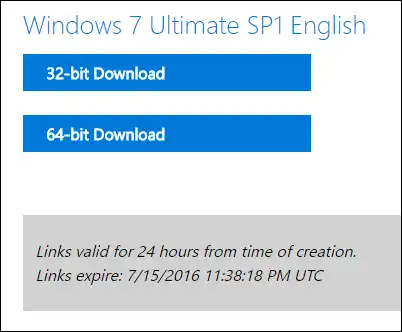
Now click this link that leads to the Windows 7 ISO download page. And input a valid Windows 7 product key to activate the download. After that, select the lanague and Windows 7 version before the downloading process begins. However, if you didn't have a license key, you can download the ISO from other file hosting websites.
Part 2: Create Windows 7 USB Installer on Mac without Bootcamp
Once Windows 7 ISO is downloaded, the next move is to burn the ISO to USB. Since the majority of users may not have a lot of technical knowledge on how the burning works, it is highly recommended that you use third-party app like UUByte ISO Editor so that you can accomplish the installation with minimal effort. UUByte ISO Editor is one of the best applications in the world for burning ISO files to USB as well as creating bootable media for installation purposes.
It is easy to use, and it allows you to change your storage and installation preferences in a very simply manner. Additionally, it is compatible with a variety of file systems, including UEFI and legacy BIOS boot schemes. One of the things you will admire about UUByte ISO Editor is the high success rate it comes with, and with a very simple UI. Whether you are a pro or a novice, you will find using the tool quite easy and intuitive. Use the steps below to download UUByte ISO Editor to your computer and to create a bootable Windows 7 USB.


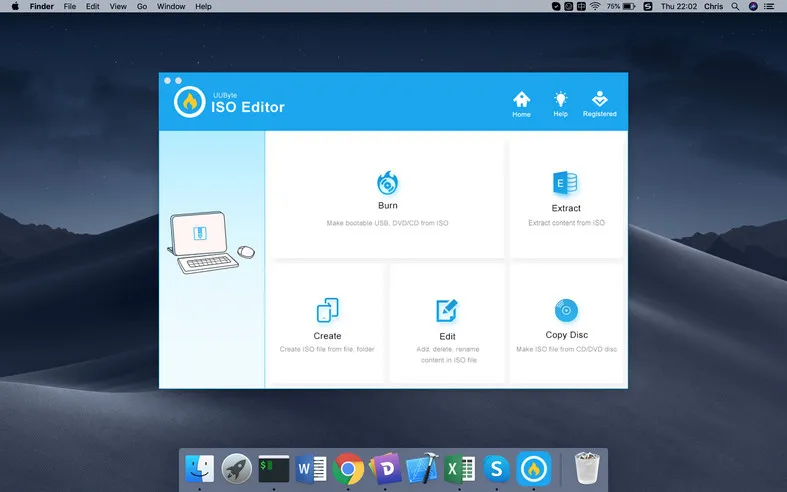
Step 1: Download and install UUByte ISO Editor in the Mac where you want to install Windows 7. You will be required to give a password before you can start the program, and once you do this, you will be taken to the screen shown below.
Step 2: Upon launching the software, choose the "Burn" option so that you can start the process of creating a bootable USB.
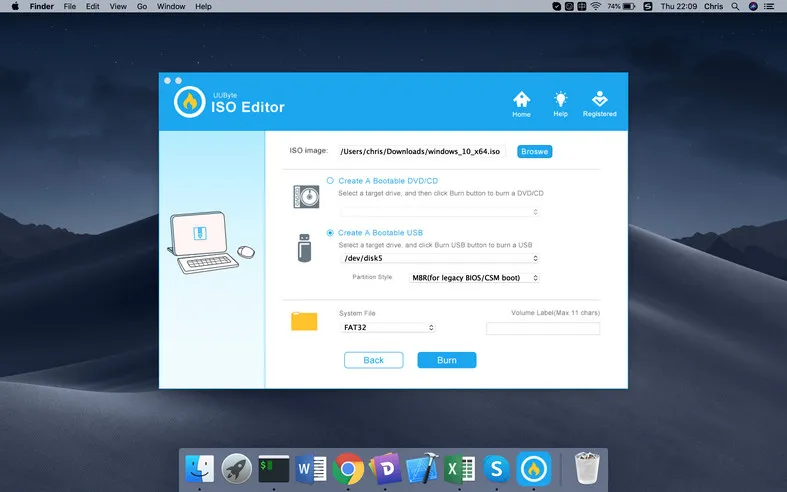
Step 3: Select the Windows ISO file you had downloaded on the previous step, choose the USB option and click, "Bun" to commence the process. In a short while, the bootable drive will be created and from this, you will have an easy way to create to proceed with the installation of Windows 7 on Mac.
With UUByte ISO Editor for Mac, you don't have to worry about using the advanced settings or even tampering with the command line. The software will do the formatting so that you don't have to worry about complex and lengthy actions. Indeed, it is a great alternative to Boot Camp app.
Part 3: Make a New Partition for Windows 7 on Mac SSD
Now you have a bootable Windows 7 USB to be used for OS installation. However, the situation is much different on a Mac because the internal drive on Mac is formated to APFS or HFS+, which is unable to hold Windows 7 partition. You have to manually create a new partition being formatted to FAT or FAT32.
To add a new partition for Windows 7 OS, please first take a full backup of your Mac internal drive. If something went wrong, you can still restore the machine from backup. This is an important step for protecting your data.
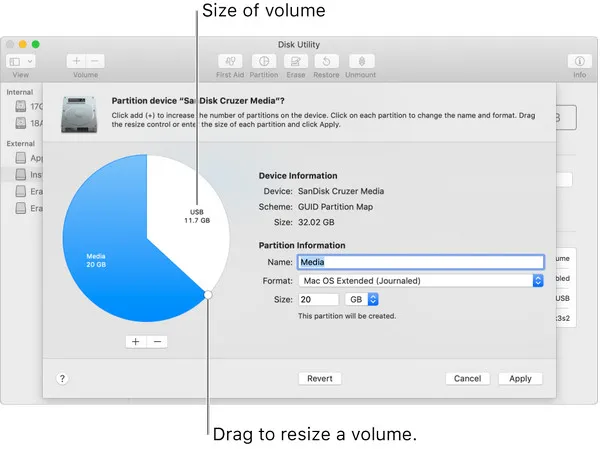
After that, run Disk Utility app and locate the internal drive from right side. Then, click the Partition tab on top menu and choose MS-DOS(FAT) in Format column. Next, set a size for Windows volume. It should be more than 50G to run Windows 7 smoothly on Mac.
Part 4: Install Windows 7 from USB on Mac without Boot Camp
At this point, you have already downloaded the Windows ISO and created a bootable Windows 7 USB with the help of the UUByte ISO Editor tool. Now, the next step is to simply boot your Mac from the USB so that you can proceed and install Windows 7on Mac. To do this, use the following step.
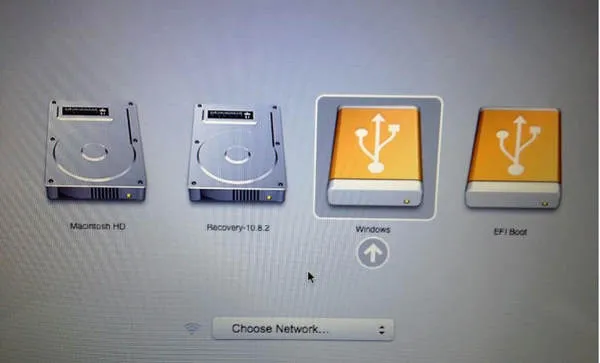
Boot Mac from USB: Connect the USB flash drive to an USB port and reboot Mac while holding onto the Option key. If you did everything correctly, the USB name appears on the startup screen, where you can select the device to boot from. Click the USB drive name and you should be able to see Windows 7 logo.
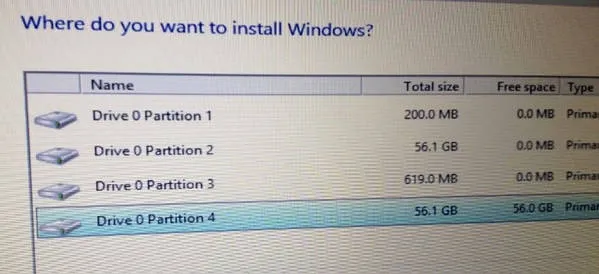
Install Windows 7 on Mac: From this stage, the installation process will be the normal one, and all you have to do is follow the prompts and make any adjustments on the settings as you wish. If, however, the computer doesn't booth from the USB flash drive, try to disable the SIP by attempting to boot from the recovery partition. The startup selector should come up, and this should now allow you to boot from the USB flash drive. And the most important part is to choose the newly created partition to install Windows 7 on it. Wait for about 10 minutes and the installation will be finished.
Part 5: Download Windows Support Software (Optional)
The Windows 7 installation image only ships with the minimal package of devcie drivers. Some of the new hardware may be not working when you run Windows 7 on a Mac. You have to update or install the missing drivers for certain devices. Fortunately, Apple has a solid plan for this.
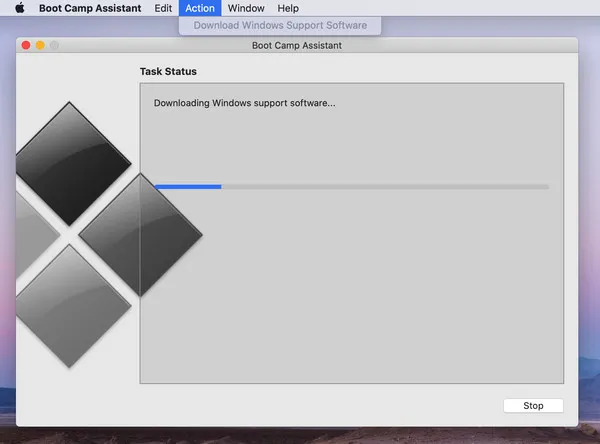
To download latest Windows drivers, you have to roll back to Mac and launch Boot Camp Assistant app. Click the Action tab and open Download Windows Support Software wizard. Now select a local folder to save the drivers. Wait about 5 minutes amd copy the entire WindowsSupport folder to Windows 7 install USB.
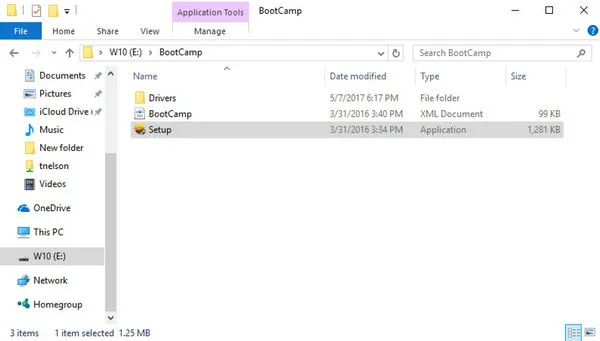
Reboot Mac into Windows 7 and plug in the USB drive. Go to WindowsSupport folder and run setup.exe from BootCamp subfolder. This will install all necessary drivers for all hardware on this computer.
This step is mandatory only when some of the hardware are not working. If everything goes fine, then just skip this part for sure.
Conclusion
There are other methods you could use to install Windows on Mac without Bootcamp but the above suggestion is the easiest one you can go with. And it takes much less time with low risky. That's the reason we share in at here. You can also use Bootcamp or Terminal app to get the same result but it is much harder to do this without advanced computer knowledge.

Petty is editor in chief at UUByte and writes various topics about Windows and Mac to help people make the most of current technology.