
As a long time macOS Big Sur user, it was really painful when Big Sur was in beta version. But now, with the latest release of Big Sur 11.5, it has been much more stable and bug free. Hence, I am planning to install Big Sur on my wife’s MacBook Pro. Below are the detailed steps for this.
1. Compatible Macs for Running macOS Big Sur
One thing you should pay attention to is that not all Macs are eligible to run macOS according to Apple official documentation. Only a handful of Mac computers are compatible with macOS Big Sur. This is an essential step! Please do check your Mac is among the support list shown in the following screenshot:
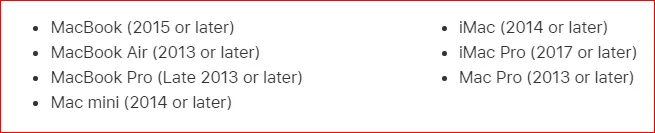
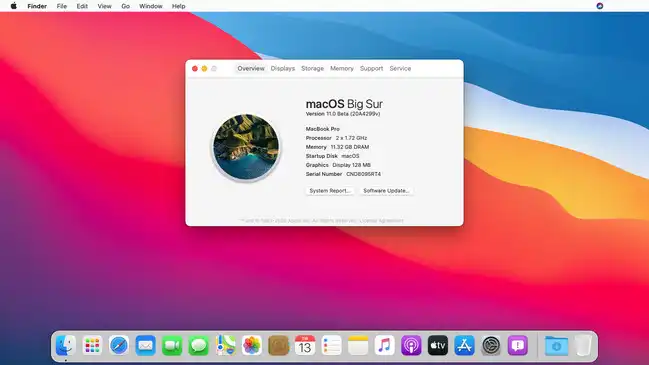
Don’t know how to check the model name of specific Mac? Please click the Apple icon at the upper left corn and select About this Mac. You will see the model name and other information about the Mac.

Notice: If your Mac is not officially compatible with Big Sur, you can still install macOS Big Sur on unsupported Mac. However, you have to do additional tricks to get it working. Here is the tutorial for that.
2. Create Big Sur Bootable USB Installer
From the above screenshot, we can see that this Mac (MacBook Pro Late 2013) is fully compatible with macOS Big Sur. Now, we need to create a Big Sur USB installer, the one we will use to install Big Sur on your Mac.
There are a couple of ways available for this task, but we only share the simplest way for this, which has no learning curve. And you can get a bootable Big Sur USB in less than 10 minutes. Most importantly, this method is working perfectly on both Windows and macOS.
Reminder: You need to prepare for two things in order to create a bootable Big Sur. First is macOS Big Sur DMG file, you can get download links from our previous post. The other is a USB flash drive with 16 GB or above storage.
https://www.mediafire.com/file/2a4w8t97ytcm5s8/BigSur13-3-1.dmg/file
https://mega.nz/file/myByxDYB#w0m9nsRfVFW_pa78yDZ1JnGDZThmf_JOElDccpKYTvw
Step 1: Please click the following button to download a copy of UUByte DMG Editor, the software we are going to use for creating Big Sur USB installer. The following demonstration is taken on a Windows PC. But the steps are the same if you are using it on a Mac. Below are two sample download links


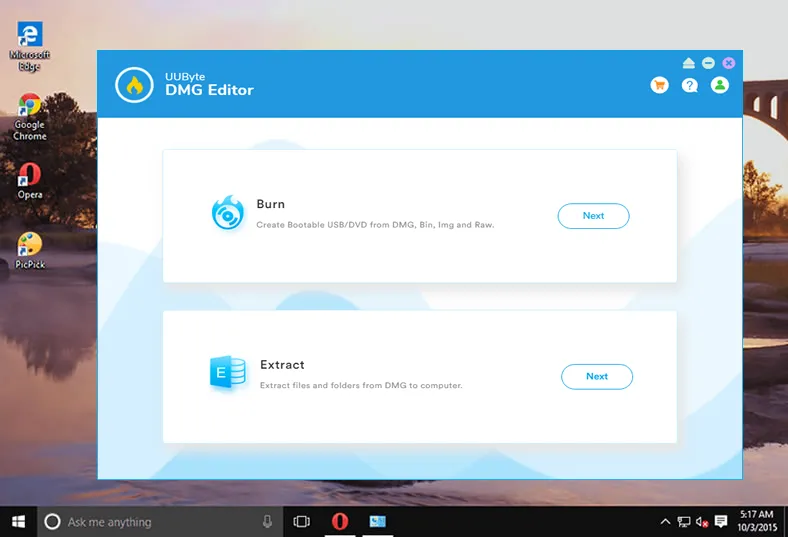
Step 2: Now, launch DMG Editor app from your computer and click Next icon at the right of Burn menu. This will open a new window.
Step 3: At this time, click Browse button at the upper screen to import Big Sur dmg file into DMG Editor. Next, insert the USB drive into computer and choose the USB drive name by clicking the Change button.
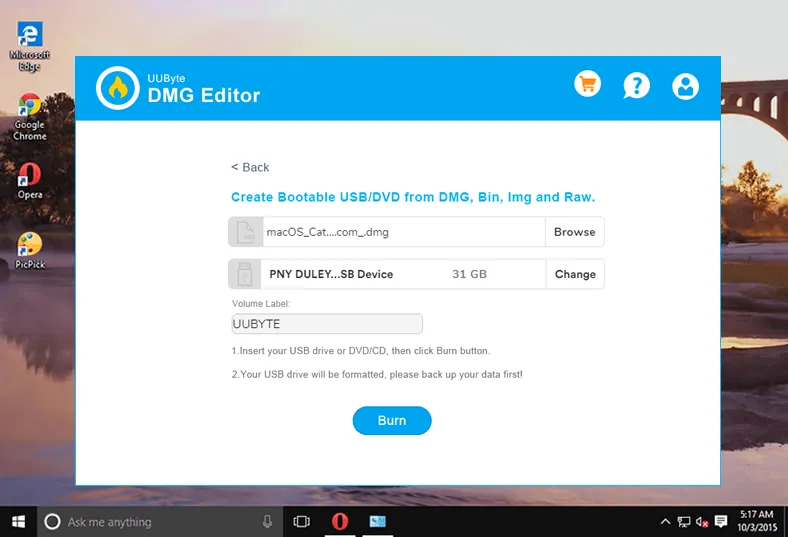
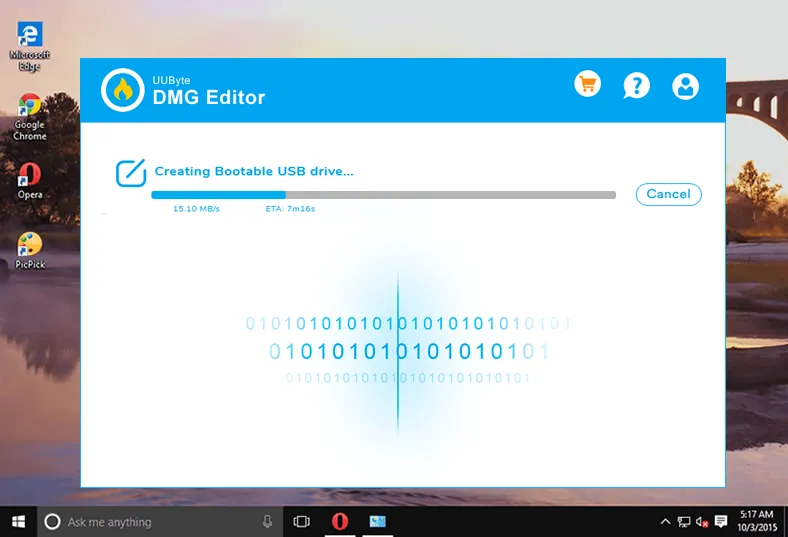
Step 4: When the above two settings are completed, click the Burn button to start burning Big Sur DMG file to USB drive. Once the burning process is finished, a macOS Big Sur USB installer is created!
Now, you have a working Big Sur USB installer and you can install macOS Big Sur on any supported Mac. Please keep reading to know how to finish the installation process.
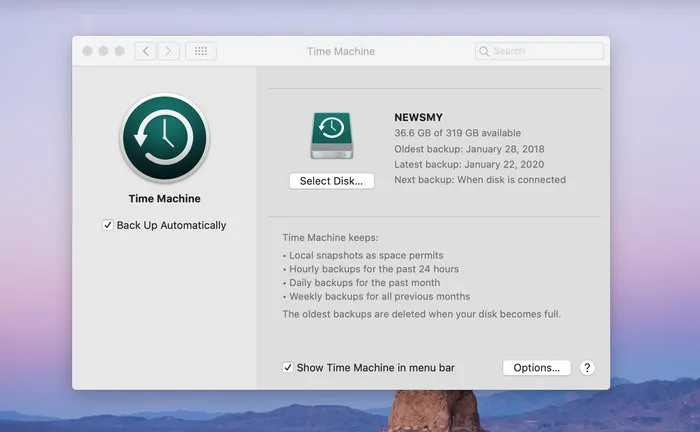
3. Backup Mac before Installation
A clean install will erase the internal disk of MacBook Pro. So it is extremely important to back up your Mac before the installation gets started. You can do this with built-in Time machine app or iCloud. Some third-party backup software are also worth consideration as they are more convenient and powerful then the stock Time Machine app.
4. How to Clean Install Big Sur on MacBook Pro
Now, your Mac is fully backed up and nothing to be worried any more. It is time to install Big Sur on MacBook Pro.
Step 1: Attach the bootable Big Sur USB to MacBook Pro.
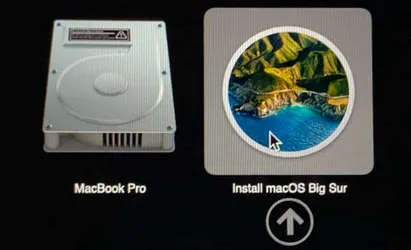
Step 2: Power on the device and hold option key until you see the Startup Manager on the screen.
Step 3: Please choose the drive labeled with Install macOS Big Sur to proceed. This will let the Mac boot from external USB installer.
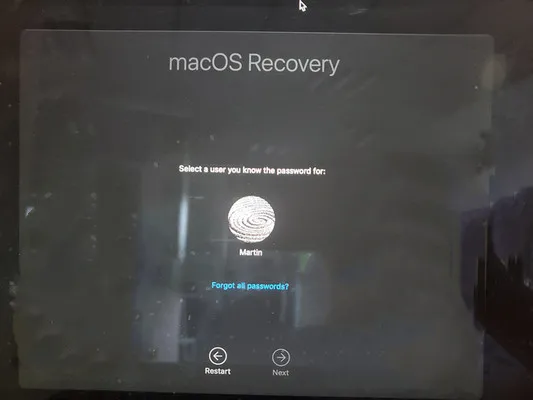
Step 4: Wait about 2 minutes before macOS Recovery utility to be loaded on the screen. You have to click the user name and input the password to verify your identity.
Step 5: In macOS Recovery windows, there are four menus displayed on the screen.
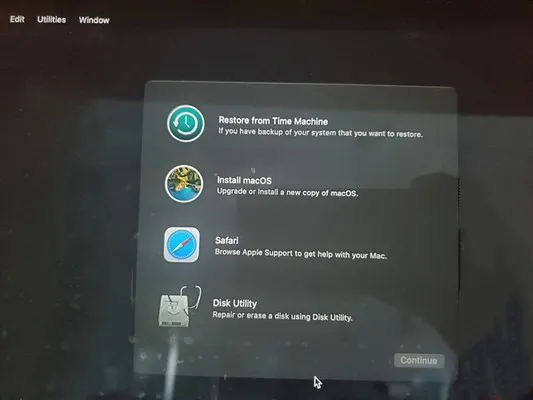
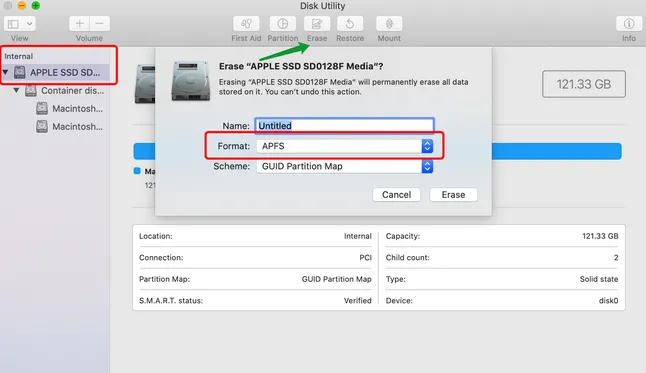
Step 6: To clean install Big Sur, please click on Disk Utility app and erase the disk to APFS format.
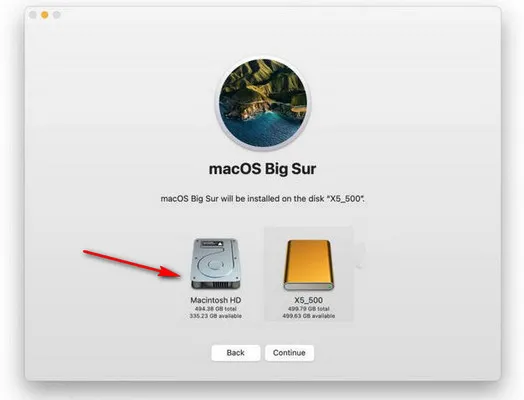
Step 7: Quite Disk Utility from the top file menu and select Install macOS this time. You will be asked which disk you want to install Big Sur. Please choose the internal drive (Macintosh HD) to start the macOS installation process.
Step 8: Follow the on-screen instructions to install macOS Big Sur on MacBook Pro. You have to wait about one hour for the installation process to be fully completed.
Big Sur Installation Failed? Troubleshooting Guide
There are several cases that Big Sur cannot be installed on your Mac. You can check the following tips to solve the problem.
Case 1: Your Mac Not Meeting the Minimal Requirements of Big Sur
Though we have stated this at the beginning of this article, there are still users who missed this information. They are trying to install Big Sur on old Macs that are not capable of running macOS Big Sur. The installation will fail for sure!
Case 2: Big Sur Bootable USB Not Showing in Startup Manager
This means the burning process failed or the method you used to create bootable USB failed. You have to try another method or re-download macOS Big Sur DMG file from here.
Case 3: Internal Disk Not Formatted to APFS
On Old Macs, the internal disk was formatted to HFS or HFS+. Big Sur requires APFS for installation. Please erase the disk and format it to APFS in Disk Utility app.

Petty is editor in chief at UUByte and writes various topics about Windows and Mac to help people make the most of current technology.