
Most Windows 10 users don't know that you can actually run multiple Windows OS on the same PC. The way this is done is by using multiple installers for the purpose, but you have to have the right tools for this. These are called multiboot applications, and most will allow you to create multiboot installation media on USB. Here are some of the best tools to achieve this and start using, for example, both Windows 7 and Windows 10 on the same computer. After the multiboot USB is created, then you can start to install them on the same computer one by one in different partitions.
Windows 10 Dual Boot Creator #1:WinUSB
WinUSB is one of the most popular options because it's simple enough for most new users to get the hang of right away. The interface is clean compared to a lot of other open-source utilities, and the steps are fairly simple as well. Unless you need to use advanced settings options, the method is very straightforward. Before you proceed with this or any of the following methods, you will need to get your ISO files ready on the same computer. Once you download the respective Windows ISO files from Microsoft's website (after bypassing the Media Creation Tool), you can follow the instructions below:
Step 1: Download and install WinUSB on your PC, then launch the application.
Step 2: In the main software interface, you'll see an option to plug in the USB flash drive on which you'll be creating the bootable media. Do that now and see if it's detected by the software.
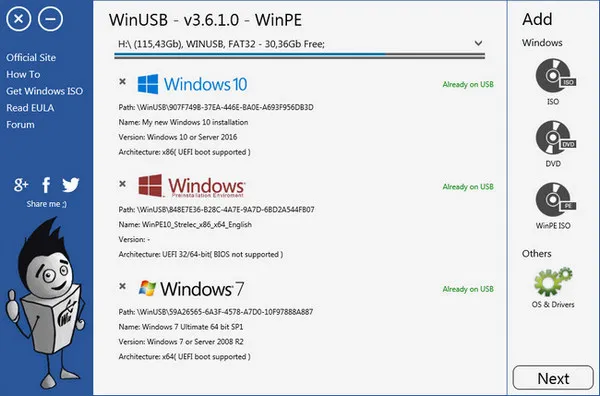
Step 3: The next action is to add your ISO files. As you add each file to the program, you'll see a progress bar showing you whether it's loaded. Finished means it is successfully imported into the program and flashed to the USB drive. As you can see from the following screenshot, there are 3 Windows OS (Windows 10, Windows 8 and Windows 7) installed on the same USB.
WinUSB is popular because it allows you to have different Windows versions without formatting your USB drive for each one separately. In fact, you can even have movies and bootable ISO files on the same flash drive as long as there's adequate space available. Alternatively, you can also choose to format it before burning the ISO files to it.
Windows 10 Dual Boot Creator #2: YUMI
YUMI is another popular multiboot drive utility for multiple Windows installations. Apart from being able to have multiple Windows versions on a single USB installer, you can also have diagnostics tools and other applications. As with the previous utility, you can have other data on your USB drive in addition to your bootable ISO files. This makes it highly flexible and convenient when you have high-capacity USB drives at your disposal. Here's how YUMI works:
Step 1: After downloading and installing YUMI on your PC, launch the program and execute the first step in the process, which is selecting your USB flash drive. Obviously, you need to first insert it into a working port.
Step 2: The second step is to choose Windows as the operating system. Although this tool was primarily meant for Linux distributions, you can also use it to create Windows installers.
Step 3: The next step is to add your distribution file or ISO file for Windows 7, 10 or any other version you want. There's a checkbox option here to show you all the ISOs on your computer, which is useful if you're unsure of which versions you might have downloaded in the past.
Step 4: Finally, click on the Create button to burn the ISO to your USB drive. You can do this as many times as you want to load more ISO files.

Windows 10 Dual Boot Creator #3: SARDU
SARDU is another easy and flexible option for creating multiple Windows installers on a USB that can be used on the same PC. The unique feature it offers is that you can defrag your drive and burn the disk images to a physical disk as well. However, for the purpose of this article, we'll show you how to create a multiboot USB flash drive using this software.
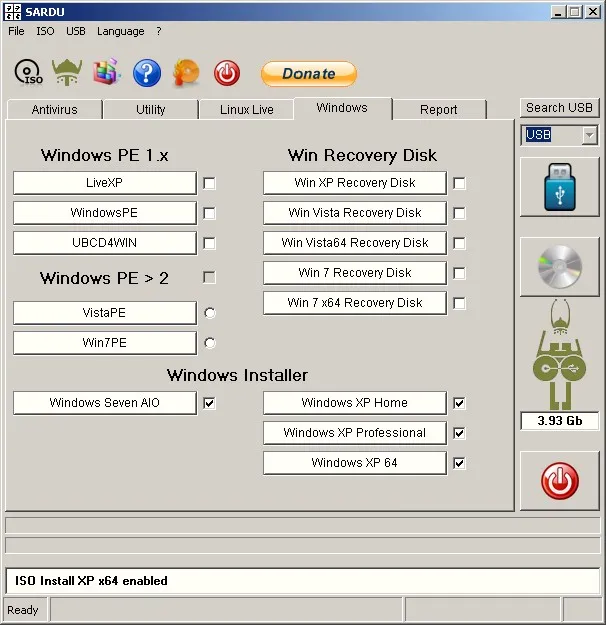
Step 1: When you launch the program after downloading and installing it, you'll see an ISO icon in the menu bar on the top left right under the File option. Click on that, then go to the Windows tab to select your ISO files.
Step 2: Next, insert your pen drive, click the dropdown under the Search USB button on the right panel and choose the pen drive from the list shown.
Step 3: Finally, click on the USB drive icon on the right. That will burn your chosen Windows ISO files to the drive.
Finally Install Multiple Windows OS on Same PC
After using one of the methods above to create your multiboot Windows installer, each time you use it, set your BIOS to boot from the USB drive instead of your hard drive. That way, you can choose whichever one you want, and it will boot directly from the USB drive without having to go through the entire installation process each time.
To do this, hit the F8 or other designated key to access the BIOS menu, where you can change the boot priority to point to the USB drive. Once you do that, you can easily boot into one of the Windows versions that are in your USB installer.

Petty is editor in chief at UUByte and writes various topics about Windows and Mac to help people make the most of current technology.