
Linux is a great open-source operating system that can be installed on any desktop or laptop. What sets Linux apart from Windows and macOS is that it has a number of different versions that suit all your needs, ranging from newcomers to hard-core users. We call these versions distributions. The best part is that you can download all of Linux's distributions for free and install them on multiple machines.
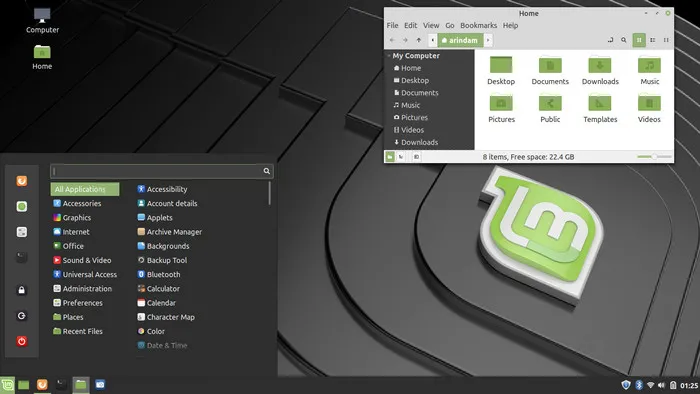
One of the most popular Linux distributions is Linux Mint. Each distribution serves as a different purpose and there is no exception to Mint. Basically, Linux Mint is specifically designed to produce a modern and elegant operating system which is very easy to use. The coolest part is that a Linux Mint stick can be created from macOS and Windows, meaning that you can boot from Linux without installation.
In this guide, we will show you how to create a Linux Mint bootable USB in Windows 10 and macOS. Before we proceed, there are a couple of things you need to understand about Linux Mint.
Why Linux Mint?
Linux Mint is one of the most used Linux distributions out there, as it is free and reliable. Like other distributions, Linux Mint can be installed on all platforms, including macOS, Windows, Android, and iOS. Linux Mint is widely supported by community and developers. The best thing about Linux Mint is that it is not vulnerable to viruses and malware attacks, which is ideal for testing purposes.
Creating a Linux Mint bootable USB is a no-brainer if you want to use it on a different computer. However, the process may be a little bit confusing to some folks. With that in mind, we are here to help.
Create Linux Mint Bootable USB on Windows PC
Windows is the most popular desktop OS and there are many apps that are capable of creating bootable Linux Mint USB installer. In this section, we pick up the best three one based on our testing.
1. UUByte LiteBoot
There are a lot of Windows users that are planning to give a try on Linux Mint. So at the beginning, we are introduing a couple of methods to create Linux Mint bootable USB on Windows, especially on Windows 10, which is now the most popular desktop operating syste.
Creating Linux Mint Bootable USB on Windows 10 is not hard at all. The first software recommendation is called UUByte LiteBoot. It is a leading program that's designed to handle all your needs for bootable USB thumb drive, including Windows, Linux and macOS. It also includes other modules for Windows ISO download and system backup and restore. Plus, it is buit with a modern UI and has a very pleasant user experience.
Step 1: Once you have UUByte LiteBoot installed on your computer, download Linux Mint onto your Mac (you can download it from here).
Step 2: Insert a USB thumb drive into Windows 10 where UUByte LiteBoot being installed. Make sure your USB device is fully compatible with the hardware, you can empty it and then reformat it using the built-in utility from right-click optionsl.
Step 3: Open UUByte LiteBoot on Windows 10 and then select Linux Boot from the main menu. Now, import the Linux Mint ISO file you downloaded earlier. Before the burning process begins, make sure you have made a copy of all important files on that USB drive.
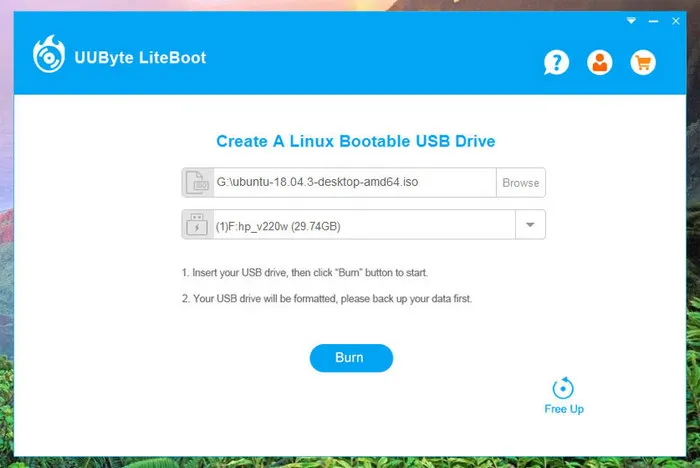
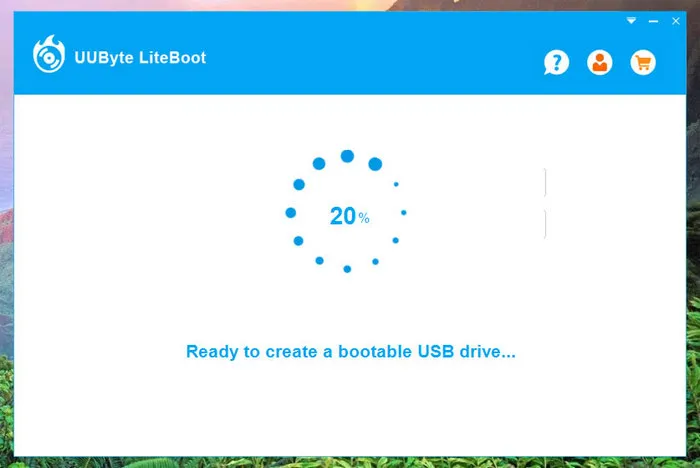
Step 4: Click Burn button to start burning Linux ISO to the target USB drive. It usually takes about 7 minutes to complete the task. Please be patient and you will see an alear on the screen when it is done.
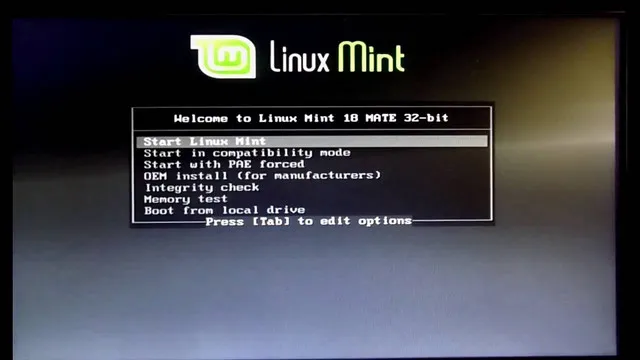
Step 5: Now, you have a bootable Linux Mint USB. You should insert this drive into the computer and start installing Linux mint on it by changing the first boot device to USB during startup.
In short, if you are in searching for a reliable ISO burner to create bootable Linux Mint USB, then give UUByte LiteBoot a try. It is lightweight, fast, and reliable.
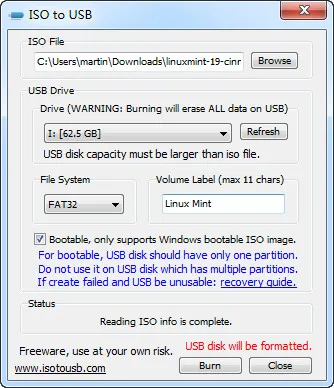
2. ISO to USB
ISO to USB is a free program that lets you burn ISO image file to a USB drive, including USB Pen drive, USB sticks and USB thum drive. It is lightweight and features a simple user interface. However, it lacks some important features, including the ability to create ISO archive from external drives.
First off, you can download ISO to USB from its website and then open it on your Windows 10 machine. When the main menu shows up, click Browse to locate the Linux Mint ISO file you downloaded earlier. Select the USB drive you inserted and then hit the Burn button. The tool will start burning the ISO file to USB drive. ISO to USB has a high success rate, so you won't have any issues here.
3. RMPrepUSB
RMPrepUSB is one of the most powerful software for creating Windows and Linux bootable USB drives. In reality, RMPrepUSB is not just about creating a bootable drive, as it can do a lot more. One such thing lies in the ability to format USB and run USB speed test. And there are much more options for selecting bootloader and file systems.
This program is completely free (no subscription plans), so you don't need to spend some extra cash on its advanced features. However, it is only for advanced users as there are two many advanced settings being involved.
Step 1: Download RMPrepUSB from here and then open it on your Windows 10 computer.
Step 2: Once you are done, insert a blank USB drive into Windows . From the main menu, you can see the USB drive name showing up at the top.
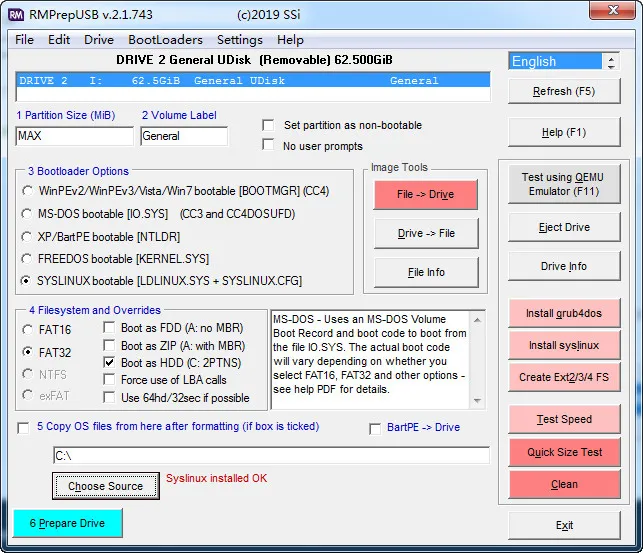
Step 3: Click Prepare Drive to initiate the burning process and click OK from the popup menu. If this the first time you are using RMPrepUSB, the tool will run a test. Once the test is complete, repeat the above steps.
Step 4: After the bootloader information was written to USB, then extract the ISO file of Linux Mint image and copy the folder to USB. Now, it becomes a bootable Linux Mint USB.
To verifiy the burning successful or not, the user can test the result with QEMU emulator that is embeded into the program in default. You can see the option on left sidebar. This is the same as UUByte Boot Pro.
Create Linux Mint Bootable USB on Mac: Terminal App
You can create a bootable USB for Linux Mint from a Mac environment. However, you can not do it on your own as you need a little help from some third-party software out there. If you do some googling, you should find tons of them, but many of them might not work for you. Don't worry, we made a list of the best programs for creating Linux Mint bootable USB.
If you don't want to install some third-party app on your computer, you can use the dd command in macOS Terminal. This is a cool tool that allows you to execute some commands in macOS. In this case, you can rely on Terminal to create a bootable USB for Linux Mint.
Step 1: Insert the USB drive into your Mac and then open Terminal (Applications folder > Utilities).
Step 2: Enter the following command to convert ISO file IMG file:
hdiutil convert -format UDRW -o img_file_output_path linux_mint_iso_file_path
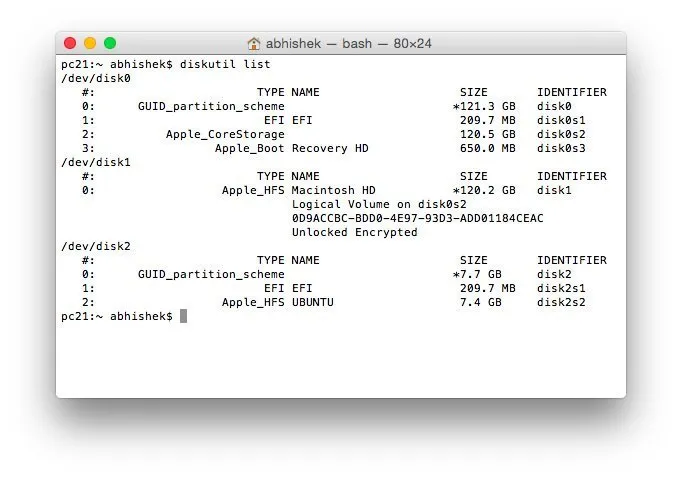
Step 3: Find the USB drive number and unmount the disk, X is the drive number of inserted USB drive:
diskutil list
diskutil unmountDisk /dev/diskX
Step 4: When all preparations are completed, it is the time to write the converted IMG file to USB, which becomes bootable afterwards.
sudo dd if=/img_file_path of=/dev/rdiskN bs=1m
Step 5: Ignore warning message that pops up uppon completion and eject the USB drive. You can now use this bootable USB to install Linux Mint on any computer.
Linux Mint Bootable USB Not Working? Troubleshooting Guide
The success rate of creating bootable Linux Mint USB is pretty high with recommended tools we suggest above. However, some user may experience technical error during boot, such as disk error or no bootable device found. Here are a few useful tips to fix the problem.
Issue 1 : USB drive not detected
Answer: First, make sure the USB drive is installed. On Windows 7 and later version, the dirve will be installed automatically when the USB is plugged in. If failed, you have to download the USB driver and install it manually. On Mac, you can format the drive with Disk Utility app.
Issue 2: Black screen during installation
Answer: If you got a black screen during install, it means the burning process failed. Mostly because the free space is not enough on the drive. At least 4G free storage is required for installation. Also, check the ISO image is valid. If you tried two programs and failed, then it is highly possible that the ISO file is damged. You have to re-download the file again.
Issue 3 : Installation won't start
Answer: This happens frequently on old hardware that does not support UEFI boot. You need to disable secure boot and swithc to legacy Boot in BIOS.
Wrapping Up
Creating Linux Mint bootable USB has been a lot of easier with modern software and applications, especially on Windows. Mac solution is much less due to the lack of apps from third-party developers. Honestly, there are far more options then the software listed above but they are the best among them so you don't take much time to test the candidate one by one.

Petty is editor in chief at UUByte and writes various topics about Windows and Mac to help people make the most of current technology.