
Linux is the second most popular operatying on earth that backends millions of devices like desktop computers, laptops, web servers, Android phones and portable devices. Now peole are aware of the importance of Linux and thousands of people are starting to leanr Linux. Ubuntu usually comes at the first place for beginners because of its excellent UI and rich of third-party applications.
However, you should create a bootable USB first before you can do anything with Ubuntu Linux. In this tutorial, we will share 5 popular Linux ISO bunring tools to help you make a bootable Ubuntu USB for installation.
Ubuntu vs. Linux Mint: The Endless Debate
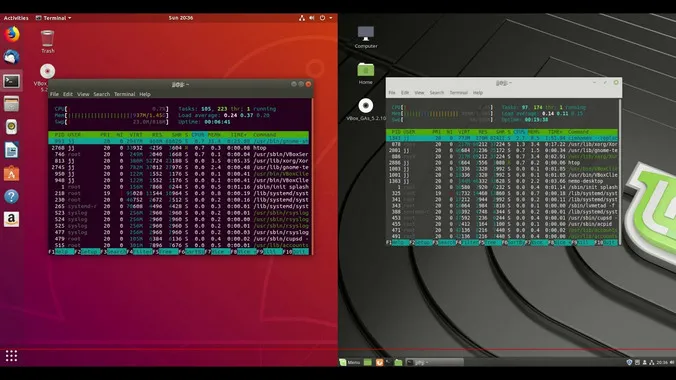
The ongoing debate about Ubuntu vs. Linux Mint will probably never end, but on many levels, Ubuntu is a more popular Linux distro. While Linux Mint goes after the Windows user base, Ubuntu is more focused on making life easier for Mac users. Right off the bat, Ubuntu Gnome, for example, has a much more engaging experience than Linux Mint. It has a much more modern design and offers some really cool effects that macOS users love.
In addition, when you're running both on a new machine, you won't spot that many differences in performance. Overall, it depends on what environment you prefer, but the clincher is that Ubuntu has a larger variety of desktop environments (DEs) that are supported.
More reading: How to create a bootable Linux Mint USB
UUByte LiteBoot
In order to install Ubuntu on your computer, you'll need to download an ISO file and use that to create bootable media on a USB or a physical disk like a DVD or CD. For this purpose, you can use a number of ISO burning utilities. The best ones are showcased below.
Whether you're on Windows or macOS, UUByte LiteBoot can help you effortlessly create a bootable USB for your chosen Ubuntu distro. It's a versatile app that has other uses like system backup and restore, creating Windows bootable USB, download Windows ISO file, and, of course, burning ISO to USB. In addition, the tool has one of the highest success rates for burning image disks to portable media. Here's how to use it:
Step 1: Download and install UUByte LiteBoot on a Windows PC.
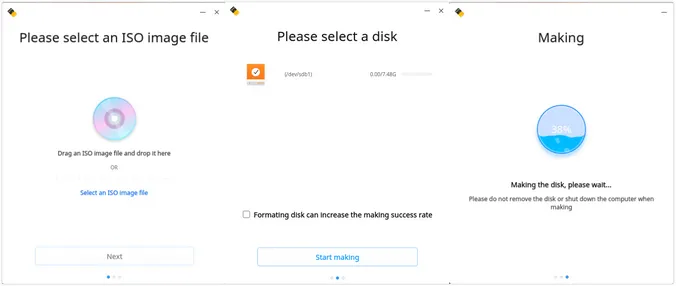
Step 2: Open the program from desktop shortcut. The main UI is shown like the following screenshot.The main window is the default option to create bootable USB from Linux based ISO files. Currently, it supports all popular Linux distros, like Ubuntu, Linux Mint, Manjaro, Kali Linux. Now insert an USB drive into Windows 10 computer.
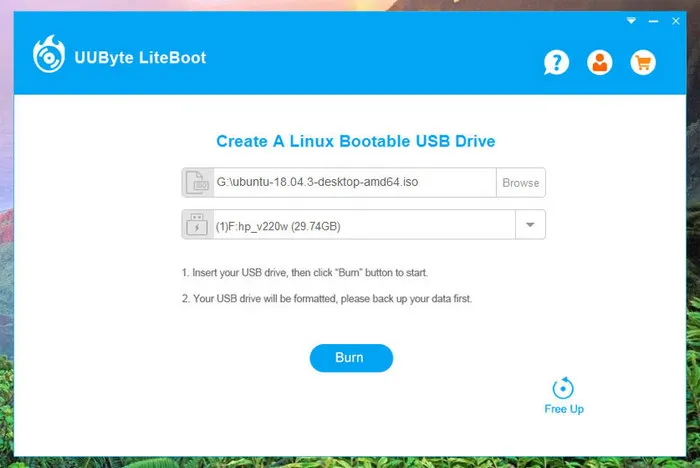
Step 3: Once the USB drive name shows up on the screen, please kindly Import Ubuntu ISO file into the program by clicking the 'Browse' button. Click Burn button to start writing Ubuntu ISO to USB if all data on USB drive was backed up safely.
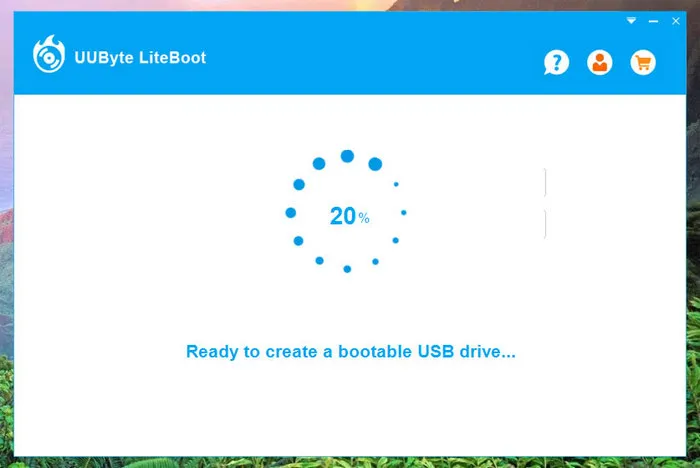
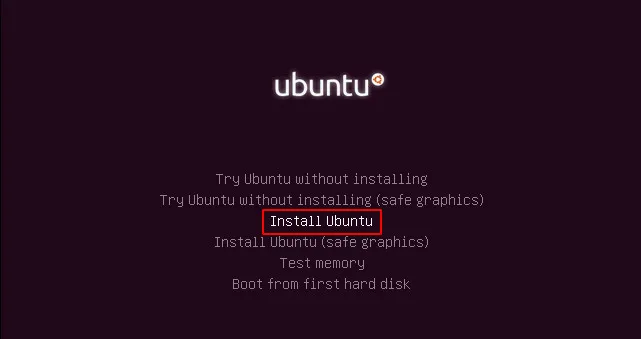
Step 4: The process for creating Ubuntu bootable USB is now finished. You should start Ubuntu on your computer by changing the first boot device to USB. This can be done in Boot Menu or BIOS.
It's as simple as that. Once the burning is done, your Ubuntu bootable USB can be ejected and is now ready to be used for new installation. The same process also applies to Windows ISO image if you want to create a bootable Windows USB. The Mac Boot feature will be available soon!
XBOOT
XBOOT is another useful tool with a unique feature that makes it a multiboot utility. That means you can have multiple distros and operating systems on a single USB drive. The disadvantage is that it's only for Windows. However, if you're a first-time user, this could be a great starting point in your journey to gain experience with various Linux distros. Here's what to do:
Step 1: You can extract and run XBOOT after downloading it from author's website.
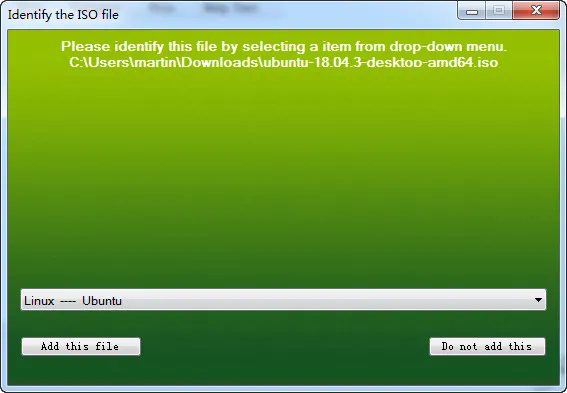
Step 2: Go to Windows Explorer and click-drag your ISO file into the XBOOT interface. Once the ISO file being loaded, you have to verify the file and choose Linux --- Ubuntu from the drop down list.
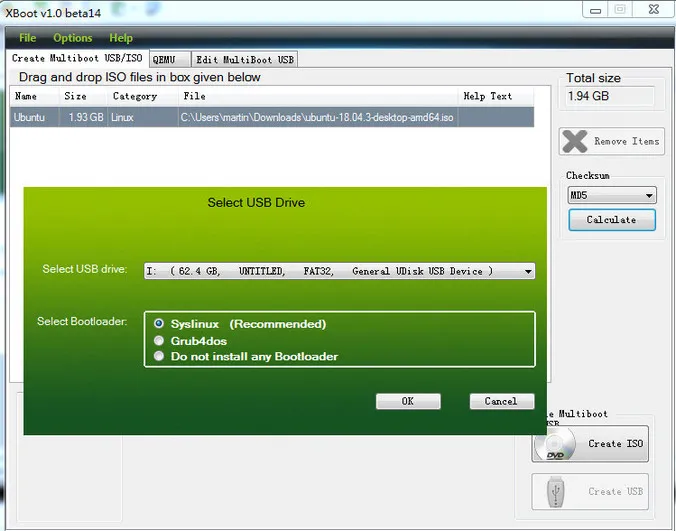
Step 3: You'll see two buttons at the bottom. Click on the 'Create USB' option. On the next page, choose your USB drive letter and choose between the two bootloader options. You can also leave it on the default Syslinux. Wait for the progress bar and an alert to show you that the bootable USB has been successfully created.
Xboot is one of the most reliable tool to create bootable Ubuntu USB on Windows 10. You can even install multiple Linux distro on the same USB drive. However, the burning speed is much slower than UUByte software, meaning you have to wait for more time.
WinToFlash
Yet another multiboot utility is Novicorp's WinToFlash, which works with all the latest Windows releases. It's perfect for creating your Ubuntu bootable USB and also have other distros stored on the same USB drive. And it's portable so you won't even have to install it - just run it directly off another USB drive after saving the executable file there.
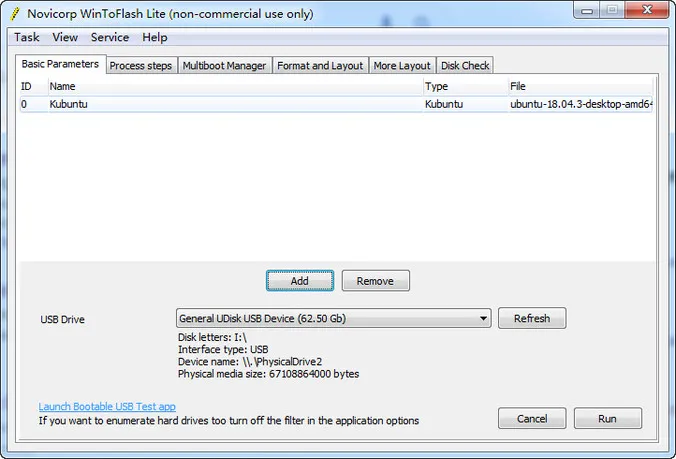
The process of creating a USB installer for Ubuntu is very similar to the one used on other tools, but don't be misled by the term "Windows Setup Transfer Wizard" when you run the program, because the wizard can help you create a bootable USB from any ISO file. Just follow the instructions shown to you in each step of the wizard, such as choosing your ISO and drive, confirming your options in the alerts and license agreement pages, and so on. You should be able to see the progress of the burn session, which shouldn't take more than a few minutes.
Note: Only Kbuntu ISO is supported in Lite version, which is free. For more ISO support, a license key is required!
MultiBootUSB
MultiBootUSB is a Python utility that allows you to install various Linux distros and operating system files on a flash drive without deleting the data that's already in there. It's basically a graphical user interface for the well-known data duplicator utility in Linux, which is more popularly known as the dd command. Here's how it works:
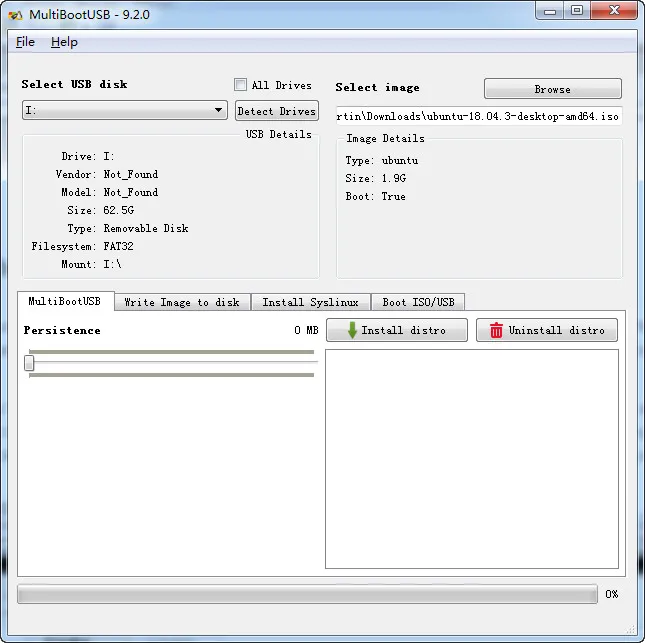
Once you download the file, install it on your Windows PC by following the instructions provided by the setup wizard. After installation, launch the app and plug in your flash drive. Wait until you see it in the MultiBootUSB interface, then click on Browse to import your disk image into the program. Finally, just click the Install Distro button and confirm in the popup that appears. You should be able to see a list box with the name of your Ubuntu distro, which you'll see each time you launch the application.
Deepin Boot Maker
Deepin is an emerging Linux distro that acts like Windows. It is the best choice for users who want to turn Linux into a working machine. There are stock apps in Deepin for Office, entertainment and gaming. It has a large user base in China. Prior to Linux development, Deepin is the most popluar vendor for Windows customization.
Deepin Linux has many differences between main stream distros and some of the burning tools failed to create bootable USB from Deepin OS. That pushes the developer to make it own tool to create bootable USB. Deepin Boot Maker is the official tool developed by Deepin to help user create bootable install disk. It is an offshoot of UNetbootin and works on macOS, Windows, and Linux computers to burn ISO to USB. Besides Deepin Linux, it also supports other Linux variants like Ubuntu, Debian and Linux Mint.
After it's installed, just select your disk image, select the USB drive after inserting it, and hit Start. You'll see a checkbox for opting to format the USB. If you choose this option, make sure the USB flash drive doesn't have any important personal data to lose. It only takes a few minutes for the bootable drive to be created, after which you can go ahead and do the Ubuntu installation.
Summary
After creating Ubuntu bootable USB with one of the above recommended tools, the bootable USB is ready for use. Depending on how comfortable you are with each of these tools, choose the one that you think works best. As for our recommendation, we advise you to use UUByte software for its power, simplicity, and accuracy. It is by far the most polished UI of all, and the biggest advantage, as we saw earlier, is that you get a full-fledged ISO toolkit when you install the software on your PC or Mac.

Petty is editor in chief at UUByte and writes various topics about Windows and Mac to help people make the most of current technology.