
Dual-boot Mac is a good option if you want to test out the new feature of beta macOS. So you can keep the current macOS and install a new copy on a separate volume. This feature allows you to run two macOS versions on a single Mac at the same time. This would be much helpful as some app just runs on a new version of macOS and you are not prepared for a full upgrade on your main working macOS volume.
Well, this seems to be good, but you must have a good knowledge before stepping into this battleground. And, here you will get everything that is required for this battle.
Since Apple launched several versions of the macOS in the past few years, so you must be familiar with the different versions of macOS before installing another copy of macOS on current Mac.
Part 1: macOS Version History
macOS is the third generation of Mac desktop operating system developed by Apple. It is the upgraded version of OS X and was first released in 2016 to keep peace with the latest hardware innovation. Before the installation starts, you have to know which version you should go with. And most important, each version has its own hardware requirement.
macOS Version History
- macOS 11.0 Big Sur Beta (2020)
- macOS 10.15 Catalina (2019)
- macOS 10.14 Mojave (2018)
- macOS 10.13 High Sierra (2017)
- macOS 10.12 Sierra (2016)
To install a new copy of macOS of any version on the existing OS of Mac, you need to perform few tasks, i.e. disk partition, creation of bootable USB, and installing macOS on Mac machine. But before moving ahead, let's see the system requirement needed to perform this job.
Part 2: Hardware Requirements for macOS
It will be not going to work if you are trying to install a copy of macOS on a incompatible Mac model. So you must take some time reading the hardware requirements for each macOS, which varies for different versions. Fortunately, Apple has detailed documentation on that topic. Here is a few examples for macOS hardware requirements:
Catalina: https://support.apple.com/kb/SP803
Mojave: https://support.apple.com/kb/SP777
High Serria: https://support.apple.com/kb/sp765
Serria: https://support.apple.com/kb/sp765
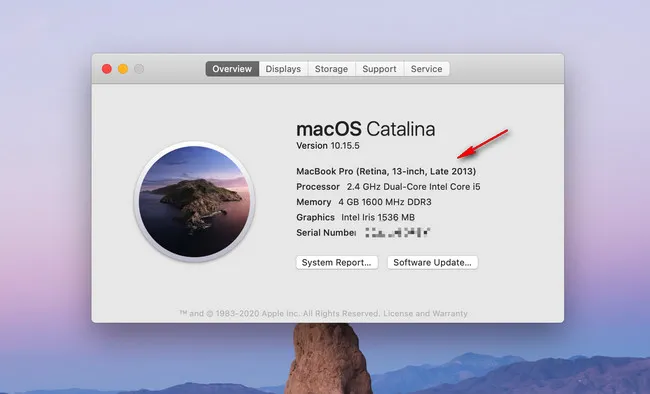
How to check your Mac model? Please click the apple icon at the upper left corner and select "About This Mac". You will see the macOS version along with hardware details of this Mac from the pop-up small window. That's!
Part 3: Download macOS Installation File (.dmg)
You can now decide to pick up the right macOS version for your Mac after reading the hardware requirement. The next step is to download the dmg file for macOS installation and create a bootable macOS USB installer from dmg file. Below is a list of macOS DMG file download links:
Catalina DMG Download: https://drive.google.com/drive/folders/RHjyvaNW4r628CM
Mojave DMG Download: https://archive.org/download/macOS_Mojave/macOS_Mojave.dmg
High Serria DMG Download: https://www.mediafire.com/macOS_High_Sierra_10.13.6_DMG
Serria DMG Download: http://updates-http.cdn-apple.com/InstallOS.dmg
Part 4: Create Bootable macOS USB Installer on Mac
To create a bootable USB installer for macOS, you need to burn macOS dmg file to USB drive. Terminal is the inbuilt command-line utility that does the burning task, but all the steps are command based. So here we have suggest a GUI app that will reduce your effort, called UUByte DMG Editor.
This tool will give you the sole authority on the DMG file, which means you can open or extract content from dmg file as per your requirements. Moreover, UUByte DMG Editor will help you to burn the DMG file on USB drives more efficiently. Let dive into the steps.
Step 1: Download and Install UUByte DMG Editor on your Mac and if you want to get a better experience with this software, then download it from its official site.


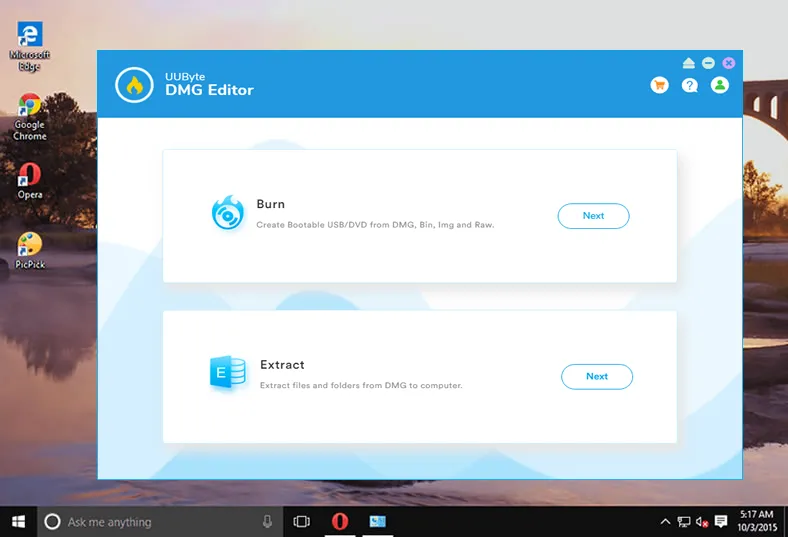
Step 2: Launch the application and meanwhile insert the USB drive on your Mac. On the main interface of UUByte DMG Editor, you will get two options, Burn and Extract, choose the first one.
Step 3: In the Burn section, you will have to upload the macOS dmg file and also need to select the path of the USB drive.
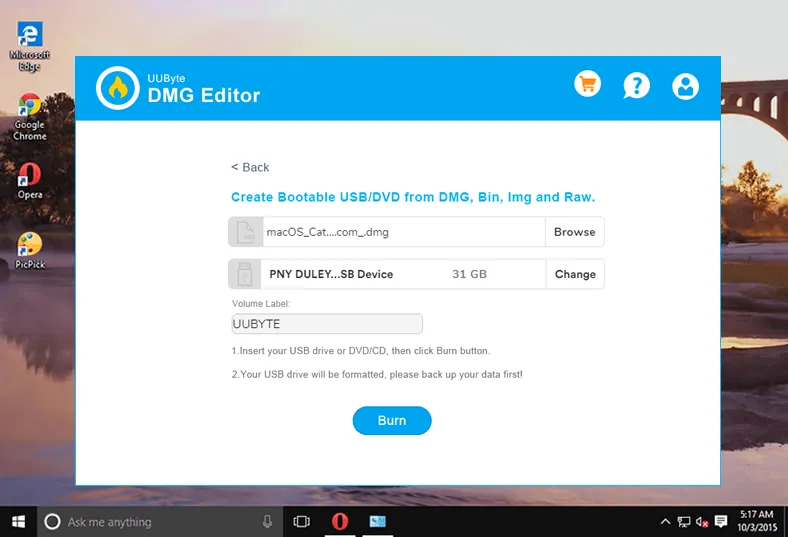
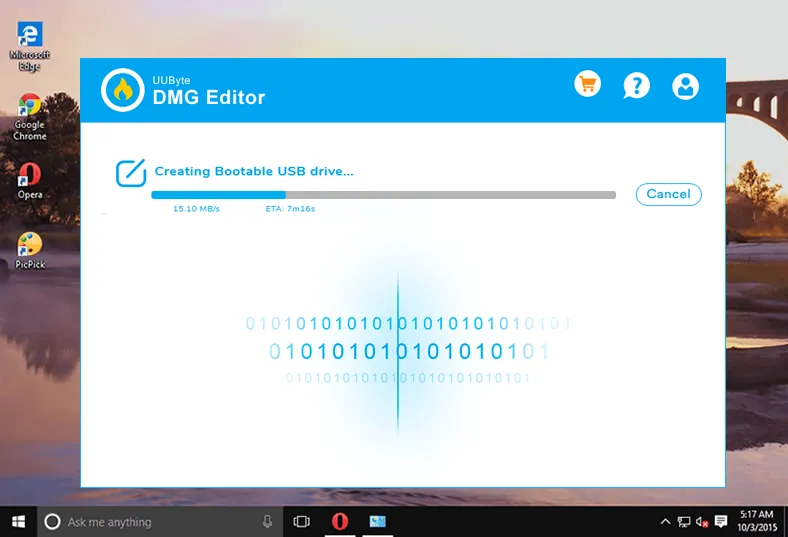
Step 4: After adding macOS DMG file, click on the Burn button. Now the process has started and you need to wait for a while for its completion.
UUByte DMG Editor made the task much simpler and the interface is intuitive that will help you to achieve the goal smoothly because only relevant options are provided that are needed for the job. In short, no additional knowledge is required to use UUByte DMG Editor.
Part 5: Add a New APFS Volume on Mac
APFS is the new file system designed for macOS. In default, each Mac has only APFS volume, which can only keep one instance of macOS. To install a new copy of macOS on your Mac, you have to add a separate APFS for holding the additional verison of macOS. You can do this by following the above steps.
Step 1: Open Disk Utility app on your Mac.
Step 2: Move to the left sidebar and click the physical name of Mac's internal SSD or HDD.
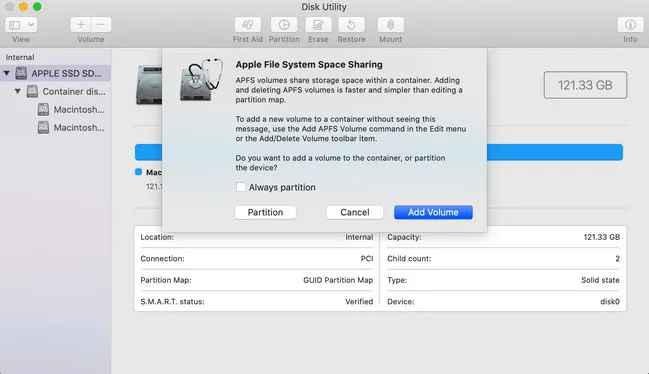
Step 3: Click the Partition tab on the top and click Add Volume from pop-up window.
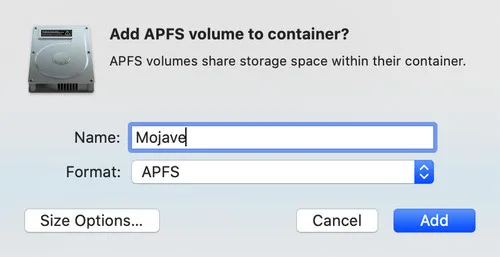
Step 4: Give a name for the new volume and choose APFS as the target format. Also set a size for the new volume by clicking the Size Options...
Now, a separate APFS volume is created and you can install new macOS on this volume without affecting the current volume.
Part 6: Install macOS on a Separate APFS Volume
You have created a separate volume for installing another copy of macOS and also you have a bootable USB drive. So, you have reached the half-mile and at this section, you will learn how to install macOS on a separate APFS volume.
Step 1: Make sure you have inserted the bootable USB drive on target Mac.
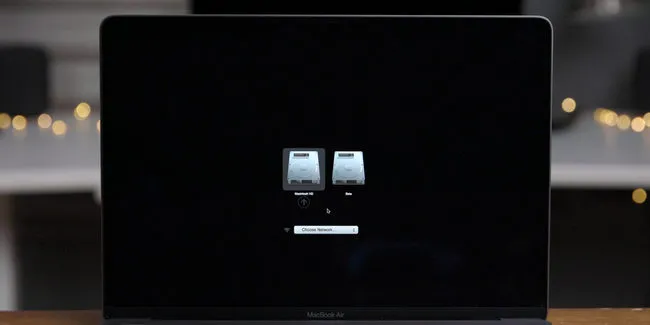
Step 2: Restart the device and immediately press and hold the Option key to launch the boot menu, where you can choose the device to boot Mac.
Step 3: Wait for about 1-2 minute, you will see macOS installation wizard.
Step 4: Click Show All Disks... button and select the newly created APFS to install this macOS version.

Step 5: Accept the Terms and Conditions page. Now, click on the Install button to get started with a new copy of macOS on current Mac. The installation process will take some time and once it gets completed, your Mac will restart.
That's it; your job is done and now you can access two macOS on a single Mac machine.
Part 7: Run Two Versions of macOS on One Mac
Now, you have two different versions of macOS on a single Mac. And you have to set up Preferences and connect iCloud account to the new macOS in order to make it a full working copy. At this time, how can you boot from the newly installed macOS? It is so easy.
If you want to set the newly installed macOS as the primary boot, then go to Preferences -> Start Disk. Then select the device from the drive being listed in here. After that, Mac will boot automatically from that selected drive.
However, if you just want to use the new copy temporally, then shut down the Mac, hit the power button and keep pressing the Option key to open up Startup Manager. Now, click the macOS name to run it this time.
Summary
Installing two versions of macOS on a single Mac is no longer challenging task as we have covered all the details about it. The most important part is to see if the Mac is compatible with target macOS version you are trying to install. If picked up in a wrong way, then the rest of work is uselessly. Please double check!

Petty is editor in chief at UUByte and writes various topics about Windows and Mac to help people make the most of current technology.