
ISO files are essentially exact copies of a disk, program, file or folder. Although ISO files are usually used to copy the contents of a disk, they can also be created from specific files, or even folders that contain other subfolders and files. This article shows you three different software utilities that can be used to create ISO files from files or folders on your computer.
Free ISO Creator 1: UUByte ISO Editor (Windows 10/8/7 and Mac)
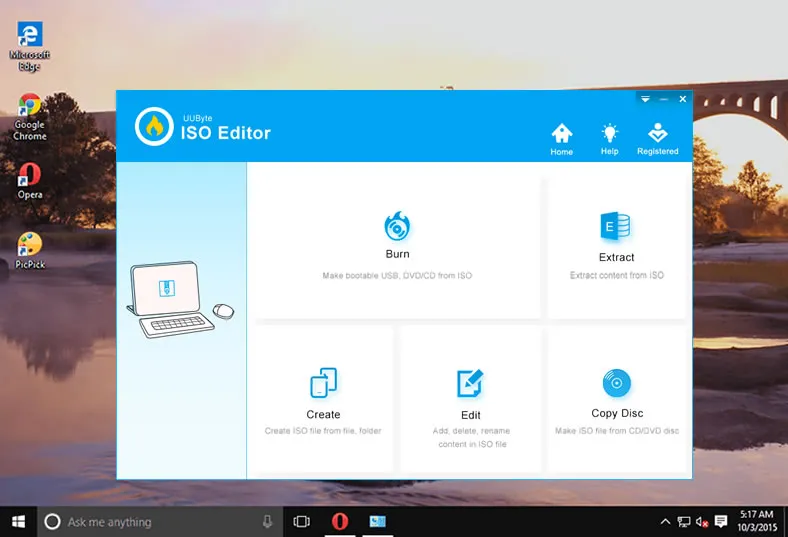
UUByte ISO Editor is an extremely versatile ISO creation and burning software. It has multiple utilities built into it, including creating image files or ISO files from disks, burning files to disks, copying or erasing disks, and also creating ISO files from files and folders. The interface is simple enough for novice users to get comfortable with quickly, and the steps are easy to follow.
Why Choose UUByte ISO Editor
- Create ISO image from local files or folders.
- Quickly Burn ISO to USB or DVD.
- Create Windows bootable USB in minutes.
- Extract content from ISO file.
- Freely edit any ISO file and re-built the origin image.


Step 1: After downloading and installing UUByte ISO Editor on your computer (Windows or Mac), you will see an option called "Create" on the main screen .
Step 2: Click on it and then click on the "Add Files" or "Add Folder" button. This will allow you to add whatever files and folders you need to the compilation of the ISO file. Another alternative is to either drag and drop or copy paste the folders and files to the compilation window.

Step 3 :Check if all the files and folders that you need for the ISO file are present. If there is anything you do not need, you can remove it at this point by using the "Remove" option. There are also several other options such as renaming the content, applying labels, adding new folders, and changing advanced settings.
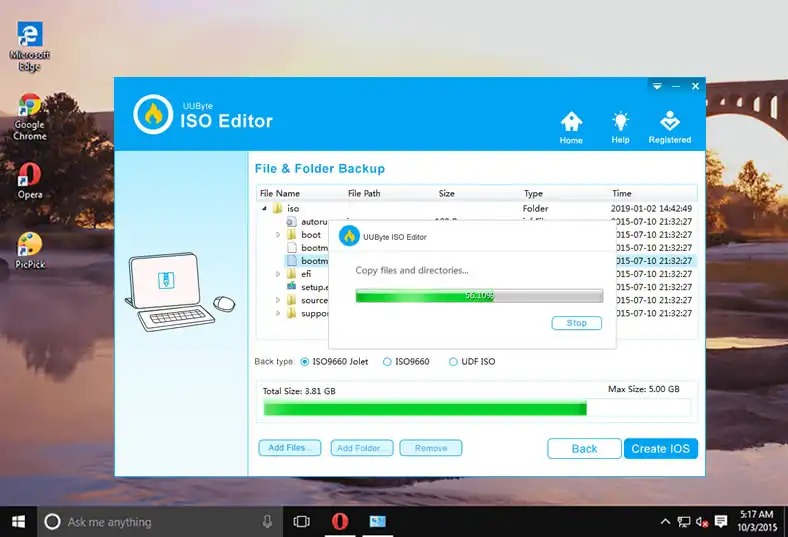
Step 4: Once you are satisfied that the content and the settings are as per your requirement, click on the "Create ISO " button. You will now be asked to name your target ISO file. Type in an appropriate name and then click on "Create Now". Once it has completed the creation of the ISO file, you may close the program by using the close button. In your selected target location, you should now be able to see the ISO file containing all the folders and files that you specified during the compilation.
Free ISO Creator 2: ImgBurn (Easily Convert Files to ISO)
Another versatile tool to create ISO files or disk images from files or folders on your PC is ImgBurn. It is used by a tremendous number of Windows users and is considered more reliable than most other ISO creation utilities. Also a great tool to burn ISO to CD.
One unique feature of ImgBurn is that once the ISO file has been created and you burn this file to create a bootable disk, you will be able to verify the disk to see if the ISO file was burned properly. The steps below describe how to use ImgBurn to create an ISO file from files and folders on your computer:
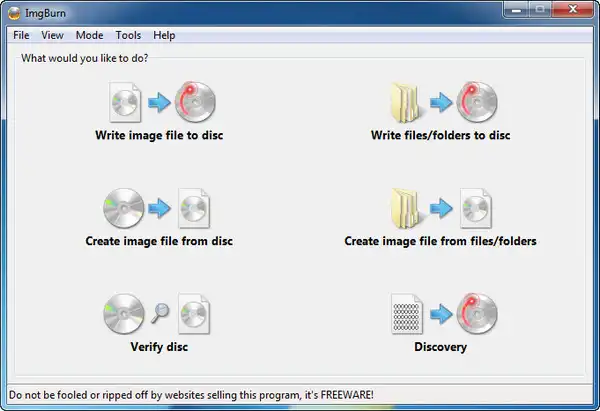
Step 1 : Download and install ImgBurn from the official website. Open the application and, on the first window, you will see an option called "Create image file from files/folders". Select that option.
Step 2: Once you are inside the compilation page, use the "Source" option to add files and folders for the compilation. Once you have done this, you may a select target location for the ISO file in the "Destination" section.
Step 3: If you look at the right hand side of the compilation window, you will see several basic and advanced options. You may leave all default values as they are, or if you require some specific parameters, you can set them here. For example, if you want to include system or hidden files, or restrict it to archived files alone, this is where you would make those changes.
Step 4: Once you check that the settings are all correct, you may proceed to click on the "Build ISO" icon at the bottom of the left side of the software interface. In a few moments, your ISO file will be created and saved to the location that you specified earlier.
Free ISO Maker 3: ISO Create Wizard
This ISO creation utility is extremely simple to use, but it is equally efficient and an ideal way to create ISO files from your local files or folders. You can also use this utility to create virtual drives from these same folders and files, and there is also a file size indicator so that you will know the size of the ISO file before creating it. Here is how to use free ISO create wizard:
Step 1: Download and install the application on your PC. When you launch it, you will see a window when you select your source folders and files, and the destination for your ISO file.
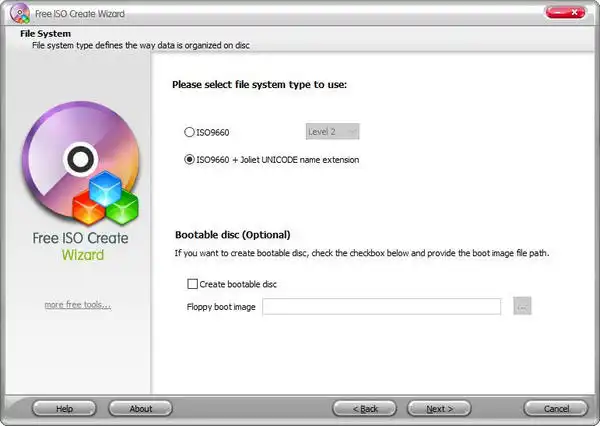
Step 2: Once you have selected your source files, folders and subfolders, you will need to specify a name for the ISO file and select the type of file system to be used to create the ISO file. When you are done, click on "Next" and then confirm the ISO file creation.
Step 3: Assuming that you have applied the appropriate settings in the compilation step above, you will soon have an ISO file ready for use in the destination that you specified earlier.
Conclusion:
All of these utilities are quite versatile when it comes to managing ISO files and their content. However, you must also be aware that not all of them work 100% of the time. There are often errors that occur while creating the ISO file, and these errors may show up later once you burn the ISO file to a disk and then try to use it. You may also experience errors with the compilation and creation process of the ISO file. If you are unable to successfully create a valid ISO file using any of these methods, you may consider using alternate premium utilities that have much higher success rates for creating ISO files from files and folders on a local drive.

Petty is editor in chief at UUByte and writes various topics about Windows and Mac to help people make the most of current technology.