
A bootable installer is a special type of media that can be used to reinstall operating system or fix system issues that never be solved in usual way. When there is something with your Mac, or you urgently need to upgrade your Mac to the latest version of macOS, a bootable installer could be a great help.
This tutorial tells you how to easily create a bootable installer for macOS on both Windows and Mac.
Before getting started, you should know there is only two types of installation media for macOS. One is the official macOS installation app, which is only available from Mac App Store. The other is macOS dmg file, which is made by third-party developers or system administrators.
Part 1. Create a Bootable Installer for macOS on Mac
macOS is the native operating system for all Mac computers. And Apple provides an official tool to create bootable USB installer from macOS installation app with the help of Terminal command, which is totally free. In addition, it is also possible to make a bootable macOS installer from DMG file. We will show examples for both tactics.
Create a Bootable Installer for macOS with Official App
This is the most reliable way to make bootable macOS installer on Mac as it is backed by Apple. It is completely free and no need to download additional software for this purpose.
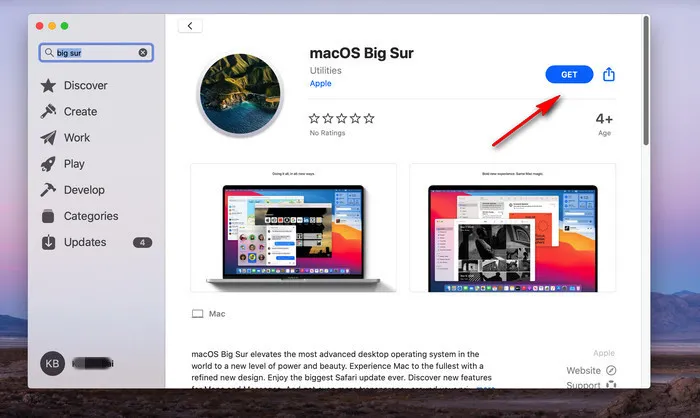
First, download macOS from Mac App Store. Just launch App Store app on your Mac and search for the macOS name. However, only the most recent versions are available for download, including Big Sur, Catalina, Mojave and High Sierra. After that, click the Get button (Big Sur as example) to download the installation app on your Mac.
The downloading process will take more than 15 minutes as the file size is pretty big (Over 8GB). When it is completed, you will see a Install macOS [version name] app in Application folder.

Now, insert an USB drive into Mac. If everything goes fine, you will see the drive name in left sidebar of Finder app. Then, open Terminal app and type the following command to find the actual volume name of USB drive, which will be used in next step: ls /Volumes/
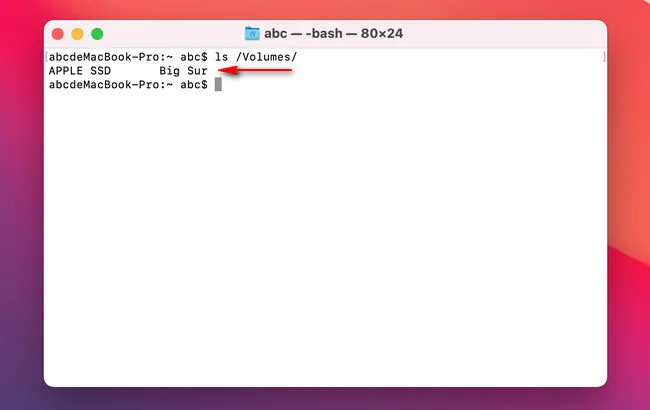
In above example, the volume name of my USB drive is Big Sur.
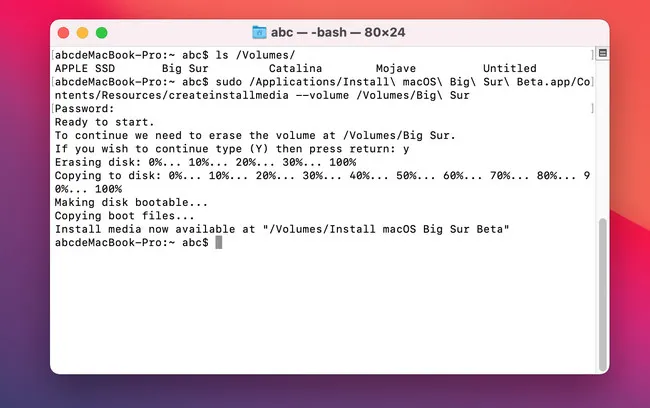
Finally, copy one of the following commands to Terminal and change the volume name. Click Enter to start creating a bootable installer for macOS.
Big Sur: sudo /Applications/Install\ macOS\ Big\ Sur.app/Contents/Resources/createinstallmedia --volume /Volumes/Big\ Sur
Catalina: sudo /Applications/Install\ macOS\ Catalina.app/Contents/Resources/createinstallmedia --volume /Volumes/Big\ Sur
Mojave: sudo /Applications/Install\ macOS\ Mojave.app/Contents/Resources/createinstallmedia --volume /Volumes/Big\ Sur
High Sierra: sudo /Applications/Install\ macOS\ High\ Sierra.app/Contents/Resources/createinstallmedia --volume /Volumes/Big\ Sur
You have to wait at least 10 minutes for the above task to be finished. After that, you can use the bootable USB installer for macOS reinstallation, downgrade or upgrade.
Create a Bootable Installer for macOS without Terminal
If you are scared of using text commands in Terminal, please don't worry. There are still two free GUI app available for this task. One is MDS and the other is Disk Marker X. We will go with MDS first.
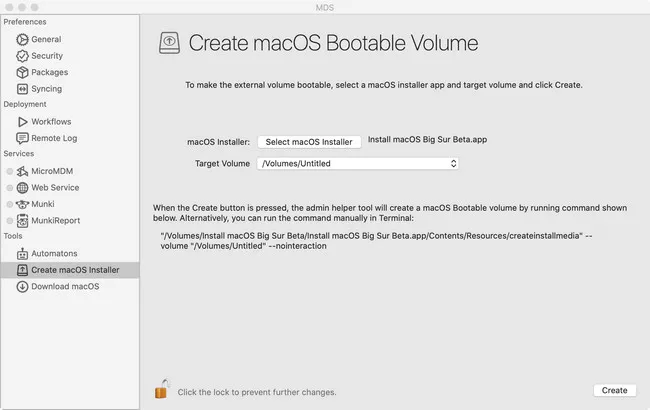
MDS is popular Mac deploying tool developed by Twocanoes. It can help you set up Mac, download macOS, create bootable macOS installer, install macOS and configure macOS in just a few seconds. Most importantly, it is built upon a modern graphics user interface, making it super easy to use.
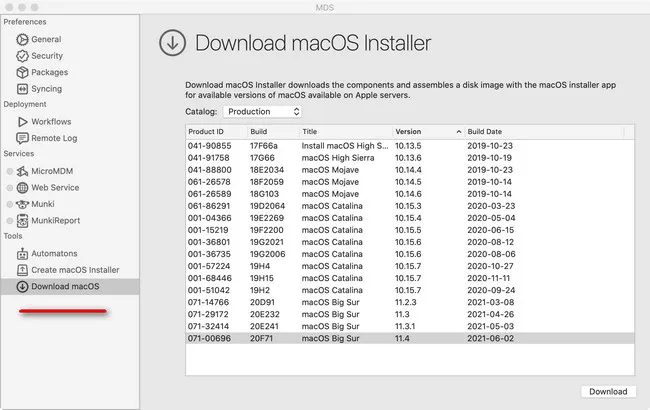
First, download MDS from this link and install the app on your Mac. Once loaded, navigate the left sidebar and find go to Download macOS, where you can download the desired macOS. Currently available versions are Big Sur, Catalina, Mojave and High Serria.
After download, please move to Create macOS Installer section. Please select the macOS installer you just downloaded and a target USB drive. Finally, click the Create button to begin making a bootable USB installer for macOS.
Disk Marker X is another free app with the sole purpose for creating a bootable macOS disk. It has been available since Mac OS X Lion (10.7) so it is very popular and reputable solution. The only drawback is that it does not support macOS Big Sur. You can create bootable installer from the following OS candidates.:
- macOS Catalina (10.15)
- macOSMojave (10.14)
- macOSHigh Sierra (10.13)
- macOSSierra (10.12)
- OS X EI Capitan (10.11)
- OS X Yosemite (10.10)
- OS X Mavericks (10.9)
- OS X Mountain Lion (10.8)
- OS X Lion (10.7)
The steps are also quite simple. First, download a macOS installation app and open Disk Maker X. Next, select the location of macOS install app and pick up the drive name. Confirm the operation as it will erase the whole disk. Finally, click Erase then create the disk button to start the process.
Create a Bootable Installer for macOS from DMG File
In case, you are unable to download the official macOS installation app, an alternative choice is to make a bootable installer from macOS dmg file, where you can find them on this website or other places on Internet. The software to be used is called UUByte DMG Editor, which works on both Windows and macOS platforms. The details steps will be shown in next section.
Part 2. Create a Bootable Installer for macOS on Windows 10/8/7
Windows, even Windows 10 does not add support for dealing with macOS installation app, which is working on macOS only. If you are on a Windows computer and search for a way to create bootable installer for macOS, the only option is by using macOS DMG file.
So in the coming section, we will demonstrate on how to create a bootable installer for macOS from dmg file on a Windows 10 PC. The steps are the same on Windows 8 and Windows 7. The software we are going to use is UUByte DMG Editor, a cross-platform app that runs well on Windows and Mac.


Step 1: Download a macOS DMG file. These are download links of macOS DMG file, such as Big Sur, Catalina, Mojave, High Sierra, and EI Capitan. For old Mac OS X versions, please download it from Internet.
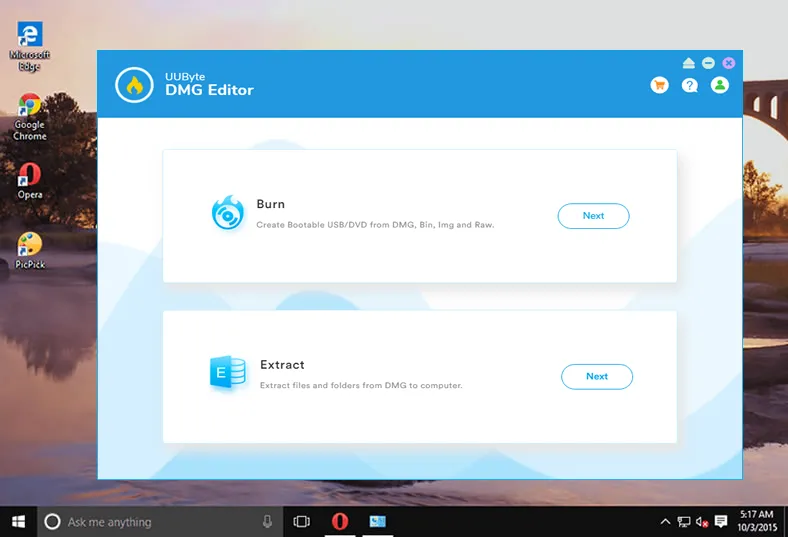
Step 2: Install DMG Editor on a Windows computer and open it after installation. Now, plug a USB disk into Windows and click Burn button from the main screen. Make sure eject other USB storage devices at the same time.
Step 3: Click the Browse button to locate the macOS dmg file you have downloaded and select the USB drive name in below column.
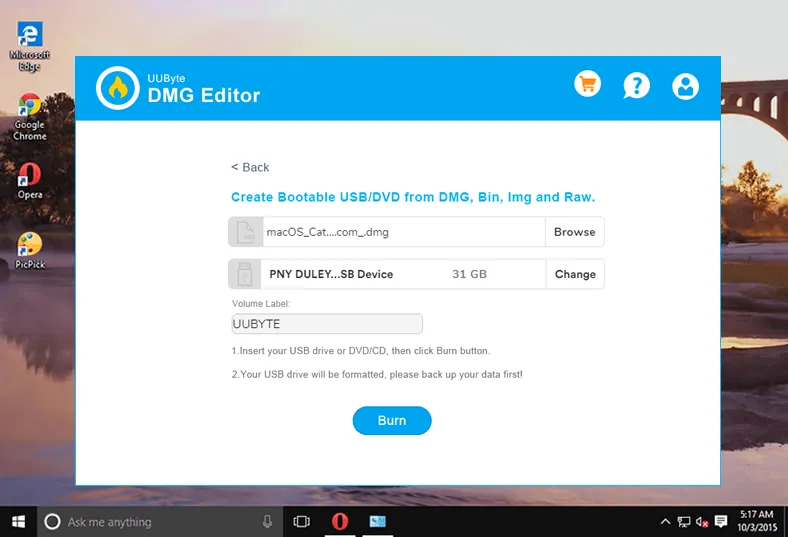
Step 4: Finally, click the Start button to create a bootable installer for macOS on Windows 10.
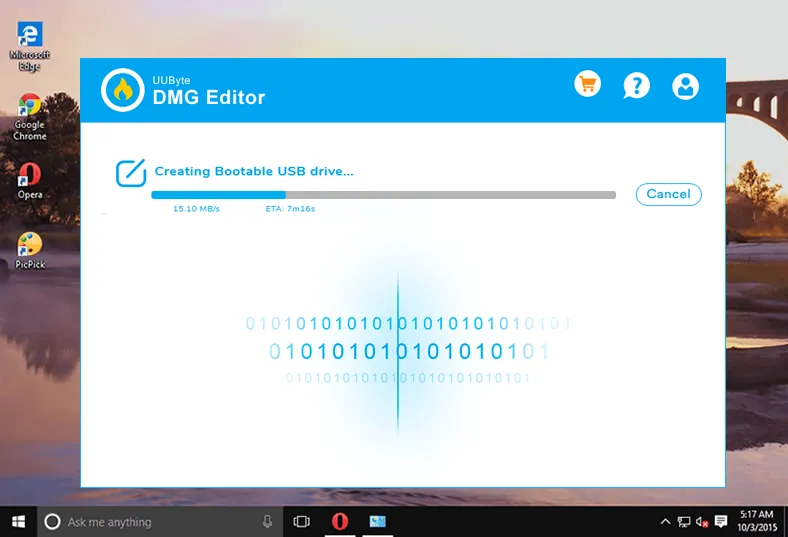
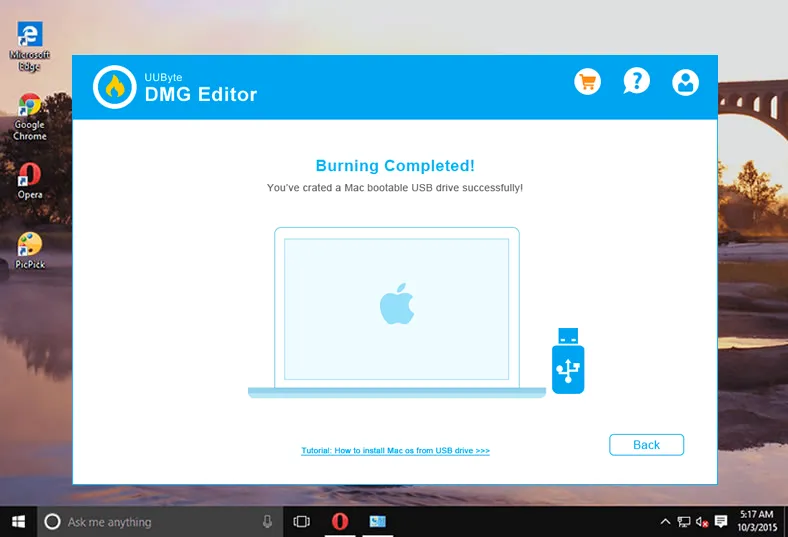
Step 5: For a fast USB 3.0 drive, you need to only wait a couple of minutes. For slow USB 2.0 drive, you should wait more than 20 minutes. Please be noted! You will see a notice on screen when the burning process is completed.
There are few tools that are capable of creating macOS bootable USB on a Windows machine. For this task, UUByte DMG Editor is good to go!
Part 3: Install macOS on Mac from Bootable Installer
Eject the USB from Windows 10 computer and plug it into your Mac. Reboot your Mac and keep pressing the Option key at startup to bring up the boot manager. Pick up the drive name and boot up from external USB. After that, follow the screen prompt to start installing macOS from USB on target Mac.

Closing Words
The above is a complete tutorial for creating a bootable installer for macOS on Windows and Mac. It covers all the details and being verified on four different computers (MacBook Pro, iMac, Windows 10 PC and Windows 7 Laptop). Please go ahead and pick up the best method for you.

Petty is editor in chief at UUByte and writes various topics about Windows and Mac to help people make the most of current technology.