
I had to format my hard drive, thanks to a malware attack on my Windows 11 computer. But that was not the end of my woes since. when I tried to reinstall Windows 11 after formatting , Windows 11 installation wizard could not detect my internal SSD anymore. There was nothing showing up on the window where it asks you for the drive to install Windows 11.
There are multiple reasons for this to happen. It could be missing SSD driver, a bad partition table or simply a loose connection. In this tutorial, I will show you how to address SSD not found problem for each of these cases.
Case 1: Missing SSD Driver
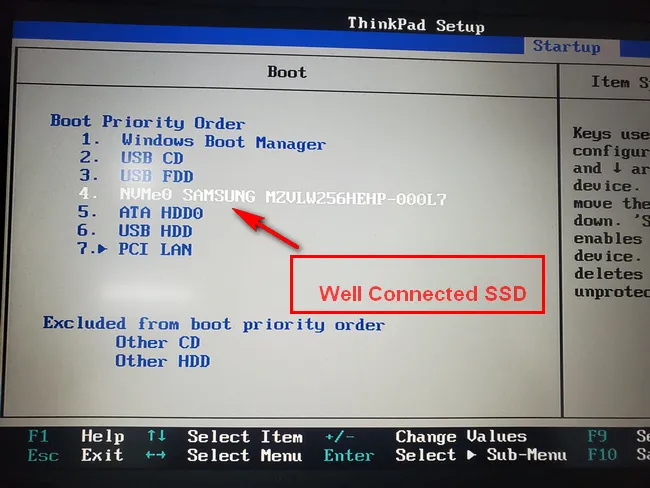
Driver is the bridge between the operating system and hardware. If the driver is missing from Windows 11 installation media, then the OS could not be able to delete and manage the hardware for sure. This is the most common case why SSD is not found during Windows 11 installation. Please go to BIOS settings and check If the SSD is being listed.
If yes, then it is most probably a driver issue and you can follow the below steps to resolve it.
Step 1: Download Intel IRST driver from this link on a computer and unzip the files inside a folder.
Step 2: Copy and paste this folder into the Windows 11 installation media that you just created.
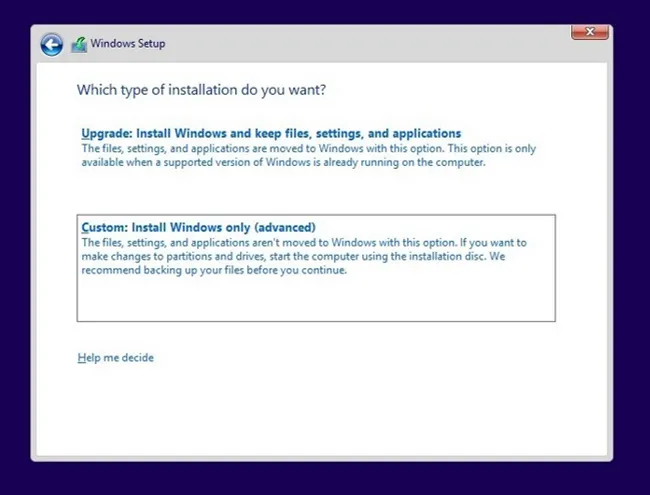
Step 3: Boot the computer from Windows 11 installation USB and follow the instructions on the screen till you reach the window where you are asked what type of installation you would like to perform. Here, you need to select Custom: Install Windows only (advanced).
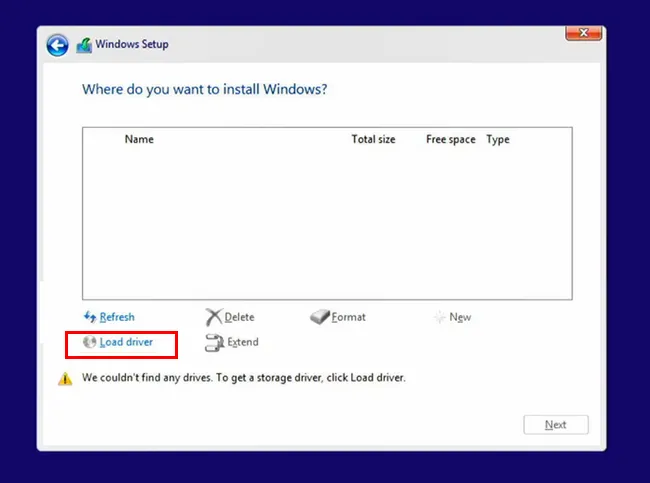
Step 4: You'll be asked where would you like to install Windows and will have the option to load drivers. Click on the button that says Load driver.
Step 5: Now, you will be asked to insert the media where the drivers are located. Click Browse and select the folder that contains the drivers in the USB drive. This will show you a list of drivers available. Select either of them and click Next.
Step 6: This should start the driver installation process. Once completed, you will be able to see your SSD drive once again. Select a partition on this SSD drive and click Next.
Step 7. From the next step, just follow the instructions on the screen like you would normally for installing Windows 11 on this SSD.
Case 2: Broken or Incompatible File System
Another command issue is that the SSD is not partitioned with the right file system. For a Windows bootable drive, FAT32 and NTFS are the two valid for system installation. To fix this issue, you have to format the drive with FAT32 or NTFS.
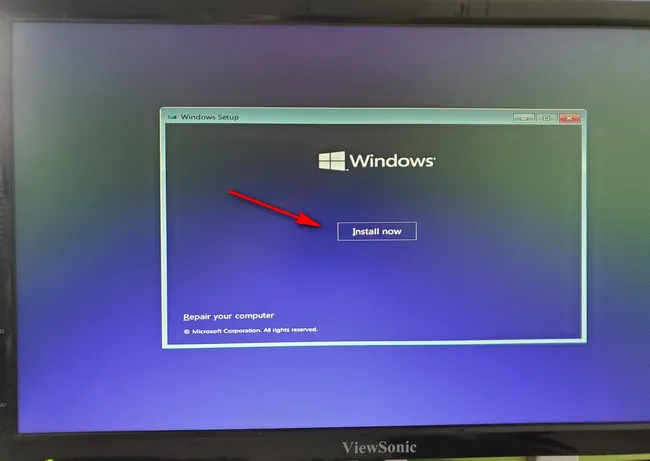
Step 1: Boot your computer from Windows 11 installation USB. You can create one with Media Creation Tool from Microsoft and a blank USB.

Step 2: While you see the Install Now window, press Shift and F10 buttons simultaneously on your keyboard. This will open the Command Prompt utility.
Step 3: Type the command diskpartand press Enter.
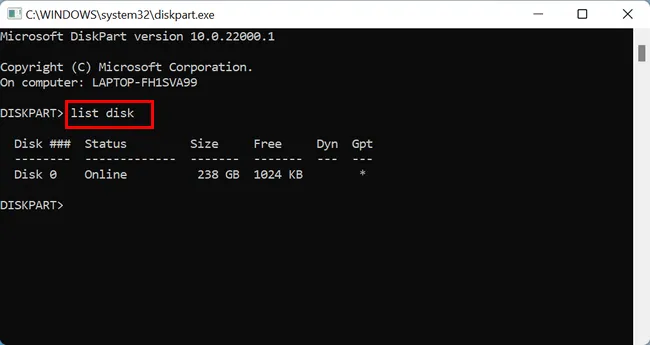
Step 4: Then type list disk and this will list all the drives present in your computer along with your SSD. Check the disk number against your SSD from this list.
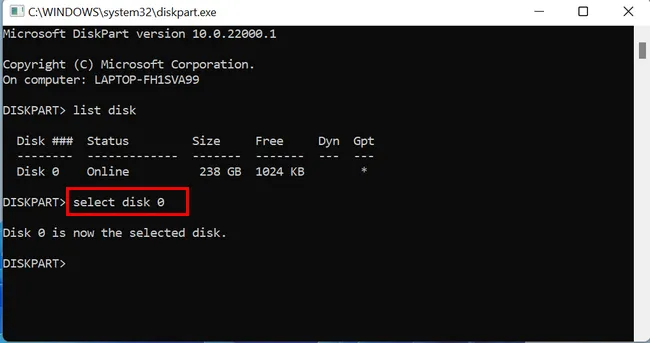
Step 5: Next, type select disk # and replace # with the number that was showing against your SSD. This will select your SSD for applying the next command.
Step 6: Type clean to format the SSD.
Now try to reinstall Windows 11 and check if your SSD is detected now. If it is still not detected, move to the next section.
Reason 3: Loosely Connected SSD
The last and foremost cause for a missing SSD during Windows 11 installation is a loosely connected SSD. The connection may have come off while you were moving your computer, or maybe dust has settled on the connecting wires. Here's what you can do in this case:
Step 1: Go to the BIOS settings of your computer and check if the SSD is showing up in BIOS.
Step 2: Ensure that the port called the SATA port is enabled in your BIOS settings. You'll probably find it under Storage Configuration settings in the BIOS.
Step 3: In case it's not showing up in the BIOS, check the cable connections that leads to the SSD. These are called SATA cables.
Step 4: If the cables look fine, connect your SSD to an external USB adapter or use another SATA cable to check if it is detected in BIOS.
Step 5: Next, check for physical damages to the SSD. This may even be caused by electrical short circuits.
Hope these solve the issue with Windows 11 installation. Even though the steps might look complicated, if you follow the instructions carefully you will not have any problems.

Petty is editor in chief at UUByte and writes various topics about Windows and Mac to help people make the most of current technology.