
Imagine one fine day you turn on your Mac and it just sits there not doing anything (a black screen with some error). For sure, you are unable to get into Mac desktop in such scenario. Honestly, even thinking about it makes my heart skip a beat. However, there is a solution to this in case if it has happened with you; a Mac bootable USB. A bootable Mac USB installer is usually used to repair a Mac in case it refuses to boot normally by reinstalling macOS. However, if your Mac is already not booting up then you need another device to prepare this type of macOS bootable USB.
When my Mac had stopped working, I didn't have access to another Mac, instead I had a Windows 11 PC at my home. However, Windows 11 does not recognize DMG files natively. A DMG files is similar to a Windows 11 ISO file, it can be used to create a bootable USB flash drive to install macOS operating system.
I started searching online on how to create a Mac bootable USB on my Windows 11 PC, and I found out that there are only two tools that can help you do that. After testing both of theme, I decided to go with UUByte DMG Editor, the best user-friendly tool to create macOS bootable USB on a PC. In the follow sections, I will share detailed information regarding this topic.
About UUByte DMG Editor
UUByte DMG Editor can be used to quickly create a Mac bootable USB installer. It is compatible with all modern versions of Windows operating system starting from Windows Vista right up to Windows 11, it is also compatible with Mac OS X 10.9 and latest macOS Monterey.
Even though it is named a DMG Editor, it can work with more than 10 type of files including IMG, ISO, ZIP, BIN, GZ etc. Additionally, it supports Windows, Linux, macOS, Android, and a number of other operating system images. Using UUByte DMG Editor you can also view and extract files and folders from DMG archive on a Windows or Mac computer. This cool tool is pretty fast, and can burn images to multiple USB flash drives at once.
To create a Mac bootable USB on Windows 11 you need 3 things. A blank USB flash drive (at least 16 GB), a copy of DMG disk image file for the version of macOS that needs to be installed on your Mac, and UUByte DMG Editor. You can usually download the DMG disk image file from Apple App Store. However, since you don't have access to your Mac, I have provided a few links using which you would be able to download the DMG disk image file for your macOS outside of Mac App Store.
macOS Monterey DMG: https://www.uubyte.com/download-macos-12-monterey-dmg-file.html
macOS Big Sur DMG: https://www.uubyte.com/download-macos-big-sur-dmg.html
macOS Catalina DMG: https://www.uubyte.com/download-macos-catalina-dmg.html
macOS Mojave DMG: https://www.uubyte.com/download-macos-mojave-dmg.html
macOS High Sierra DMG: https://www.uubyte.com/download-macos-high-sierra-dmg.html
How to Make a Mac bootable USB on Windows 11 PC with DMG Editor
Now that you have the first 2 components required to create the Mac bootable USB on your Windows 11 PC, you need to download and install the 3rd component; UUByte DMG Editor. Download it from the following links and install it on your Windows 11 PC.


Step 1: Connect USB Drive to Windows 11 and Open DMG Editor
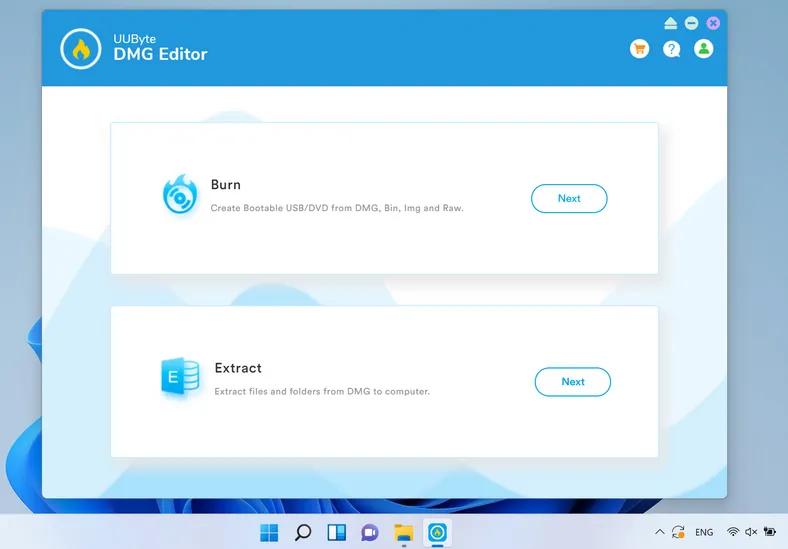
Please plug in a USB flash drive into Windows PC and make sure it is shown up in Windows Explorer. This means the USB drive is fully functioning. After that, launch UUByte DMG Editor, you'll be greeted with a window that will have 2 sections on it. Click on the Next button underneath the Burn section.
Step 2: Add DMG File
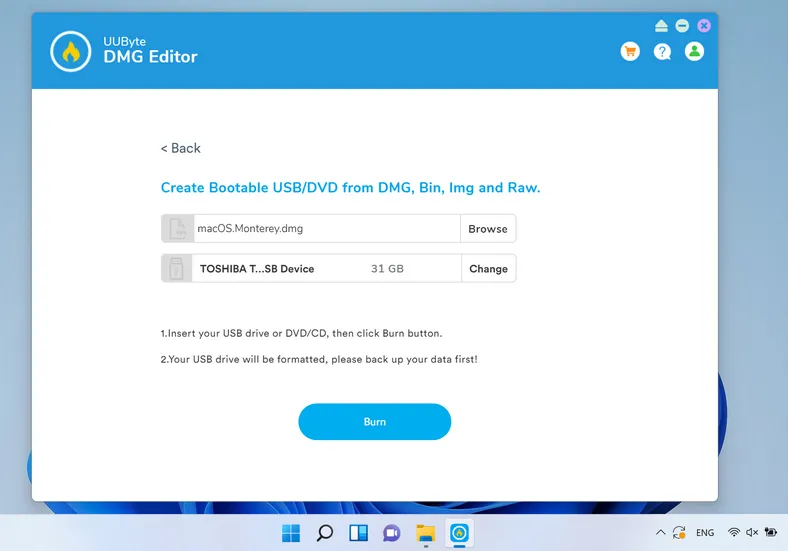
Once you click on the Next button, you'll see a new window. Here, you would be able to select the DMG disk image file and the USB flash drive. Click on the respective browse buttons to choose them. There will be a text box called Volume Label, enter a meaningful name here so that you can recognize the USB flash drive properly. Once done, click on the Burn button to start the process of creating Mac bootable USB on Windows 11 PC.
Step 3: Burn macOS DMG to USB Drive
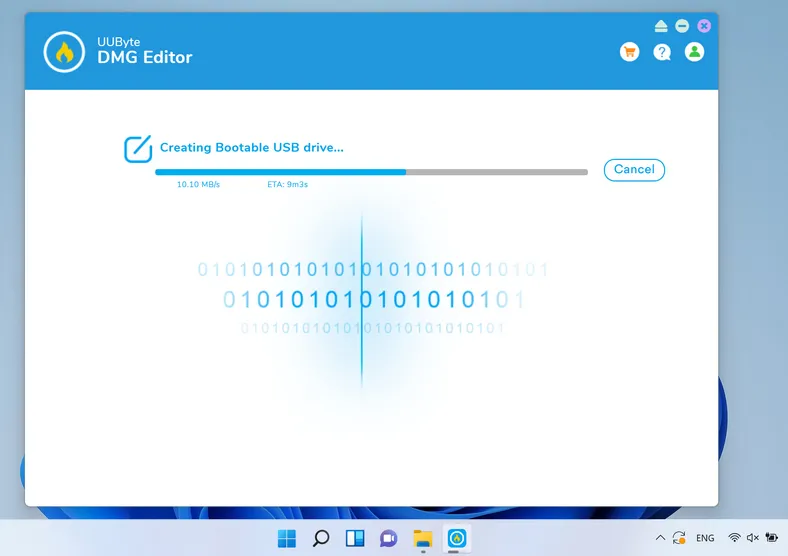
Once the process begins, you'll see a progress bar. You may have to wait for 5-10 minutes for the process to complete. Once the process is done, the progress bar will reach 100%. At this point you can close the UUByte DMG Editor and take out the USB flash drive.
Step 4: Boot Mac from USB and Install macOS on Mac
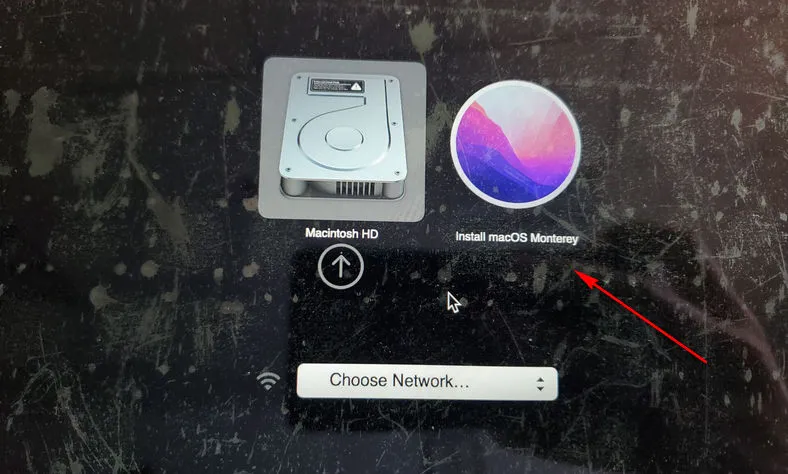
After removing the bootable Mac USB flash drive, insert it in your Mac that is refusing to boot up. When the Mac boots up and you can hear the sound of it booting up, you need to press and hold down the Option button on your keyboard. This will bring up the Startup Disk Manager system utility and you should be able to view the bootable USB flash drive here. Select this USB flash drive and the Mac still start to boot from this USB flash drive, and then the macOS installation will begin.
While using DMG Editor on my Windows 11 PC, I came across a flashing error message that popped up at the end of burning process. You don't need to worry about it because the utility still manage to create a Mac bootable USB on Windows 11 PC successfully.
One last thing, if your Mac has OS X El Capitan installed on it, then you need to use this link to download the DMG file for this macOS. This is because the original release for OS X El Capitan is in a PKG file format instead of a DMG file format, which usually throws an error with UUByte DMG Editor. However, the above link will give you access to a DMG version of that disk image file.
Summary
This is as simple as it gets in order to create a macOS bootable USB installer on a Windows 11 PC. You don't need to type any command, just a few clicks and you are good to go. Simply follow the steps given in this tutorial properly and you should have a bootable Mac USB installer in no time.

Petty is editor in chief at UUByte and writes various topics about Windows and Mac to help people make the most of current technology.