
macOS Monterey stable release 12.0.1 is available for download from Mac App Store. And a lot of officially supported Macs have received upgraded notice through Software Update. And this is the smoothest and safest way to install macOS Monterey on a Mac. Unfortunately, Apple dropped support for dozens of Macs that is currently running Big Sur, which is a really big pity.
If you were planning to test macOS Monterey on an unsupported Mac, what you are going to do? This is the thing we will cover in this post. We learnt it is totally possible to run macOS Monterey on unsupported Mac after applying a few patches in macOS kernel. Please don't get scared! There is a super nice GUI app to help you pull the job off. It is called OpenCore Legacy Patcher.
[Disclaimer]: Installing macOS on unsupported Mac is not recommended by Apple. Please take your own risk for doing this though OpenCore Legacy Patcher is a matured tool and have a lot of successful cases. Before getting into the steps, please make a full backup of important files on target Mac that you will try to run macOS Monterey.
Table of Contents:
A List of Unsupported Mac Models that Possibly Run macOS Monterey
In simple terms, if your Mac were on official support list, then you will receive direct upgrade notification from Software Update.

If not, it means the current Mac is not eligible to install and run macOS Monterey. Fortunately, OpenCore Legacy Patcher has the potential to let you install macOS Monterey on a number of unsupported Macs dropped by Apple official. The full list:
Highly Possible and Low Risk
- MacBook Pro 2013 and 2014
- MacBook Air 2013 and 2014
- MacBook 2015
- iMac 2015 and 2014
There is no problem to install macOS Monterey on Mac being listed above. For even old Macs, a Metal GPU and upgraded WiFi/BT card are mandatory in order to run macOS Monterey. Additional steps are required to successfully install macOS Monterey on those outdated devices. Honestly, it is not recommended but you are free to try it out.
Less Possible and High Risk
- MacBook Pro Early 2008 or later
- MacBook Air Late 2008 or later
- MacBook Later 2008 or later
- Mac Mini Early 2009 orlater
- iMac 2008 or later
- Mac Pro 2008 or later
- MacBook Pro Early 2008 or later
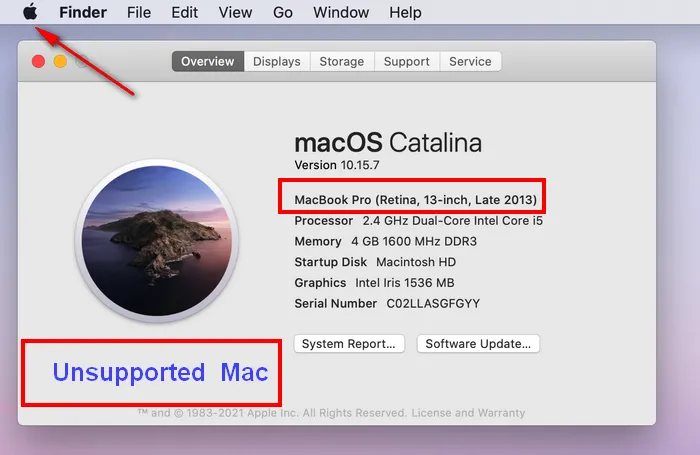
How to Check the Model Name of Mac
Now, you get the list of unsupported Macs that can potentially run macOS Monterey. How can I know the model name of my Mac? This is pretty simple!
On macOS desktop, click the Apple icon at the upper left corner. Next, choose About This Mac from drop-down menu. A small window pops up and you will see the model name under Overview tab, which displays model name, production year, processor, memory and graphics card. From my case, this Mac is an unsupported Mac model but it has the potential to install macOS Monterey successfully on it after patching. We will show more details in coming sections.
How to Create macOS Monterey USB Installer
After checking the model name, you are pretty sure it is not on official supported list but you insist installing macOS Monterey on it. Now, it is time to begin a new journey. And the first step is to create a macOS Monterey USB installer. Currently, there are two different approaches to do that.
Method 1: Create macOS Monterey Bootable USB from macOS App
There is a built-in feature in each macOS that helps you make bootable USB from macOS installation app, which is available in Mac App Store. However, it is a command-line based method. If you want to use a GUI app instead, please move to Method 2.
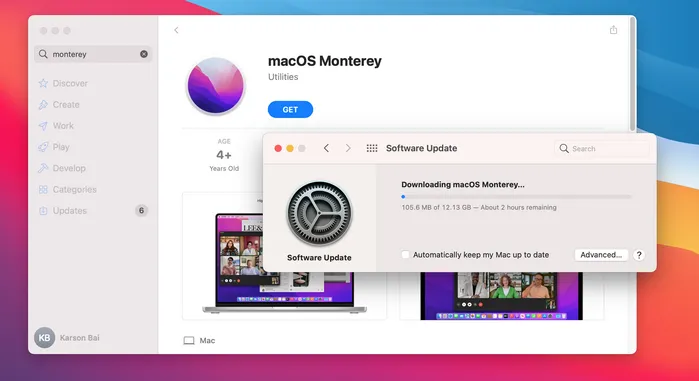
Step 1: Download macOS Monterey app from Mac App Store. This will take a huge amount of time as this app is over 12 GB. Once the download is finished, Install macOS Monterey app will be shown in Application folder.
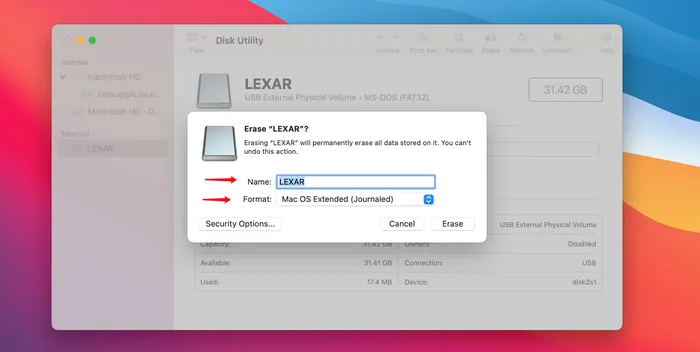
Step 2: Insert a blank USB flash drive and eject other connected external devices. Once the USB drive is seen by Mac, launch Disk Utility app and erase the disk with Mac OS Extended (Journaled). Also note the USB name. It is named LEXAR in my case.
Step 3: Now, check the mounted volume name of USB drive. It is LEXAR in my case.
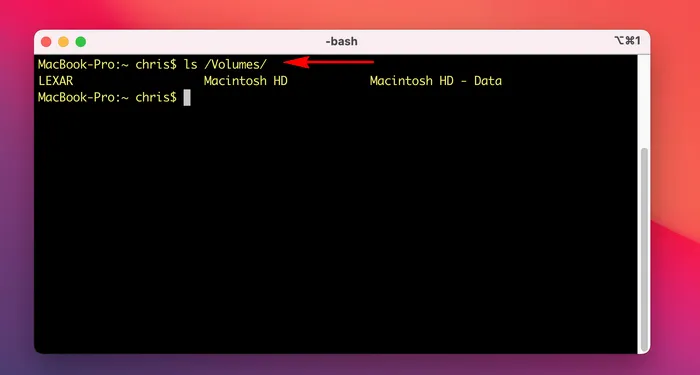
Step 4: Input the following command to make a macOS Monterey USB installer:
sudo /Applications/Install\ macOS\ Monterey.app/Contents/Resources/createinstallmedia --volume /Volumes/Lexar
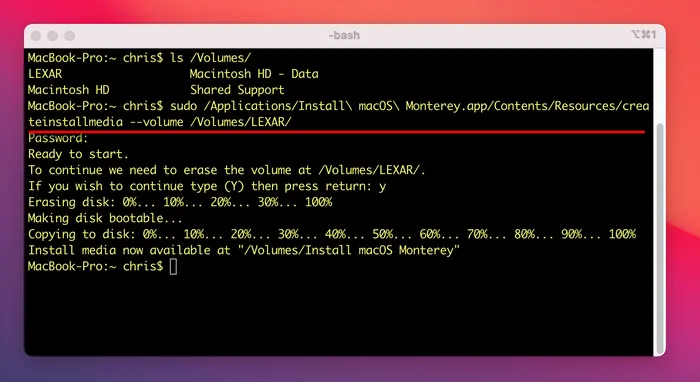
You have to input Mac login password to grant the permission and wait about 20 minutes. A completion message is shown on the screen once it is done successfully. Now, the USB name is changed to Install macOS Monterey.
Method 2: Create macOS Monterey Bootable USB from DMG
Command Line is free but most of folks dislike it as we are more comfortable with graphics user interface. If you are the one, then DMG Editor is your best choice. It is a powerful and well-designed app to create macOS bootable USB installer from dmg file.


Step 1: Download macOS Monterey dmg file from here (link 1 and link 2).
Step 2: Second, plug in a USB drive and open DMG Editor on your Mac. Now, click Burn button on first screen and import macOS dmg file into the program. .
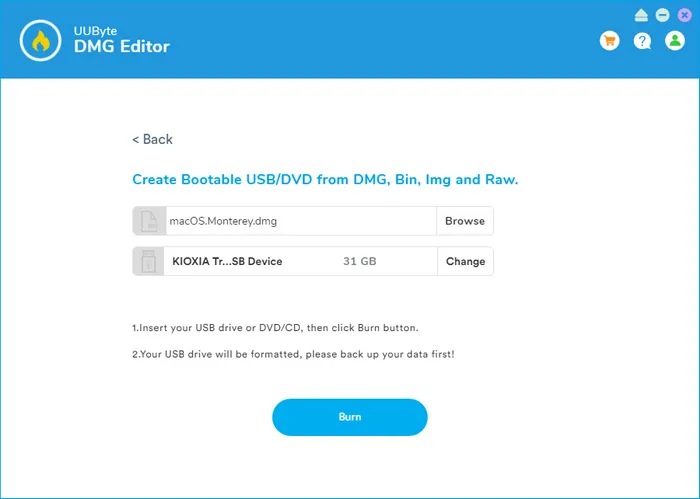
Step 3: Finally, click Burn button to start making a macOS Monterey bootable USB from dmg file.
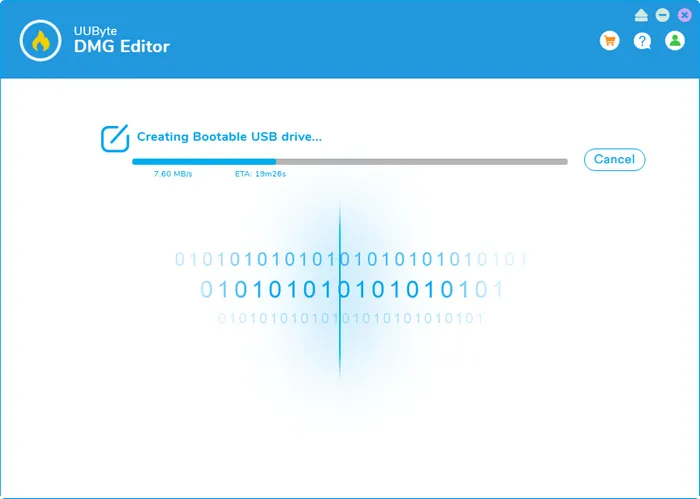
Now, a native macOS Monterey USB installer is ready, which is unable to install macOS Monterey on unsupported Mac. We need to make extra steps to get Monterey working on unsupported Mac.
Build OpenCore and Install to USB Drive
We have to make a few changes to macOS Monterey USB installer we made in above as the native macOS Monterey installation wizard won't be continued on an unsupported Mac. The hacking part can be done with the help of OpenCore Legacy Patcher.
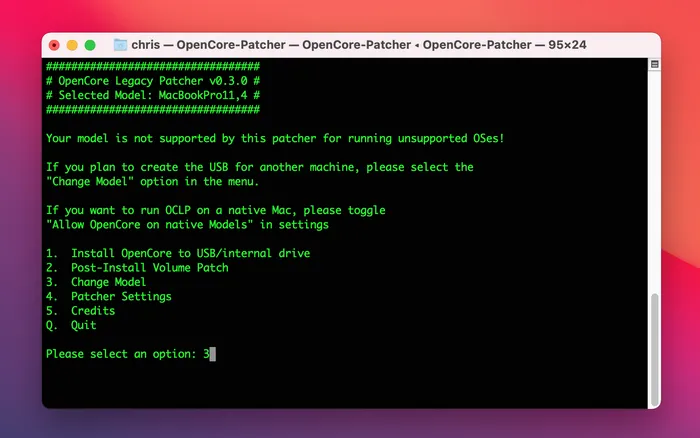
Step 1: Now, download the latest version of OpenCore-Patcher-TUI.app.zip (currently 0.3.1) from GitHub. This is a brand new version that patches macOS Monterey.
Step 2: Decompress the zip file and open OpenCore-Patcher app from Downloads folder. Wait about 5 seconds to load the menus.
Step 3: Type '3' in prompt to change Mac model. The default model goes to the Mac where OpenCore Patcher is running. The default Mac model is MacBookPro 11,4 after opening OpenCore Legacy Patcher. It is a MacBook Pro Late 2015. However, I am building OpenCore for another Mac (MacBook Pro Late 2013 ) in my case so I need to change to that model. Please skip this step if you built Open Core for current machine.
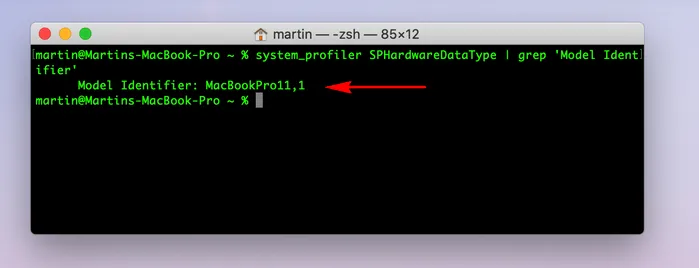
Step 4: You will be asked to enter the model identifier of target Mac. You can run the following command on target Mac to get the specific name. For MacBook Pro Late 2013, the model identifier is MacBookPro11,1.
system_profiler SPHardwareDataType | grep 'Model Identifier'
Step 5: Enter the identifier name in to OpenCore Patcher to proceed. This will get back to main menu and the selected model is changed to MacBook Pro 11,1 from MacBook Pro 11, 4 at the top. Now, type '1' to build OpenCore for this machine (Unspported MacBook Pro Late 2013).

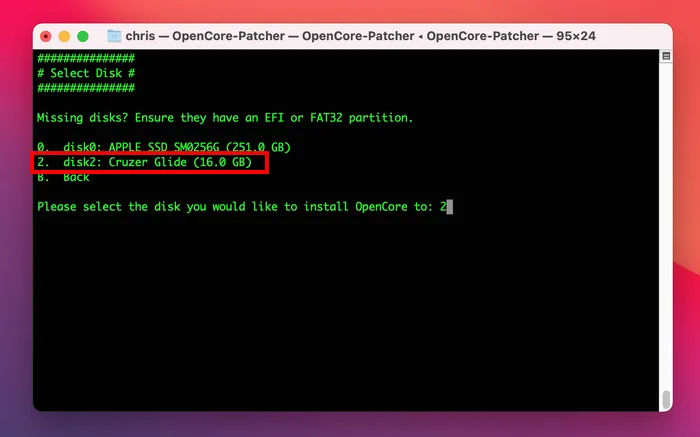
Step 6: When the building task is done, it will go back to main window. It is time to install OpenCore to USB. Please plug in another USB drive to the Mac (not macOS Monterey USB). You will see the USB name in selecting disk window. Input '2' to proceed.
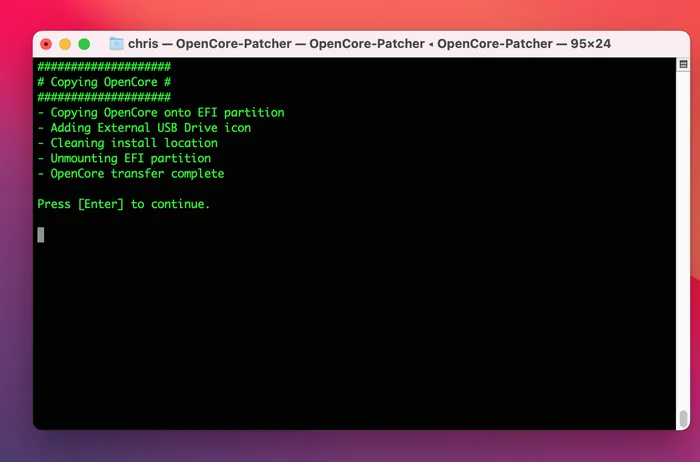
Step 7. Click Enter to continue. After confirmation, it starts to copy OpenCore to EFI partition, clean install location and unmount the USB drive.
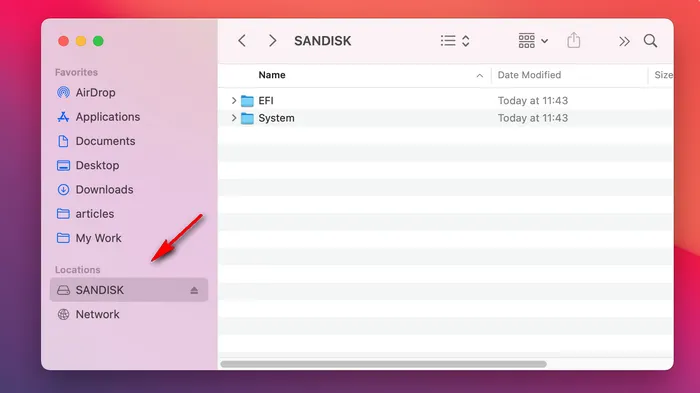
Step 8: The installation will be completed in seconds and the disk is umounted. Now, connect the USB to Mac again and you will see two folders (EFI and System ) in USB drive.
OpenCore is now installed to USB drive and the final part is to patch macOS Monterey during boot up and install macOS Monterey on an unsupported Mac.
Install macOS Monterey on Unsupported Mac
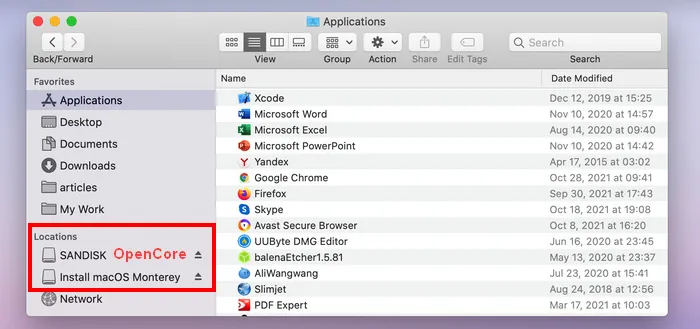
Step 1: Connect macOS Monterey Installation USB and OpenCore USB to the target Mac. Make sure both USB shows up on your Mac before restarting. SANDISK is a bootable USB that contains OpenCore EFI Boot.
Step 2: Reboot the Mac and press Option key until you will Startup Manager, which lists all bootable device on screen. From my example, you will see three bootable disks: Macintosh HD, Install macOS Monterey and EFI Boot (OpenCore USB).
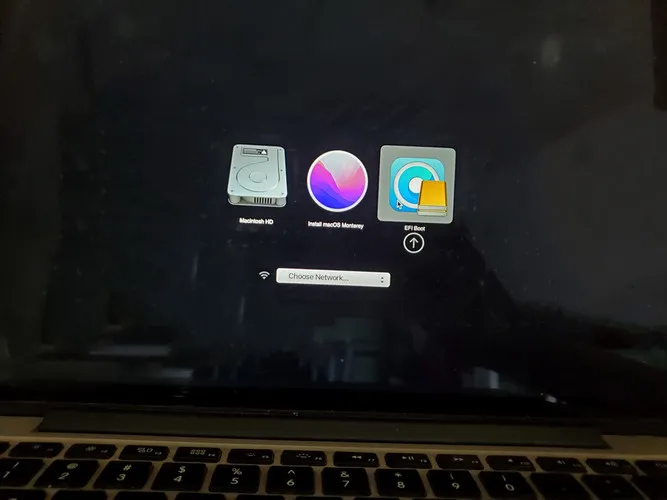
Step 3: Click on EFI Boot to load OpenCore bootloader utility into memory so you can patch macOS Monterey in real-time. You will be back to Startup Manager and OpenCore EFI Boot no longer appears onn the screen. This is a normal procedure!
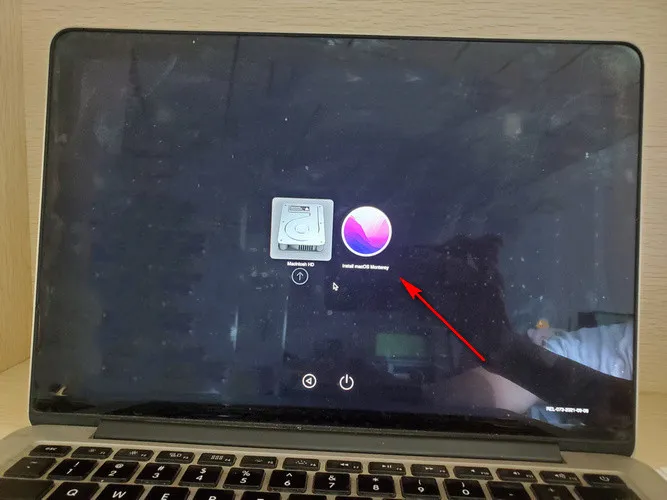
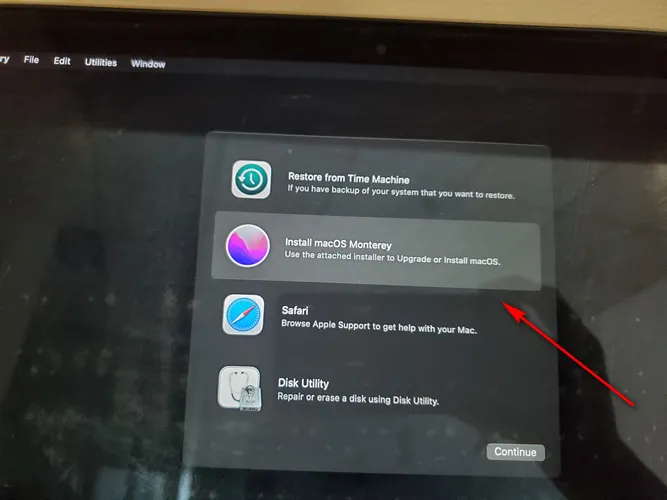
Step 4: Now, click Install macOS Monterey to boot into macOS Recovery where you can start installing macOS Monterey on unsupported Mac. Your Mac will reboot a couple of times and go to Monterey desktop after installation.
OpenCore Troubleshooting
As you can see from above tutorial, it is a complex and time-consuming task to install macOS Monterey successfully on an unsupported Mac. You might encounter problems or errors during the process. You can refer to this part as a reliable troubleshooting source.
1. OpenCore app crashes on Mac
Under my experienment, OpenCore Legacgy Patcher GUI app crashed when it tried to build OpenCore for selected USB drive. Please switch to OpenCore Legacy Patcher TUI app (~32 MB) and it worked great on different Macs.
2. Mac was stuck on Apple Logo
After selecting Install macOS Monterey from Startup Manager, the Mac might be stuck on Apple logo and never proceeded to next step. Please restart the Mac again. If this still didn't help, then re-create macOS Monterey USB with a dffeirent approach.
3. OpenCore EFI Boot Not Showing up
This mostly happens when you are trying to install OpenCore to a Mac internal disk instead of USB drive. To solve this, please rebuild OpenCore and install it to a USB drive.
For complete troubleshooting guide, please refer to the official page and GitHub issues page.

Petty is editor in chief at UUByte and writes various topics about Windows and Mac to help people make the most of current technology.