
It is a true fact that many organizations still use Windows XP. Personally, I thought Windows XP was the last best operating system that Microsoft released. It is quite usable till date. If you miss those good old days of Windows XP and want to run Windows XP from a Mac, then I have a simple solution for you.
Run Windows XP on a modern Mac using the UTM app, and work on Windows XP from within macOS! Sounds like a dream come true? Let me show you how to turn this dream into reality.
What is the UTM App?
This is a virtualization app that is built just for Apple devices. It lets you create a virtual machine where you can install any operating system of your choice, including Windows XP. It utilizes the Hypervisor virtualization framework from Apple to install and use any ARM64 operating system on the Mac.
Build using QEMU, a super-reliable emulation software, albeit minus the difficulties users encounter while trying to setup and configure QEMU, thanks to all of its difficult commands and related options.
This is a free and open-source utility that you can find on GitHub, or download the paid version from the Apple Store. Both the GitHub version and the one available on the Apple Store are same except for one small but important difference, with the Apple Store UTM app you will get automatic downloads. Most importantly, it is compatible with Intel and Apple M1 Mac and it also supports the latest macOS Monterey. This makes it fully possible to run Windows XP on any modern Mac.
Preparation Work
Here are a couple of things you need to keep handy before you start installing Windows XP on your modern Mac:
1. UTM App: https://mac.getutm.app
2. ISO image for Windows XP: https://drive.google.com/file/d/1-wh6GlOFhkP4b0aLdpE8TDtne-6vdD6I/view
3. Spice Guest Driver Tool for Windows XP: https://github.com/utmapp/spice-guest-tools-0.164.3.iso
How to Install Windows XP on Modern Mac with UTM App
Now that you have everything you need to install Windows XP on your Mac using the UTM app, let's start the installation process. Remember, this might look lengthy, but it's not at all difficult. More so since I would be explaining each process with detail.
Part 1: Windows XP Virtual Machine Settings
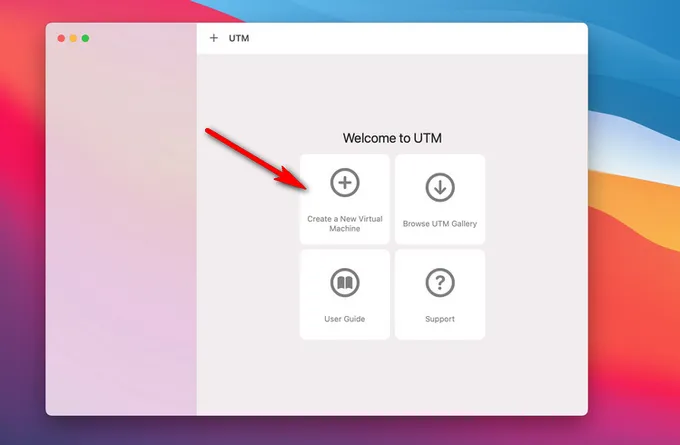
Step 1: After you have installed UTM app, open it from Launchpad or Applications folder and click on the button that says Create a New Virtual Machine.
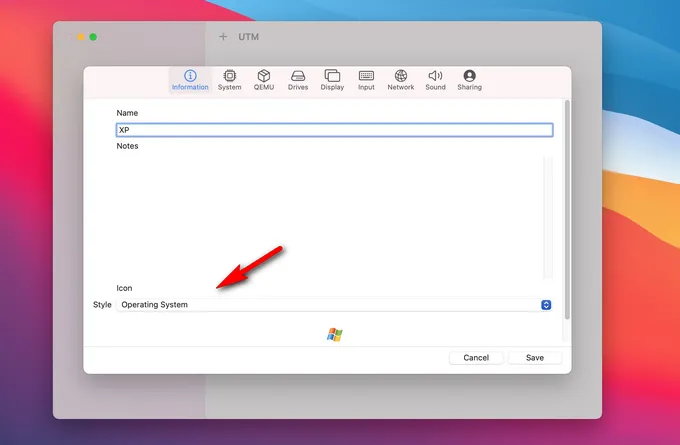
Step 2: That should open up a wizard to help you create a new Windows XP virtual machine on the Mac. Under name, type in a meaningful name for your new virtual machine, like XP or something similar, select the Style as Operating System, give it an icon, then move to the next step by clicking on the System tab.
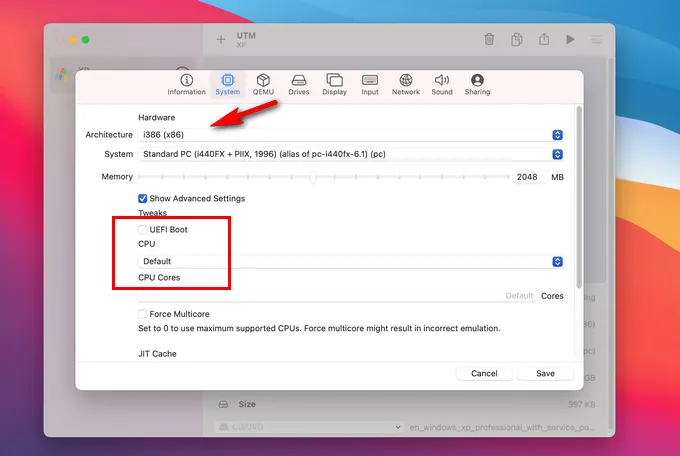
Step 3: Under System tab, select the Architecture as i386(x86) and system as Standard PC (i440FX + PIIX, 1996). drag the memory slider to 2048 MB (equivalent to 2GB or RAM). Next, check the option 'Show Advanced Settings'. Now, from the options that show up, uncheck UEFI Boot. Under CPU select Default and we are done on the System tab.
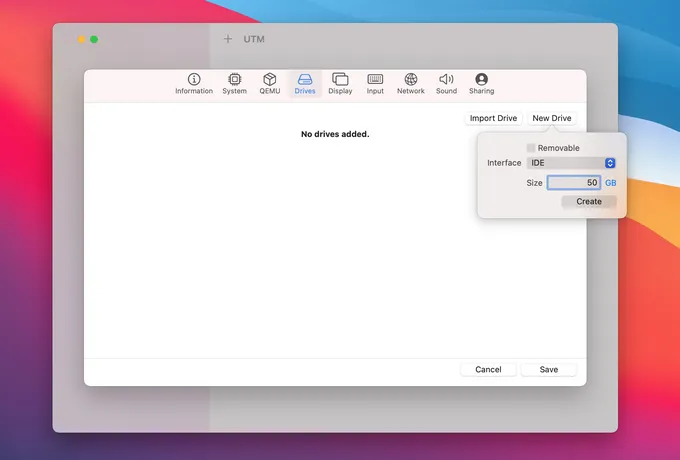
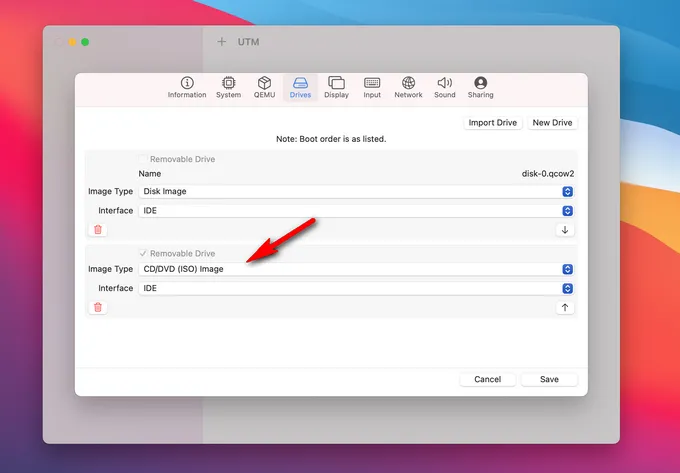
Step 4: Under Drives tab click on New Drive. In the box that pops up select 'IDE' for Interface, uncheck 'Removable', set a good amount for storage space (remember, this is the hard drive for Windows XP virtual machine), and finally press Create.
Step 5: Click on New Drive once again, however, this time check Removable, select the Interface as IDE, and click Create. This should create a CD/DVD drive for your virtual machine. Once done, it should look something like the below screenshot.
Step 6: Move to the Display tab, select 'Spice QXL GPU (primary, vga compatible) (qxl-vga)' for Emulated Display Card. Leave the rest of the settings as is and click on the Input tab.

Step 7: Under Input tab, check 'Enabled' and leave the default selection as is. Note that it might be different for you, no need to worry about it. Once done, click on Save. This should create a shell for Windows XP virtual machine.
Part 2: Install Windows XP on the Virtual Drive
Now, all the configuration work is done. It is time to install Windows XP on virtual drive.
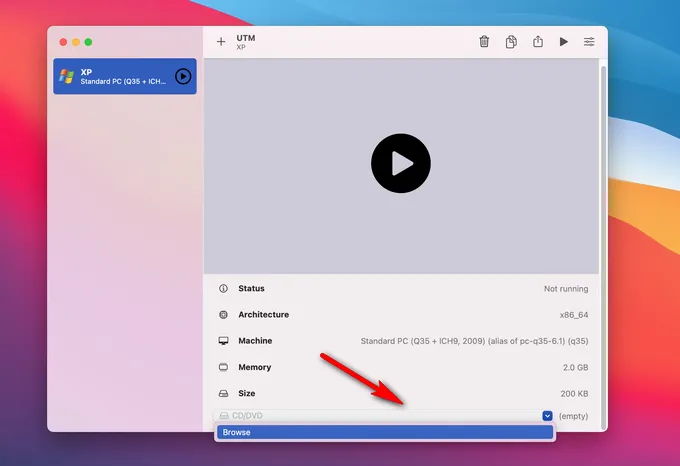
Step 1: Now, locate the new Windows XP virtual machine you just created from the left sidebar, click on it. On the right side of the window scroll down to find the CD/DVD drive, click on it, then click on Browse, and select the Windows XP ISO image file that you downloaded. Once done, start your virtual machine by clicking on the big play button at the center of the window.
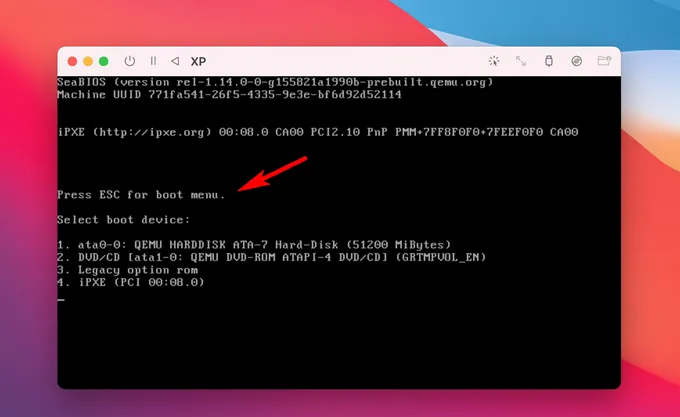
Step 2: This should start the Windows XP virtual machine. Press ESC key to enter into boot menu and type '2' to let the device boot from DVD drive. This will take 2-4 minutes.
Step 3: You'll see a Windows XP setup screen. Press Enter to continue. On the license agreement screen, press the fn+F8 keys to proceed.

Step 4: Wait a fee seconds and you'll see the partition information. This is the virtual hard drive we had created, simple press Enter here to continue.
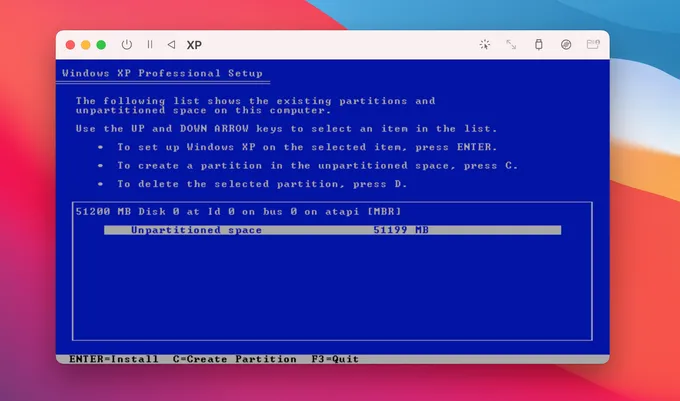
Step 5: From the new window, move to first menu to do a quick format on the drive with NTFS. This should quickly format the drive with NTFS file system.

Step 6: After drive formatting, UTM app will automatically start copying the files required for installing Windows XP. Finally, it will restart the virtual machine and start installing Windows XP.
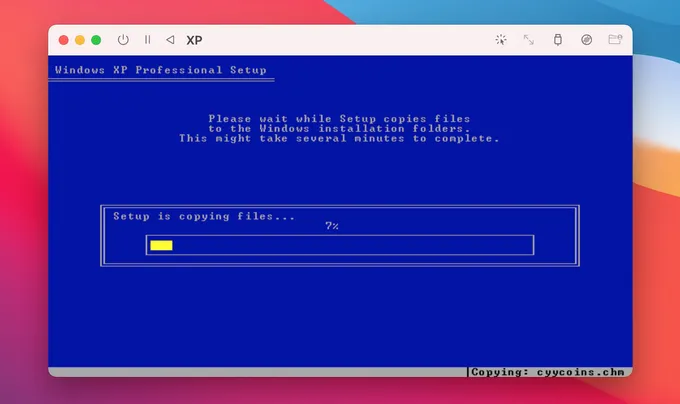
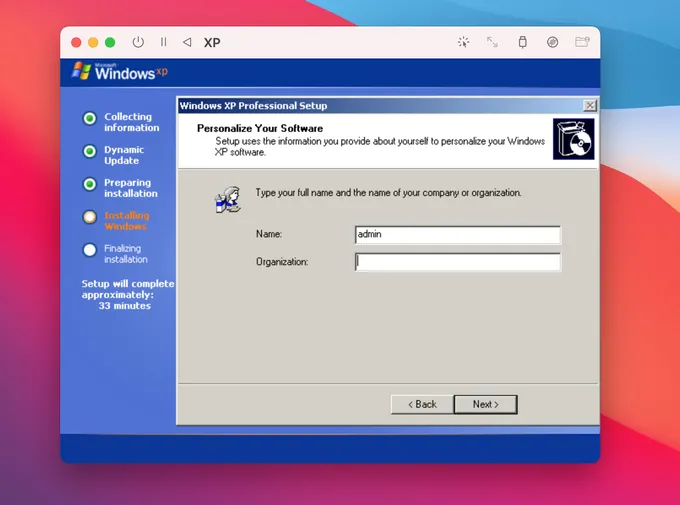
Step 7: When the file copying process is completed, Windows XP installation wizard appears up. Now it will ask you to type in your Name, go ahead and enter it and press Next.
Note: If the mouse is not available, please use tab and enter key to do the selection.
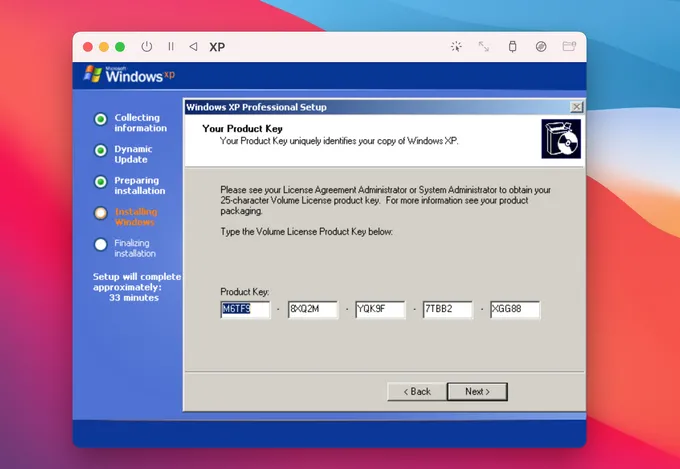
Step 8: To continue the installation, you have to input a valid Windows XP product key. If you have one, enter it here. If you don't, you can use the following product key (M6TF9-8XQ2M-YQK9F-7TBB2-XGG88).
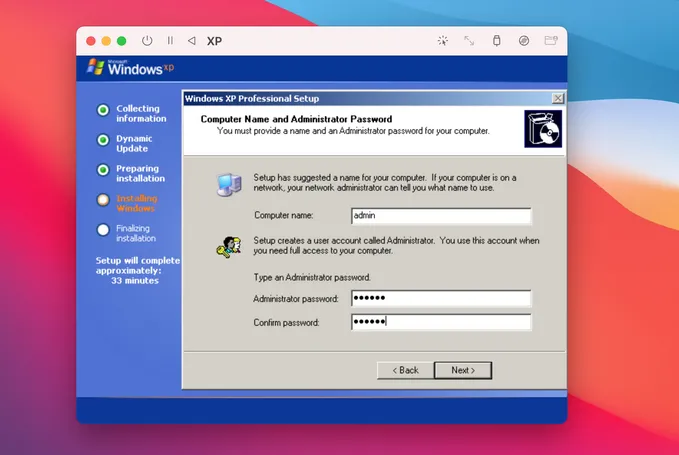
Step 9: Enter a computer name and password to proceed.
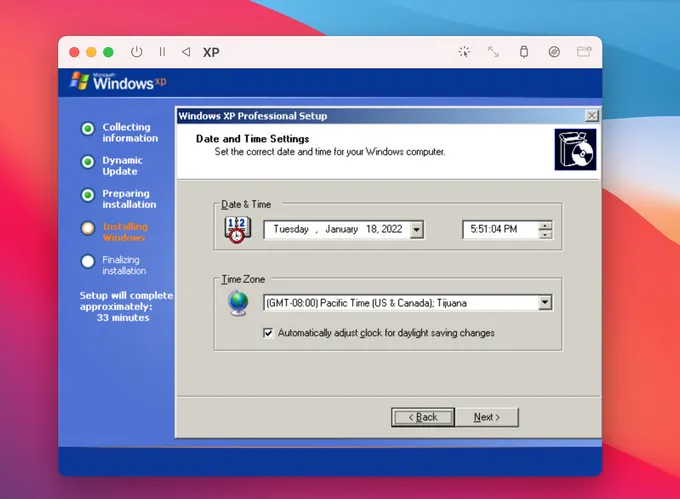
Step 10: Now, select the Date and Time Settings and click Next. Under Network Settings select Typical Settings and click Next. After this, the installation gets started.
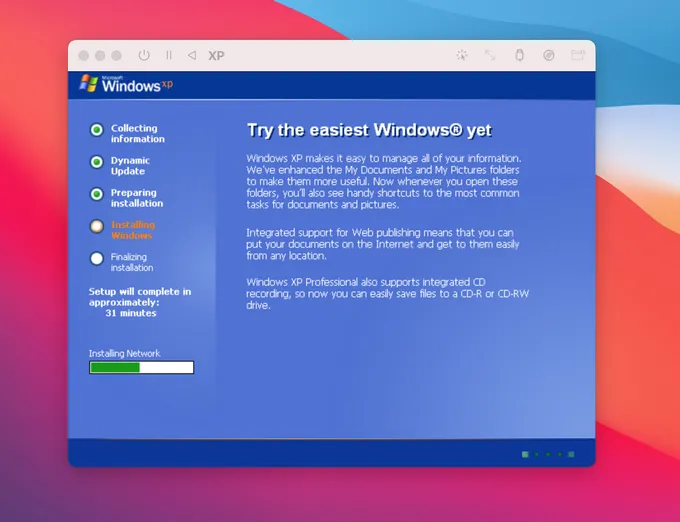
Step 11: From this time on, Windows XP installation will be started immediately. It will install all necessary components to get Windows 11 running. This approximately takes 40 minutes to fully completed the installation process.
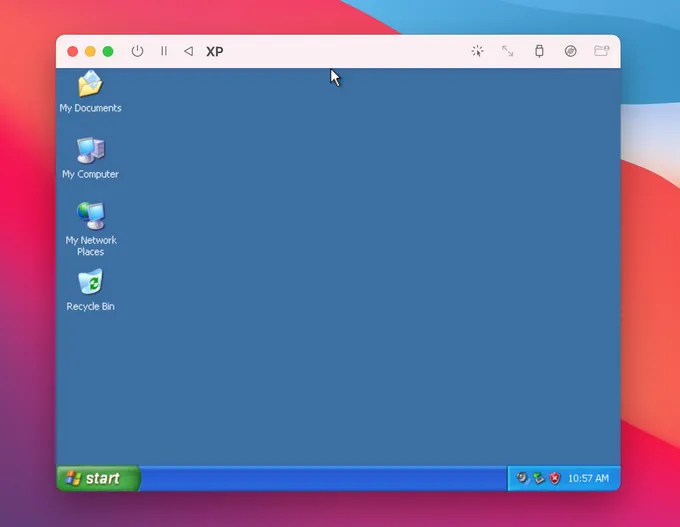
Step 12: Once done, Windows XP virtual machine will restart and the Windows XP OOBE will show up. Complete it by following the instructions on the screen. You'll be greeted to a Windows XP desktop as if you were on a Windows computer and not a Mac.
Part 3: Install Missing Drivers for Windows XP (Optional)
In case, some of the drivers are missing from the installation or new hardware is not working properly on your Mac, then you need to install additional drivers to fix the issue.
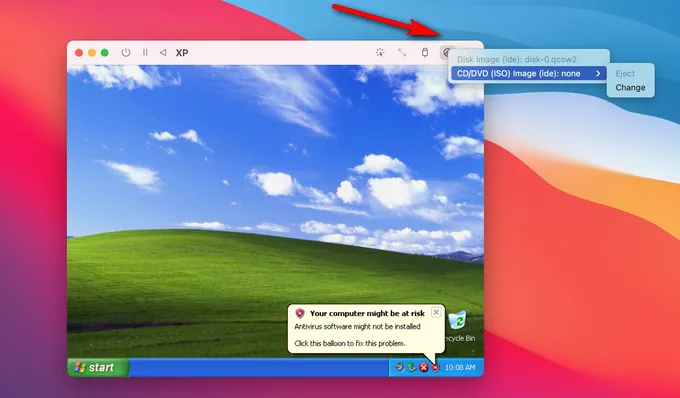
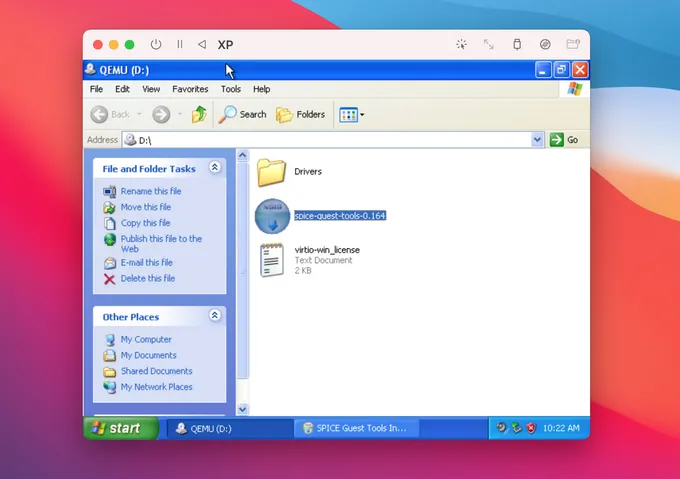
Step 1: Click on the CD drive icon at the top, then click on Change to select the Spice Guest Tools ISO image file.
Step 2: The ISO file will be mounted by UTM and here you need to double click spice-guest-tools-0.164 to start the setup process.
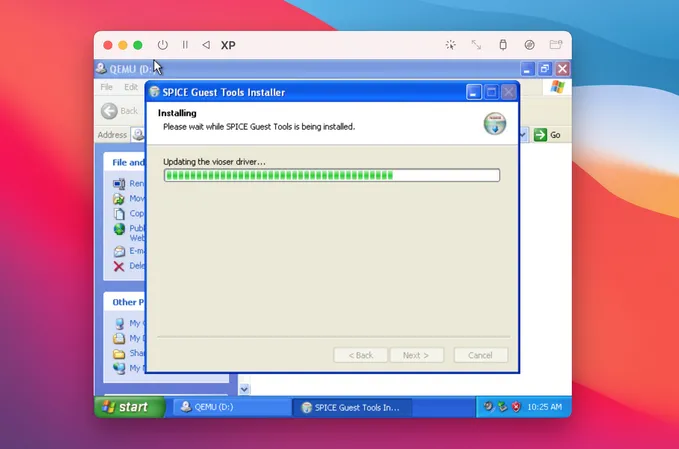
Step 3: This opens up Spice Guest Tool Installer wizard. Just follow the instructions on the screen to install your network and display drivers.
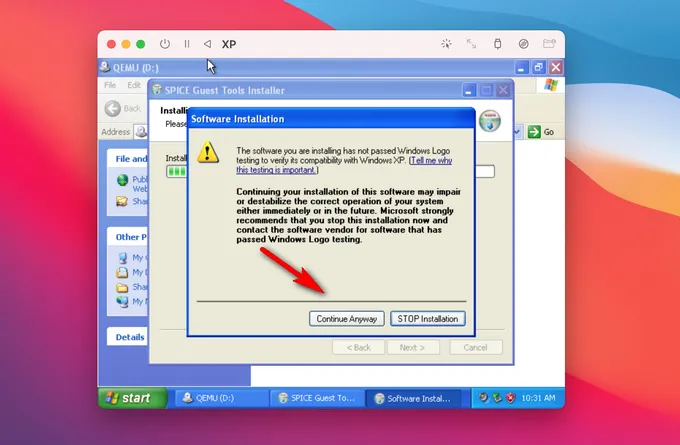
Step 4: While this installation process is going on, you may receive a prompt like the one shown below. Click Continue Anyway here.
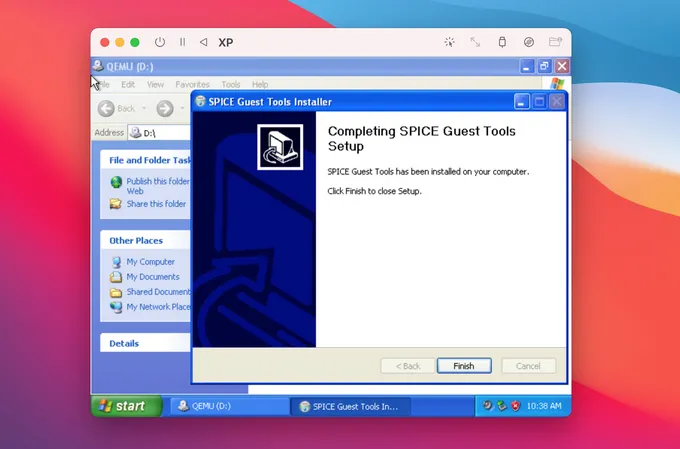
Step 5: Once done, click on Finish to complete the setup. Once done, you are good to go. You now have a fully functional Windows XP virtual machine on your Mac device.
You should be able to do almost anything on this Windows XP virtual machine like you would do on a normal Windows computer. Don't forget to change the resolution of your virtual machine and match it with that of your mac device to get a better display, the process is the same as a normal Windows XP computer.
Did you find it difficult? I am sure you didn't. Although I must admit, it is a bit lengthy and time consuming, but most of it is automatic. Hope you are able to follow the steps given here and create your own Windows XP virtual machine on your Mac with the UTM app.

Petty is editor in chief at UUByte and writes various topics about Windows and Mac to help people make the most of current technology.