
Arch is a famous Linux distribution among system administrators and advanced users who prefer playing Linux from a high level. It only has a basic OS and you are free to build the system based on Arch rules. If you are interested in Arch Linux, then you should first create Arch Linux Bootable USB for installation. Here you will get the 3 utmost methods to help you to complete the task. The methods are simple and easy to apply and all you need to just follow the steps listed below.
Method 1: Diskpart Command
diskpart is a text-based free utility shipped with Windows. It means you can use this tool on all Windows machines, including the latest Windows 10. The core function of diskpart is for disk management, such as creating partitions, deleting partitions, merging partitions, etc... In this part, we are going to use this powerful tool to create a bootable Linux USB from Arch ISO image.
Step 1: First and foremost, download Arch Linux ISO file from its official website. If the download speed was slow, kindly pick up a mirror near to you.
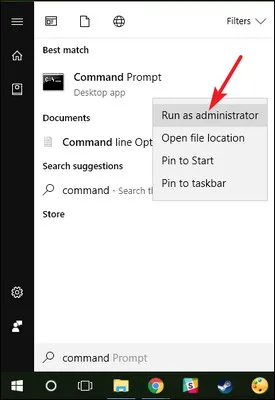
Step 2: Now, insert an USB flash drive and then run Command Prompt as administrator. To do this task, click on the Start menu, type CMD in the search bar and then select 'Run as administrator'. In the command box, type diskpart and then press the Enter key.
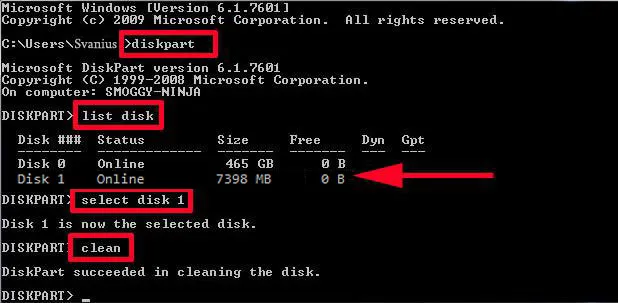
Step 3: Soon, you will get a list of drives attached to current machine, Disk 1 shows the USB and you need to select the same and for that, type this command: select disk 1
Step 4: After selecting Disk 1, you need to clean it and for that, type clean. Now, you need to create a new primary partition for the USB by typing create partition primary.
Step 5: After completing the above step, type select partition 1 and hit the 'Enter' key. Now, type active in the box and press the 'Enter' key.
Step 6: To format the USB, you need to type: format fs=ntfs quick
Step 7: Now, close the Diskpart section by typing exit in the command box.
Step 8: After completing the above step, move to the download folder, extract files from Arch ISO and paste all the files to the USB drive.
That's it; An Arch Linux Bootable USB is ready to use. This method looks simple, but there are lots of commands and if you enter any incorrect command, then you will fail to accomplish the task.
Method 2: UUByte LiteBoot
Command Prompt is definitely not a good option for most people as you have to deal with command prompt, which should be 100% correct for each comamnd. It is tough and hard to understand if you were not familiar with tech terms. So in this section, we will introduce a GUI-based software that do the same job as Command Prompt but a lot of easier.
UUByte LiteBoot is an ultimate boot toolkit for creating bootable USB not only for Linux but also for Windows and macOS. The user interface is built with a modern design and no complex settings to be made during the creation process. All you need to do is several mouse clicks. The settings are completed automatically at the background.
Step 1: Download and install LiteBoot on your PC. Now, launch the software and soon, you will get the Registration window and if you have purchased the license key, then click on the 'Register' button. However, if you don't have the license key, then purchase LiteBoot to access its full features.
Step 2: After completing the registration process, click 'Linux Boot' on the main window and tap the 'Browse' button to load the Arch Linux ISO file into the program.
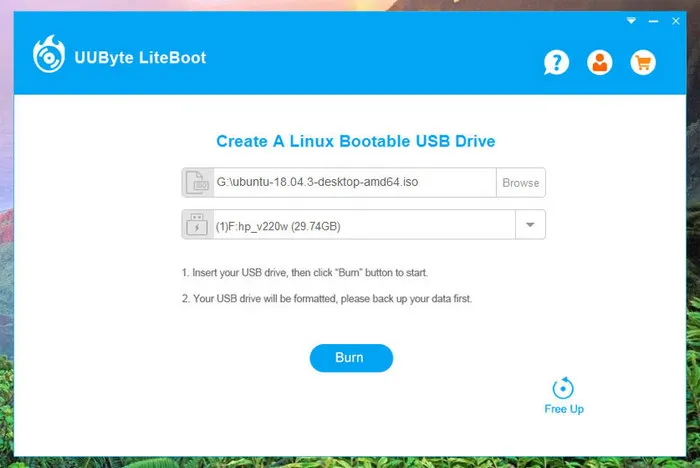
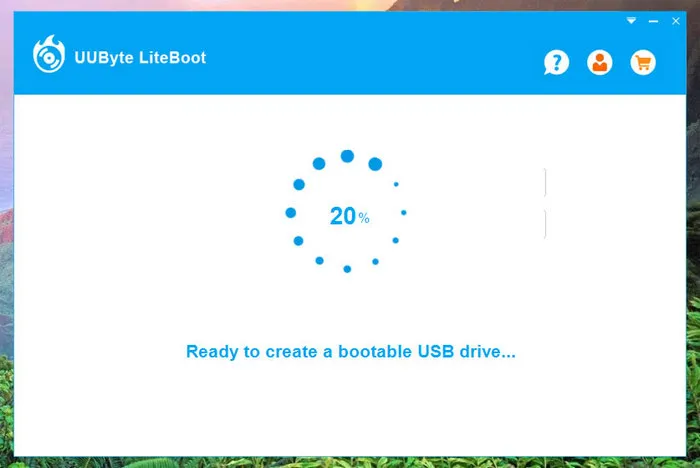
Step 3: Now, select the inserted USB drive name from the drop-down list and click on the 'Burn' button to burn Arch Linux ISO to USB drive. The rest of the tasks will be done by LiteBoot in less than 5 minutes. No addition actions to be made!
Step 4: After the bootbale USB is created successfully with LiteBoot, you should insert the drive into the target machine. Then let the computer boot from USB and start installing Arch Linux.
This method is very simple to follow and even the beginner can create an Arch Linux Bootable USB with the help of this amazing software.
Method 3: Create Arch Linux Bootable USB on Mac using dd Command
If you are using Mac OS, then the 'dd' command will help you to create Arch Linux bootable USB and the prime role of such command is to copy and transform the respective file. To perform this task, you will need a USB drive and the downloaded file of Arch Linux in order to create a bootable USB on macOS.
Step 1: Locate the inserted USB drive and for that launch the terminal and type the command: diskutil list
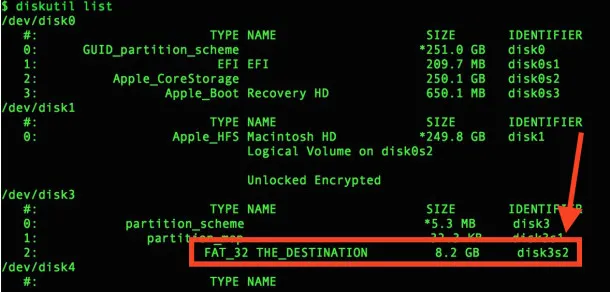
Step 2: Thereafter, you will get the list of drives, note down the name of the USB drive. Now, you need to format the USB and for that type the command (assuming the USB name is disk4 in above screenshot): umount /dev/disk4
Step 3: After providing the path of the USB, type the command provided below in the terminal box to wipe out all the existing data in the USB drive: mkfs.vfat /dev/disk4
Step 4: Now, you need to give the path of the USB followed by the path of Arch Linux ISO file and the command for the same is:
sudo dd bs=4M if=arch.iso of=disk4.
Note: In place of input, you will have to give the path of the Arch Linux ISO file and in place of target USB drive, you need to provide the location of the USB and it will be the same one as you found in Step 1.
That's it' your Bootable USB is ready to use. The method is a bit technical one and to perform this task, you will have to pay more attention amid providing the USB path and the Arch Linux ISO file. If you make any mistake in these steps, then you will fail to create an Arch Linux Bootable USB.
The Bottom Line
The 'add' and 'diskpart' methods, based on text commands, need a lot of time and attention because you need to play with the commands and if you will do any foul, then you won't get the result. However, in the UUByte method, you don't have to work more because the software is capable enough to complete the task and all you need to follow the guidance provided by LiteBoot.

Petty is editor in chief at UUByte and writes various topics about Windows and Mac to help people make the most of current technology.