Table of Contents
Are you a Mac user looking to venture into the world of Windows 11? Whether it’s for testing, a software requirement, or simply curiosity, creating a Windows 11 bootable USB on a Mac is much more challenging, especially after the removal of Bootcamp app on Apple Silicon Mac, which is the mainstream of Apple produced computers.
But fear not! In this comprehensive guide, we’ll walk you through the surprisingly simple process of using Ventoy LiveCD to create a Windows 11 bootable USB drive on a Mac. This method is not only straightforward but also incredibly efficient, allowing you to manage multiple ISOs on a single USB.
What is Ventoy?
![]()
Ventoy is an open-source tool that simplifies the process of creating bootable USB drives. It’s unique in that it allows users to store multiple ISO files on a single USB stick, and then choose which one to boot from in real-time. This is particularly useful for IT professionals, system administrators, or anyone who needs to boot from different operating systems or software environments frequently.
Can You Run Ventoy on Mac?
No. According to the documentation of official Ventoy website, macOS is not supported. This means you can not directly run Ventoy app on any Mac. However, there is no problem to use Ventoy on Windows and Linux platform.
Fortunately, there is a hidden workaround you can take advantage of in order to make a Windows 11 bootable USB on a Mac with Ventoy. That is the usage of Ventoy LiveCD.
What is Ventoy LiveCD?
Ventoy LiveCD is an alternative solution if the user had problem creating a bootable USB with the Ventoy app. It is based on Porteus Kiosk , lightweight and secure Linux distribution.
A Linux LiveCD refers to a bootable CD, DVD, or USB flash drive that contains a complete, functioning Linux operating system. The term "LiveCD" historically comes from the medium being a CD, but in modern usage, it can refer to any bootable external media, including USB drives. These tools are instrumental for various purposes, including system repair, recovery, testing, and installation. Key features of a Ventoy LiveCD:
- No Installation Required: The operating system runs entirely from the external media, without the need for installation on the hard drive. This allows you to use the operating system without altering your computer’s existing software or data.
- System Recovery and Maintenance: If your main operating system is not booting or is malfunctioning, a LiveCD can be a lifesaver. You can boot from it to access file systems, recover data, and perform system repairs.
- Testing and Evaluation: LiveCDs are an excellent way to test a new Linux distribution without installing it. You can experience the look and feel of the OS and test its compatibility with your hardware.
- Security and Privacy: Since nothing is installed on the hard drive and the OS runs in a stateless manner, LiveCDs are often used for secure, private browsing or for accessing sensitive data.
How to Use Ventoy LiveCD to Create a Windows 11 Bootable USB on Mac
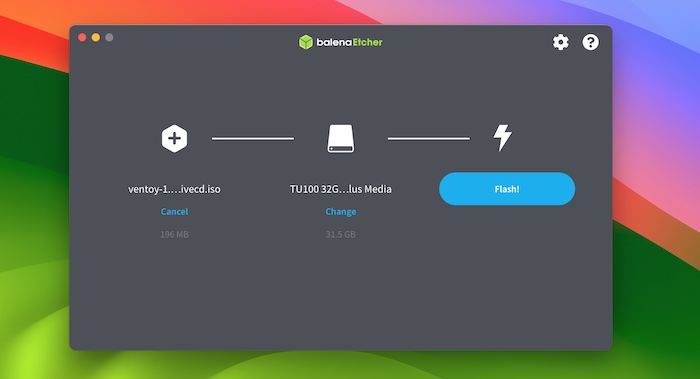
Ventoy LiveCD is packed under an ISO image format. You can not run this disk image on your Mac. Instead, you should burn the Ventoy ISO to USB in order to make it working for bootable purpose. We will using the free Etcher app for this task.

Etcher is a free and open-source bootable USB creator designed to create bootable USB drives and SD cards with ease. Known for its user-friendly interface, Etcher simplifies the process of burning ISO images to USB drives. It is a great option for those who are not tech-savvy.
Steps to Burn Ventoy LiveCD ISO to USB on Mac with Etcher
Step 1: Navigate to the Etcher website (https://www.balena.io/etcher/) and download the macOS version of the app. Once downloaded, open the .dmg file and drag the Etcher icon to your Applications folder to install it.
Step 2: Insert a USB drive into your Mac. Make sure that any important data on the drive is backed up, as the process will erase all existing data on the USB.
Step 3: Locate Etcher in your Applications folder and open it. You may need to confirm that you want to open it since it was downloaded from the internet.
Step 4: Click on “Flash from file” and navigate to the location where your Ventoy ISO file is stored. Select the file and open it in Etcher.
Step 5: Click on “Select target” and choose the USB drive you inserted earlier. Ensure you select the correct drive to avoid any data loss on other drives.
Step 6: Click on “Flash!” to begin writing the Ventoy ISO to the USB drive. You may be prompted to enter your Mac’s password as Etcher needs permission to access the drive.
Step 7: Etcher will now burn the ISO file to your USB drive. A progress bar will display the status. Once the process is complete, Etcher will validate the flash to ensure everything was written correctly.
Step 8: After the flashing process is complete, put Windows 11 ISO into the USB drive.
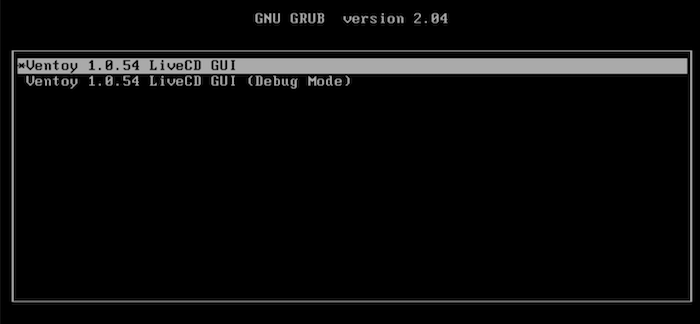
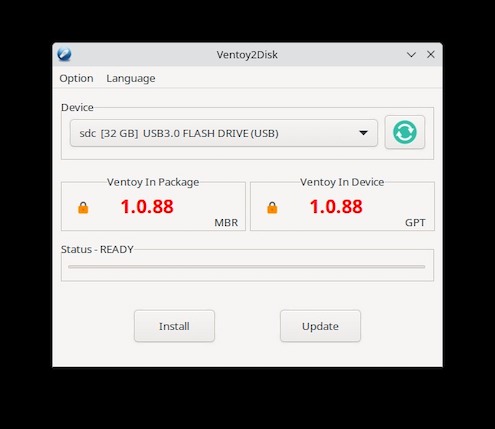
Step 9: Boot your PC from Ventoy USB and run Ventoy app in Linux to make a bootable USB stick for Windows 11 installation.
Alternative Solutions for Making Windows 11 Bootable USB on Mac
The above workaround is working quite fine on Intel Macs. And it has problems with Apple Silicon Mac, especially for M3 chip. We will introduce an alternative solution in here.
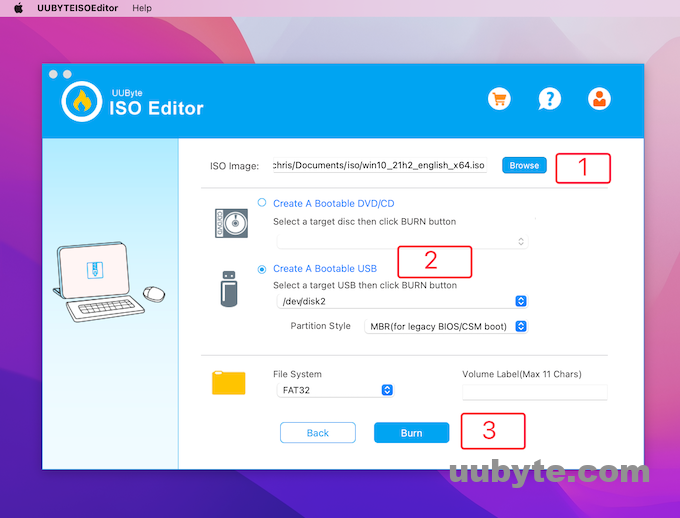
Creating a Windows 11 USB installation drive on a Mac can be a straightforward process with the help of UUByte ISO Editor, a versatile and user-friendly software solution. UUByte ISO Editor is designed to handle various ISO tasks, including burning ISO files to USB drives, which is essential for creating a bootable Windows 11 USB. To start, you’ll need to have the Windows 11 ISO file downloaded and a USB drive with enough storage capacity, typically 8 GB or more.


The process begins with installing UUByte ISO Editor on your Mac. Once installed, launch the application and select the ‘Burn’ module to write the Windows 11 ISO file to your USB drive. Insert your USB drive into the Mac and select it within the UUByte interface. Then, choose the Windows 11 ISO file you’ve downloaded. UUByte ISO Editor will take care of the rest, formatting the USB drive as needed and transferring the Windows 11 installation files. The software provides progress indicators, ensuring you’re kept informed throughout the process.
Pros of UUByte ISO Editor:
- Full platform Support: Compatible with all Intel and Apple Silicon Mac.
- User-Friendly Interface: The software is designed for ease of use, with a simple, clear interface.
- Versatility: Support various ISO files, including Windows 11, Windows 10 and Windows 7.
- Reliability: Provide a stable and efficient way to create bootable USB drives.
- Advanced Features: Available options for partition styles and file systems.
- Cross-Platform Compatibility: Work on both Mac and Windows systems.
Final Words
Congratulations! You’ve successfully navigated the process of creating a Windows 11 bootable USB on your Mac using Ventoy LiveCD. This versatile approach not only simplifies the initial setup but also offers ongoing flexibility for managing multiple ISO files. Whether you’re a developer, a tech enthusiast, or just someone who needs Windows 11 alongside macOS, this method provides a seamless and efficient solution.