Table of Contents
Today, we’re going to focus on a topic that many tech enthusiasts have been curious about: How to install Windows 11 on a Mac using UTM. If you’re a Mac user who wants to take advantage of the exciting features and capabilities offered by Microsoft’s latest operating system, Windows 11, then this guide is for you.
In this blog post, we will provide you with a comprehensive, step-by-step guide on how to install Windows 11 on your Mac using UTM. From downloading the necessary files to configuring the virtual machine, we’ll cover everything you need to know to get started with Windows 11 on your Apple device. So, let’s dive in and explore the world of virtualization and cross-platform capabilities!

Can You Install Windows 11 Directly on a Mac?
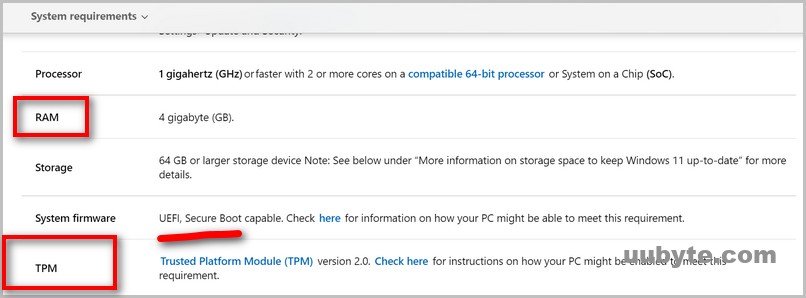
No. According to the system requirements of Windows 11, Mac is not eligible to install Windows 11 because Apple don’t ship TPM chip with all Macs. This means you can’t install Windows 11 natively both Intel and Apple Silicon Mac even with Bootcamp app.
Currently, the only way to install and run Windows 11 on a Mac is through a virtual machine, such as UTM, Parallels Desktop or VMware Fusion.
Introduction to Virtual Machine Technology
Virtual Machine (VM) technology has revolutionized the way we utilize computing resources by enabling multiple operating systems to run concurrently on a single physical machine. In this introduction, we will explore the fundamentals of virtualization, its benefits, and how it has transformed the way businesses and individuals operate in today’s digital landscape.
At its core, virtualization is the process of creating a virtual environment that emulates the functionality of a physical computer system. This environment, known as a virtual machine, allows users to run multiple operating systems and applications on a single piece of hardware. VM technology is made possible through the use of virtualization software, also known as a hypervisor, which manages the distribution of system resources like CPU, memory, storage, and networking among the virtual machines.
The adoption of virtual machine technology offers numerous advantages, including:
Resource Efficiency: VMs enable better utilization of hardware resources by running multiple virtual machines on a single physical machine, reducing the need for additional hardware and lowering costs.
Flexibility: VMs allow users to run various operating systems and applications simultaneously, catering to diverse needs and workloads.
Scalability: Virtualization makes it easy to scale computing resources up or down, depending on the requirements, without the need for physical hardware adjustments.
Isolation and Security: Each virtual machine operates in a separate environment, ensuring that issues or vulnerabilities in one VM do not affect others. This isolation is particularly valuable for testing, development, and deploying secure systems.
Simplified Backup and Recovery: VMs can be easily backed up and restored, ensuring rapid disaster recovery and reducing downtime.
Virtual machine technology has become an essential component in modern IT infrastructure, providing a versatile and efficient platform for businesses and individuals to maximize their computing resources. As virtualization continues to evolve, its impact on the computing landscape will only continue to grow, driving innovation and optimization across various industries.
What is UTM
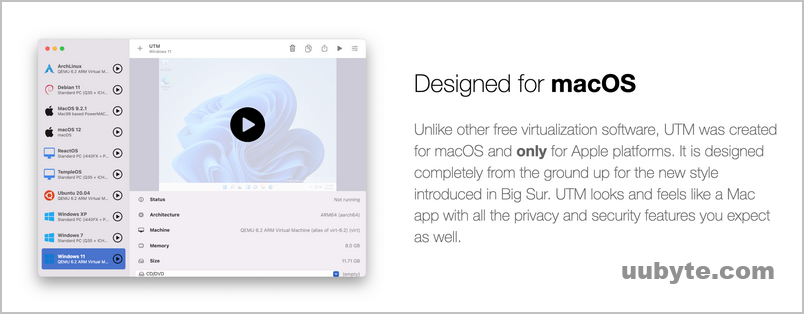
UTM is a powerful and free virtualization tool that enables Mac users to run different operating systems on their machines, without the need for dual-booting or partitioning. UTM is built on top of QEMU, a well-known and widely used open-source processor emulator and virtualization solution. By creating a virtual environment within macOS, UTM allows you to run Windows 11 seamlessly, side-by-side with your favorite Mac apps.
Why Choosing it over Parallels Desktop
Here are some reasons why you might choose UTM over the premium Parallels Desktop app, the most popular virtual machine app for Mac:
Cost: UTM is an open-source software, which means it is available for free. In contrast, Parallels Desktop is a commercial product that requires a paid subscription or a one-time purchase. If you’re on a tight budget or prefer not to spend money on virtualization software, UTM is a more cost-effective choice.
Open-source community: As an open-source project, UTM benefits from contributions by developers worldwide, fostering a collaborative environment for continuous improvements and updates. This also means that the source code is publicly available, allowing users to audit it for security or customize it to their specific needs.
Compatibility: UTM supports a wide range of guest operating systems, including Windows, Linux, and other Unix-based systems. While Parallels Desktop is primarily designed for running Windows on macOS, UTM offers more flexibility in terms of the operating systems you can run.
Lightweight solution: UTM is a relatively lightweight virtualization tool compared to Parallels Desktop, which makes it suitable for users who prefer a simpler interface and minimal resource usage.
How to Install Windows 11 on Mac with UTM
Installing Windows on a Mac using UTM involves several steps, including downloading the necessary files, setting up a virtual machine, and installing Windows 11 within the virtual environment. Follow the steps outlined below to get started:
Step 1: Visit the UTM official website (https://getutm.app/) and download the latest version of UTM for macOS. Once downloaded, install UTM by dragging the application into the Applications folder.
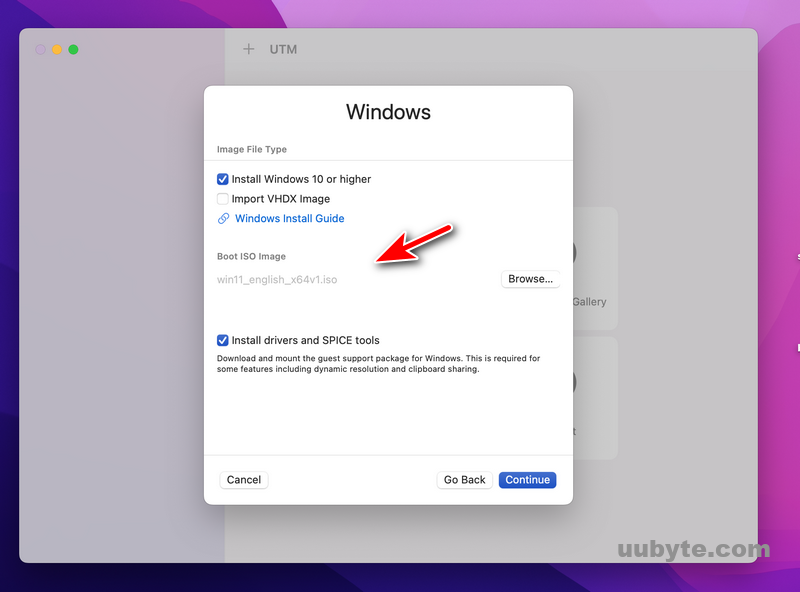
Step 2: Obtain Windows 11 ISO: Download the Windows 11 ISO file from Microsoft’s official website or from other legitimate sources. Ensure that you download the appropriate edition and architecture (64-bit) for your needs.
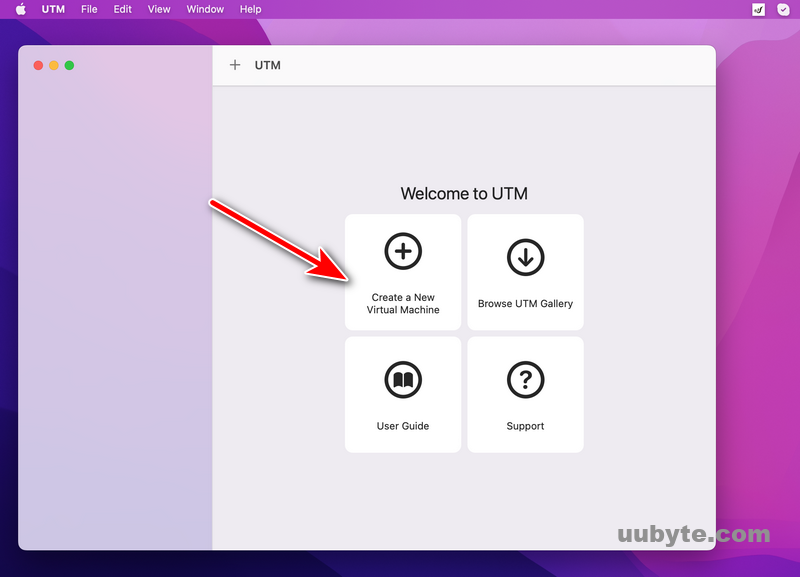
Step 3: Open the UTM application on your Mac. Click the "+" button in the top-left corner to create a new virtual machine.
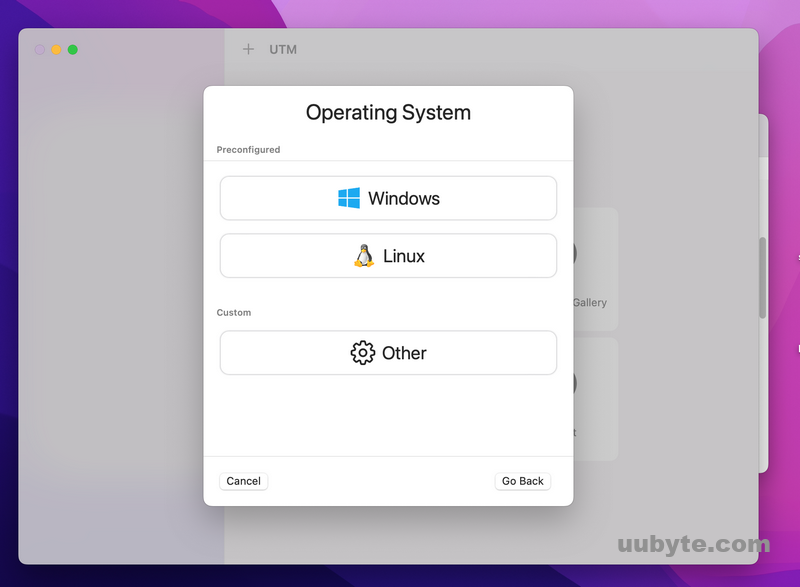
Step 4: Give your virtual machine a name and select "Microsoft" as the OS Family and "Windows 11" as the OS Version.
Step 5: Import Windows 11 ISO into UTM app.
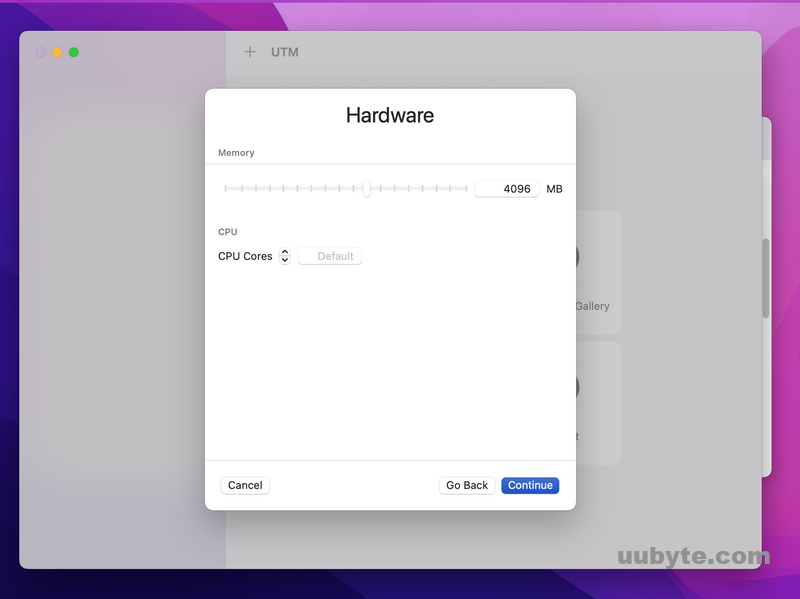
Step 6: Under the System tab, allocate the desired amount of RAM and CPU cores to the virtual machine based on your Mac’s hardware resources. For a smooth experience, it’s recommended to allocate at least 4 GB of RAM and 2 CPU cores.
Step 7: Click on the Drives tab and add a new drive by clicking the "+" button. Change the drive type to "CD/DVD," and then click the "Path" button to locate and select the Windows 11 ISO file you downloaded earlier. Additionally, add another drive for storage with the type "Disk Image" and set its size according to your requirements (a minimum of 64 GB is recommended for Windows 11).
Step 8: Click the "Save" button to save your virtual machine configuration. Then, click the "Start" button to boot up the virtual machine using the Windows 11 ISO.

Step 9: Within the virtual machine, follow the on-screen instructions to create a Windows bootable USB and install Windows 11 within it. You may need to create and format a partition during the installation process, using the allocated disk space you set earlier.

Step 10: After Windows 11 has been installed, restart the virtual machine. Now, you should be able to boot into Windows 11 within your UTM virtual machine on your Mac.
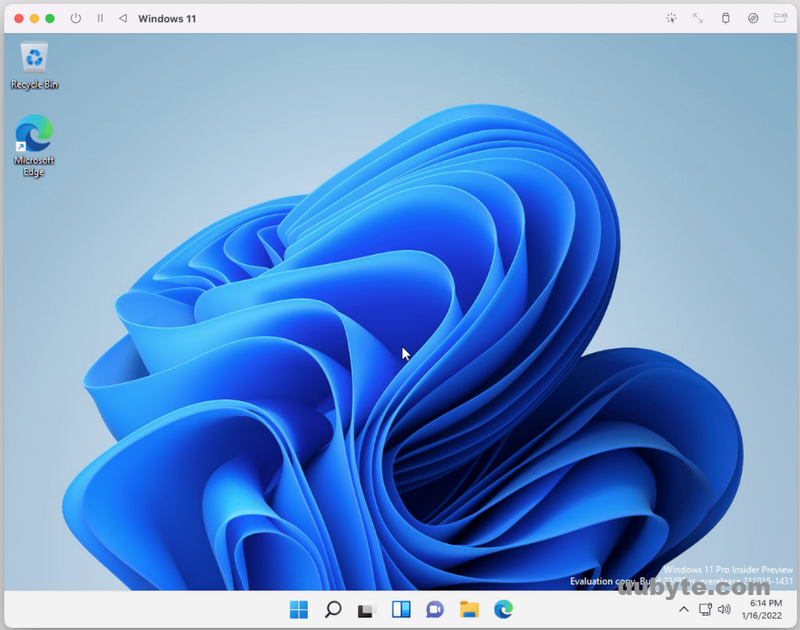
Remember that the performance of Windows 11 within UTM may not be as fast as running it natively or using other virtualization software like Parallels Desktop. However, UTM allows you to experience Windows 11 on your Mac without any additional costs.
Frequently Asked Questions
Here are some frequently asked questions (FAQs) related to installing Windows 11 on a Mac using UTM:
Can I run Windows 11 on an older Mac using UTM?
Yes, you can run Windows 11 on an older Mac using UTM, provided your Mac meets the minimum system requirements for Windows 11 and has enough resources to allocate to the virtual machine. Keep in mind that performance may not be optimal on older hardware.
Is it legal to install Windows 11 on a Mac?
Yes, it is legal to install Windows 11 on a Mac using virtualization software like UTM or Apple’s Boot Camp Assistant. However, ensure that you obtain a legitimate copy of Windows 11 and follow Microsoft’s licensing guidelines.
Can I use UTM to install other operating systems on my Mac?
Yes, UTM supports various guest operating systems, including different versions of Windows, Linux distributions, and other Unix-based systems. You can create multiple virtual machines with different operating systems based on your requirements.
How does the performance of Windows 11 on UTM compare to other virtualization solutions like Parallels Desktop?
UTM may not provide the same level of performance as commercial virtualization solutions like Parallels Desktop. However, UTM is a free, open-source option that allows you to run Windows 11 on your Mac without additional costs. If performance is critical for your use case, you might consider a commercial solution like Parallels Desktop.
Can I use Windows applications on my Mac using UTM?
Yes, once you have installed Windows 11 on a virtual machine using UTM, you can install and use Windows applications within the virtual environment. However, the performance of these applications may vary depending on your Mac’s hardware resources and the virtual machine’s allocated resources.
Can I access files on my Mac from the Windows 11 virtual machine?
Yes, you can access files on your Mac from the Windows 11 virtual machine by setting up shared folders between the host and guest operating systems. This can be done by configuring the virtual machine settings in UTM and using file sharing options within Windows 11.
How can I transfer files between macOS and the Windows 11 virtual machine?
You can transfer files between macOS and the Windows 11 virtual machine using shared folders, as mentioned above, or by using external storage devices like USB drives, which can be connected to the virtual machine through UTM’s settings.
Video Tutorial: How to Install Windows 11 in UTM (M1 Mac)
Summary
Installing Windows 11 on a Mac with UTM offers an accessible and cost-effective solution for users who want to experience the features and capabilities of Microsoft’s latest operating system on their Apple devices. By leveraging the power of virtualization technology, UTM enables seamless integration of Windows 11 within macOS, providing flexibility and convenience without the need for dual-booting or partitioning. Although UTM might not deliver the same level of performance as commercial virtualization solutions like Parallels Desktop, it remains an appealing option for users who prefer a free, open-source alternative.
Following the steps outlined in this guide, you can easily set up and run Windows 11 on your Mac, allowing you to enjoy a broader range of applications and explore the benefits of both operating systems. As virtualization technology continues to evolve, the potential for running multiple operating systems on a single device will only expand, further enhancing productivity, versatility, and cross-platform capabilities for users across the globe.