Our editor has received dozens of feedback about how to create a Windows 10 installation media on Mac Sonoma, the latest macOS operating system. The situation has changed dramatically since the release of Big Sur. The default bootable USB creation featured is removed by Apple and you have to use third-party app in order to make a bootable Windows 10 USB on Mac.
Please don’t worry! We will show you the step-by-step guide for creating a Windows 10 installation USB on Mac Sonoma, no matter it is an Intel Mac or Apple Silicon Mac, including M1, M2 and M3.
Can I Create Windows 10 Installation Media on Mac Sonoma with Bootcamp?
No. Bootcamp, the official app for dual-boot Windows and Mac, has removed the feature of bootable USB creation since macOS Big Sur. Hence, you are unable to You can create Windows 10 installation media on a Mac running macOS Sonoma. Now, Boot Camp is used for installing Windows on your Mac, not for creating installation media.
Preparation for Creating Windows 10 Installation Media on Mac
- Windows 10 ISO file downloaded from Microsoft.
- USB Flash drive with 8/16/32 GB storage.
- UUByte ISO Editor or Terminal App.
- A Working Mac computer with good Internet connection.
Virtual Machine: The Easiest Way to Create Windows 10 Installation Media on Mac
It is common to see Windows virtual machine running on Mac. With the help of virtualization software, Mac can run a Windows instance without any disk. on Window, there are several free tools available for creating Windows 10 bootable USB, such as the official Media Creation Tool and the popular Rufus software. If you have a Windows virtual machine running on your Mac, this is the simplest way to create a Windows 10 installation media on Mac. The following approach will use Parallels Desktop app as example.
Step 1: Power on Windows virtual machine on your Mac from Parallels Desktop app and connect a USB drive to it.

Step 2: Open a web browser in Windows VM and download Windows 10 ISO from Microsoft.com
Step 3: Download and run the Media Creation Tool in your Windows VM.
Step 4: Follow the instructions to create installation media. Select “USB flash drive” when prompted and choose the connected USB drive. The tool will download the necessary files and create a bootable Windows 10 installation USB.
Step 5: Once the process is complete, safely eject the USB drive from the Windows VM and then from your Mac. You can now use this USB drive to install Windows 10 on any compatible computer.
ISO Editor App: The Fastest Way to Create Windows 10 Installation Media on Mac
Setting up a virtual machine on your Mac is a very challenging and time consuming process. Most importantly, a new virtual machine could eat up 100GB free space on a Mac. This will have a great negative impact when working on a Mac. And it is not ideal solution for a budge Mac model.
Instead, we recommend using a GUI app to complete the process. It takes much less time and no need for much free storage.
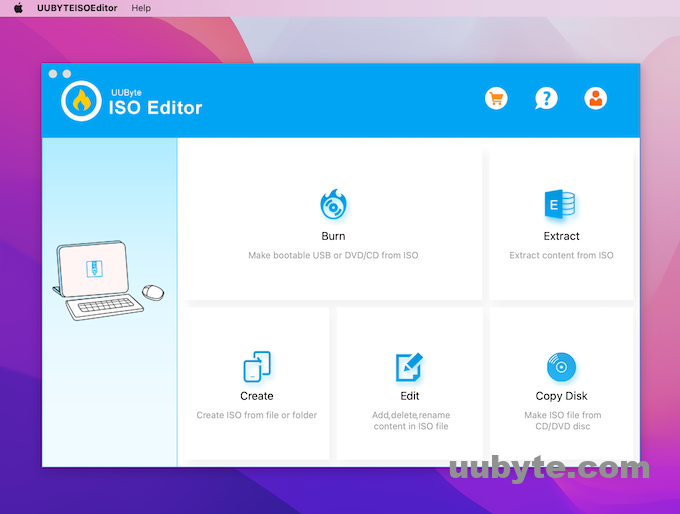
UUByte ISO Editor is indeed a convenient and efficient tool for creating Windows 10 installation media on a Mac. It simplifies the process significantly compared to traditional methods. Here’s how you can use UUByte ISO Editor to create Windows 10 installation media on Mac Sonoma:
Step 1: Download and install UUByte ISO Editor on your Mac. You can find it on the UUByte website.


Step 2: Unplug other USB devices from your Mac and only leave a USB drive for creating Windows 10 installation media. Ensure it has at least 8GB of storage and note that all data on the drive will be erased.
Step 3: Open UUByte ISO Editor on your Mac and select the ‘Burn’ option.
Step 4: Add the downloaded Windows 10 ISO file as the source file and pick up your USB drive (e.g. /dev/disk2)as the destination for the burn process.
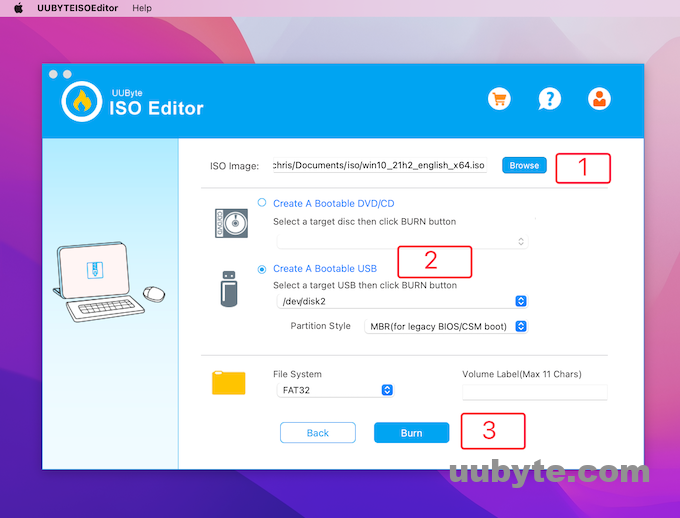
Step 5: Start the burning process by clicking on the ‘Burn’ button. The application will convert the ISO file into a bootable format and write it to the USB drive.
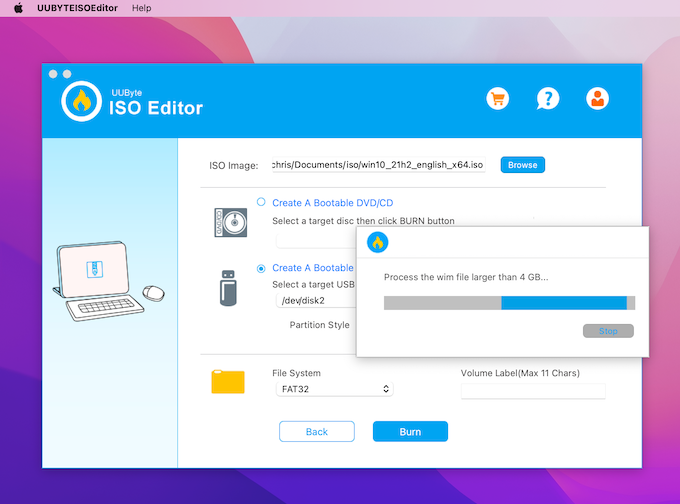
Step 6: At the end, ISO Editor app will split the install.wim file so it can be kept on a FAT32 partition. Wait for the process to complete. This could take a while depending on the speed of your USB drive and Mac.
Terminal: A Free and Advanced Approach to Create Windows 10 Installation Media on Mac
Terminal is an application on macOS that provides a command line interface to the underlying Unix operating system. It allows users to perform various tasks by typing commands into a text-based interface, offering a way to control the Mac and its software without a graphical user interface.
Using Terminal to create Windows 10 installation media on a Mac is a method suited for those comfortable with command-line interfaces. It’s a free approach that involves downloading the Windows 10 ISO file, preparing a USB drive, and using specific commands in Terminal to copy the ISO file onto the USB.
Despite its power and flexibility, Terminal requires a certain level of technical knowledge to use effectively, and commands must be used with caution, as some of them can significantly alter or even damage the system if used improperly. However, for those who are familiar with Unix or Linux commands, Terminal provides a robust and efficient way to interact with macOS.
Step 1: Connect a USB drive and open Terminal on your Mac.
Step 2: Type diskutil list external in Terminal and press Enter to display a list of all connected drives. Identify your USB drive from this list (look for identifiers like /dev/disk2).

Step 3: Unmount the USB drive using the command diskutil unmountDisk /dev/diskX (replace diskX with the correct identifier for your USB drive).
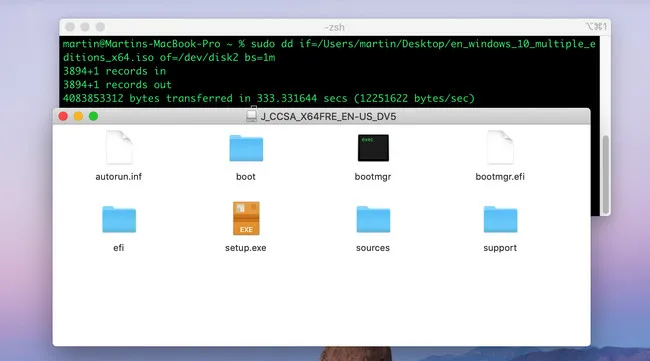
Step 4: Use the dd command to write the ISO file to the USB drive. The command will look something like:
sudo dd if=/path/to/downloaded.iso of=/dev/rdiskX bs=1m
Replace /path/to/downloaded.iso with the actual path to your ISO file and /dev/rdiskX with your drive identifier, and note that rdiskX is used for faster data transfer.
Bonus Tip: How to Install Windows 10 on Mac
Once you have a Windows 10 installation media, the next step is how to install Windows 10 on a target device with this drive. We will show you how to do it on a PC or Mac.
Warning: Windows 10 can’t be directly installed on Apple Silicon Mac.
How to Install Windows 10 on a PC from USB Drive
Installing Windows 10 on a PC using a USB drive is a widely used method, especially when upgrading from an older version of Windows or performing a clean installation on a new or existing computer.
This process involves preparing a bootable USB drive with the Windows 10 installation files, changing the boot order in the computer’s BIOS or UEFI settings to prioritize USB booting, and then proceeding with the installation steps as guided by the Windows setup process. It’s a straightforward and efficient method, ideal for those without access to an optical drive or for systems like laptops and small form factor PCs that often lack a built-in CD/DVD drive.
How to Install Windows 10 on a Mac (Intel Chip Only) from USB Drive
Installing Windows 10 on an Intel-based Mac using a USB drive is a practical solution for users who need to run Windows-specific applications or prefer the Windows operating system’s environment on their Mac hardware.
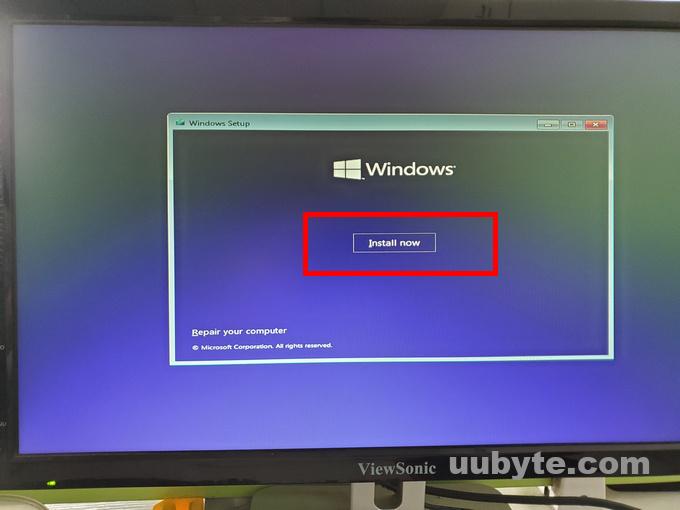
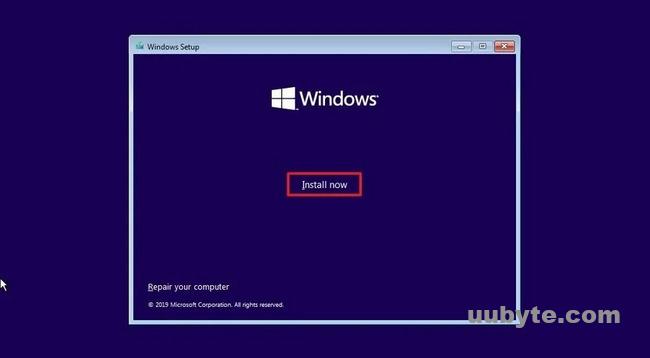
Typically, the firsts step is to partition the Mac’s hard drive using Disk Utility app, and then booting the Mac from the USB drive by pressing the Option key from restart. Windows 10 installation wizard will be loaded on the screen and you can now start installing Windows 10 on your Mac. This will be done in less than 30 minutes.
FAQs about Creating Windows 10 Installation Media on Mac
Does Rufus work on Mac Sonoma?
No. Rufus is one of the most bootable USB creation software on Windows PC. There is no Mac version of Rufus according to the official website. However, you can run this app from a Windows VM in Mac.
Can I Use UNetbootin to create Windows 10 bootable USB?
UNetbootin is an across-platform app for making bootable USB. However, it does not support Windows 10 ISO from the time we are writing this post.
Is UUByte ISO Editor working on Apple M3 Mac?
Yes. The new version of ISO Editor has added support for M3 chip as well as M2 and M1. You can use it on the latest macOS Sonoma 14.1.
Editor’s Summary
The above tutorial shares three actionable solutions to help you create a Windows 10 installation media on Mac Sonoma. In fact, you can also try these tricks on Ventura, Monterey, Big Sur and Catalina. Please forgot Bootcamp and advocate the new approaches introduced in this post.