Table of Contents
macOS Sonoma is the latest operating system for Mac desktops and laptops. It has been three months since the first public beta. Now many computers have upgraded the OS from the old to the macOS Sonoma. In addition, new Mac will be shipped with macOS Sonoma by default in future.
There are a lot of new features are available in Sonoma, such as interactive desktop widgets, re-designed game mode and improved video conferencing. However, the feature of creating Windows bootable USB in Bootcamp app is still missing.
In this post, we will show you how to easily create a Windows 10 bootable USB on Mac Sonoma in 2023! My test device is a 2022 MacBook Pro running macOS Sonoma Beta 4.
What Happens to Bootcamp App on Mac Sonoma?
In the early days of macOS, Apple developed an app called BootCamp that allows the users installing Windows on their Mac computers. It was a smooth experience with a few mouse clicks. Later, Apple added a new feature to Bootcamp, which helps the users to create a Windows bootable USB for later use. These are the two core functions of Bootcamp app.
Unfortunately, Apple removed the bootable USB creation function since macOS Big Sur. What makes things more worse is that Bootcamp app was removed from Mac on all Apple Silicon Macs, including M1 and M2 Mac.
The users have to find other alternative apps or workarounds to create Windows 10 bootable on Mac Sonoma. It is totally possible but the process is a bit tricky! We will show you four different methods to help you make a Windows 10 installation USB on Mac Sonoma.
Are There Any Difference Between Intel and Apple Silicon Mac?
The answer is a big No in 2023!
Now, the methods for creating Windows 10 bootable USB on macOS Sonoma have no difference between Intel Mac and Apple Silicon Mac. The reason is that many third-party tools already added support for Apple Silicon Mac. In the early days of Apple Silicon release, there were only a few apps fully compatible with the new architecture. This means the following four methods we are going to introduce can be applied to all Macs running macOS Sonoma.
Things You Should Prepare for
There are a couple of things you should prepare for before making the bootable USB. This is a crucial step! If you followed all suggestions, then it could be a simple task. Otherwise, you would waste a lot of time and effort to get it done.
1. Windows 10 ISO Image
Open a web browser on Mac Sonoma and paste this link to the address bar:
https://www.microsoft.com/zh-cn/software-download/windows10
Scroll download the page a little bit and choose the edition for Windows 10. Then, click the "Confirm" button and choose a target language for Windows 10.
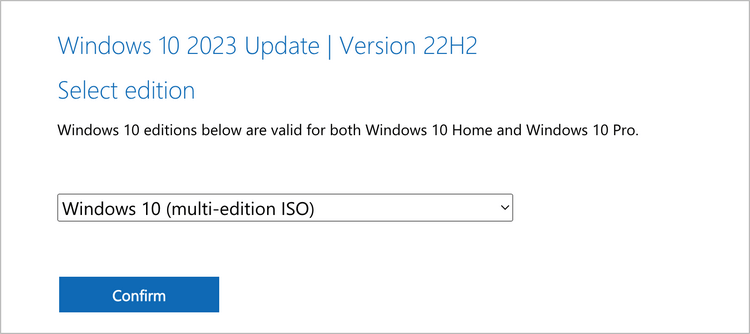
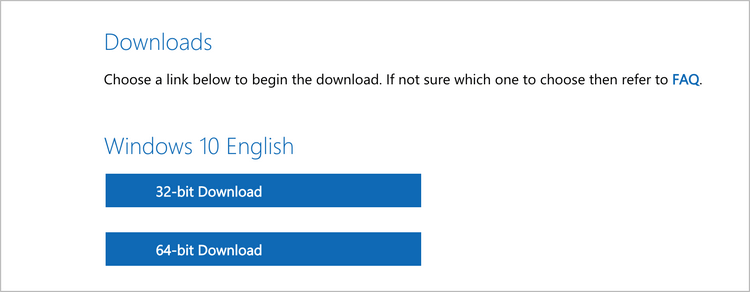
After that, you will be present with two download links. One is for Windows 10 64-bit and the other one is for 32-bit. Please go with the 64-bit edition if you don’t know the difference as most of the apps are 64-bit in Windows 10. In addition, the latest Windows 10 version is 22H2.
2. A Fast USB Drive with at Least 8GB Storage
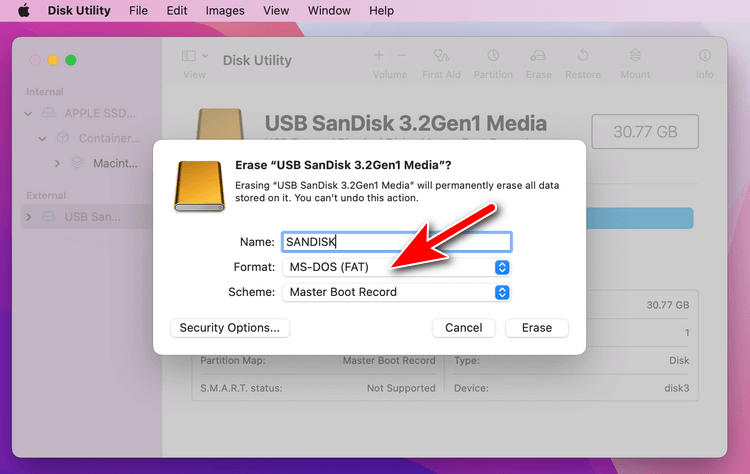
The Windows 10 ISO image is approximately 5GB. So you should get a USB drive with the storage between 8GB and 32 GB. For USB drive with more than 32 GB, the drive should be formatted to FAT first. You can do this with the stock Disk Utility app.
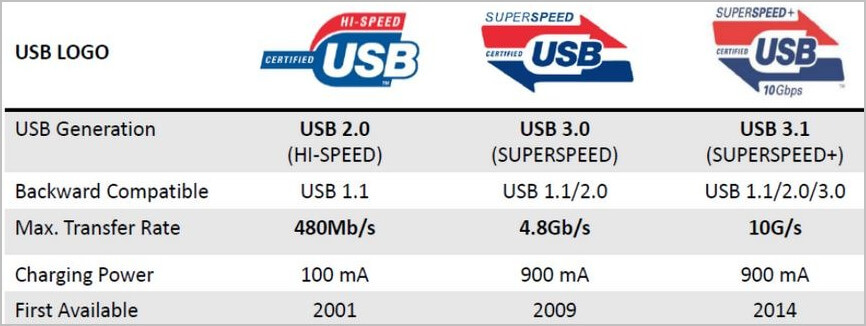
Another important factor you should pay attention to is the speed of USB drive. We recommend using a USB 3.1 or 3.0 drive as it has much faster writing speed. This will dramatically save the time for ISO burning. You should wait more than 30 minutes for a slow USB drive. Usually, you can tell the USB is 2.0 or 3.0 from the device surface or order page.
3. ISO Burning App
To create a Windows 10 bootable USB drive, ISO burning app is required in most of the cases. It will decompress the ISO image, write boot information to the drive and copy all the files and folders in the ISO file to the target USB drive.
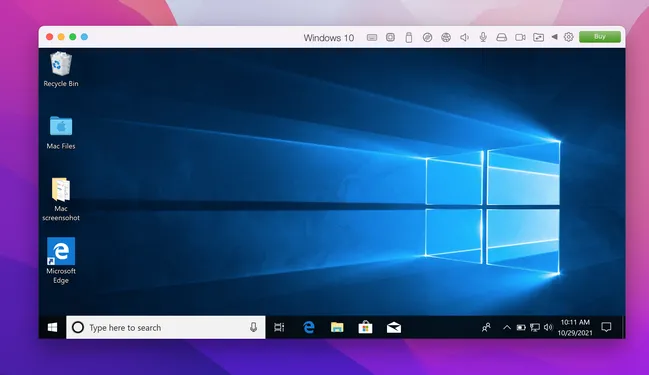
#1 Create Windows 10 Bootable USB on Mac Sonoma from VM
Mac is a great device but it is not perfect! As we can see, many games and apps are not available on Mac. That’s why a lot of Mac users built a Windows virtual machine on their Mac.
A virtual machine (VM) is a software-based emulation of a computer system that operates on top of a physical machine. It enables multiple operating systems to run simultaneously on a single physical computer or server. In other words, a virtual machine creates a virtualized environment where the software behaves as if it were running on a dedicated physical machine.
If you have a Windows virtual machine running on your Mac, then this is the easiest way to make a Windows 10 bootable USB on Mac Sonoma as there are tons of free tools on Windows for doing this type of work.
Step 1: Start Windows 10 virtual machine on your Mac.
Step 2: Connect an external USB drive to Mac and make sure the Windows virtual machine lists the drive in file explorer.
Step 3: Download and install the official Media Creation Tool from Microsoft.
Step 4: Follow the prompt to make a Windows 10 bootable USB with Media Creation Tool.

Pros:
- Simple and fast.
- Many free tools available.
Cons:
- Take hours to set up a new virtual machine.
- Virtual machine software is not free.
#2 Create Windows 10 Bootable USB on Mac Sonoma via ISO Editor
ISO Editor is a popular app developed by UUByte Inc. It is a powerful ISO toolkit that supports dozens of ISO functions, such as making bootable USB, editing ISO file and creating new ISO file. The most notable feature is that it is fully compatible with all macOS versions, ranging from the oldest macOS Sierra to the latest macOS Sonoma.
What is more, ISO Editor app has added support for Apple Silicon Mac in 2021. You can now run this app smoothly on both Intel or M1/M2 Mac. You won’t find another dedicated app with these features. That’s why we recommend it at the second place of our tutorial.
To create a Windows 10 bootable USB on Mac with UUByte ISO Editor, you can follow the details listed in below:
Step 1: Download ISO Editor installation package from the following link. Double click on it and drag the app icon to Application folder so you can open ISO Editor from Launchpad.
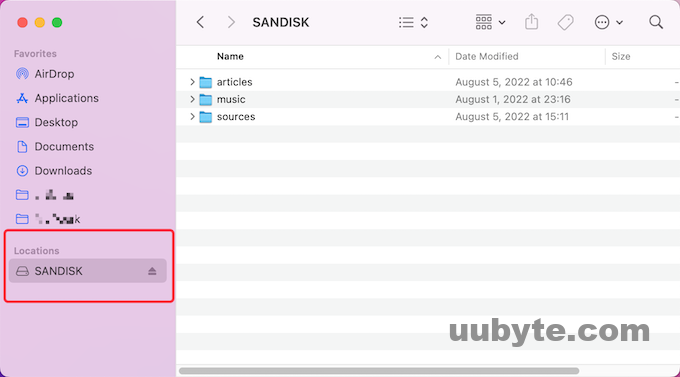
Step 2: Connect a USB flash drive to Mac and make sure you can see the device name from Finder app.
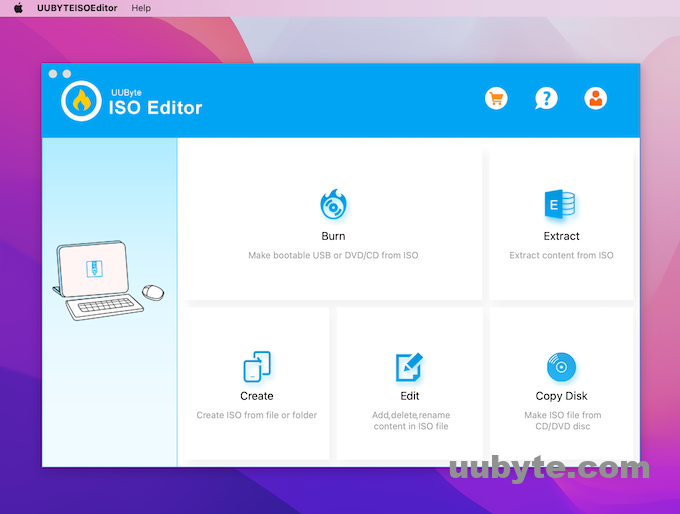
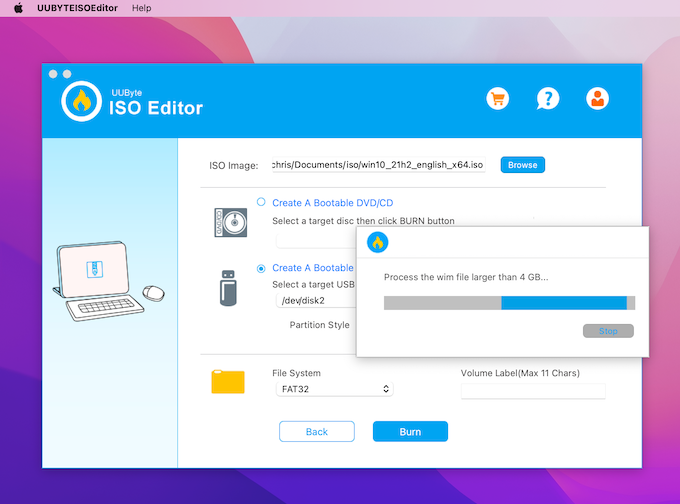
Step 3: Open ISO Editor app and click on the "Burn" tab from the screen. This will lead you to the window for creating Windows bootable USB.
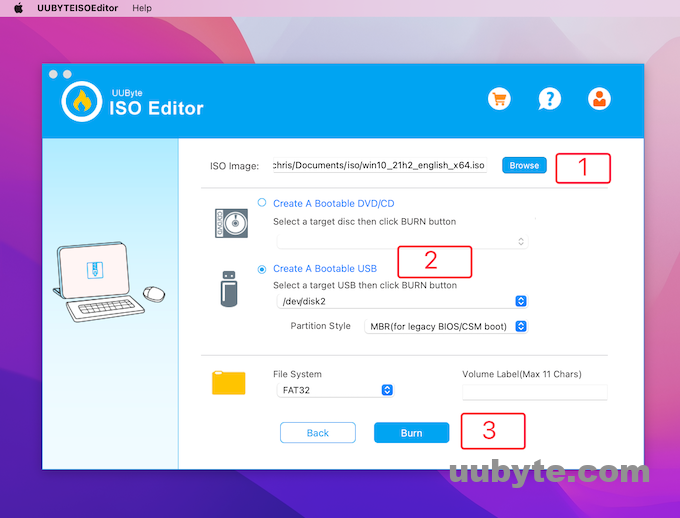
Step 4: Import Windows 10 USB and select the USB drive from the drop-down list.
Step 5: Now, click the "Burn" button at the bottom to burn Windows 10 ISO to USB. This will be done in less than 2 two minutes.
Step 6: When the burning process is done, ISO Editor app will split the install.wim file from the Windows 10 ISO into two small files . The reason for doing this extra step is that Mac only supports FAT file system and the file size should be less than 4 GB (install.wim > 4GB).
Pros:
- Intuitive and easy user interface.
- Split install.wim file automatically.
- Higher success rate.
- Support all modern macOS.
- Fully compatible with Intel and Apple Silicon Macs.
Cons:
- Not free (30-day trial available).
- Can only burn Windows ISO.
#3 Create Windows 10 Bootable USB on Mac Sonoma Using UNetbootin
UNetbootin is a free and open-source software that allows you to create bootable USB drives for various operating systems. It is available for Windows, macOS, and Linux and is a popular tool for creating bootable USB media to install or run operating systems from.
To create a Windows 10 bootable USB on Mac using UNetbootin, follow these steps:
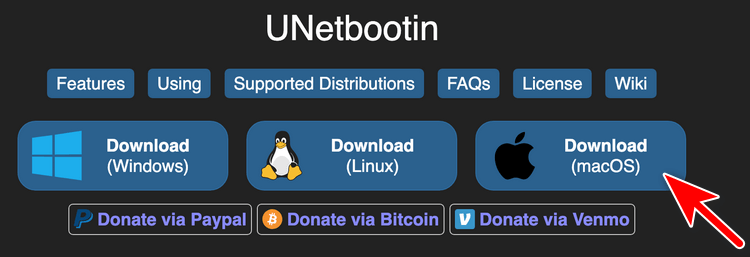
Step 1: Visit the UNetbootin website (https://unetbootin.github.io/) and download the macOS version of UNetbootin.
Step 2: Open the UNetbootin application that you downloaded earlier.
Step 3: In the UNetbootin interface, select "Diskimage" and click the "…" button to browse for the Windows 10 ISO file you downloaded earlier. Ensure that the "Type" is set to "USB Drive."
Select the correct USB drive in the "Drive" drop-down menu. Double-check that you have chosen the correct USB drive as this process will erase its contents.

Step 4: Click the "OK" or "Start" button to begin the process of creating the bootable Windows 10 USB drive.
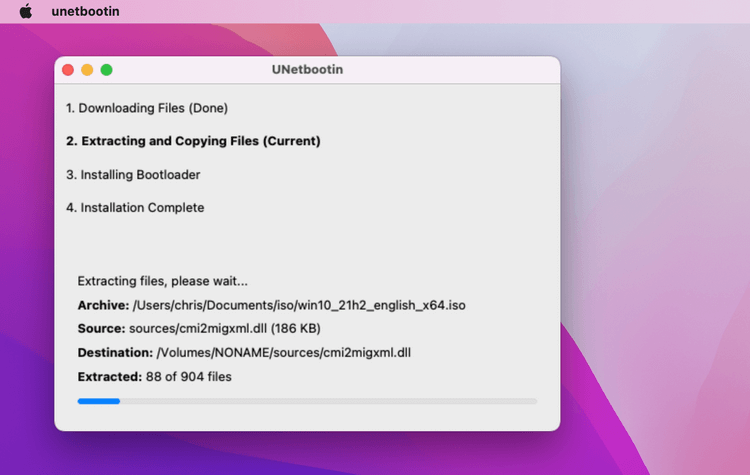
Step 5: UNetbootin will now copy the contents of the Windows 10 ISO to the USB drive and make it bootable. This process may take some time, depending on the speed of your USB drive and computer.
Pros:
- Free of use.
- No installation required.
Cons:
- Poor user interface.
- Take too much time in copying files to USB.
- Some of the USB drive are not bootable.
#4 Create Windows 10 Bootable USB on Mac Sonoma Using Terminal
Now, it comes to the final section of this tutorial. You could see many blog posts list Terminal as the first app to create a Windows 10 bootable USB on Mac. However, we thought it is too complicate for users who never used command or are not familiar with text commands. It is an agile tool for advance users.
In short, Terminal is a command-line interface on macOS that allows users to interact with the computer using text commands. It provides a powerful way to control the system, execute various tasks, and perform administrative functions. The Terminal is commonly used by developers, system administrators, and advanced users who prefer a more direct and efficient way of managing their Mac.
To create a Windows 10 bootable USB on Mac with Terminal, please check the steps in below:
Step 1: In Terminal, eject other USB devices and only leave the one for creating Windows 10 bootable USB. Now, type the following command to list all the external disks connected to this Mac. Identify the USB drive by its size and format. It will typically be something like "/dev/diskX" (where X is the disk number).
diskutil list external
Step 2: Before proceeding, unmount the USB drive using the following command (replace "diskX" with the appropriate disk number you identified in the previous step):
diskutil unmountDisk /dev/diskX
Step 3: Convert the Windows 10 ISO file to a DMG (Apple Disk Image) format using the hdiutil command:
hdiutil convert -format UDRW -o ~/path/to/windows10.img ~/path/to/Windows10.iso
Replace "/path/to/windows10.img" with the desired path where the DMG file will be saved, and "/path/to/Windows10.iso" with the path to the downloaded Windows 10 ISO file.
Step 4: Use the dd command to copy the DMG file to the USB drive (replace "diskX" with the appropriate disk number for your USB drive):
sudo dd if=~/path/to/windows10.img.dmg of=/dev/rdiskX bs=1m
The sudo command will prompt you to enter your Mac password.
Congratulations! You have now created a bootable Windows 10 USB drive on your Mac using Terminal. You can use this USB drive to install Windows 10 on any compatible computer or device.
Pros:
- 100%.
- Come with macOS Sonoma.
- No download and software installation.
Cons:
- No graphics user interface.
- Much more dangerous if typed the wrong command.
- Lower success rate.
Video Tutorial: Create Windows 10 Bootable USB on Mac
Frequently Asked Questions
Can I make Windows bootable USB on Mac M1?
Yes. They are multiple tools you can use to make a Windows bootable USB on Mac M1, even M2. The ecosystem of Apple Silicon architecture is matured now!
Does Rufus work on Mac?
Rufus does not have a Mac version as you can check from its official website. However, you can create a Windows virtual machine on Mac and use Rufus in virtual machine.
What is the Mac version of Rufus?
UUByte ISO Editor is the Mac version of Rufus. It can create Windows 10 bootable USB in a quite simple way with high successful rate.
What format should a bootable USB be for Windows 10?
FAT is the best file format for creating Windows bootable USB on Mac. You can't write to NTFS drive on Mac as NTFS is not natively supported by Mac.
How to make a bootable USB on Mac using Disk Utility?
Unfortunately, Disk Utility has deprecated bootable USB feature for a long time. You can use Terminal instead to make a bootable USB on Mac if you don't like third-party apps.
The Final Words
In this post, we introduce four different methods to help you create a Windows 10 bootable USB on Mac Sonoma. Using a Windows virtual machine provides a sandboxed environment and doesn’t require formatting the USB drive, but it might be more resource-intensive. UUByte ISO Editor offers a straightforward GUI-based approach but may come with a cost for advanced features. UNetbootin is free and simple to use, but it might not work with all ISO files. Terminal provides full control and is free, but it requires some familiarity with command-line operations.
Choose the method that suits your preferences and expertise level. Always make sure to back up any important data on the USB drive before creating the bootable Windows 10 USB, as the process involves formatting the drive and might result in data loss. With a bootable USB drive in hand, you can install or repair Windows 10 on various compatible devices, making it a valuable tool for troubleshooting and system management.