Note: For Apple Silicon Mac M1/M2/M3/M4, please refer to this guide instead.
This is the online portal that demonstrates how to use our BitLocker Geeker software to read and write an encrypted BitLocker drive on Apple Silicon Mac. Please follow the steps carefully!
Step 1: Download and Install BitLocker Geeker on Mac
Click the download button at the upper right corner and follow the screen prompt to install UUByte BitLocker Geeker app on your Mac. During the installation process, you need to input the user password to grant permission to the app.

Step 2: Insert BitLocker Encrypted Drive into Mac
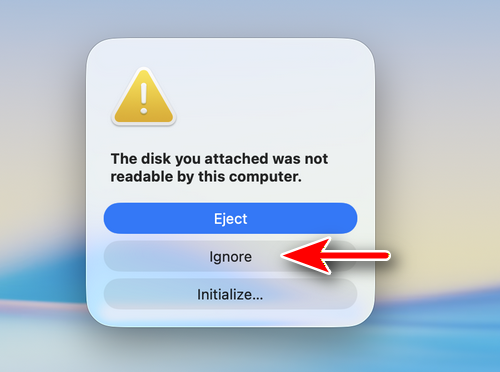
When a BitLocker encrypted USB drive is connected to Mac via USB port, you will see the following message within a few seconds. In here, you should click Ignore option at this time. The Initialize option will format the drive and Eject option will unmounts the drive.
Open BitLocker drive app, you can see the drive is listed on the screen. However, you need to turn on Full Disk Access, allow user management of kernel extensions and update system extension before you can read and write the BitLocker drive.
Step 3: Grant Full Disk Access to BitLocker Geeker App
On macOS Catalina and later, it is mandatory to enable Full Disk Access permission for BitLocker Geeker app.
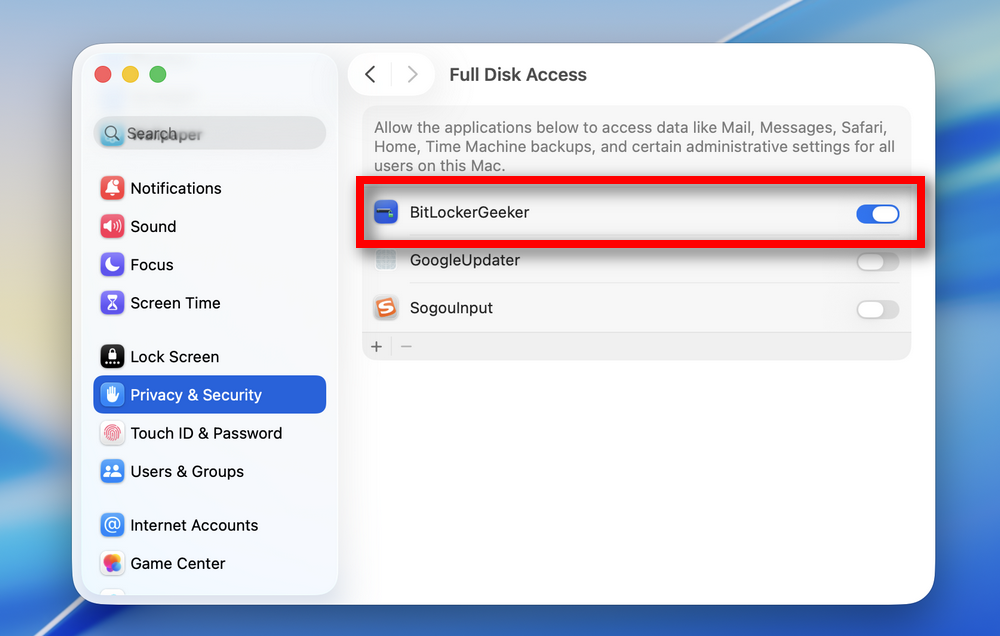
First, Open System Settings and locate Security & Privacy on the panel.
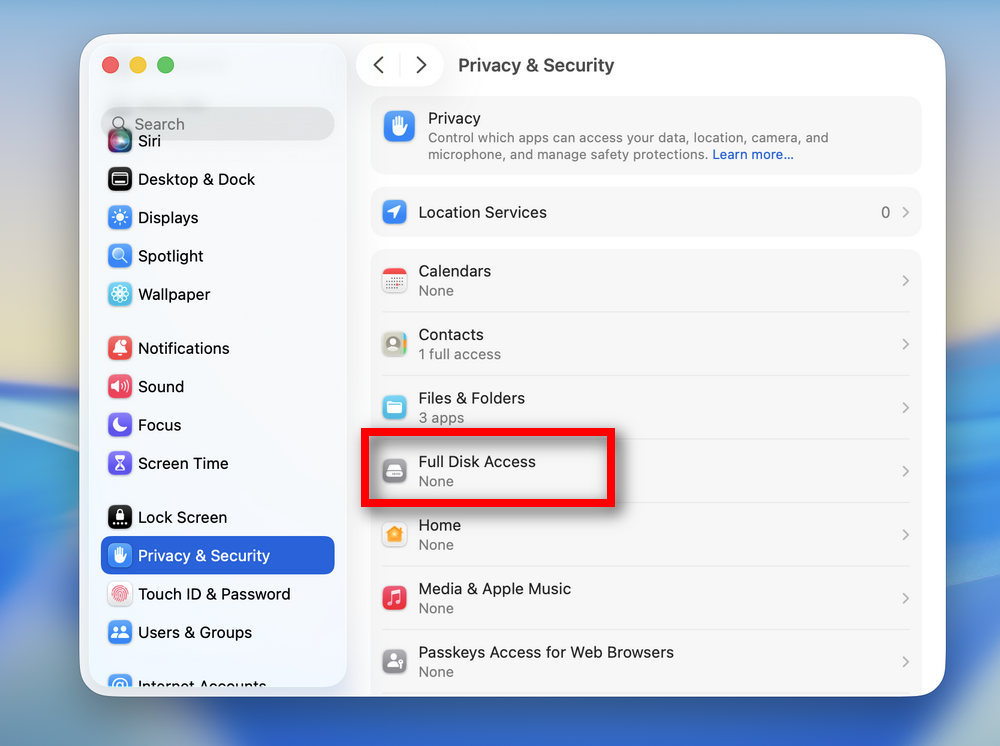
Scroll down the items at the left section and find Full Disk Access option. From the right side, click the + symbol to add BitLocker Geeker app to it.
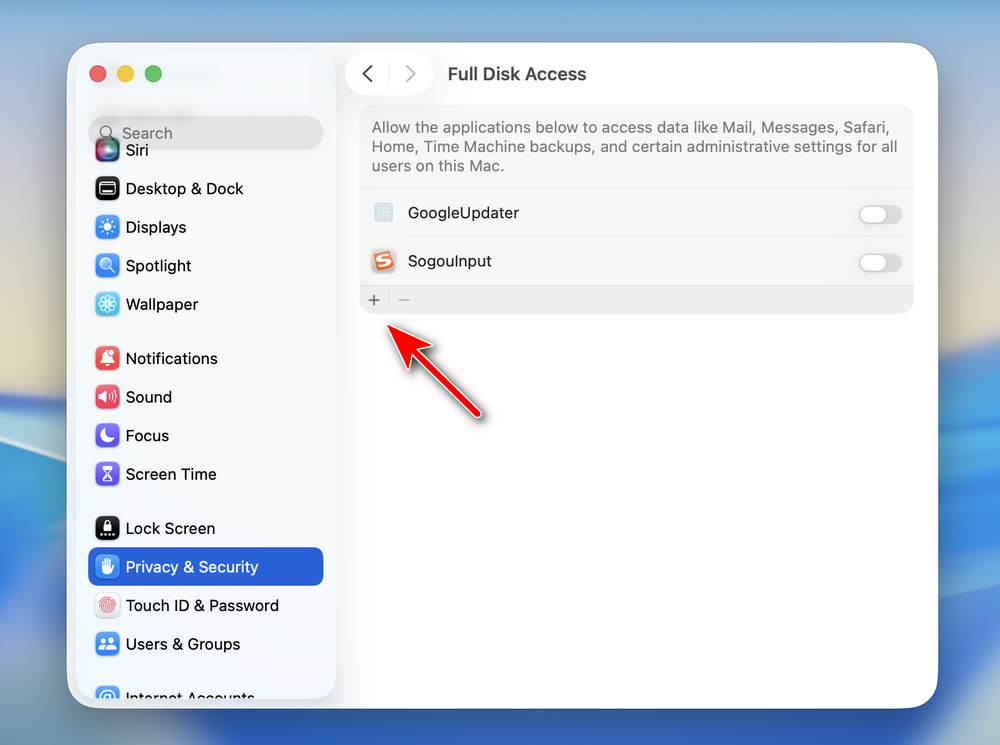
Now, quit and reopen the System Settings app. After that, you will see BitLockerGeeker has full disk access permision
Step 4: Update System Extension
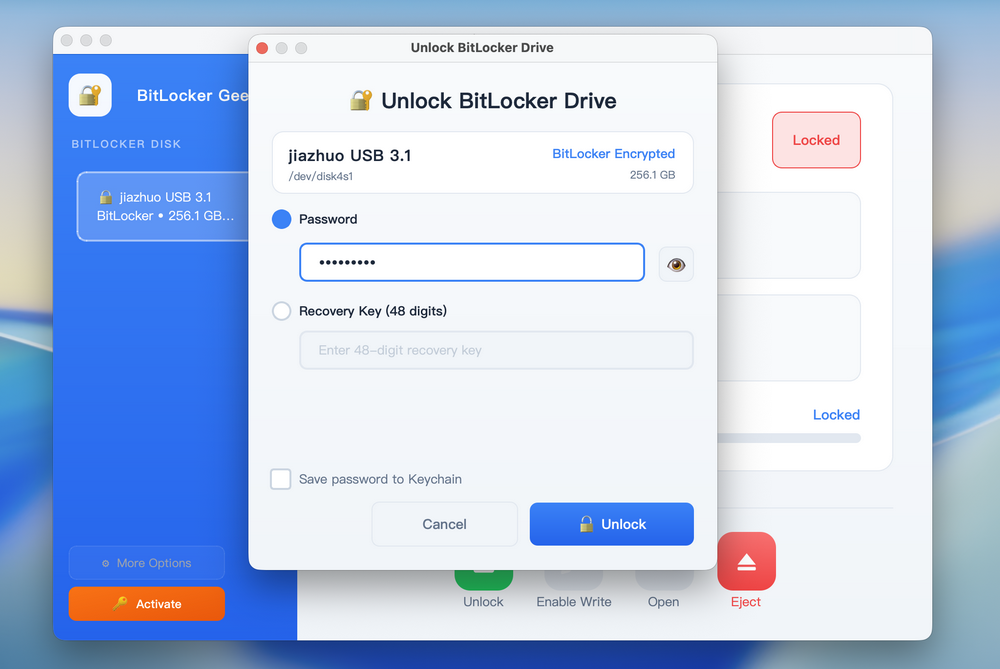
Now, run Bitlocker Geeker app and input the BitLocker password to unlock the drive.
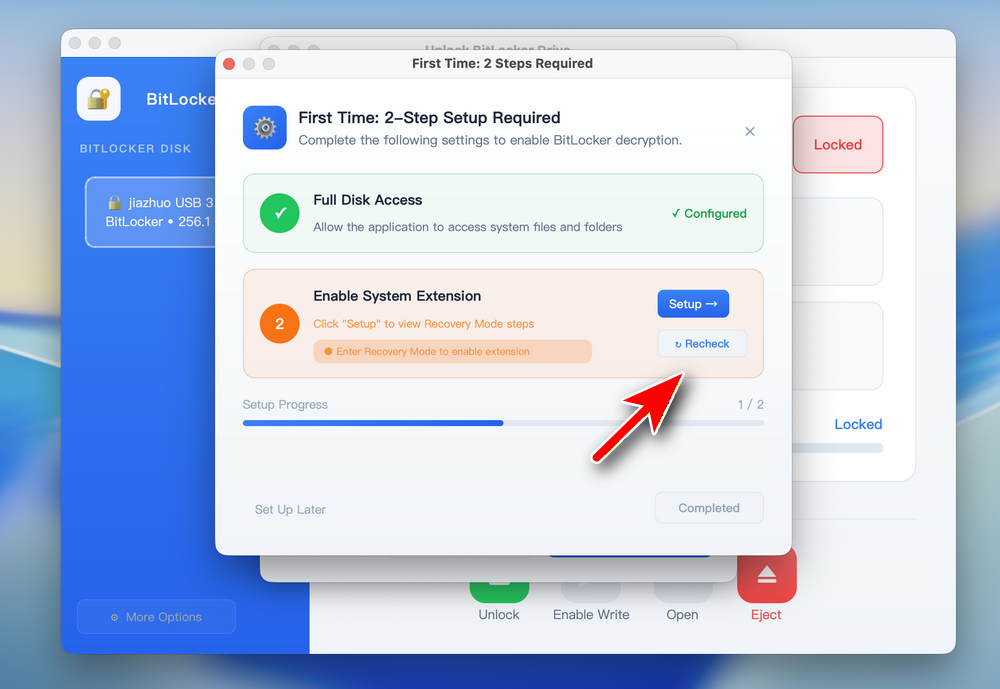
You will be promoted to setting window that asks Full Disk Access and enable system extension. At this time, click the Recheck button.
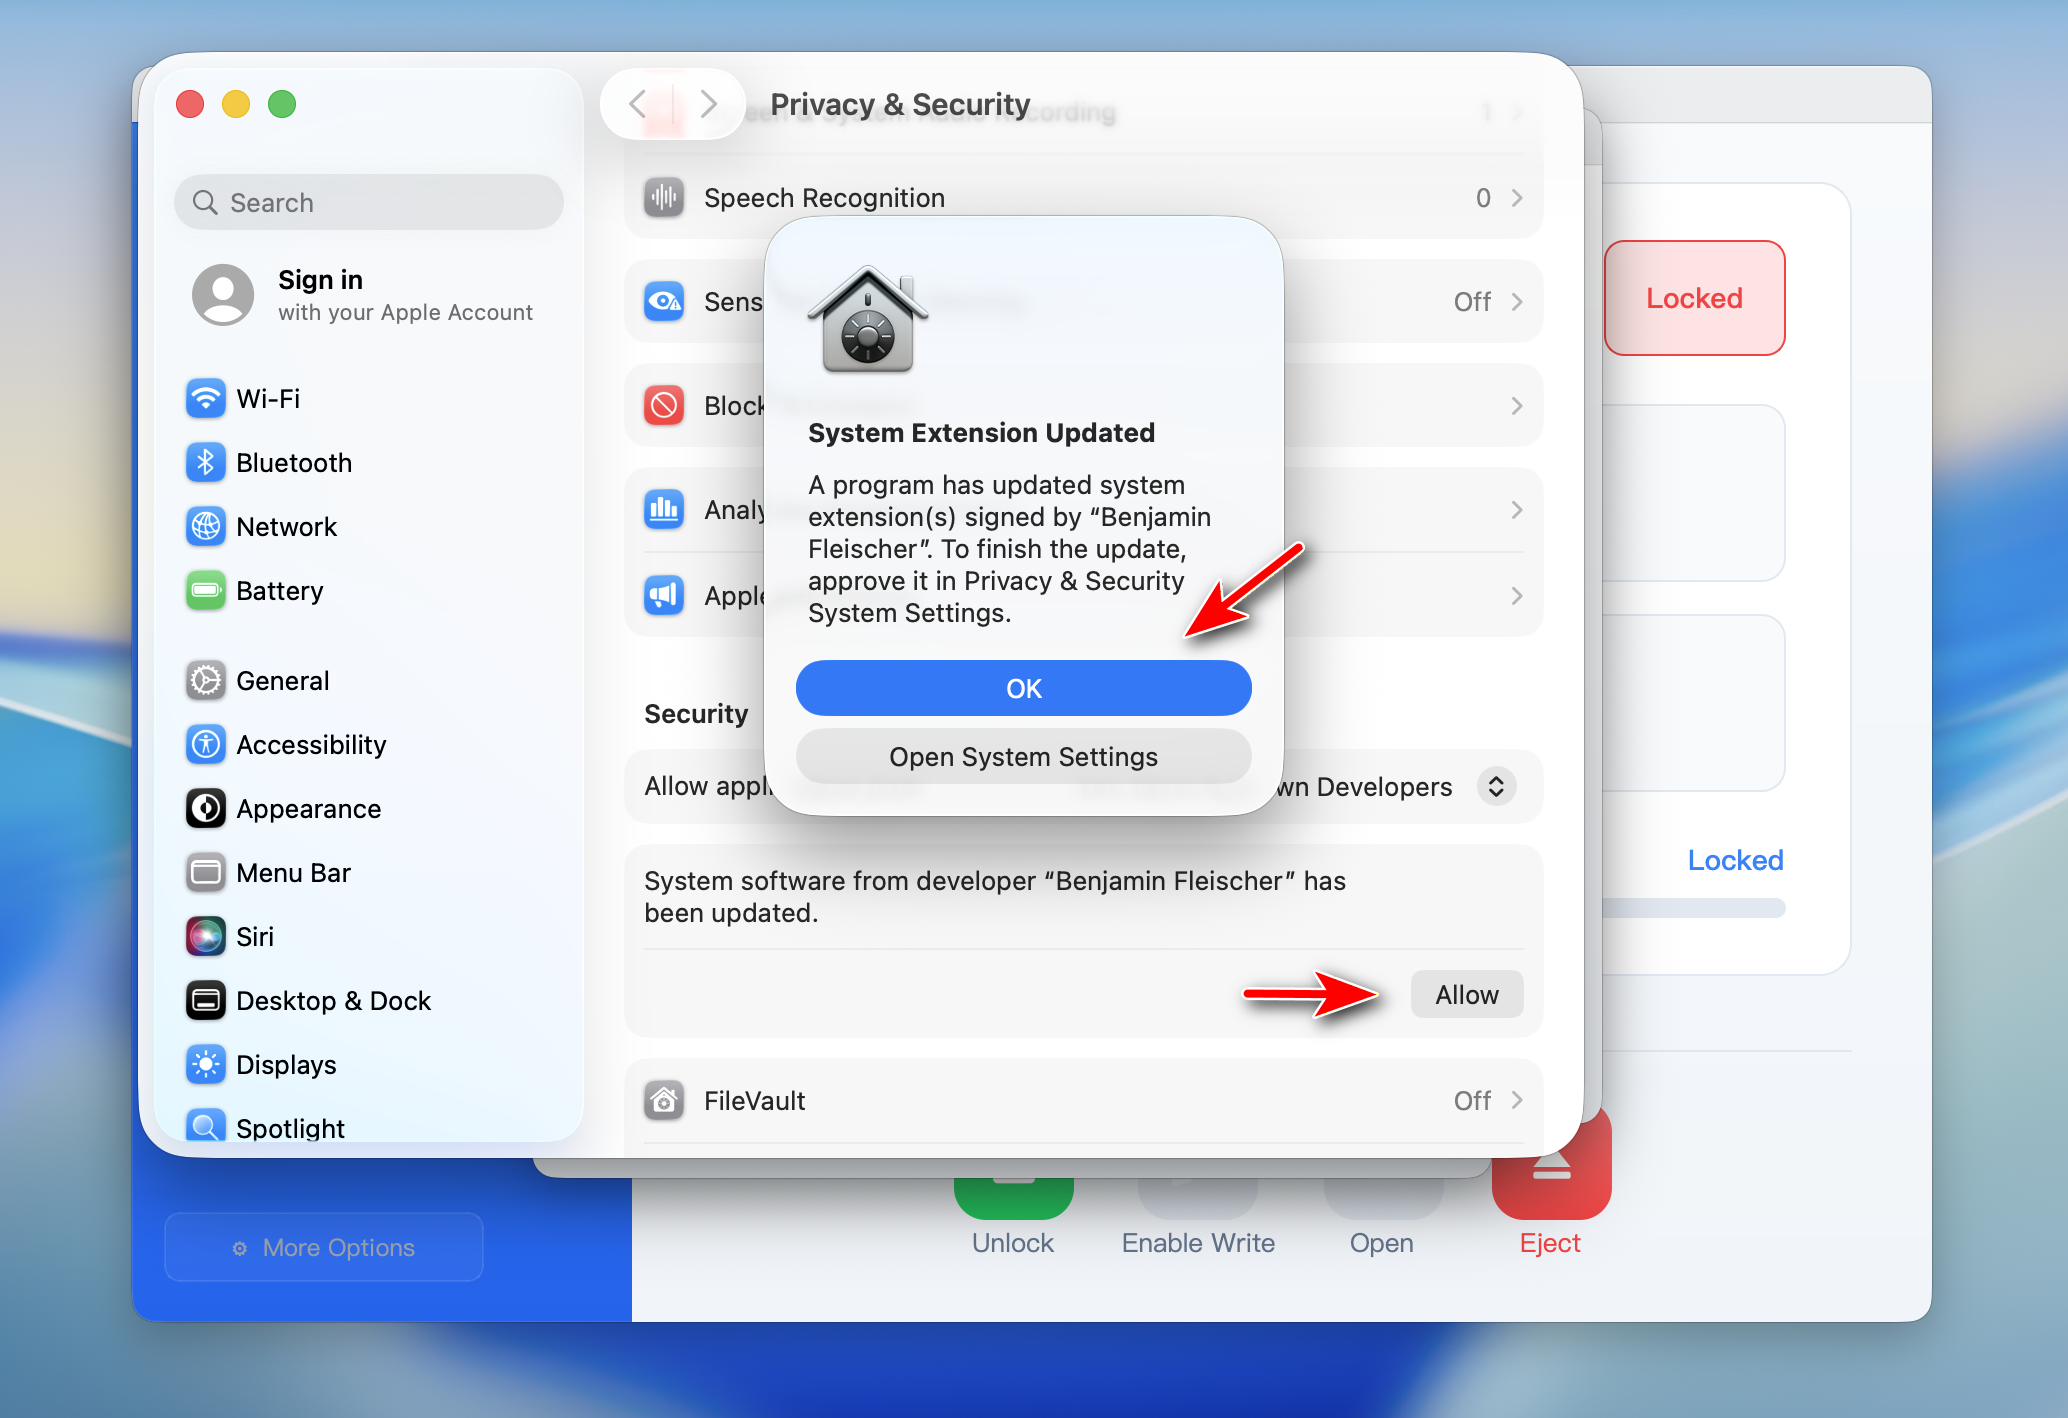
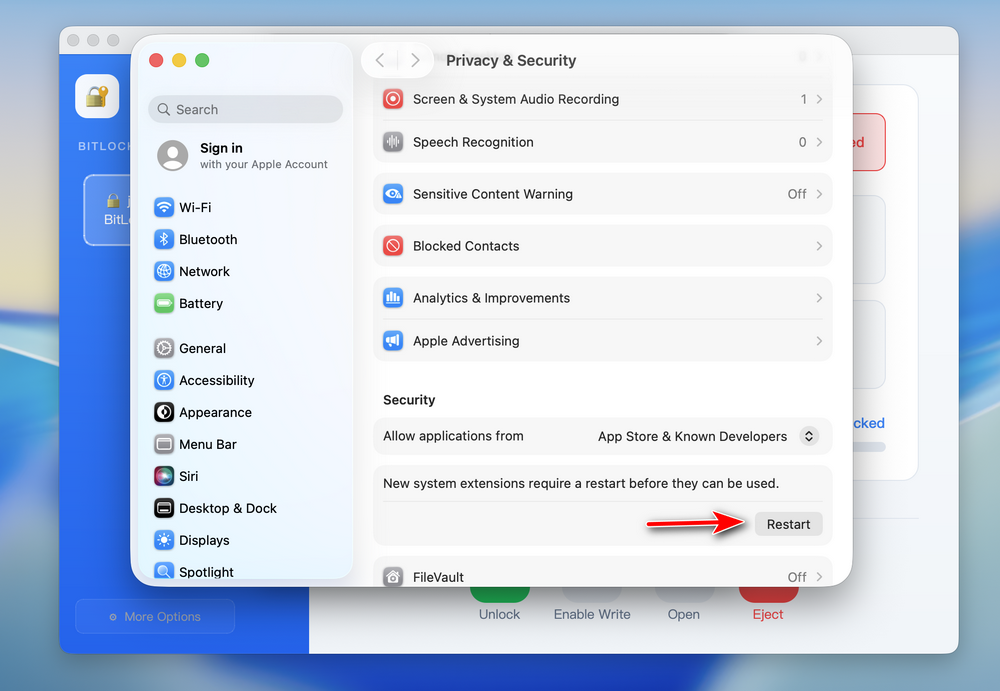
At this time, please click the OK and Allow button to proceed.
You have to restart the Mac once it is done.
Step 5: Start Unlocking BitLocker Drive on Your Mac
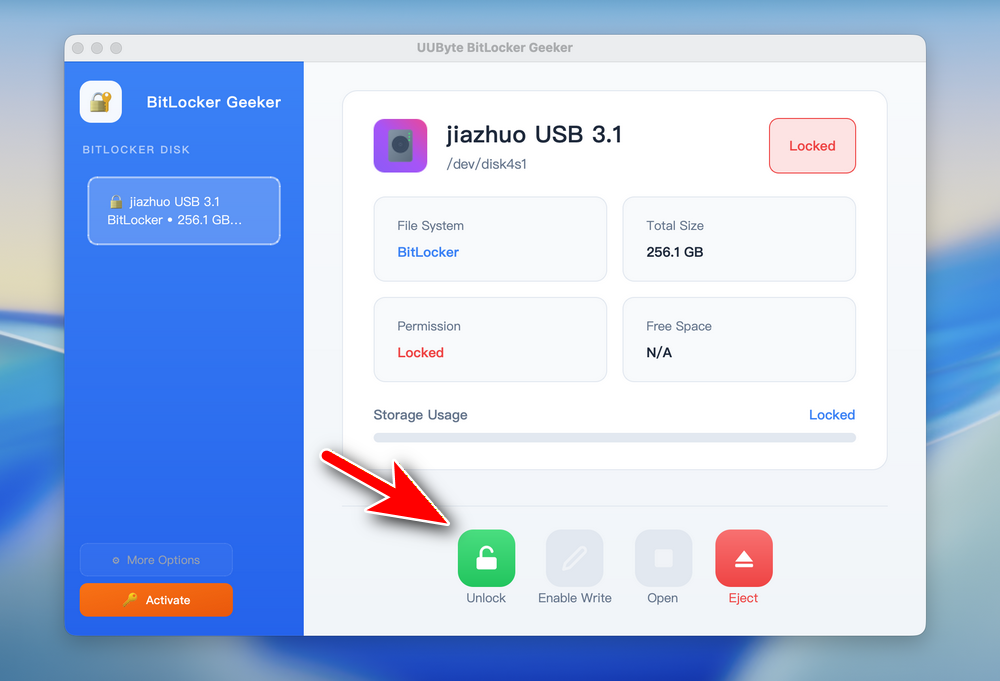
Open BitLocker Geeker app on your Mac and you will see the Bitlocker drive being displayed on the home screen. Now, click Unlock button and enter the BitLocker password to unlock the drive.
Wait a few seconds and you will receive a message saying the Unlock completed.
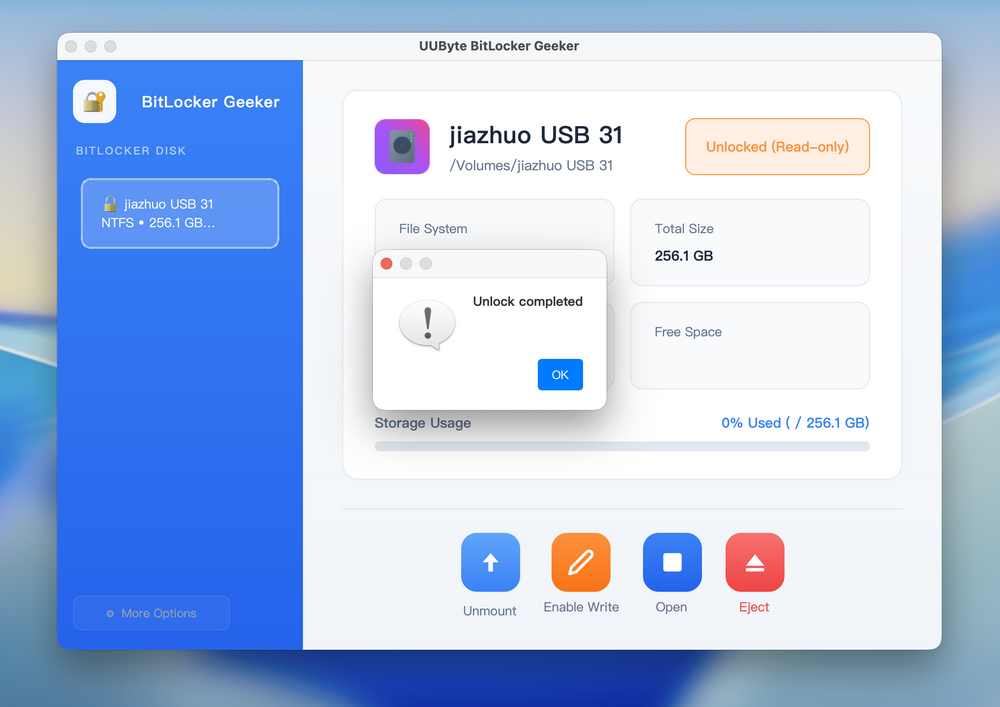
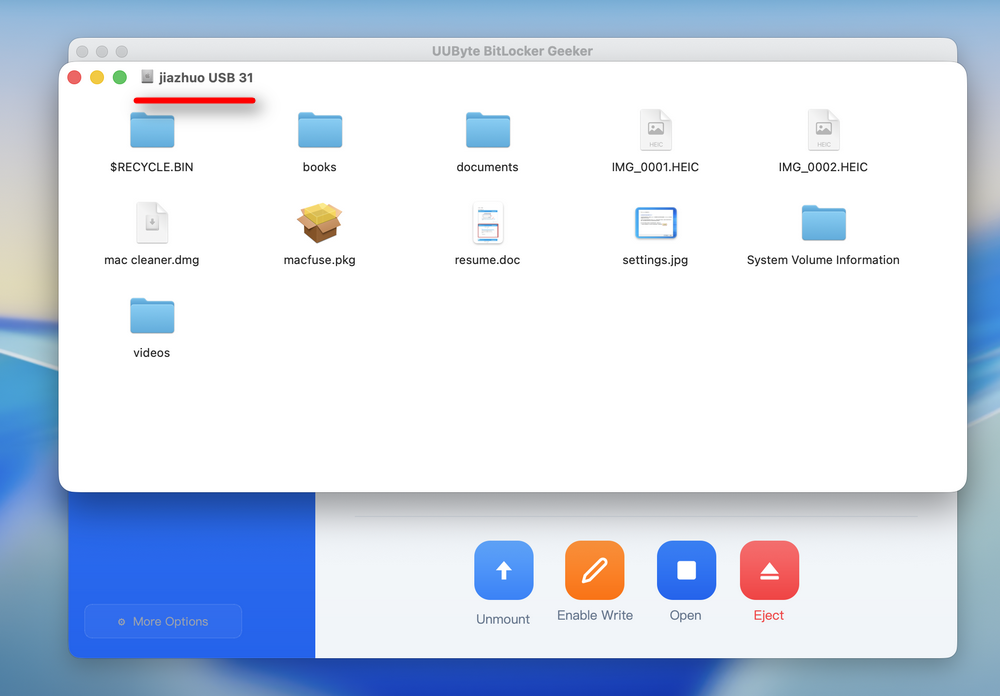
Now, you can now view all content from the BitLocker drive by clicking the Open button at the bottom.
Step 6: Enable Write Permission to BitLocker Drive
When the Bitlocker drive is unlocked, you can only view and copy the content to your Mac. If you want to copy files to this drive or make changes, then you have to enable write permission from the app. To do this, click the Enable Write button.
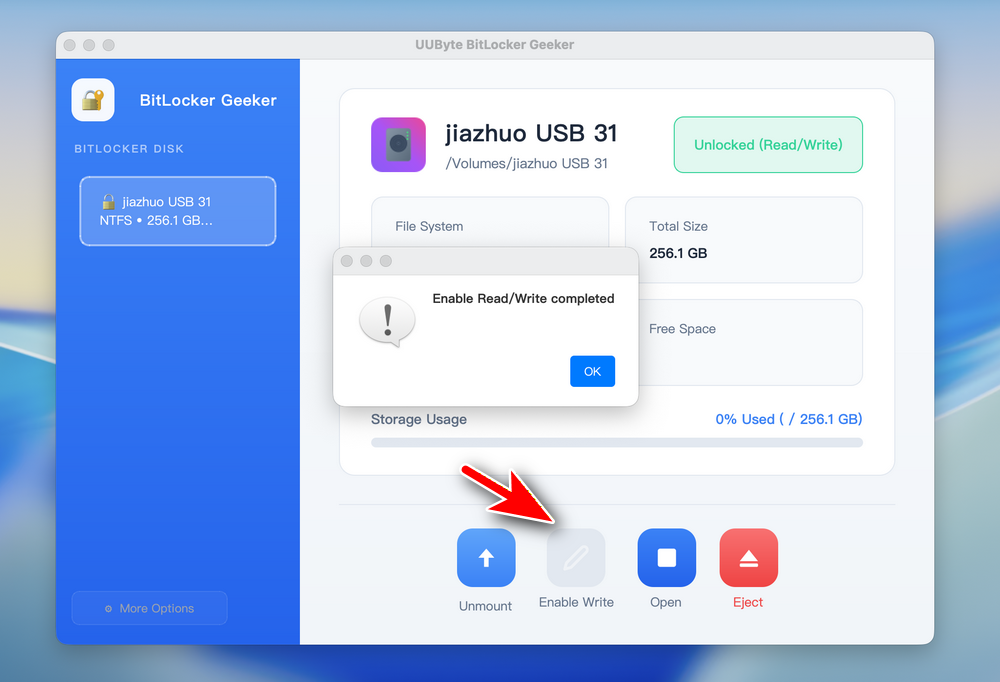
You can now read and write the Bitlocker drive without any restriction.
Summary:
The above is a complete tutorial for using our BitLocker Geeker app on Mac. If you have any question, please contact us via Email. We will reply as soon as possible.